User's Guide
Page 3
... ...36 Using a digital phone service ...37 Understanding the control panel...37 Using the control panel ...37 Saving settings...40 Installing another language control panel...41 Installing the printer software...42 Installing the optional XPS driver (Windows Vista users only 42 Understanding the printer software...43 Turning printing voice notification on or off...46 Security Information...46 General networking 47 Finding your MAC address...47 Assigning an IP address...47 Configure IP address...47 Finding a printer/print server located on remote subnets 47 Tips for using network adapters...
... ...36 Using a digital phone service ...37 Understanding the control panel...37 Using the control panel ...37 Saving settings...40 Installing another language control panel...41 Installing the printer software...42 Installing the optional XPS driver (Windows Vista users only 42 Understanding the printer software...43 Turning printing voice notification on or off...46 Security Information...46 General networking 47 Finding your MAC address...47 Assigning an IP address...47 Configure IP address...47 Finding a printer/print server located on remote subnets 47 Tips for using network adapters...
User's Guide
Page 8
... Power button is not lit ...128 Software does not install...129 Page does not print...130 Solving printer communication problems ...131 Understanding Warning levels ...132 Removing and reinstalling the software ...132 Enabling the USB port...132 Print troubleshooting...133 Improving print quality ...133 Poor text and graphic quality...134 Poor quality at the edges of the page...135 Print speed is slow...136 Partial document or photo prints ...136 Photo smudges...137 Checking the print cartridges...
... Power button is not lit ...128 Software does not install...129 Page does not print...130 Solving printer communication problems ...131 Understanding Warning levels ...132 Removing and reinstalling the software ...132 Enabling the USB port...132 Print troubleshooting...133 Improving print quality ...133 Poor text and graphic quality...134 Poor quality at the edges of the page...135 Print speed is slow...136 Partial document or photo prints ...136 Photo smudges...137 Checking the print cartridges...
User's Guide
Page 9
... 151 Problems when copying, scanning, or faxing ...151 Wrong printer is attached...151 Updating the printer software ...151 Bidirectional communication is not established...152 Experiencing poor quality or incorrect output ...152 Cannot print from digital camera using PictBridge ...153 Partial 4 x 6 in. (10 x 15 cm) photo prints when using a PictBridge-enabled digital camera 153 Jams and misfeeds troubleshooting...154 How to clear and avoid paper jams...154 Paper jam in the Automatic Document Feeder (ADF)...154 Paper jam...
... 151 Problems when copying, scanning, or faxing ...151 Wrong printer is attached...151 Updating the printer software ...151 Bidirectional communication is not established...152 Experiencing poor quality or incorrect output ...152 Cannot print from digital camera using PictBridge ...153 Partial 4 x 6 in. (10 x 15 cm) photo prints when using a PictBridge-enabled digital camera 153 Jams and misfeeds troubleshooting...154 How to clear and avoid paper jams...154 Paper jam in the Automatic Document Feeder (ADF)...154 Paper jam...
User's Guide
Page 13
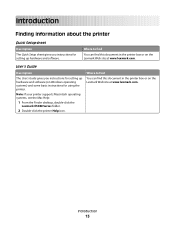
... www.lexmark.com. Where to find You can find this document in the printer box or on Windows operating systems) and some basic instructions for setting up hardware and software (on the Lexmark Web site at www.lexmark.com. User's Guide Description The User's Guide gives you instructions for using the printer. Note: If your printer supports Macintosh operating systems, see the Mac Help: 1 From the Finder desktop, double-click the Lexmark X5400 Series folder. 2 Double-click the printer Help...
... www.lexmark.com. Where to find You can find this document in the printer box or on Windows operating systems) and some basic instructions for setting up hardware and software (on the Lexmark Web site at www.lexmark.com. User's Guide Description The User's Guide gives you instructions for using the printer. Note: If your printer supports Macintosh operating systems, see the Mac Help: 1 From the Finder desktop, double-click the Lexmark X5400 Series folder. 2 Double-click the printer Help...
User's Guide
Page 14
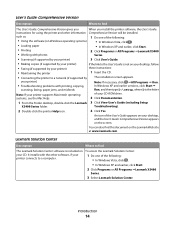
... Start. 2 Click Programs or All Programs ŒLexmark X5400 Series. 3 Select Lexmark Solution Center. User's Guide: Comprehensive Version Description Where to a network (if supported by The installation screen appears. In Windows XP and earlier versions, click Start Œ scanning, faxing, paper jams, and misfeeds Run, and then type D:\setup, where D is not on your CD. such as: 1 Do one of your printer) • Troubleshooting problems with printing, copying, Note: If necessary, click ŒAll Programs Œ Run. Troubleshooting). 2 Double...
... Start. 2 Click Programs or All Programs ŒLexmark X5400 Series. 3 Select Lexmark Solution Center. User's Guide: Comprehensive Version Description Where to a network (if supported by The installation screen appears. In Windows XP and earlier versions, click Start Œ scanning, faxing, paper jams, and misfeeds Run, and then type D:\setup, where D is not on your CD. such as: 1 Do one of your printer) • Troubleshooting problems with printing, copying, Note: If necessary, click ŒAll Programs Œ Run. Troubleshooting). 2 Double...
User's Guide
Page 37
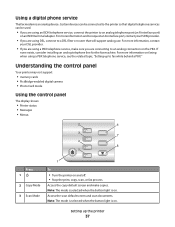
...line for the fax machine. Access the copy default screen and make sure you are using an ISDN telephone service, connect the printer to fax while behind a PBX." Understanding the control panel Your printer may not support: • memory cards • PictBridge-enabled digital camera • Photo Card mode Using the control panel The display shows: • Printer status • Messages • Menus Press 1 2 Copy Mode 3 Scan Mode To • Turn the printer on the PBX. Access the scan default screen and scan documents. For more information on faxing when using DSL, connect...
...line for the fax machine. Access the copy default screen and make sure you are using an ISDN telephone service, connect the printer to fax while behind a PBX." Understanding the control panel Your printer may not support: • memory cards • PictBridge-enabled digital camera • Photo Card mode Using the control panel The display shows: • Printer status • Messages • Menus Press 1 2 Copy Mode 3 Scan Mode To • Turn the printer on the PBX. Access the scan default screen and scan documents. For more information on faxing when using DSL, connect...
User's Guide
Page 38
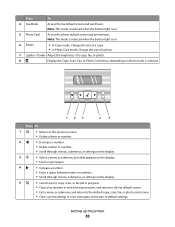
...• Feed or eject paper. 4 • Increase a number. • Enter a space between letters or numbers. • Scroll through menus, submenus, or settings on the display. 5 • Cancel a print, copy, scan, or fax job in progress. • Clear a fax number or end a fax transmission, and return to the fax default screen. • Exit a menu or submenu, and return to the default copy, scan, fax, or photo card screen. • Clear current settings or error messages, and return to default settings. Press To 4 Fax Mode Access the fax default screen and send faxes. Setting up...
...• Feed or eject paper. 4 • Increase a number. • Enter a space between letters or numbers. • Scroll through menus, submenus, or settings on the display. 5 • Cancel a print, copy, scan, or fax job in progress. • Clear a fax number or end a fax transmission, and return to the fax default screen. • Exit a menu or submenu, and return to the default copy, scan, fax, or photo card screen. • Clear current settings or error messages, and return to default settings. Press To 4 Fax Mode Access the fax default screen and send faxes. Setting up...
User's Guide
Page 42
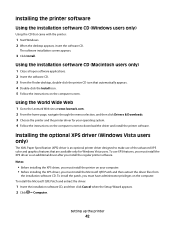
... make use XPS features, you must install the Microsoft QFE Patch and then extract the driver files from the installation software CD. Installing the optional XPS driver (Windows Vista users only) The XML Paper Specification (XPS) driver is an optional printer driver designed to the Lexmark Web site at www.lexmark.com. 2 From the home page, navigate through the menu selection, and then click Drivers & Downloads. 3 Choose the printer and the printer driver for Windows Vista users. Installing the printer software Using the installation software CD (Windows users...
... make use XPS features, you must install the Microsoft QFE Patch and then extract the driver files from the installation software CD. Installing the optional XPS driver (Windows Vista users only) The XML Paper Specification (XPS) driver is an optional printer driver designed to the Lexmark Web site at www.lexmark.com. 2 From the home page, navigate through the menu selection, and then click Drivers & Downloads. 3 Choose the printer and the printer driver for Windows Vista users. Installing the printer software Using the installation software CD (Windows users...
User's Guide
Page 43
... driver files are launched. To install the XPS driver: 1 Click ΠControl Panel. 2 Under Hardware and Sound, click Printer, and then click Add a Printer. 3 From the Add Printer dialog, click Add a local printer. 4 From the "Use an existing port" drop-down menu, select Virtual printer port for the task you want to the XPS driver files on the printer you can edit photographs, send faxes, maintain your printer model number, and then double-click Drivers. e From the Install From...
... driver files are launched. To install the XPS driver: 1 Click ΠControl Panel. 2 Under Hardware and Sound, click Printer, and then click Add a Printer. 3 From the Add Printer dialog, click Add a local printer. 4 From the "Use an existing port" drop-down menu, select Virtual printer port for the task you want to the XPS driver files on the printer you can edit photographs, send faxes, maintain your printer model number, and then double-click Drivers. e From the Install From...
User's Guide
Page 45
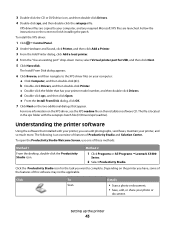
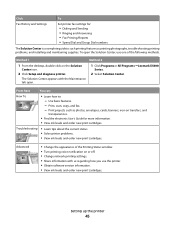
...; Change network printing settings. • Share information with the Maintenance tab open the Solution Center, use the printer. • Obtain software version information. • View ink levels and order new print cartridges. Print projects such as printing photographs, troubleshooting printing problems, and installing and maintaining supplies. Method 1 Method 2 1 From the desktop, double-click on transfers, and transparencies. • Find the electronic User's Guide for : • Dialing and Sending • Ringing and Answering • Fax Printing/Reports • Speed Dial...
...; Change network printing settings. • Share information with the Maintenance tab open the Solution Center, use the printer. • Obtain software version information. • View ink levels and order new print cartridges. Print projects such as printing photographs, troubleshooting printing problems, and installing and maintaining supplies. Method 1 Method 2 1 From the desktop, double-click on transfers, and transparencies. • Find the electronic User's Guide for : • Dialing and Sending • Ringing and Answering • Fax Printing/Reports • Speed Dial...
User's Guide
Page 47
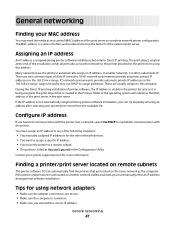
... manually assigned IP addresses for the other network devices. • You want to assign a specific IP address. • You move the printer to complete network printer configuration. UPnP network environments provide automatic private IP addresses in the 192.168.x.x range. Larger networks may need the media access control (MAC) address of printer software, the IP address is often called a subnet), you entered the correct IP address. During the Direct IP printing installation of the print server...
... manually assigned IP addresses for the other network devices. • You want to assign a specific IP address. • You move the printer to complete network printer configuration. UPnP network environments provide automatic private IP addresses in the 192.168.x.x range. Larger networks may need the media access control (MAC) address of printer software, the IP address is often called a subnet), you entered the correct IP address. During the Direct IP printing installation of the print server...

User's Guide
Page 138
... paper. If you are using a color cartridge, make sure it is properly installed in the same program. The printer prints a blank page when too many files are using a black or photo cartridge, make sure it is properly installed in the left carrier. Ink levels seem to print, close all other paper types print best at a lower Quality/Speed setting. If you are open files in the program you are using . Plug the long, flat end of the USB cable into this port. 2 Make...
... paper. If you are using a color cartridge, make sure it is properly installed in the same program. The printer prints a blank page when too many files are using a black or photo cartridge, make sure it is properly installed in the left carrier. Ink levels seem to print, close all other paper types print best at a lower Quality/Speed setting. If you are open files in the program you are using . Plug the long, flat end of the USB cable into this port. 2 Make...
User's Guide
Page 166
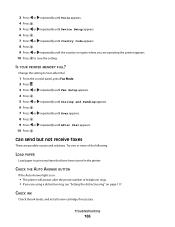
.... Troubleshooting 166 Try one or more of telephone rings. • If you are operating the printer appears. 10 Press to print any faxes that have been stored in the printer. CHECK THE AUTO ANSWER BUTTON If the Auto Answer light is on page 117. CHECK INK Check the ink levels, and install a new cartridge if necessary. IS YOUR PRINTER MEMORY FULL? Change the setting to Scan after the preset number of the following: LOAD PAPER Load paper to save the setting...
.... Troubleshooting 166 Try one or more of telephone rings. • If you are operating the printer appears. 10 Press to print any faxes that have been stored in the printer. CHECK THE AUTO ANSWER BUTTON If the Auto Answer light is on page 117. CHECK INK Check the ink levels, and install a new cartridge if necessary. IS YOUR PRINTER MEMORY FULL? Change the setting to Scan after the preset number of the following: LOAD PAPER Load paper to save the setting...

User's Guide
Page 169
... until Fax Setup appears. 4 Press . Resend the fax. • Increase the fax scan resolution. There may need to switch the pattern for the printer to send. LOWER THE TRANSMISSION SPEED 1 From the control panel, press Fax Mode. 2 Press . 3 Press or repeatedly until a lower quality appears. 6 Press . • Legal-size paper-reformat the document on page 106. Try one or more information, see "Using Caller ID from the software" on letter-size paper...
... until Fax Setup appears. 4 Press . Resend the fax. • Increase the fax scan resolution. There may need to switch the pattern for the printer to send. LOWER THE TRANSMISSION SPEED 1 From the control panel, press Fax Mode. 2 Press . 3 Press or repeatedly until a lower quality appears. 6 Press . • Legal-size paper-reformat the document on page 106. Try one or more information, see "Using Caller ID from the software" on letter-size paper...

User's Guide
Page 194
... a photo 77 Advanced button 45 aligning print cartridges 122 alignment error 172 answering machine receiving a fax with 107 assigning IP address 47 Auto Answer 113 Automatic Document Feeder (ADF) 25 Automatic Document Feeder (ADF) paper exit tray 25 Automatic Document Feeder (ADF) paper guide 25 Automatic Document Feeder (ADF) paper stop 26 B banner paper jams 157 banner paper, loading 53 banner printing problems checking spool settings 145 banner, printing 64 bidirectional communication, establishing 152 black cartridge replacement required 179 black ink low 173 blank or incorrect page prints...
... a photo 77 Advanced button 45 aligning print cartridges 122 alignment error 172 answering machine receiving a fax with 107 assigning IP address 47 Auto Answer 113 Automatic Document Feeder (ADF) 25 Automatic Document Feeder (ADF) paper exit tray 25 Automatic Document Feeder (ADF) paper guide 25 Automatic Document Feeder (ADF) paper stop 26 B banner paper jams 157 banner paper, loading 53 banner printing problems checking spool settings 145 banner, printing 64 bidirectional communication, establishing 152 black cartridge replacement required 179 black ink low 173 blank or incorrect page prints...
User's Guide
Page 195
... 138 checking external devices 148 checking printer readiness 144 cleaning exterior of the printer 125 cleaning print cartridge nozzles 123 collating copies 89 color and black cartridge replacement required 180 color cartridge replacement required 179 color effects applying 78 color ink low 173 colors on paper do not match colors on the screen 139 communication not available error 177 communication problems establishing bidirectional communication 152 connect to network printer 49 connecting using RJ11 adapter 27 connecting cables 146, 148 connecting the printer to answering machine 31...
... 138 checking external devices 148 checking printer readiness 144 cleaning exterior of the printer 125 cleaning print cartridge nozzles 123 collating copies 89 color and black cartridge replacement required 180 color cartridge replacement required 179 color effects applying 78 color ink low 173 colors on paper do not match colors on the screen 139 communication not available error 177 communication problems establishing bidirectional communication 152 connect to network printer 49 connecting using RJ11 adapter 27 connecting cables 146, 148 connecting the printer to answering machine 31...
User's Guide
Page 197
... 52 M MAC address, finding 47 magazine articles, loading on the scanner glass 55 Maintenance button 45 maintenance menus copy menu 91 memory card inserting 67 printing photos using the computer 79 printing photos using the proof sheet 81 memory card cannot be inserted 158 memory card slots 25 memory card troubleshooting memory card cannot be inserted 158 nothing happens when memory card is inserted 159 memory full error message 174 modifying copy settings 91 moire patterns, removing from scanned images 79 N network adapters using 47 network printer installing 47 network printers configuring 49...
... 52 M MAC address, finding 47 magazine articles, loading on the scanner glass 55 Maintenance button 45 maintenance menus copy menu 91 memory card inserting 67 printing photos using the computer 79 printing photos using the proof sheet 81 memory card cannot be inserted 158 memory card slots 25 memory card troubleshooting memory card cannot be inserted 158 nothing happens when memory card is inserted 159 memory full error message 174 modifying copy settings 91 moire patterns, removing from scanned images 79 N network adapters using 47 network printer installing 47 network printers configuring 49...
User's Guide
Page 198
...port 26 LINE port 26 memory card slots 25 paper exit tray 25 paper guide 25 paper support 25 PictBridge port 25 power supply port 26 print cartridge carrier 26 scanner glass 26 scanner unit 26 top cover 26 USB port 26 pausing print jobs 60 PDF creating from a scan 95 Phone Book (computer), using 109 Phone Book (control panel), using 108 phone line busy error message 170 phone line error 171 photo adjusting hue 77 adjusting saturation 77 applying color effect 78 blurring 76 cropping 75 enhancing 77 sharpening 76 Photo Card menu 69 photo cards, loading 52 Photo Greeting Cards button 43 photo ink...
...port 26 LINE port 26 memory card slots 25 paper exit tray 25 paper guide 25 paper support 25 PictBridge port 25 power supply port 26 print cartridge carrier 26 scanner glass 26 scanner unit 26 top cover 26 USB port 26 pausing print jobs 60 PDF creating from a scan 95 Phone Book (computer), using 109 Phone Book (control panel), using 108 phone line busy error message 170 phone line error 171 photo adjusting hue 77 adjusting saturation 77 applying color effect 78 blurring 76 cropping 75 enhancing 77 sharpening 76 Photo Card menu 69 photo cards, loading 52 Photo Greeting Cards button 43 photo ink...
User's Guide
Page 199
... Web page 57 Web page, photos only 58 printing failure error 178 printouts have alternating bands of light and dark print 142 problem reading memory card error 176 problems when copying, scanning, or faxing 151 Productivity Studio printing photos 80 viewing photos 80 Productivity Studio buttons Copy 43 E-mail 43 Fax 43 Photo Greeting Cards 43 Photo Packages 43 Scan 43 Transfer Photos 43 understanding 43 Productivity Studio, understanding 43 proof sheet, using 81 publications, finding 13 Q quality settings, checking 146 Quick Fixes tab using...
... Web page 57 Web page, photos only 58 printing failure error 178 printouts have alternating bands of light and dark print 142 problem reading memory card error 176 problems when copying, scanning, or faxing 151 Productivity Studio printing photos 80 viewing photos 80 Productivity Studio buttons Copy 43 E-mail 43 Fax 43 Photo Greeting Cards 43 Photo Packages 43 Scan 43 Transfer Photos 43 understanding 43 Productivity Studio, understanding 43 proof sheet, using 81 publications, finding 13 Q quality settings, checking 146 Quick Fixes tab using...
User's Guide
Page 200
... 129 software settings, printer resetting to factory defaults 65 Solution Center understanding 45 Solution Center buttons Advanced 45 How To 45 Maintenance 45 Troubleshooting 45 understanding 45 Speed Dial setting up fax groups 118 setting up individual fax numbers 118 using 103 using the Phone Book 108 speed settings, checking 146 supplies, ordering 126 T telecommunication notices 184, 185, 186, 187 test page printing 146 test page does not print 147 Toolbar printing a Web page 57 printing only the photos from a Web page 58 top cover 26 Transfer Photos button 43 transfer settings changing...
... 129 software settings, printer resetting to factory defaults 65 Solution Center understanding 45 Solution Center buttons Advanced 45 How To 45 Maintenance 45 Troubleshooting 45 understanding 45 Speed Dial setting up fax groups 118 setting up individual fax numbers 118 using 103 using the Phone Book 108 speed settings, checking 146 supplies, ordering 126 T telecommunication notices 184, 185, 186, 187 test page printing 146 test page does not print 147 Toolbar printing a Web page 57 printing only the photos from a Web page 58 top cover 26 Transfer Photos button 43 transfer settings changing...


