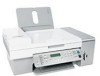
User's Guide
Page 7
Sending a broadcast fax at a scheduled time...105 Receiving a fax...105 Receiving a fax manually...105 Setting a fax manual answer code...106 Using Caller ID from the control panel ...106 Using Caller ID from the software...106 Receiving a fax automatically...the printer 120 Replacing print cartridges...120 Installing print cartridges...120 Removing a used print cartridge ...121 Refilling print cartridges...122 Using genuine Lexmark print cartridges...122 Aligning print cartridges...122 Cleaning the print cartridge nozzles...123 Wiping the print cartridge nozzles and contacts 123 Preserving the...
Sending a broadcast fax at a scheduled time...105 Receiving a fax...105 Receiving a fax manually...105 Setting a fax manual answer code...106 Using Caller ID from the control panel ...106 Using Caller ID from the software...106 Receiving a fax automatically...the printer 120 Replacing print cartridges...120 Installing print cartridges...120 Removing a used print cartridge ...121 Refilling print cartridges...122 Using genuine Lexmark print cartridges...122 Aligning print cartridges...122 Cleaning the print cartridge nozzles...123 Wiping the print cartridge nozzles and contacts 123 Preserving the...
User's Guide
Page 47
... Utility. Finding a printer/print server located on the same network as Unconfigured in any of the following situations: • You manually assigned IP addresses for using this address. General networking Finding your MAC address You may use DHCP to assign addresses. Assigning an ...print server are located on remote subnets The printer software CD can try manually entering an address after selecting your system support person for Direct IP printing. General networking 47 You must manually enter an IP address during printer software installation, you have the ability...
... Utility. Finding a printer/print server located on the same network as Unconfigured in any of the following situations: • You manually assigned IP addresses for using this address. General networking Finding your MAC address You may use DHCP to assign addresses. Assigning an ...print server are located on remote subnets The printer software CD can try manually entering an address after selecting your system support person for Direct IP printing. General networking 47 You must manually enter an IP address during printer software installation, you have the ability...
User's Guide
Page 49
...sending scanned images to the printer. Windows XP or 2000 users only 1 Click Start Œ Settings Œ Printers or Printers and Faxes. 2 Right-click the Lexmark X5400 Series icon. 3 From the sidebar menu, select Properties. 4 Click the Ports tab. 5 Make sure: • The port is set to assign the ... must first highlight the printer in the window. You can send scanned images from the list in the window, and then click Configure to manually assign an IP address to your computer. Add printers Specify remote subnets that is already installed on the Control Panel of the printer. Also,...
...sending scanned images to the printer. Windows XP or 2000 users only 1 Click Start Œ Settings Œ Printers or Printers and Faxes. 2 Right-click the Lexmark X5400 Series icon. 3 From the sidebar menu, select Properties. 4 Click the Ports tab. 5 Make sure: • The port is set to assign the ... must first highlight the printer in the window. You can send scanned images from the list in the window, and then click Configure to manually assign an IP address to your computer. Add printers Specify remote subnets that is already installed on the Control Panel of the printer. Also,...
User's Guide
Page 75
... area by using your mouse and dragging the lines to your computer. a Select "Skip Save option and go automatically to", and choose to Automatically Save, Manually Save, or Print your photos from your mouse to rotate the image 90 degrees in either direction. You can choose how you want to edit...
... area by using your mouse and dragging the lines to your computer. a Select "Skip Save option and go automatically to", and choose to Automatically Save, Manually Save, or Print your photos from your mouse to rotate the image 90 degrees in either direction. You can choose how you want to edit...
User's Guide
Page 76
... effect automatically. If you are not satisfied with the results after applying any of the One-Click Auto Fixes. Working with the steps below. 4 Click Manual Red-Eye Reduction. 5 Move the cursor across the photo, and place it over an affected eye. 6 Click to reduce the red-eye effect. This ensures...
... effect automatically. If you are not satisfied with the results after applying any of the One-Click Auto Fixes. Working with the steps below. 4 Click Manual Red-Eye Reduction. 5 Move the cursor across the photo, and place it over an affected eye. 6 Click to reduce the red-eye effect. This ensures...
User's Guide
Page 104
...fax. 11 Click Send. Note: Press the keypad numbers to the call (On Hook Dial) The manual dialing feature lets you dial a telephone number while listening to use an automated answering system. 5 Press Start Color or Start Black. It is on. 2 Load an original document facedown into the ADF. You ...can now hear the dial tone of 30 fax numbers have been entered. 6 Press Start Color or Start Black. Note: Do not load postcards, photos, small items, transparencies, photo paper, or thin media (such as magazine clippings) into the ...
...fax. 11 Click Send. Note: Press the keypad numbers to the call (On Hook Dial) The manual dialing feature lets you dial a telephone number while listening to use an automated answering system. 5 Press Start Color or Start Black. It is on. 2 Load an original document facedown into the ADF. You ...can now hear the dial tone of 30 fax numbers have been entered. 6 Press Start Color or Start Black. Note: Do not load postcards, photos, small items, transparencies, photo paper, or thin media (such as magazine clippings) into the ...
User's Guide
Page 105
.... Note: At the designated time, the fax numbers are dialed and the fax is sent to set up a manual answer code, see "Entering a fax number" on page 103. 13 If needed, repeat step 12 and press ...groups at a time you have been entered. 14 Press Start Color or Start Black. or • Press * 9 * on the scanner glass. Receiving a fax Receiving a fax manually 1 Make sure the Auto Answer light is not set up... more information, see the related topic, "Setting a fax manual answer code." 4 Hang up a manual answer code: • Press Start Color or Start Black. The printer receives the fax.
.... Note: At the designated time, the fax numbers are dialed and the fax is sent to set up a manual answer code, see "Entering a fax number" on page 103. 13 If needed, repeat step 12 and press ...groups at a time you have been entered. 14 Press Start Color or Start Black. or • Press * 9 * on the scanner glass. Receiving a fax Receiving a fax manually 1 Make sure the Auto Answer light is not set up... more information, see the related topic, "Setting a fax manual answer code." 4 Hang up a manual answer code: • Press Start Color or Start Black. The printer receives the fax.
User's Guide
Page 106
... . 6 Press or repeatedly until Caller ID Pattern appears. 7 Press . 8 Press or repeatedly until the setting you want appears. 9 Press to save the setting. Setting a fax manual answer code 1 From the desktop, double-click the Productivity Studio icon. 2 From the Settings area in the left pane of the Welcome screen, click Setup...
... . 6 Press or repeatedly until Caller ID Pattern appears. 7 Press . 8 Press or repeatedly until the setting you want appears. 9 Press to save the setting. Setting a fax manual answer code 1 From the desktop, double-click the Productivity Studio icon. 2 From the Settings area in the left pane of the Welcome screen, click Setup...
User's Guide
Page 156
... or stick together. Try one or more of paper into the printer. • Load paper with the paper.) See "Loading paper" on . REMOVE THE PAPER MANUALLY 1 Press to turn off the printer. 2 Firmly grasp the paper, and gently pull it out. Warning-Potential Damage: When possible, paper should be pulled out...
... or stick together. Try one or more of paper into the printer. • Load paper with the paper.) See "Loading paper" on . REMOVE THE PAPER MANUALLY 1 Press to turn off the printer. 2 Firmly grasp the paper, and gently pull it out. Warning-Potential Damage: When possible, paper should be pulled out...
User's Guide
Page 167
... Dial has been programmed for faxing, press Fax Mode. See "Setting up Speed Dial" on page 118. • As an alternative, dial the telephone number manually.
... Dial has been programmed for faxing, press Fax Mode. See "Setting up Speed Dial" on page 118. • As an alternative, dial the telephone number manually.
User's Guide
Page 186
... network. Cet équipement utilise des prises de téléphone CA11A. The grant of warranty. This equipment should not be used under any single manual call initiation, and • The equipment shall go on the equipment associated with minimum conditions for any sort of a telepermit for connection to the PSTN...
... network. Cet équipement utilise des prises de téléphone CA11A. The grant of warranty. This equipment should not be used under any single manual call initiation, and • The equipment shall go on the equipment associated with minimum conditions for any sort of a telepermit for connection to the PSTN...
User's Guide
Page 196
black ink low 173 cartridge error 172 cartridge missing 177 clear carrier jam 173 clearing 177 color and black cartridge replacement required 180 color cartridge replacement required 179 color ink low 173 communication not available 177 could not detect a proof sheet 175 error 1104 173 error ... factory default settings, resetting to 66 faded colors 139 Fax menu 112 fax activity reports 119 confirmation reports 119 customizing settings 109 forwarding 108 receiving automatically 107 receiving manually 105 receiving with an answer code 105 setting a manual answer code 106 Fax button 43 fax cover...
black ink low 173 cartridge error 172 cartridge missing 177 clear carrier jam 173 clearing 177 color and black cartridge replacement required 180 color cartridge replacement required 179 color ink low 173 communication not available 177 could not detect a proof sheet 175 error 1104 173 error ... factory default settings, resetting to 66 faded colors 139 Fax menu 112 fax activity reports 119 confirmation reports 119 customizing settings 109 forwarding 108 receiving automatically 107 receiving manually 105 receiving with an answer code 105 setting a manual answer code 106 Fax button 43 fax cover...
User's Guide
Page 200
... fax has poor print quality 168 receiving a fax automatically 107 fax forwarding 108 manually 105 using an answering machine 107 with manual answer code 105 recycling WEEE statement 184 reducing an image 90 red-eye automatic reduction 76 manual reduction 76 refilling print cartridges 122 remote fax error 169 removing an external device...
... fax has poor print quality 168 receiving a fax automatically 107 fax forwarding 108 manually 105 using an answering machine 107 with manual answer code 105 recycling WEEE statement 184 reducing an image 90 red-eye automatic reduction 76 manual reduction 76 refilling print cartridges 122 remote fax error 169 removing an external device...


