Setup Guide
Page 5
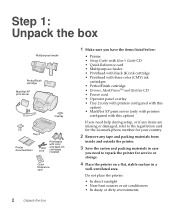
... card • Multipurpose feeder • Printhead with black (K) ink cartridge • Printhead with three color (CMY) ink cartridges • PerfectFinish cartridge • Drivers, MarkVisionTM and Utilities CD • Power cord • Operator panel overlay • Tray 2 (only with printers configured with this option) • MarkNet XP print server (only with printers configured with this option) If you need help during setup, or if any items are missing or damaged, refer to the registration card for the Lexmark phone number...
... card • Multipurpose feeder • Printhead with black (K) ink cartridge • Printhead with three color (CMY) ink cartridges • PerfectFinish cartridge • Drivers, MarkVisionTM and Utilities CD • Power cord • Operator panel overlay • Tray 2 (only with printers configured with this option) • MarkNet XP print server (only with printers configured with this option) If you need help during setup, or if any items are missing or damaged, refer to the registration card for the Lexmark phone number...
Setup Guide
Page 32
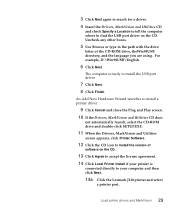
... Next. 14a Click the Lexmark J110 printer and select a printer port. Load printer drivers and MarkVision 29 An Add New Hardware Wizard launches to install a printer driver. 9 Click Cancel and close the Plug and Play screen. 10 If the Drivers, MarkVision and Utilities CD does not automatically launch, select the CD-ROM drive and double-click SETUP.EXE. 11 When the Drivers, MarkVision and Utilities screen appears, click Printer Software. 12 Click the...
... Next. 14a Click the Lexmark J110 printer and select a printer port. Load printer drivers and MarkVision 29 An Add New Hardware Wizard launches to install a printer driver. 9 Click Cancel and close the Plug and Play screen. 10 If the Drivers, MarkVision and Utilities CD does not automatically launch, select the CD-ROM drive and double-click SETUP.EXE. 11 When the Drivers, MarkVision and Utilities screen appears, click Printer Software. 12 Click the...
Setup Guide
Page 37
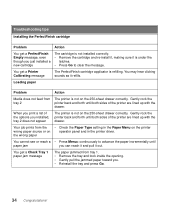
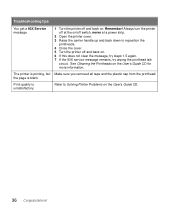
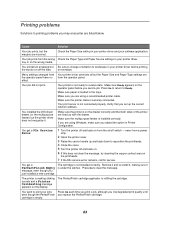
... 250-sheet drawer correctly. When you print a list of the printer are lined up with the drawer. You may hear clicking sounds as it refills. You get a Check Tray 1 paper jam message The paper jammed from the • Check the Paper Type setting in the Paper Menu on the printer wrong paper source or on operator panel and in the printer driver. Troubleshooting tips Installing the PerfectFinish cartridge Problem Action You get a PerfectFinish Empty message, even though you just installed a new cartridge The cartridge...
... 250-sheet drawer correctly. When you print a list of the printer are lined up with the drawer. You may hear clicking sounds as it refills. You get a Check Tray 1 paper jam message The paper jammed from the • Check the Paper Type setting in the Paper Menu on the printer wrong paper source or on operator panel and in the printer driver. Troubleshooting tips Installing the PerfectFinish cartridge Problem Action You get a PerfectFinish Empty message, even though you just installed a new cartridge The cartridge...
Setup Guide
Page 39
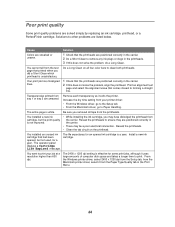
... Cleaning the Printheads on . The printer is unsatisfactory. Always turn the printer off at the on/off switch, never at a power strip. 2 Open the printer cover. 3 Raise the carrier handle up and back down to Solving Printer Problems on the User's Guide CD. 36 Congratulations! Refer to reposition the printheads. 4 Close the cover. 5 Turn the printer off and back on the User's Guide CD for more information. the page is blank Print quality is printing...
... Cleaning the Printheads on . The printer is unsatisfactory. Always turn the printer off at the on/off switch, never at a power strip. 2 Open the printer cover. 3 Raise the carrier handle up and back down to Solving Printer Problems on the User's Guide CD. 36 Congratulations! Refer to reposition the printheads. 4 Close the cover. 5 Turn the printer off and back on the User's Guide CD for more information. the page is blank Print quality is printing...
Setup Guide
Page 42
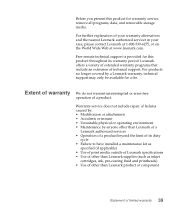
..., and removable storage media. Free remote technical support is provided for this product for a fee. Before you present this product throughout its duty cycle • Failure to have installed a maintenance kit as specified (if applicable) • Use of print media outside of Lexmark specifications • Use of other than Lexmark supplies (such as inkjet cartridges, ink, pre-coating fluid and printheads) • Use of other than Lexmark or a Lexmark authorized servicer •...
..., and removable storage media. Free remote technical support is provided for this product for a fee. Before you present this product throughout its duty cycle • Failure to have installed a maintenance kit as specified (if applicable) • Use of print media outside of Lexmark specifications • Use of other than Lexmark supplies (such as inkjet cartridges, ink, pre-coating fluid and printheads) • Use of other than Lexmark or a Lexmark authorized servicer •...

User's Guide
Page 11
.... 3 From the Paper Type setting, select the size envelope you want to print a letter from tray 1 and an envelope from the manual feeder (or multipurpose feeder if installed). 1 Load letterhead in tray 1 and an envelope in question and press F1 or right-click your mouse. 2 It's easy to change the corresponding operator panel settings. 2 Open the File Menu from your software application. 3 Choose Print (or Printer) Setup to open your printer driver. 4 In the Print Setup dialog box...
.... 3 From the Paper Type setting, select the size envelope you want to print a letter from tray 1 and an envelope from the manual feeder (or multipurpose feeder if installed). 1 Load letterhead in tray 1 and an envelope in question and press F1 or right-click your mouse. 2 It's easy to change the corresponding operator panel settings. 2 Open the File Menu from your software application. 3 Choose Print (or Printer) Setup to open your printer driver. 4 In the Print Setup dialog box...
User's Guide
Page 13
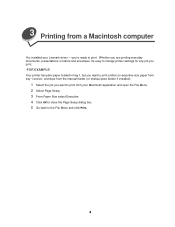
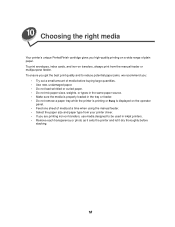
... you are printing everyday documents, presentations or letters and envelopes, it's easy to change printer settings for any job you print. -FOR EXAMPLEYour printer has plain paper loaded in tray 1, but you want to print from a Macintosh computer You installed your Macintosh application and open the File Menu. 2 Select Page Setup. 3 From Paper Size select Executive. 4 Click OK to close the Page Setup dialog box. 5 Go back to the File Menu and click Print. 4 3 Printing from your Lexmark driver -
... you are printing everyday documents, presentations or letters and envelopes, it's easy to change printer settings for any job you print. -FOR EXAMPLEYour printer has plain paper loaded in tray 1, but you want to print from a Macintosh computer You installed your Macintosh application and open the File Menu. 2 Select Page Setup. 3 From Paper Size select Executive. 4 Click OK to close the Page Setup dialog box. 5 Go back to the File Menu and click Print. 4 3 Printing from your Lexmark driver -
User's Guide
Page 15
... added or removed. 6 Change the paper type, turn PerfectFinish off or change a print quality setting. Change how many pages per sheet to print, print a booklet or use manual duplex. Change the paper source, dry time delay or printing order. Apply more vibrant color or match the color on another job. Watermark Print a watermark. Update any options you work on your monitor. Choose this option from the Print dialog box: General Paper Handling Paper Type/Quality Layout Color Background Printing Installed Options To: Change the number of copies...
... added or removed. 6 Change the paper type, turn PerfectFinish off or change a print quality setting. Change how many pages per sheet to print, print a booklet or use manual duplex. Change the paper source, dry time delay or printing order. Apply more vibrant color or match the color on another job. Watermark Print a watermark. Update any options you work on your monitor. Choose this option from the Print dialog box: General Paper Handling Paper Type/Quality Layout Color Background Printing Installed Options To: Change the number of copies...
User's Guide
Page 27
... types in the same paper source. • Make sure the media is properly loaded in the tray or feeder. • Do not remove a paper tray while the printer is printing or Busy is displayed on the operator panel. • Feed one sheet of media at a time when using the manual feeder. • Select the paper size and paper type from your printer driver. • If you high-quality printing on a wide range of media before stacking. 18 To print envelopes, index cards...
... types in the same paper source. • Make sure the media is properly loaded in the tray or feeder. • Do not remove a paper tray while the printer is printing or Busy is displayed on the operator panel. • Feed one sheet of media at a time when using the manual feeder. • Select the paper size and paper type from your printer driver. • If you high-quality printing on a wide range of media before stacking. 18 To print envelopes, index cards...
User's Guide
Page 42
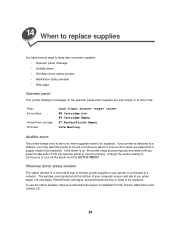
... other users are low or need to be replaced. Windows driver status window The status window is a convenient way to monitor printer supplies if your printer is on the operator panel when supplies are low, empty, or at the bottom of life. If your printer is installed from the SETUP MENU. If the alarm is connected to a network. The window runs minimized at end of your computer screen and alerts you when paper, ink cartridges, PerfectFinish cartridges, and printheads...
... other users are low or need to be replaced. Windows driver status window The status window is a convenient way to monitor printer supplies if your printer is on the operator panel when supplies are low, empty, or at the bottom of life. If your printer is installed from the SETUP MENU. If the alarm is connected to a network. The window runs minimized at end of your computer screen and alerts you when paper, ink cartridges, PerfectFinish cartridges, and printheads...
User's Guide
Page 58
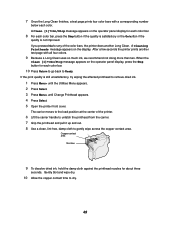
... time to remove dried ink. 1 Press Menu> until the Utilities Menu appears. 2 Press Select. 3 Press Menu> until Change Printhead appears. 4 Press Select. 5 Open the printer front cover. When the Clean [1]?=Go/Stop message appears on the operator panel display, press the Stop button for each color bar. 8 For each color. The carrier moves to the load position at the center of the color bars, the printer does another test page with a corresponding number below each color...
... time to remove dried ink. 1 Press Menu> until the Utilities Menu appears. 2 Press Select. 3 Press Menu> until Change Printhead appears. 4 Press Select. 5 Open the printer front cover. When the Clean [1]?=Go/Stop message appears on the operator panel display, press the Stop button for each color bar. 8 For each color. The carrier moves to the load position at the center of the color bars, the printer does another test page with a corresponding number below each color...
User's Guide
Page 67
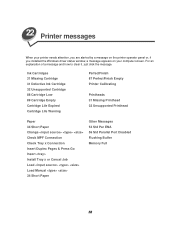
... the printer operator panel or, if you installed the Windows driver status window, a message appears on your computer screen. Ink Cartridges 31 Missing Cartridge 31 Defective Ink Cartridge 32 Unsupported Cartridge 88 Cartridge Low 89 Cartridge Empty Cartridge Life Expired Cartridge Life Warning PerfectFinish 87 PerfectFinish Empty Printer Calibrating Printheads 31 Missing Printhead 32 Unsupported Printhead Paper 34 Short Paper Change Check MPF Connection Check Tray x Connection Insert Duplex Pages & Press Go Insert Install Tray x or Cancel Job Load Load Manual 34 Short Paper Other...
... the printer operator panel or, if you installed the Windows driver status window, a message appears on your computer screen. Ink Cartridges 31 Missing Cartridge 31 Defective Ink Cartridge 32 Unsupported Cartridge 88 Cartridge Low 89 Cartridge Empty Cartridge Life Expired Cartridge Life Warning PerfectFinish 87 PerfectFinish Empty Printer Calibrating Printheads 31 Missing Printhead 32 Unsupported Printhead Paper 34 Short Paper Change Check MPF Connection Check Tray x Connection Insert Duplex Pages & Press Go Insert Install Tray x or Cancel Job Load Load Manual 34 Short Paper Other...
User's Guide
Page 72
... is securely connected. Your job prints from the operator panel. The cartridge is not ready to clear the message. Make sure the printer is on the printheads. 7 If the 93x service errror remains, call for service. tray or on the display. Your printer is not installed correctly. You installed the 250-sheet drawer (or the multipurpose feeder) but the Paper Size and Paper Type settings set up with the drawer. Menu settings changed from a power strip. 2 Open the printer cover. 3 Raise the...
... is securely connected. Your job prints from the operator panel. The cartridge is not ready to clear the message. Make sure the printer is on the printheads. 7 If the 93x service errror remains, call for service. tray or on the display. Your printer is not installed correctly. You installed the 250-sheet drawer (or the multipurpose feeder) but the Paper Size and Paper Type settings set up with the drawer. Menu settings changed from a power strip. 2 Open the printer cover. 3 Raise the...
User's Guide
Page 73
... Clean. You want to print your printer driver: • From the Windows driver, go to the Setup tab. • From the Macintosh driver, go to other problems are positioned correctly in the Print Menu. 64 Solutions to Paper Handling. Your print job has misaligned lines. 1 Check that the printheads are solved simply by replacing an ink cartridge, printhead, or a PerfectFinish cartridge. The operator panel displays a Cartridge Life Expired message. You installed a new ink cartridge, but not used, for an opened , but the print quality is...
... Clean. You want to print your printer driver: • From the Windows driver, go to the Setup tab. • From the Macintosh driver, go to other problems are positioned correctly in the Print Menu. 64 Solutions to Paper Handling. Your print job has misaligned lines. 1 Check that the printheads are solved simply by replacing an ink cartridge, printhead, or a PerfectFinish cartridge. The operator panel displays a Cartridge Life Expired message. You installed a new ink cartridge, but not used, for an opened , but the print quality is...

User's Guide
Page 75
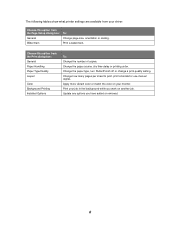
... each menu. Printer status Use the settings in the SUPPLIES MENU to monitor your printer driver to the other tray. The menu map shows the printer settings for a description of using printer settings to control how you want to Ink Saver Color menu Menu Item Printer Setting Print Quality Ink Saver* Normal Best • Select N-UP PRINTING printing from Normal (the default) to print. Media handling If you use it is empty, the printer automatically switches to save paper by selecting the same Paper Size and Paper Type in tray 1 and tray...
... each menu. Printer status Use the settings in the SUPPLIES MENU to monitor your printer driver to the other tray. The menu map shows the printer settings for a description of using printer settings to control how you want to Ink Saver Color menu Menu Item Printer Setting Print Quality Ink Saver* Normal Best • Select N-UP PRINTING printing from Normal (the default) to print. Media handling If you use it is empty, the printer automatically switches to save paper by selecting the same Paper Size and Paper Type in tray 1 and tray...
User's Guide
Page 112
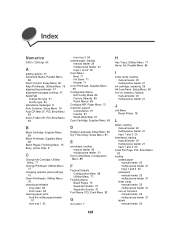
... Cartridge, Supplies Menu 69 Black Printhead, Supplies Menu 69 Blank Pages, Finishing Menu 75 Busy, printer state 8 C Change Ink Cartridge, Utilities Menu 77 Change Printhead, Utilities Menu 77 changing operator panel settings 10 Clean Printheads, Utilities Menu 76 cleaning printheads long clean 48 short clean 48 clearing paper jams from the multipurpose feeder 57 from tray 1 53 from tray 2 55 coated paper, loading manual feeder 20 multipurpose feeder 21 trays 1 and 2 20 Color Menu Best 71 Ink Saver 71 Normal 71 Color Printhead, Supplies Menu 69 Configuration Menu Exit Config Mode 89 Factory...
... Cartridge, Supplies Menu 69 Black Printhead, Supplies Menu 69 Blank Pages, Finishing Menu 75 Busy, printer state 8 C Change Ink Cartridge, Utilities Menu 77 Change Printhead, Utilities Menu 77 changing operator panel settings 10 Clean Printheads, Utilities Menu 76 cleaning printheads long clean 48 short clean 48 clearing paper jams from the multipurpose feeder 57 from tray 1 53 from tray 2 55 coated paper, loading manual feeder 20 multipurpose feeder 21 trays 1 and 2 20 Color Menu Best 71 Ink Saver 71 Normal 71 Color Printhead, Supplies Menu 69 Configuration Menu Exit Config Mode 89 Factory...
User's Guide
Page 113
... software 98 Menu button 7 moving the printer 102 multipurpose feeder clearing paper jams 57 loading paper 26 removing paper 26 N NetPnP 100 NPA Mode Parallel Menu 85 USB Menu 88 N-Up printing, using 31 O operator panel Go button 7 Menu button 7 Return button 8 Select button 7 Stop button 7 operator panel settings, changing 10 options adding 51 removing 51 Orientation, PCL Emul Menu 83 P Panel Menus, Configuration Menu 89 paper feeding problems, solving 65 paper jams clearing 52 messages 200 Check Tray 1 53 201 Check Tray 1 53 203 Open Cover 54 204 Open Cover 54 205 Open Cover 54 206 Check...
... software 98 Menu button 7 moving the printer 102 multipurpose feeder clearing paper jams 57 loading paper 26 removing paper 26 N NetPnP 100 NPA Mode Parallel Menu 85 USB Menu 88 N-Up printing, using 31 O operator panel Go button 7 Menu button 7 Return button 8 Select button 7 Stop button 7 operator panel settings, changing 10 options adding 51 removing 51 Orientation, PCL Emul Menu 83 P Panel Menus, Configuration Menu 89 paper feeding problems, solving 65 paper jams clearing 52 messages 200 Check Tray 1 53 201 Check Tray 1 53 203 Open Cover 54 204 Open Cover 54 205 Open Cover 54 206 Check...
User's Guide
Page 114
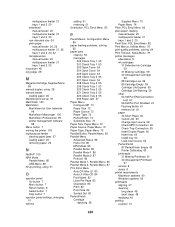
... and 2 20 tray 1 clearing paper jams 53 loading paper 22 tray 2 clearing paper jams 55 loading paper 22 tray linking 66 troubleshooting network solutions 94 solving paper feeding problems 65 solving print quality problems 64 solving printing problems 63 U universal configuration files (UCF) 92 USB Buffer, USB Menu 88 USB Menu NPA Mode 88 USB Buffer 88 using manual duplex 28 MarkVision 98 N-Up printing 31 Utilities Menu Align Printheads 76 Change Ink Cartridge 77 Change Printhead 77 Clean Printheads 76 Factory Defaults 77 Hex Trace 77 Print Menus 76 Y Yellow Cartridge, Supplies Menu 69 Symbols...
... and 2 20 tray 1 clearing paper jams 53 loading paper 22 tray 2 clearing paper jams 55 loading paper 22 tray linking 66 troubleshooting network solutions 94 solving paper feeding problems 65 solving print quality problems 64 solving printing problems 63 U universal configuration files (UCF) 92 USB Buffer, USB Menu 88 USB Menu NPA Mode 88 USB Buffer 88 using manual duplex 28 MarkVision 98 N-Up printing 31 Utilities Menu Align Printheads 76 Change Ink Cartridge 77 Change Printhead 77 Clean Printheads 76 Factory Defaults 77 Hex Trace 77 Print Menus 76 Y Yellow Cartridge, Supplies Menu 69 Symbols...
Quick Reference Guide
Page 1
...-free cloth. Copper contact area Nozzles Short Clean appears on (|). 2 Open the printer front cover. Printer Calibrating The PerfectFinish cartridge applicator is refilling the cartridge. If you do not see any improvement, do a Short Clean, which fixes most print quality problems. 1 From the Utilities Menu, press Menu> until you can reach it and pull it out of the printer. • If the paper does not advance, remove the source tray, pull out the jammed paper...
...-free cloth. Copper contact area Nozzles Short Clean appears on (|). 2 Open the printer front cover. Printer Calibrating The PerfectFinish cartridge applicator is refilling the cartridge. If you do not see any improvement, do a Short Clean, which fixes most print quality problems. 1 From the Utilities Menu, press Menu> until you can reach it and pull it out of the printer. • If the paper does not advance, remove the source tray, pull out the jammed paper...

Quick Reference Guide
Page 2
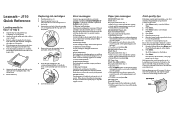
Menu Select Return Light Go Stop Press : • To enter the menus (>Menu takes you to the first menu;
Menu Select Return Light Go Stop Press : • To enter the menus (>Menu takes you to the first menu;


