
Maintenance Guide
Page 2
...scanner glass...4 Adjusting scanner registration...4 Storing supplies...5 Conserving supplies...5 Checking the status of supplies...5 Checking the status of supplies from the printer control panel 5 Checking the status of supplies from a network computer 5 Ordering supplies...6 Ordering toner cartridges ...6 Ordering a photoconductor kit ... staple cartridges ...7 Ordering a cleaning kit...7 Replacing supplies...7 Replacing the toner cartridge ...7 Replacing the photoconductor ...9 Moving the printer...14 Before moving the printer ...14 Moving the printer to another location...18 Shipping the...
...scanner glass...4 Adjusting scanner registration...4 Storing supplies...5 Conserving supplies...5 Checking the status of supplies...5 Checking the status of supplies from the printer control panel 5 Checking the status of supplies from a network computer 5 Ordering supplies...6 Ordering toner cartridges ...6 Ordering a photoconductor kit ... staple cartridges ...7 Ordering a cleaning kit...7 Replacing supplies...7 Replacing the toner cartridge ...7 Replacing the photoconductor ...9 Moving the printer...14 Before moving the printer ...14 Moving the printer to another location...18 Shipping the...

Maintenance Guide
Page 3
...Warning-Potential Damage: Do not use household cleaners or detergents, as they may cause damage to clean the interior may damage the finish of the printer. 4 Wipe only the outside of wipes for the touch screen and scanner glass is turned off and unplugged from the wall outlet and disconnect ...all cables to maintain optimum print quality. Cleaning the exterior of the printer, unplug the power cord from the wall outlet. CAUTION-SHOCK HAZARD: To avoid the risk of electric shock when cleaning the exterior of the...
...Warning-Potential Damage: Do not use household cleaners or detergents, as they may cause damage to clean the interior may damage the finish of the printer. 4 Wipe only the outside of wipes for the touch screen and scanner glass is turned off and unplugged from the wall outlet and disconnect ...all cables to maintain optimum print quality. Cleaning the exterior of the printer, unplug the power cord from the wall outlet. CAUTION-SHOCK HAZARD: To avoid the risk of electric shock when cleaning the exterior of the...

Maintenance Guide
Page 4
.... 2 Clean the scanner glass and backing material. 3 Hold down arrow until the progress bar appears. 4 Release the buttons. Maintaining the printer 4 Adjusting scanner registration Scanner Registration is a process to align the scan area with water. 2 Open the scanner cover. 1 White underside of the ADF cover 2 White ...
.... 2 Clean the scanner glass and backing material. 3 Hold down arrow until the progress bar appears. 4 Release the buttons. Maintaining the printer 4 Adjusting scanner registration Scanner Registration is a process to align the scan area with water. 2 Open the scanner cover. 1 White underside of the ADF cover 2 White ...
Maintenance Guide
Page 5
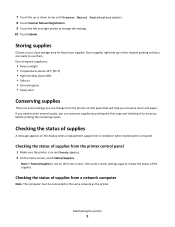
... item is needed or when maintenance is on the home screen, then print a menu settings page to review the status of supplies from the printer control panel that will help you can change the settings. 10 Touch Submit. Checking the status of the supplies. Storing supplies Choose a cool,...until you are some settings you can conserve supplies by printing the first copy and checking it for the printer supplies. Checking the status of supplies from the printer control panel 1 Make sure the printer is required. Note: If Status/Supplies is not on and Ready appears. 2 On the home...
... item is needed or when maintenance is on the home screen, then print a menu settings page to review the status of supplies from the printer control panel that will help you can change the settings. 10 Touch Submit. Checking the status of the supplies. Storing supplies Choose a cool,...until you are some settings you can conserve supplies by printing the first copy and checking it for the printer supplies. Checking the status of supplies from the printer control panel 1 Make sure the printer is required. Note: If Status/Supplies is not on and Ready appears. 2 On the home...

Maintenance Guide
Page 6
... countries or regions, visit the Lexmark Web Site at 1-800-539-6275 for information about Lexmark authorized supplies dealers in your Web browser. Ordering toner cartridges Recommended toner cartridge and part number Part name High Yield Toner Cartridge Part number X860H21G For printer(s) X860, X862, X864 Ordering ...Note: If you do not know the IP address of the printer, print a network setup page and locate the IP address in the U.S., contact Lexmark at www.lexmark.com or contact the place where you purchased the printer. Note: All life estimates for the ADF) Part number 40X2375...
... countries or regions, visit the Lexmark Web Site at 1-800-539-6275 for information about Lexmark authorized supplies dealers in your Web browser. Ordering toner cartridges Recommended toner cartridge and part number Part name High Yield Toner Cartridge Part number X860H21G For printer(s) X860, X862, X864 Ordering ...Note: If you do not know the IP address of the printer, print a network setup page and locate the IP address in the U.S., contact Lexmark at www.lexmark.com or contact the place where you purchased the printer. Note: All life estimates for the ADF) Part number 40X2375...

Maintenance Guide
Page 7
Maintaining the printer 7 Ordering staple cartridges When Staples Low or Staples Empty appears, order the specified staple cartridge. Part name Cleaning kit (wet and dry wipes) Part number ... number 25A0013 Ordering a cleaning kit Use the wet and dry wipes from the cleaning kit to continue appears, or when print becomes faded: 1 Turn the printer off. 2 Open the front door. For more information, see the illustrations inside the stapler door.
Maintaining the printer 7 Ordering staple cartridges When Staples Low or Staples Empty appears, order the specified staple cartridge. Part name Cleaning kit (wet and dry wipes) Part number ... number 25A0013 Ordering a cleaning kit Use the wet and dry wipes from the cleaning kit to continue appears, or when print becomes faded: 1 Turn the printer off. 2 Open the front door. For more information, see the illustrations inside the stapler door.

Maintenance Guide
Page 8
Maintaining the printer 8 3 Grasp the handle and pull out the cartridge. 4 Unpack a new cartridge. Extended light exposure can cause print quality problems. 5 Firmly shake the cartridge side-to-side several times to direct light for an extended period of time. Warning-Potential Damage: When replacing a toner cartridge, do not leave the new cartridge exposed to redistribute the toner.
Maintaining the printer 8 3 Grasp the handle and pull out the cartridge. 4 Unpack a new cartridge. Extended light exposure can cause print quality problems. 5 Firmly shake the cartridge side-to-side several times to direct light for an extended period of time. Warning-Potential Damage: When replacing a toner cartridge, do not leave the new cartridge exposed to redistribute the toner.

Maintenance Guide
Page 9
... helps you decide when you before the photoconductor reaches this point. Maintaining the printer 9 Replacing the photoconductor You can determine approximately how full the photoconductor is by printing the printer settings configuration sheet. To ensure print quality and to avoid damage to order replacement supplies. 6 Insert the new cartridge into place when...
... helps you decide when you before the photoconductor reaches this point. Maintaining the printer 9 Replacing the photoconductor You can determine approximately how full the photoconductor is by printing the printer settings configuration sheet. To ensure print quality and to avoid damage to order replacement supplies. 6 Insert the new cartridge into place when...

Maintenance Guide
Page 10
Note: The photoconductor cannot be pulled out if Side Door A is closed. When 84 Replace photoconductor or 84 Photoconductor low appears, order a new photoconductor immediately. Maintaining the printer 10 To replace the photoconductor: 1 Turn the printer off. 2 Open the front door. While the printer may continue to function properly after the photoconductor has reached its official end‑of‑life, print quality significantly decreases.
Note: The photoconductor cannot be pulled out if Side Door A is closed. When 84 Replace photoconductor or 84 Photoconductor low appears, order a new photoconductor immediately. Maintaining the printer 10 To replace the photoconductor: 1 Turn the printer off. 2 Open the front door. While the printer may continue to function properly after the photoconductor has reached its official end‑of‑life, print quality significantly decreases.

Maintenance Guide
Page 11
Place the photoconductor on a flat, clean surface. 5 Unpack the new photoconductor. Maintaining the printer 11 3 Lower Side Door A. 4 Pull the photoconductor out of the printer.
Place the photoconductor on a flat, clean surface. 5 Unpack the new photoconductor. Maintaining the printer 11 3 Lower Side Door A. 4 Pull the photoconductor out of the printer.

Maintenance Guide
Page 12
Maintaining the printer 12 6 Align and insert the end of the photoconductor. 7 Remove the tape from the top of the photoconductor.
Maintaining the printer 12 6 Align and insert the end of the photoconductor. 7 Remove the tape from the top of the photoconductor.

Maintenance Guide
Page 13
8 Push the photoconductor as far as it will go. Maintaining the printer 13 The photoconductor clicks into place when correctly installed. 9 Close Side Door A.
8 Push the photoconductor as far as it will go. Maintaining the printer 13 The photoconductor clicks into place when correctly installed. 9 Close Side Door A.

Maintenance Guide
Page 14
The printer returns to move it safely. Note: After you insert the photoconductor and close all the doors, the printer performs a motor cycle and clears the Replace Photoconductor warnings. Maintaining the printer 14 Moving the printer Before moving the printer CAUTION-POTENTIAL INJURY: The printer weight is greater than 55kg (121 lbs), and requires at least four persons or a properly rated mechanical handling system to the Ready state. 10 Close the front door.
The printer returns to move it safely. Note: After you insert the photoconductor and close all the doors, the printer performs a motor cycle and clears the Replace Photoconductor warnings. Maintaining the printer 14 Moving the printer Before moving the printer CAUTION-POTENTIAL INJURY: The printer weight is greater than 55kg (121 lbs), and requires at least four persons or a properly rated mechanical handling system to the Ready state. 10 Close the front door.

Maintenance Guide
Page 15
... the power cord from the wall outlet. • Disconnect all cords and cables from the printer before moving it. • Remove all printer options before moving is not covered by the printer warranty. Removing the optional trays 1 Remove the printer tray. 2 Remove the two thumbscrews and save them. Follow these guidelines to avoid personal...
... the power cord from the wall outlet. • Disconnect all cords and cables from the printer before moving it. • Remove all printer options before moving is not covered by the printer warranty. Removing the optional trays 1 Remove the printer tray. 2 Remove the two thumbscrews and save them. Follow these guidelines to avoid personal...

Maintenance Guide
Page 16
Maintaining the printer 16 3 Place the tray into the printer. 4 Remove the cable cover.
Maintaining the printer 16 3 Place the tray into the printer. 4 Remove the cable cover.

Maintenance Guide
Page 17
5 Disconnect the optional drawer connector. 6 Attach the cable cover. 7 Lift the printer off the trays. Maintaining the printer 17
5 Disconnect the optional drawer connector. 6 Attach the cable cover. 7 Lift the printer off the trays. Maintaining the printer 17

Maintenance Guide
Page 18
...have a surface able to support the full footprint of the printer. Shipping the printer When shipping the printer, use the original packaging or call the place of purchase for a relocation kit. Moving the printer to another location The printer and options can be safely moved to another location by ...following these precautions: • Any cart used to move the printer must have a surface able to support the dimensions of the options...
...have a surface able to support the full footprint of the printer. Shipping the printer When shipping the printer, use the original packaging or call the place of purchase for a relocation kit. Moving the printer to another location The printer and options can be safely moved to another location by ...following these precautions: • Any cart used to move the printer must have a surface able to support the dimensions of the options...

User's Guide
Page 2
... Learning about the printer 9 Thank you for choosing this printer!...9 Finding information about the printer...9 Selecting a location for the printer...10 Printer configurations...12 Basic functions of the scanner...13 Understanding the ADF and scanner glass 14 Understanding the printer control panel 15 Understanding...Installing internal options...27 Installing hardware options...36 Attaching cables...38 Verifying printer setup...39 Setting up the printer software...40 Setting up wireless printing...42 Installing the printer on a wired network 47 Changing port settings after installing a new...
... Learning about the printer 9 Thank you for choosing this printer!...9 Finding information about the printer...9 Selecting a location for the printer...10 Printer configurations...12 Basic functions of the scanner...13 Understanding the ADF and scanner glass 14 Understanding the printer control panel 15 Understanding...Installing internal options...27 Installing hardware options...36 Attaching cables...38 Verifying printer setup...39 Setting up the printer software...40 Setting up wireless printing...42 Installing the printer on a wired network 47 Changing port settings after installing a new...

User's Guide
Page 4
Contents 4 E-mailing color documents...104 Canceling an e-mail...104 Understanding e-mail options...104 Faxing...107 Getting printer ready to fax...107 Sending a fax...112 Creating shortcuts...113 Using shortcuts and the address book 115 Customizing fax settings...116...or flash drive 127 Scanning to a computer...127 Scanning to a flash drive...128 Understanding scan profile options...128 Improving scan quality...130 Understanding printer menus 131 Menus list...131 Paper menu...132 Reports menu...142 Network/Ports menu...144 Security menu...153 Settings menu...156 Booklet Adjustments menu......
Contents 4 E-mailing color documents...104 Canceling an e-mail...104 Understanding e-mail options...104 Faxing...107 Getting printer ready to fax...107 Sending a fax...112 Creating shortcuts...113 Using shortcuts and the address book 115 Customizing fax settings...116...or flash drive 127 Scanning to a computer...127 Scanning to a flash drive...128 Understanding scan profile options...128 Improving scan quality...130 Understanding printer menus 131 Menus list...131 Paper menu...132 Reports menu...142 Network/Ports menu...144 Security menu...153 Settings menu...156 Booklet Adjustments menu......

User's Guide
Page 5
...Storing supplies...202 Conserving supplies...202 Checking the status of supplies...202 Ordering supplies...203 Replacing supplies...204 Moving the printer...211 Administrative support 216 Finding advanced networking and administrator information 216 Using the Embedded Web Server...216 Checking the ...Adjusting the brightness of the display 217 Restoring the factory default settings 218 Troubleshooting 219 Solving basic problems...219 Understanding printer messages...220 Clearing jams...235 Solving printing problems...262 Solving copy problems...265 Solving scanner problems...267 Solving fax ...
...Storing supplies...202 Conserving supplies...202 Checking the status of supplies...202 Ordering supplies...203 Replacing supplies...204 Moving the printer...211 Administrative support 216 Finding advanced networking and administrator information 216 Using the Embedded Web Server...216 Checking the ...Adjusting the brightness of the display 217 Restoring the factory default settings 218 Troubleshooting 219 Solving basic problems...219 Understanding printer messages...220 Clearing jams...235 Solving printing problems...262 Solving copy problems...265 Solving scanner problems...267 Solving fax ...


