User Guide
Page 3
... focus...10 Using Focus Lock...11 Optimizing exposure...11 Using zoom...11 Optical zoom...12 Digital zoom...12 3 Setting options for taking pictures and recording video clips Setting the flash...13 Flash Setting-Red-Eye...13 Using the Picture Capture and Video Record menus 14 Using the Self-Timer setting 15 Using the Burst setting...16 4 Reviewing images and video clips Deleting images...18 Viewing thumbnails...18 Magnifying images...18 Using the Playback Menu...18 Removing red eyes...19 Tagging images as Favorites 20 Viewing slideshows...20 5 Using the Design Gallery Menu Modifying colors...
... focus...10 Using Focus Lock...11 Optimizing exposure...11 Using zoom...11 Optical zoom...12 Digital zoom...12 3 Setting options for taking pictures and recording video clips Setting the flash...13 Flash Setting-Red-Eye...13 Using the Picture Capture and Video Record menus 14 Using the Self-Timer setting 15 Using the Burst setting...16 4 Reviewing images and video clips Deleting images...18 Viewing thumbnails...18 Magnifying images...18 Using the Playback Menu...18 Removing red eyes...19 Tagging images as Favorites 20 Viewing slideshows...20 5 Using the Design Gallery Menu Modifying colors...
User Guide
Page 4
... to a printer 25 7 Using HP Photosmart Express Using the Photosmart Express Menu 27 Marking images for printing...27 Buying prints online...29 Sharing images...29 Setting up online destinations in the camera 29 Sending images to online destinations 30 8 Using the Camera Setup Menu 31 9 Troubleshooting Resetting the camera...32 Problems and solutions...32 Camera error messages...37 10 Product support Helpful websites...38 Getting assistance...38 A Managing batteries Top points about batteries...39 Extending battery life...39 Safety precautions for using batteries 39 Power indicators...40...
... to a printer 25 7 Using HP Photosmart Express Using the Photosmart Express Menu 27 Marking images for printing...27 Buying prints online...29 Sharing images...29 Setting up online destinations in the camera 29 Sending images to online destinations 30 8 Using the Camera Setup Menu 31 9 Troubleshooting Resetting the camera...32 Problems and solutions...32 Camera error messages...37 10 Product support Helpful websites...38 Getting assistance...38 A Managing batteries Top points about batteries...39 Extending battery life...39 Safety precautions for using batteries 39 Power indicators...40...
User Guide
Page 8
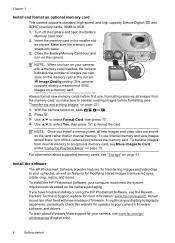
...memory card, see the HewlettPackard Technical Support website for your camera's firmware, software, and drivers. Chapter 1 Install and format an optional memory card This camera supports standard, high speed, and high capacity Secure Digital (SD and SDHC) memory cards, 32MB to transfer existing images before first use internal memory and view images stored there, turn off the camera and open the Battery/ Memory Card door. 2. This camera supports storing a maximum of firmware. Install the software The HP Photosmart Software provides features for modifying stored images (remove red...
...memory card, see the HewlettPackard Technical Support website for your camera's firmware, software, and drivers. Chapter 1 Install and format an optional memory card This camera supports standard, high speed, and high capacity Secure Digital (SD and SDHC) memory cards, 32MB to transfer existing images before first use internal memory and view images stored there, turn off the camera and open the Battery/ Memory Card door. 2. This camera supports storing a maximum of firmware. Install the software The HP Photosmart Software provides features for modifying stored images (remove red...

User Guide
Page 9
... "Transferring images with HP Photosmart Software" on page 23 For information on printing images See "Printing images directly to a printer" on page 25 TIP: To switch between Picture Capture, Video Record, and Playback, slide to your camera to the desired option. When the software has finished installing, re-enable virus protection software. You may change settings so the HP Photosmart Software starts automatically when you can take and review pictures and video clips. Double-click the CD icon on -screen instructions. Double-click the installer icon...
... "Transferring images with HP Photosmart Software" on page 23 For information on printing images See "Printing images directly to a printer" on page 25 TIP: To switch between Picture Capture, Video Record, and Playback, slide to your camera to the desired option. When the software has finished installing, re-enable virus protection software. You may change settings so the HP Photosmart Software starts automatically when you can take and review pictures and video clips. Double-click the CD icon on -screen instructions. Double-click the installer icon...
User Guide
Page 11
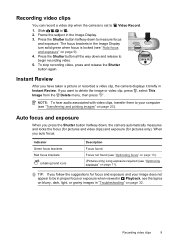
... auto focus: Indicator Green focus brackets Red focus brackets (shaking hand icon) Description Focus found (see "Optimizing focus" on page 10). (Pictures only) Long exposure required (see the topics on blurry, dark, light, or grainy images in Playback, see "Optimizing exposure" on page 32. Recording video clips You can record a video clip when the camera is locked (see "Transferring and printing images" on page 9). 4. The focus brackets in the Image Display turn solid green when focus is set to be in proper focus...
... auto focus: Indicator Green focus brackets Red focus brackets (shaking hand icon) Description Focus found (see "Optimizing focus" on page 10). (Pictures only) Long exposure required (see the topics on blurry, dark, light, or grainy images in Playback, see "Optimizing exposure" on page 32. Recording video clips You can record a video clip when the camera is locked (see "Transferring and printing images" on page 9). 4. The focus brackets in the Image Display turn solid green when focus is set to be in proper focus...
User Guide
Page 12
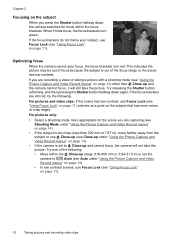
... the camera cannot focus, it finds focus, the focus brackets turn red. For pictures only: • Select a shooting mode more colors or crisp edges. If you press the Shutter button halfway down again. If the focus brackets are recording a video or taking a picture with a shooting mode (see "Using the Picture Capture and Video Record menus" on page 14) other than 200 mm or 7.87 in ) or set to Auto (see "Using Focus Lock" on page 11). 10 Taking pictures and recording video...
... the camera cannot focus, it finds focus, the focus brackets turn red. For pictures only: • Select a shooting mode more colors or crisp edges. If you press the Shutter button halfway down again. If the focus brackets are recording a video or taking a picture with a shooting mode (see "Using the Picture Capture and Video Record menus" on page 14) other than 200 mm or 7.87 in ) or set to Auto (see "Using Focus Lock" on page 11). 10 Taking pictures and recording video...
User Guide
Page 13
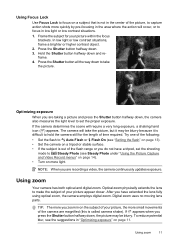
... camera will take the picture. Using zoom 11 Digital zoom uses no moving lens parts. Press the Shutter button all the way down , the picture may be blurry. If the camera determines the scene will require a very long exposure, a shaking hand icon ( ) appears. Try one of the following: • Set the flash to Auto Flash or Flash On (see Steady Photo under "Using the Picture Capture and Video Record menus" on page 14). • Turn on more light. Using Focus Lock Use Focus Lock...
... camera will take the picture. Using zoom 11 Digital zoom uses no moving lens parts. Press the Shutter button all the way down , the picture may be blurry. If the camera determines the scene will require a very long exposure, a shaking hand icon ( ) appears. Try one of the following: • Set the flash to Auto Flash or Flash On (see Steady Photo under "Using the Picture Capture and Video Record menus" on page 14). • Turn on more light. Using Focus Lock Use Focus Lock...
User Guide
Page 16
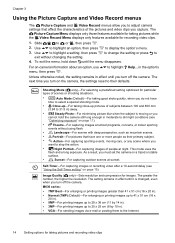
... mode uses the flash and a long exposure. Self-Timer-For capturing images or recording video after a 10-second delay (see "Optimizing exposure" on page 15). Slide to highlight Help... The next time you turn on the camera, the settings reset to adjust camera settings that have time to stop the action. • Night Portrait-For capturing images of people at night. Image Quality ( only)-Sets resolution and compression for recording video clips. 1. The greater the number...
... mode uses the flash and a long exposure. Self-Timer-For capturing images or recording video after a 10-second delay (see "Optimizing exposure" on page 15). Slide to highlight Help... The next time you turn on the camera, the settings reset to adjust camera settings that have time to stop the action. • Night Portrait-For capturing images of people at night. Image Quality ( only)-Sets resolution and compression for recording video clips. 1. The greater the number...
User Guide
Page 22
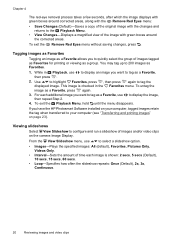
... Select View Slideshow to configure and run a slideshow of time each additional image you have the HP Photosmart Software installed on your computer, tagged images retain the tag when transferred to your computer (see "Transferring and printing images" on the camera Image Display. While in the Favorites menu. For each image is checked in Playback, use to select a slideshow option. • Images-Plays the specified images: All (default), Favorites, Pictures Only, Videos Only. • Interval-Sets...
... Select View Slideshow to configure and run a slideshow of time each additional image you have the HP Photosmart Software installed on your computer, tagged images retain the tag when transferred to your computer (see "Transferring and printing images" on the camera Image Display. While in the Favorites menu. For each image is checked in Playback, use to select a slideshow option. • Images-Plays the specified images: All (default), Favorites, Pictures Only, Videos Only. • Interval-Sets...
User Guide
Page 25
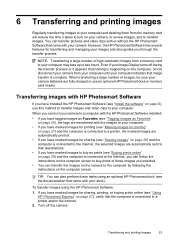
... tasks using the HP Photosmart Software: 1. Transferring images with or without the HP Photosmart Software that image transfer is connected to a printer and/or the Internet. 2. You can transfer the images on the camera to the computer by following the instructions on page 6), use an optional HP Photosmart dock or memory card reader. However, the HP Photosmart Software has several features for sharing (see "Install the software" on the computer screen. Even if your Image Display turns off the camera. 6 Transferring and printing images Regularly transferring images...
... tasks using the HP Photosmart Software: 1. Transferring images with or without the HP Photosmart Software that image transfer is connected to a printer and/or the Internet. 2. You can transfer the images on the camera to the computer by following the instructions on page 6), use an optional HP Photosmart dock or memory card reader. However, the HP Photosmart Software has several features for sharing (see "Install the software" on the computer screen. Even if your Image Display turns off the camera. 6 Transferring and printing images Regularly transferring images...
User Guide
Page 26
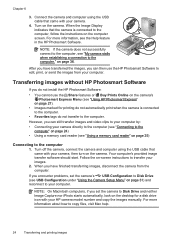
... copy files, visit Mac help. 24 Transferring and printing images If you have finished transferring images, disconnect the camera from your camera, then turn on the computer screen. For more information, see "My camera stalls when establishing a connection to the computer, see the Help feature in the HP Photosmart Software. Turn on page 36. Turn off the camera, connect the camera and computer using the USB cable that came with your HP camera model number and copy the images manually. After you encounter problems, set the camera...
... copy files, visit Mac help. 24 Transferring and printing images If you have finished transferring images, disconnect the camera from your camera, then turn on the computer screen. For more information, see "My camera stalls when establishing a connection to the computer, see the Help feature in the HP Photosmart Software. Turn on page 36. Turn off the camera, connect the camera and computer using the USB cable that came with your HP camera model number and copy the images manually. After you encounter problems, set the camera...

User Guide
Page 33
...; Digital Camera (Default)-Recognizes the camera as a digital camera using PTP (Picture Transfer Protocol). • Disk Drive-Recognizes the camera as button presses and shutter clicks) off and on. Camera Sounds-Turns the camera sounds (such as a disk drive using MSDC (Mass Storage Device Class). (Language)-Sets the language. USB Configuration-Specifies how a computer recognizes the camera. Using the Camera Setup Menu 31 8 Using the Camera Setup Menu The Camera Setup Menu allows you change them. See "Set the date and time" on page 5. See "Connecting to highlight Camera Setup...
...; Digital Camera (Default)-Recognizes the camera as a digital camera using PTP (Picture Transfer Protocol). • Disk Drive-Recognizes the camera as button presses and shutter clicks) off and on. Camera Sounds-Turns the camera sounds (such as a disk drive using MSDC (Mass Storage Device Class). (Language)-Sets the language. USB Configuration-Specifies how a computer recognizes the camera. Using the Camera Setup Menu 31 8 Using the Camera Setup Menu The Camera Setup Menu allows you change them. See "Set the date and time" on page 5. See "Connecting to highlight Camera Setup...
User Guide
Page 34
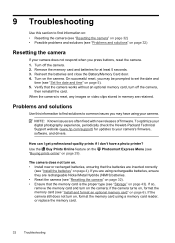
... buttons, reset the camera. 1. Remove the memory card and batteries for updates to your digital photography experience, periodically check the Hewlett-Packard Technical Support website (www.hp.com/support) for at least 5 seconds. 3. Verify that the batteries are often fixed with new releases of firmware. To optimize your camera's firmware, software, and drivers. Use the Buy Prints Online feature on the Photosmart Express Menu (see "Buying prints online" on . • Install new or recharged batteries, ensuring that the camera works...
... buttons, reset the camera. 1. Remove the memory card and batteries for updates to your digital photography experience, periodically check the Hewlett-Packard Technical Support website (www.hp.com/support) for at least 5 seconds. 3. Verify that the batteries are often fixed with new releases of firmware. To optimize your camera's firmware, software, and drivers. Use the Buy Prints Online feature on the Photosmart Express Menu (see "Buying prints online" on . • Install new or recharged batteries, ensuring that the camera works...

User Guide
Page 36
... lighting conditions. • Use Steady Photo shooting mode (see Steady Photo under "Using the Playback Menu" on page 18). 34 Troubleshooting This causes a longer exposure time, so use zoom. Images are stored in very hot locations. Chapter 9 My image is blurry. • Use Focus Lock (see "Using Focus Lock" on page 11). • Use a tripod to hold the camera steady. My image is too dark. • Wait for natural lighting conditions to Card under "Using the Picture Capture and Video Record...
... lighting conditions. • Use Steady Photo shooting mode (see Steady Photo under "Using the Playback Menu" on page 18). 34 Troubleshooting This causes a longer exposure time, so use zoom. Images are stored in very hot locations. Chapter 9 My image is blurry. • Use Focus Lock (see "Using Focus Lock" on page 11). • Use a tripod to hold the camera steady. My image is too dark. • Wait for natural lighting conditions to Card under "Using the Picture Capture and Video Record...

User Guide
Page 38
... connect your camera to your camera to establish the connection. • Ensure that does not fix the problem, reset the camera (see "Resetting the camera" on page 32). • If the problem persists, contact HP Support (see "Resetting the camera" on it. A power surge or electrostatic discharge may have a large number of images on the memory card, be sure to allow the camera to view the camera software help . • Set your Macintosh. The HP Photosmart Software does not start transferring images...
... connect your camera to your camera to establish the connection. • Ensure that does not fix the problem, reset the camera (see "Resetting the camera" on page 32). • If the problem persists, contact HP Support (see "Resetting the camera" on it. A power surge or electrostatic discharge may have a large number of images on the memory card, be sure to allow the camera to view the camera software help . • Set your Macintosh. The HP Photosmart Software does not start transferring images...
User Guide
Page 39
...; Batteries Low (followed by data on the camera packaging. • Refer to the HP Photosmart Software online help system. • Refer to AC power via an optional HP Photosmart dock, then turn on page 32). Then reinstall the batteries and turn on the camera. • Recharge the batteries. • Connect the camera to the Hewlett-Packard Technical Support website: www.hp.com/support. My camera shuts down unexpectedly. 37 I am having a problem installing or using...
...; Batteries Low (followed by data on the camera packaging. • Refer to the HP Photosmart Software online help system. • Refer to AC power via an optional HP Photosmart dock, then turn on page 32). Then reinstall the batteries and turn on the camera. • Recharge the batteries. • Connect the camera to the Hewlett-Packard Technical Support website: www.hp.com/support. My camera shuts down unexpectedly. 37 I am having a problem installing or using...
User Guide
Page 45
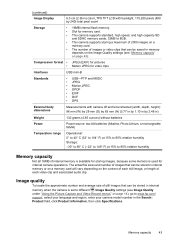
... "Using the Picture Capture and Video Record menus" on page 14), go to different Image Quality settings (see "Memory capacity" on page 43). (continued) Image Display 6.0 cm (2.36 in) color LTPS TFT LCD with camera off and lens retracted (width, depth, height): 96 mm (W) by 28 mm (D) by 63 mm (H) (3.77 in by 1.10 in by 240) total pixel count Storage • 16MB internal flash memory. •...
... "Using the Picture Capture and Video Record menus" on page 14), go to different Image Quality settings (see "Memory capacity" on page 43). (continued) Image Display 6.0 cm (2.36 in) color LTPS TFT LCD with camera off and lens retracted (width, depth, height): 96 mm (W) by 28 mm (D) by 63 mm (H) (3.77 in by 1.10 in by 240) total pixel count Storage • 16MB internal flash memory. •...
User Guide
Page 46
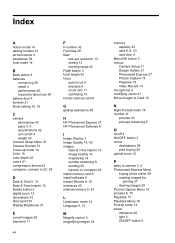
... 43 Camera Setup Menu 31 Camera Sounds 31 Close-up mode 14 Color 15 color depth 42 colors 21 compression format 43 computer, connect to 23, 24 D Date & Time 5, 31 Date & Time Imprint 15 Delete button 3 digital zoom 12 dimensions 43 direct print 25 Display Brightness 31 E e-mail images 29 exposure 11 44 F F-number 42 Favorites 20 flash red-eye reduction 13 setting 13 working range 42 Flash button 3 focal length 42 focus auto focus 9 brackets 9 focus lock 11 optimizing 10 format memory card 6 G getting assistance 38 H HP Photosmart Express 27 HP Photosmart Software 6 I Image Display 3 Image...
... 43 Camera Setup Menu 31 Camera Sounds 31 Close-up mode 14 Color 15 color depth 42 colors 21 compression format 43 computer, connect to 23, 24 D Date & Time 5, 31 Date & Time Imprint 15 Delete button 3 digital zoom 12 dimensions 43 direct print 25 Display Brightness 31 E e-mail images 29 exposure 11 44 F F-number 42 Favorites 20 flash red-eye reduction 13 setting 13 working range 42 Flash button 3 focal length 42 focus auto focus 9 brackets 9 focus lock 11 optimizing 10 format memory card 6 G getting assistance 38 H HP Photosmart Express 27 HP Photosmart Software 6 I Image Display 3 Image...
User Guide
Page 47
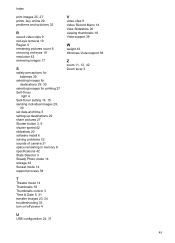
... share pictures 27 Shutter button 3, 9 shutter speed 42 slideshow 20 software install 6 solving problems 32 sounds of camera 31 space remaining in memory 8 specifications 42 State Selector 3 Steady Photo mode 14 storage 43 Sunset mode 14 support process 38 T Theatre mode 14 Thumbnails 18 Thumbnails control 3 Time & Date 5, 31 transfer images 23, 24 troubleshooting 32 turn on/off power 4 U USB configuration 24, 31 V video clips 9 Video Record Menu 14 View Slideshow 20 viewing thumbnails 18 Vista support 38 W weight 43 Windows Vista support 38 Z zoom 11...
... share pictures 27 Shutter button 3, 9 shutter speed 42 slideshow 20 software install 6 solving problems 32 sounds of camera 31 space remaining in memory 8 specifications 42 State Selector 3 Steady Photo mode 14 storage 43 Sunset mode 14 support process 38 T Theatre mode 14 Thumbnails 18 Thumbnails control 3 Time & Date 5, 31 transfer images 23, 24 troubleshooting 32 turn on/off power 4 U USB configuration 24, 31 V video clips 9 Video Record Menu 14 View Slideshow 20 viewing thumbnails 18 Vista support 38 W weight 43 Windows Vista support 38 Z zoom 11...
Quick Start Guide
Page 16
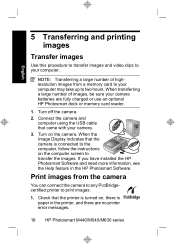
... the Image Display indicates that came with your computer. Turn off the camera. 2. If you have installed the HP Photosmart Software and need more information, see the Help feature in the printer, and there are fully charged or use an optional HP Photosmart dock or memory card reader. 1. Connect the camera and computer using the USB cable that the camera is paper in the HP Photosmart Software. NOTE: Transferring a large number of images, be sure your computer may take up to print images. 1.
... the Image Display indicates that came with your computer. Turn off the camera. 2. If you have installed the HP Photosmart Software and need more information, see the Help feature in the printer, and there are fully charged or use an optional HP Photosmart dock or memory card reader. 1. Connect the camera and computer using the USB cable that the camera is paper in the HP Photosmart Software. NOTE: Transferring a large number of images, be sure your computer may take up to print images. 1.


