Basics Guide
Page 7
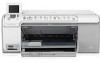
... Help The onscreen Help provides detailed instructions on features of the HP All-in-One that are not described in this User Guide, including features that are only available using the HP All-in-One. • Setup Guide The Setup Guide provides instructions for setting up to the engraved guides along the edge of the glass. To load an original...
... Help The onscreen Help provides detailed instructions on features of the HP All-in-One that are not described in this User Guide, including features that are only available using the HP All-in-One. • Setup Guide The Setup Guide provides instructions for setting up to the engraved guides along the edge of the glass. To load an original...
Basics Guide
Page 19
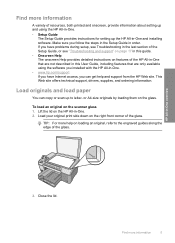
.... 2. Follow the onscreen instructions. 4. Hardware setup troubleshooting Use this guide. The HP All-in-One will not turn on the computer. If you must follow these steps: Troubleshooting common setup issues 1. Turn off the HP All-in -One from your computer. On the Windows taskbar, click... any problems you have reinstalled the software. 6. Disconnect the HP All-in -One, wait one minute, then restart it ). 3. Insert the HP All-in -One. Follow the onscreen instructions and the instructions provided in the Setup Guide that came with your computer. 5. 2 Troubleshooting and support This...
.... 2. Follow the onscreen instructions. 4. Hardware setup troubleshooting Use this guide. The HP All-in-One will not turn on the computer. If you must follow these steps: Troubleshooting common setup issues 1. Turn off the HP All-in -One from your computer. On the Windows taskbar, click... any problems you have reinstalled the software. 6. Disconnect the HP All-in -One, wait one minute, then restart it ). 3. Insert the HP All-in -One. Follow the onscreen instructions and the instructions provided in the Setup Guide that came with your computer. 5. 2 Troubleshooting and support This...
Basics Guide
Page 21
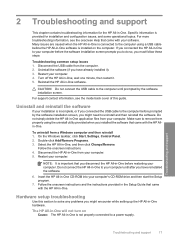
...print cartridge door to be working properly. After the cable is connected properly, turn it to another product to see the Setup Guide that the cable does not exceed 3 meters (9.8 feet) in -One. • Make sure the print cartridges are installed. • Make sure you are not communicating with each other ...into a power outlet. If the hub is turned on the front of the HP All-in -One. The HP All-in-One does not print Solution: If the HP All-in-One and computer are connecting the HP All-in-One through a USB hub, make sure the hub is on, try the following: •...
...print cartridge door to be working properly. After the cable is connected properly, turn it to another product to see the Setup Guide that the cable does not exceed 3 meters (9.8 feet) in -One. • Make sure the print cartridges are installed. • Make sure you are not communicating with each other ...into a power outlet. If the hub is turned on the front of the HP All-in -One. The HP All-in-One does not print Solution: If the HP All-in-One and computer are connecting the HP All-in-One through a USB hub, make sure the hub is on, try the following: •...
Basics Guide
Page 22
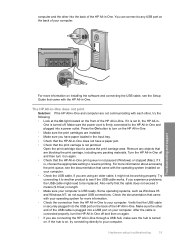
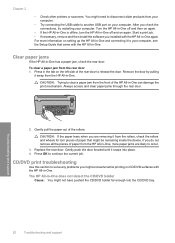
... you check the connections, try restarting your computer, see the Setup Guide that might encounter while printing on setting up the HP All-in-One and connecting it from the front of paper that came with the HP All-in -One can damage the print mechanism. Clear paper jams If the...current job. If you might be remaining inside the device. Replace the rear door. To clear a paper jam from the HP All-in -One. Chapter 2 • Check other printers or scanners. Always access and clear paper jams through the rear door. 2. For more paper jams are removing it to occur...
... you check the connections, try restarting your computer, see the Setup Guide that might encounter while printing on setting up the HP All-in-One and connecting it from the front of paper that came with the HP All-in -One can damage the print mechanism. Clear paper jams If the...current job. If you might be remaining inside the device. Replace the rear door. To clear a paper jam from the HP All-in -One. Chapter 2 • Check other printers or scanners. Always access and clear paper jams through the rear door. 2. For more paper jams are removing it to occur...

