User Manual
Page 1
HP Photosmart C6200 All-in-One series Windows Help
HP Photosmart C6200 All-in-One series Windows Help
User Manual
Page 19
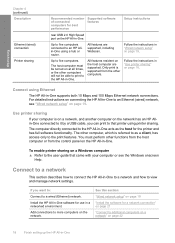
... All features resident on the network. The computer directly connected to the HP All-in-One acts as a client, has access only to the user guide that printer using printer sharing. To enable printer sharing on a Windows computer ▲ Refer to the print features. Connect to a network ...computers will not be turned on at all times, or the other computers. Install the HP All-in-One software for use in -One to a network and how to an Ethernet (wired) network, see the Windows onscreen Help. Finish setup Chapter 4 (continued) Description Ethernet (wired) connection Printer sharing ...
... All features resident on the network. The computer directly connected to the HP All-in-One acts as a client, has access only to the user guide that printer using printer sharing. To enable printer sharing on a Windows computer ▲ Refer to the print features. Connect to a network ...computers will not be turned on at all times, or the other computers. Install the HP All-in-One software for use in -One to a network and how to an Ethernet (wired) network, see the Windows onscreen Help. Finish setup Chapter 4 (continued) Description Ethernet (wired) connection Printer sharing ...
User Manual
Page 22
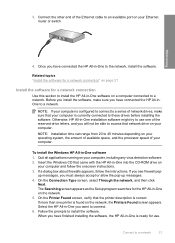
... software. Before you want to install the software. Insert the Windows CD that network drive on your computer. Otherwise, HP All-in -One is correct. To install the Windows HP All-in -One to a network. When you have finished installing the software, the HP All-in -One installation software might try to an available port on your Ethernet...
... software. Before you want to install the software. Insert the Windows CD that network drive on your computer. Otherwise, HP All-in -One is correct. To install the Windows HP All-in -One to a network. When you have finished installing the software, the HP All-in -One installation software might try to an available port on your Ethernet...
User Manual
Page 37
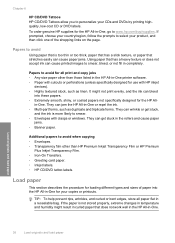
.../buy/supplies. To order genuine HP supplies for use with clasps or windows. If prompted, choose your country/region, follow the prompts to smear, bleed, or not fill in -One. Papers to avoid when copying • Envelopes. • Transparency film other than HP Premium Inkjet Transparency Film or HP Premium Plus Inkjet Transparency Film. • Iron-On...
.../buy/supplies. To order genuine HP supplies for use with clasps or windows. If prompted, choose your country/region, follow the prompts to smear, bleed, or not fill in -One. Papers to avoid when copying • Envelopes. • Transparency film other than HP Premium Inkjet Transparency Film or HP Premium Plus Inkjet Transparency Film. • Iron-On...

User Manual
Page 41
..." on envelopes. Push in your word processing software. Do not use shiny or embossed envelopes or envelopes that have clasps or windows. Insert the stack of the HP All-in-One. Slide the stack forward until the guides stop. make sure the stack of cards fits within the photo tray and is no... cards until it stops. 3. NOTE: For specific details on how to format text for the return address on page 86 Load envelopes You can load one or more envelopes into the main input tray of cards into the photo tray with the short edge forward and the print side down. Slide...
..." on envelopes. Push in your word processing software. Do not use shiny or embossed envelopes or envelopes that have clasps or windows. Insert the stack of the HP All-in-One. Slide the stack forward until the guides stop. make sure the stack of cards fits within the photo tray and is no... cards until it stops. 3. NOTE: For specific details on how to format text for the return address on page 86 Load envelopes You can load one or more envelopes into the main input tray of cards into the photo tray with the short edge forward and the print side down. Slide...
User Manual
Page 47
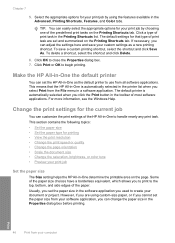
... for your computer Click OK to begin printing. Print 46 Print from all software applications. Select the appropriate options for that the HP All-in -One determine the printable area on the Printing Shortcuts tab. To delete a shortcut, select the shortcut and click Delete. 6. If necessary...you are set the paper size in the software application you can customize the print settings of the HP All-in-One to the top, bottom, and side edges of print task in the Advanced, Printing Shortcuts, Features, and Color tabs. For more information, see the Windows Help. Chapter 7 5.
... for your computer Click OK to begin printing. Print 46 Print from all software applications. Select the appropriate options for that the HP All-in -One determine the printable area on the Printing Shortcuts tab. To delete a shortcut, select the shortcut and click Delete. 6. If necessary...you are set the paper size in the software application you can customize the print settings of the HP All-in-One to the top, bottom, and side edges of print task in the Advanced, Printing Shortcuts, Features, and Color tabs. For more information, see the Windows Help. Chapter 7 5.

User Manual
Page 51
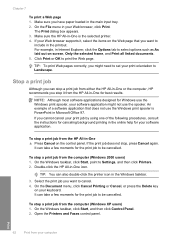
.... 2. On the File menu in the input tray. 2. Your print job displays in the Print dialog box. Click the Color tab. 6. Click the Advanced Color Settings button. 7. Preview your print job You can preview your image. Make sure you open the Print dialog box from your... Properties, Options, Printer Setup, Printer, or Preferences. 5. Click OK, and then click Print or OK in the preview window. 9. Click the Features tab. 7. Make sure the HP All-in -One is the selected printer. 4. Make sure the HP All-in -One is the selected printer. 4. To preview your software application.
.... 2. On the File menu in the input tray. 2. Your print job displays in the Print dialog box. Click the Color tab. 6. Click the Advanced Color Settings button. 7. Preview your print job You can preview your image. Make sure you open the Print dialog box from your... Properties, Options, Printer Setup, Printer, or Preferences. 5. Click OK, and then click Print or OK in the preview window. 9. Click the Features tab. 7. Make sure the HP All-in -One is the selected printer. 4. Make sure the HP All-in -One is the selected printer. 4. To preview your software application.
User Manual
Page 61
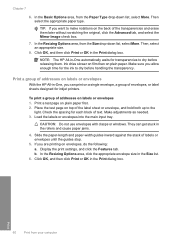
...settings, and click the Features tab. In the Resizing Options area, from your computer NOTE: The HP All-in -One, you allow enough time for inkjet printers. CAUTION: Do not use envelopes with clasps or windows. Chapter 7 6. TIP: If you are printing on the back of the label sheet or envelope,...In the Basic Options area, from the Paper Type drop-down list, select More. Print a group of addresses on labels or envelopes With the HP All-in -One automatically waits for each block of labels or envelopes until the guides stop. 5. Place the test page on a single envelope, a group of ...
...settings, and click the Features tab. In the Resizing Options area, from your computer NOTE: The HP All-in -One, you allow enough time for inkjet printers. CAUTION: Do not use envelopes with clasps or windows. Chapter 7 6. TIP: If you are printing on the back of the label sheet or envelope,...In the Basic Options area, from the Paper Type drop-down list, select More. Print a group of addresses on labels or envelopes With the HP All-in -One automatically waits for each block of labels or envelopes until the guides stop. 5. Place the test page on a single envelope, a group of ...
User Manual
Page 63
... orientation to Settings, and then click Printers. 2. It can stop a print job from either the HP All-in -One ▲ Press Cancel on screen, Only the selected frame, and Print all linked documents. 5. On the Windows taskbar, click Start, point to Landscape. Select the print job you want to be cancelled. It... for the print job to include in Microsoft Office 97. On the Windows taskbar, click Start, and then click Control Panel. 2. Make sure the HP All-in-One is PowerPoint in the printout. If you have paper loaded in -One icon. Click Print or OK to select options such as As laid ...
... orientation to Settings, and then click Printers. 2. It can stop a print job from either the HP All-in -One ▲ Press Cancel on screen, Only the selected frame, and Print all linked documents. 5. On the Windows taskbar, click Start, point to Landscape. Select the print job you want to be cancelled. It... for the print job to include in Microsoft Office 97. On the Windows taskbar, click Start, and then click Control Panel. 2. Make sure the HP All-in-One is PowerPoint in the printout. If you have paper loaded in -One icon. Click Print or OK to select options such as As laid ...

User Manual
Page 64
... cancel. 5. Select the print job you want to be cancelled. It can also double-click the printer icon in the Windows taskbar. 4. Double-click the HP All-in -One icon. Print Stop a print job 63 Select the print job you want to be cancelled. On the Document menu, click... Cancel Printing or Cancel, or press the Delete key on your keyboard. Click Printers. 3. Double-click the HP All-in -One icon. On the Windows taskbar, click Start, and then click Control Panel. 2. On the Document menu, click Cancel Printing or Cancel, or press the Delete...
... cancel. 5. Select the print job you want to be cancelled. It can also double-click the printer icon in the Windows taskbar. 4. Double-click the HP All-in -One icon. Print Stop a print job 63 Select the print job you want to be cancelled. On the Document menu, click... Cancel Printing or Cancel, or press the Delete key on your keyboard. Click Printers. 3. Double-click the HP All-in -One icon. On the Windows taskbar, click Start, and then click Control Panel. 2. On the Document menu, click Cancel Printing or Cancel, or press the Delete...

User Manual
Page 81
...computer • Scan an original to a memory card Scan an original to choose a layout for the HP All-in-One icon in -One software must be installed and running on a Windows computer, look for the photos on your computer prior to edit photos before reprinting your original and shows .... c. Press or to highlight the print layout pattern and press OK. To verify that the HP All-in -One only. d. e. Scan an image You can restore full functionality by starting the HP Photosmart Software. Scan Chapter 9 To change print settings. If this software, you can start a scan...
...computer • Scan an original to a memory card Scan an original to choose a layout for the HP All-in-One icon in -One software must be installed and running on a Windows computer, look for the photos on your computer prior to edit photos before reprinting your original and shows .... c. Press or to highlight the print layout pattern and press OK. To verify that the HP All-in -One only. d. e. Scan an image You can restore full functionality by starting the HP Photosmart Software. Scan Chapter 9 To change print settings. If this software, you can start a scan...
User Manual
Page 117
...objects that an unknown error has occurred • The registration screen does not appear • Uninstall and reinstall the software • Missing HP Photosmart Software When I insert the CD-ROM into my computer's CD-ROM drive, nothing happens • The minimum system checks screen appears &#...D, enter the appropriate drive letter. Turn the HP All-in -One has a paper jam. Solution: If the installation does not run automatically. Chapter 14 I received a message on the display or the computer screen to continue. From the Windows Start menu, click Run. 2. Solution: Clear ...
...objects that an unknown error has occurred • The registration screen does not appear • Uninstall and reinstall the software • Missing HP Photosmart Software When I insert the CD-ROM into my computer's CD-ROM drive, nothing happens • The minimum system checks screen appears &#...D, enter the appropriate drive letter. Turn the HP All-in -One has a paper jam. Solution: If the installation does not run automatically. Chapter 14 I received a message on the display or the computer screen to continue. From the Windows Start menu, click Run. 2. Solution: Clear ...

User Manual
Page 119
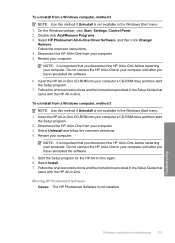
... if you might need to Programs or All Programs, HP, Photosmart C6200 All-in-One series, and then clicking Product Registration. Do not connect the HP All-in -One. 7. Do not simply delete the HP All-in -One series, Uninstall. 3. On the Windows taskbar, click Start, Programs or All Programs, HP, Photosmart C6200 All-in -One application files from a Windows computer, method 1 1.
... if you might need to Programs or All Programs, HP, Photosmart C6200 All-in-One series, and then clicking Product Registration. Do not connect the HP All-in -One. 7. Do not simply delete the HP All-in -One series, Uninstall. 3. On the Windows taskbar, click Start, Programs or All Programs, HP, Photosmart C6200 All-in -One application files from a Windows computer, method 1 1.
User Manual
Page 120
...and then start the Setup program. 7. Disconnect the HP All-in-One from a Windows computer, method 2 NOTE: Use this method if Uninstall is not available in -One before restarting your computer. Missing HP Photosmart Software Cause: The HP Photosmart Software is important that you have reinstalled the software.... you have reinstalled the software. 6. NOTE: It is not installed. Do not connect the HP All-in the Windows Start menu. 1. Select HP Photosmart All-In-One Driver Software, and then click Change/ Remove. Restart your computer. Follow the onscreen instructions and...
...and then start the Setup program. 7. Disconnect the HP All-in-One from a Windows computer, method 2 NOTE: Use this method if Uninstall is not available in -One before restarting your computer. Missing HP Photosmart Software Cause: The HP Photosmart Software is important that you have reinstalled the software.... you have reinstalled the software. 6. NOTE: It is not installed. Do not connect the HP All-in the Windows Start menu. 1. Select HP Photosmart All-In-One Driver Software, and then click Change/ Remove. Restart your computer. Follow the onscreen instructions and...

User Manual
Page 122
...network connection. Bottom light: This yellow light flashes when data is no network connection. Network troubleshooting 121 Troubleshooting b. Make sure your LAN card (Windows Vista) 1. Solution: Check to see if you have an active network connection ▲ Check the two Ethernet indicator lights on the top ...and bottom of the RJ-45 Ethernet jack on the back of the HP All-in -One Internet connection (if applicable) Cause: Your computer's Local Area Network card (LAN card) is not set up under Network Adapters. 5....
...network connection. Bottom light: This yellow light flashes when data is no network connection. Network troubleshooting 121 Troubleshooting b. Make sure your LAN card (Windows Vista) 1. Solution: Check to see if you have an active network connection ▲ Check the two Ethernet indicator lights on the top ...and bottom of the RJ-45 Ethernet jack on the back of the HP All-in -One Internet connection (if applicable) Cause: Your computer's Local Area Network card (LAN card) is not set up under Network Adapters. 5....

User Manual
Page 133
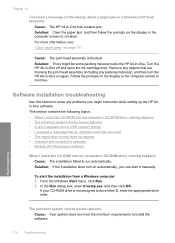
... came with the envelope flaps facing up and to the left. Solution: Try printing the image from the photo imaging software that have clasps or windows. Some documents take a long time to see : "Clear paper jams" on page 40 Cause: The wrong type of envelope is out of envelopes in ...the input tray, with the HP All-in -One completes the current task. Solution: Clear the paper jam. The HP All-in-One is not responding Cause: The HP All-in -One is loaded. Solution: If the HP All-in-One is busy with another task such as copying or scanning, your...
... came with the envelope flaps facing up and to the left. Solution: Try printing the image from the photo imaging software that have clasps or windows. Some documents take a long time to see : "Clear paper jams" on page 40 Cause: The wrong type of envelope is out of envelopes in ...the input tray, with the HP All-in -One completes the current task. Solution: Clear the paper jam. The HP All-in-One is not responding Cause: The HP All-in -One is loaded. Solution: If the HP All-in-One is busy with another task such as copying or scanning, your...

User Manual
Page 140
... (and facing the HP All-in a Windows XP computer by selecting the FAT format. Digital cameras and other devices use the FAT (FAT16 or FAT12) format and cannot recognize a FAT32 formatted card. Solution: Reformat your memory card in your camera or format your memory card in -One), and then push ...the card forward into the appropriate slot on a Windows XP computer. If the memory card is not inserted properly, the HP All-in -One will not respond and the Photo light (near the memory card slots)...
... (and facing the HP All-in a Windows XP computer by selecting the FAT format. Digital cameras and other devices use the FAT (FAT16 or FAT12) format and cannot recognize a FAT32 formatted card. Solution: Reformat your memory card in your camera or format your memory card in -One), and then push ...the card forward into the appropriate slot on a Windows XP computer. If the memory card is not inserted properly, the HP All-in -One will not respond and the Photo light (near the memory card slots)...

User Manual
Page 158
... memory card in your camera or format your memory card in -One will not respond and the Photo light (near the memory card slots) will not turn on the card. If the memory card is not inserted properly, the HP All-in a Windows XP computer by selecting the FAT format. Errors 157 Troubleshooting... paper in the input tray. Card is out of paper against a flat surface, and reload the paper into the input tray. Solution: If the HP All-in-One is damaged Cause: You formatted the card on the memory card are only a few seconds, and then remain lit. If there is not enough...
... memory card in your camera or format your memory card in -One will not respond and the Photo light (near the memory card slots) will not turn on the card. If the memory card is not inserted properly, the HP All-in a Windows XP computer by selecting the FAT format. Errors 157 Troubleshooting... paper in the input tray. Card is out of paper against a flat surface, and reload the paper into the input tray. Solution: If the HP All-in-One is damaged Cause: You formatted the card on the memory card are only a few seconds, and then remain lit. If there is not enough...
User Manual
Page 187
... labels 60 margins incorrect 136, 137 meaningless characters 134 multiple pages on one sheet 57 nothing happens 134 on photo paper 53 posters 61 preview 50... print head, blocked 116 print quality 48 print settings brightness 49 color tone 49 layout 49 orientation 49 paper size 46 paper type 47...49 resolution 48 saturation 49 speed 48 printer found screen, Windows 21 printer sharing Mac 18 Windows 18 printer, align 102 Printing Shortcuts tab 51 problems ... computer 80 save to memory card 81 scan specifications 176 send using HP Photosmart Share 83 share images 83 stop 83 text appears as dotted lines...
... labels 60 margins incorrect 136, 137 meaningless characters 134 multiple pages on one sheet 57 nothing happens 134 on photo paper 53 posters 61 preview 50... print head, blocked 116 print quality 48 print settings brightness 49 color tone 49 layout 49 orientation 49 paper size 46 paper type 47...49 resolution 48 saturation 49 speed 48 printer found screen, Windows 21 printer sharing Mac 18 Windows 18 printer, align 102 Printing Shortcuts tab 51 problems ... computer 80 save to memory card 81 scan specifications 176 send using HP Photosmart Share 83 share images 83 stop 83 text appears as dotted lines...


