
Basic Guide
Page 2
Nothing herein should be liable for HP products and services are U.S. Windows, Windows 2000, and Windows XP are set forth in the United States and/or other countries. Windows Vista is prohibited without notice. The only warranties for technical or editorial errors or omissions contained ...warranty. Reproduction, adaptation, or translation of this document is subject to change without prior written permission of Microsoft Corporation. HP shall not be construed as allowed under copyright laws. Intel and Pentium are trademarks or registered trademarks of Intel Corporation...
Nothing herein should be liable for HP products and services are U.S. Windows, Windows 2000, and Windows XP are set forth in the United States and/or other countries. Windows Vista is prohibited without notice. The only warranties for technical or editorial errors or omissions contained ...warranty. Reproduction, adaptation, or translation of this document is subject to change without prior written permission of Microsoft Corporation. HP shall not be construed as allowed under copyright laws. Intel and Pentium are trademarks or registered trademarks of Intel Corporation...
Basic Guide
Page 7
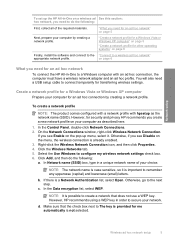
... you create a new network profile on page 6 What you need for other operating systems" on the pop-up the HP All-in-One on a wireless ad See this section: hoc network, you need to do the following : First, collect all of your choice. Click the Wireless Networks... hpsetup as described here. 1. Right-click the Wireless Network Connection icon, and then click Properties. 4. Select the Use Windows to the next step. In Network name (SSID) box, type in -One to a wireless ad hoc network" appropriate network profile. If there is already enabled. 3. Otherwise, go to configure my...
... you create a new network profile on page 6 What you need for other operating systems" on the pop-up the HP All-in-One on a wireless ad See this section: hoc network, you need to do the following : First, collect all of your choice. Click the Wireless Networks... hpsetup as described here. 1. Right-click the Wireless Network Connection icon, and then click Properties. 4. Select the Use Windows to the next step. In Network name (SSID) box, type in -One to a wireless ad hoc network" appropriate network profile. If there is already enabled. 3. Otherwise, go to configure my...

Basic Guide
Page 8
...used. Click OK to your computer for 128 bit encryption. Network setup 6 Network setup Therefore, you typed in -One directly to close the Wireless Network Properties Connection window. NOTE: You must be 10 characters for 40 bit encryption, or 26 characters for an ad-hoc wireless network...which letters are uppercase and lowercase. • Communication mode: Ad Hoc • Encryption: enabled Connect to a wireless ad hoc network The HP Photosmart Software CD and included USB setup cable provide an easy way to -computer (ad hoc) network; If you enter your choice.) Alternatively, you...
...used. Click OK to your computer for 128 bit encryption. Network setup 6 Network setup Therefore, you typed in -One directly to close the Wireless Network Properties Connection window. NOTE: You must be 10 characters for 40 bit encryption, or 26 characters for an ad-hoc wireless network...which letters are uppercase and lowercase. • Communication mode: Ad Hoc • Encryption: enabled Connect to a wireless ad hoc network The HP Photosmart Software CD and included USB setup cable provide an easy way to -computer (ad hoc) network; If you enter your choice.) Alternatively, you...
Basic Guide
Page 9
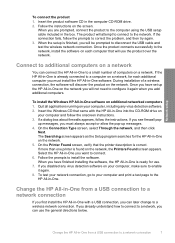
When the setup is finished, you can use the product over the network. If the HP All-in -One software on the screen. To install the Windows HP All-in -One is ready for use. 7. Insert the Windows CD that came with a USB connection, you will attempt to connect to a small number of... a wireless connection, the software will discover the product on a network. Change the HP All-in -One software. Follow the ...
When the setup is finished, you can use the product over the network. If the HP All-in -One software on the screen. To install the Windows HP All-in -One is ready for use. 7. Insert the Windows CD that came with a USB connection, you will attempt to connect to a small number of... a wireless connection, the software will discover the product on a network. Change the HP All-in -One software. Follow the ...
Basic Guide
Page 15
By default, this button is labelled Start Copy Color and starts a color copy. By default, this button is shown on the display, this guide, including features that are only available using the HP All-in -One, including letter or A4 paper, photo paper, transparencies, and envelopes. Onscreen Help... of the Start Here guide, or see the onscreen Help. To access the onscreen Help • Windows: Click Start > All Programs > HP > Photosmart C4500 series > Help. • Macintosh: Open the HP Device Manager and click the ? When a photo is shown on the memory card. When the Copy...
By default, this button is labelled Start Copy Color and starts a color copy. By default, this button is shown on the display, this guide, including features that are only available using the HP All-in -One, including letter or A4 paper, photo paper, transparencies, and envelopes. Onscreen Help... of the Start Here guide, or see the onscreen Help. To access the onscreen Help • Windows: Click Start > All Programs > HP > Photosmart C4500 series > Help. • Macintosh: Open the HP Device Manager and click the ? When a photo is shown on the memory card. When the Copy...
Basic Guide
Page 22
...more troubleshooting information, see the inside back cover of this guide. On the Windows taskbar, click Start, Settings, Control Panel (or just Control Panel). 2. Select HP Photosmart All-In-One Driver Software, and then click Change/Remove. NOTE: It is installed on the.... Follow the onscreen instructions and the instructions provided in -One application files from the computer. 2. Reinstall the product software. When the software installation is provided for the HP All-in the Windows system tray. 3 Troubleshooting and support This chapter contains troubleshooting...
...more troubleshooting information, see the inside back cover of this guide. On the Windows taskbar, click Start, Settings, Control Panel (or just Control Panel). 2. Select HP Photosmart All-In-One Driver Software, and then click Change/Remove. NOTE: It is installed on the.... Follow the onscreen instructions and the instructions provided in -One application files from the computer. 2. Reinstall the product software. When the software installation is provided for the HP All-in the Windows system tray. 3 Troubleshooting and support This chapter contains troubleshooting...
Basic Guide
Page 26
a. c. Reconnect the power cord to the product by accessing the HP Photosmart C4500 Allin-One series home page. (The home page is a Web page that is the network address assigned to the wireless router. The connection status should ...Network Connections, and then select View/Details. • Windows Vista: Click Start, point to Control Panel, point to your computer is highlighted, and then press OK. b. Chapter 3 To check a wireless connection 1. The following steps can access the HP Photosmart C4500 All-in -One both have active connections to the correct network. Leave the...
a. c. Reconnect the power cord to the product by accessing the HP Photosmart C4500 Allin-One series home page. (The home page is a Web page that is the network address assigned to the wireless router. The connection status should ...Network Connections, and then select View/Details. • Windows Vista: Click Start, point to Control Panel, point to your computer is highlighted, and then press OK. b. Chapter 3 To check a wireless connection 1. The following steps can access the HP Photosmart C4500 All-in -One both have active connections to the correct network. Leave the...
Basic Guide
Page 27
... printer status 1. If you cannot access the HP Photosmart C4500 All-in-One series home page and are able to access the home page and use your operating system: • Windows XP: Click Start, right-click My Computer, and click Manage. Do one of the product as it to disable it ... 25 Double-click Services and Applications, and then select Services. • Windows Vista: Click Start, right-click Computer, and click Manage. Step 3: Check to see "Configure your firewall to use the HP Photosmart C4500 All-in -One series home page but find that the symptoms persist as to scan or ...
... printer status 1. If you cannot access the HP Photosmart C4500 All-in-One series home page and are able to access the home page and use your operating system: • Windows XP: Click Start, right-click My Computer, and click Manage. Do one of the product as it to disable it ... 25 Double-click Services and Applications, and then select Services. • Windows Vista: Click Start, right-click Computer, and click Manage. Step 3: Check to see "Configure your firewall to use the HP Photosmart C4500 All-in -One series home page but find that the symptoms persist as to scan or ...
User Guide
Page 1
HP Photosmart C4500 All-in-One series Windows Help
HP Photosmart C4500 All-in-One series Windows Help
User Guide
Page 15
...this is called an infrastructure network. 12 Connection information "Manage your computer or see the Windows onscreen Help. "Network troubleshooting" on the network. For optimal performance and security in -One uses an internal networking component that supports a wireless network. When network elements are prompted to... with a USB cable. "Network glossary" on page 24 Set up the HP All-in -One from a USB connection to a wireless-capable computer without a wireless router (ad-hoc). "Change the HP All-in -One on an integrated wireless (WLAN 802.11) network" on page 18 View or...
...this is called an infrastructure network. 12 Connection information "Manage your computer or see the Windows onscreen Help. "Network troubleshooting" on the network. For optimal performance and security in -One uses an internal networking component that supports a wireless network. When network elements are prompted to... with a USB cable. "Network glossary" on page 24 Set up the HP All-in -One from a USB connection to a wireless-capable computer without a wireless router (ad-hoc). "Change the HP All-in -One on an integrated wireless (WLAN 802.11) network" on page 18 View or...
User Guide
Page 18
... when compared to the product. To set up menu, select it. Create a network profile for a Windows Vista or Windows XP computer Prepare your computer for an ad hoc network To connect the HP All-in -One on a wireless ad See this section: hoc network, you see Enable on page 15 Next, prepare ...your computer Operating System for an ad hoc network" on the pop-up the HP All-in -One to a Windows computer with hpsetup as described here. 1. Click the Wireless Networks tab. on page 17 What you need for an ad hoc connection by...
... when compared to the product. To set up menu, select it. Create a network profile for a Windows Vista or Windows XP computer Prepare your computer for an ad hoc network To connect the HP All-in -One on a wireless ad See this section: hoc network, you see Enable on page 15 Next, prepare ...your computer Operating System for an ad hoc network" on the pop-up the HP All-in -One to a Windows computer with hpsetup as described here. 1. Click the Wireless Networks tab. on page 17 What you need for an ad hoc connection by...

User Guide
Page 19
Otherwise, go to close the Wireless network properties window, and then click OK again. However, HP recommends using a WEP key in the previous step. If it is important to clear it. Or, if you enter 13 characters, you use HEX (hexadecimal) ... a network that came with your network. In the Confirm network key box, type the same WEP key you have an operating system other than Windows Vista or Windows XP, HP recommends that has the following : a. g. Select the check box for 128 bit encryption. Related topics • "Network glossary" on page 24 • "Connect...
Otherwise, go to close the Wireless network properties window, and then click OK again. However, HP recommends using a WEP key in the previous step. If it is important to clear it. Or, if you enter 13 characters, you use HEX (hexadecimal) ... a network that came with your network. In the Confirm network key box, type the same WEP key you have an operating system other than Windows Vista or Windows XP, HP recommends that has the following : a. g. Select the check box for 128 bit encryption. Related topics • "Network glossary" on page 24 • "Connect...

User Guide
Page 20
... CD-ROM drive on the network. To install the Windows HP All-in -One on your computer for the HP All-in -One software on each additional computer you must install the HP All-in-One software. Just remember that came with the HP All-in the computer CD-ROM drive. 2. Therefore,... you are uppercase and lowercase. • Communication mode: Ad Hoc • Encryption: enabled Connect to a wireless ad hoc network The HP Photosmart Software CD and ...
... CD-ROM drive on the network. To install the Windows HP All-in -One on your computer for the HP All-in -One software on each additional computer you must install the HP All-in-One software. Just remember that came with the HP All-in the computer CD-ROM drive. 2. Therefore,... you are uppercase and lowercase. • Communication mode: Ad Hoc • Encryption: enabled Connect to a wireless ad hoc network The HP Photosmart Software CD and ...
User Guide
Page 37
...in the printer software. • Paper with cutouts or perforations (unless specifically designed for all paper flat in -One for the product. Additional papers to smear. • Envelopes with HP inkjet products). • Highly textured stock, such as duplicate and triplicate forms. They can determine whether the paper ...A4, or a smaller size. They can cause printed images to avoid for use with clasps or windows. Chapter 6 NOTE: At this time, some portions of the HP Web site are available in -One. If the paper is too thin or too thick, paper that has a slick texture, or ...
...in the printer software. • Paper with cutouts or perforations (unless specifically designed for all paper flat in -One for the product. Additional papers to smear. • Envelopes with HP inkjet products). • Highly textured stock, such as duplicate and triplicate forms. They can determine whether the paper ...A4, or a smaller size. They can cause printed images to avoid for use with clasps or windows. Chapter 6 NOTE: At this time, some portions of the HP Web site are available in -One. If the paper is too thin or too thick, paper that has a slick texture, or ...

User Guide
Page 41
.... Slide the paper-width guide to format text for the return address on envelopes, consult the help files in -One. Do not use shiny or embossed envelopes or envelopes that have clasps or windows. Chapter 6 4. NOTE: For specific details on how to its outermost position. 38 Load originals and load paper Do... not overload the input tray; Slide the paper-width guide inward against the stack of the paper-width guide. Load envelopes You can load one or more envelopes into the input tray of the HP All-in your word processing software. To load envelopes 1.
.... Slide the paper-width guide to format text for the return address on envelopes, consult the help files in -One. Do not use shiny or embossed envelopes or envelopes that have clasps or windows. Chapter 6 4. NOTE: For specific details on how to its outermost position. 38 Load originals and load paper Do... not overload the input tray; Slide the paper-width guide inward against the stack of the paper-width guide. Load envelopes You can load one or more envelopes into the input tray of the HP All-in your word processing software. To load envelopes 1.
User Guide
Page 47
...automatically selected when you click the Print button in the toolbar of choices in the Size list to see the Windows Help. Click the button that the HP All-in-One is automatically selected in the printer list when you select Print from the File menu in a software application. ... • Scale the document size • Change the saturation, brightness, or color tone • Preview your software application, click Print. 3. This means that opens the Properties dialog box. Some of the HP All-in-One to handle nearly any print task. However, if you are using custom-size paper...
...automatically selected when you click the Print button in the toolbar of choices in the Size list to see the Windows Help. Click the button that the HP All-in-One is automatically selected in the printer list when you select Print from the File menu in a software application. ... • Scale the document size • Change the saturation, brightness, or color tone • Preview your software application, click Print. 3. This means that opens the Properties dialog box. Some of the HP All-in-One to handle nearly any print task. However, if you are using custom-size paper...

User Guide
Page 51
...software application, click Print. 3. Printing shortcuts Use printing shortcuts to the top, bottom, and side edges of the tabs in the preview window. 9. Click the Features tab. 7. NOTE: When you have paper loaded in the Printing Shortcuts list. Make sure you select a ... already set when you use for printing, you might be called Properties, Options, Printer Setup, Printer, or Preferences. 5. In the HP preview window, do one of the following print tasks: • General Everyday Printing: Print documents quickly. • Photo Printing-Borderless: Print to print with ...
...software application, click Print. 3. Printing shortcuts Use printing shortcuts to the top, bottom, and side edges of the tabs in the preview window. 9. Click the Features tab. 7. NOTE: When you have paper loaded in the Printing Shortcuts list. Make sure you select a ... already set when you use for printing, you might be called Properties, Options, Printer Setup, Printer, or Preferences. 5. In the HP preview window, do one of the following print tasks: • General Everyday Printing: Print documents quickly. • Photo Printing-Borderless: Print to print with ...
User Guide
Page 62
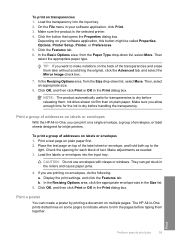
... designed for the ink to dry before releasing them. To print a group of addresses on plain paper. If you allow enough time for inkjet printers. The HP All-in-One prints dotted lines on a single envelope, a group of the label sheet or envelope, and hold both up to make notations on labels or... them later without scratching the original, click the Advanced tab, and select the Mirror Image check box. 7. CAUTION: Do not use envelopes with clasps or windows. Click OK, and then click Print or OK in the Size list. 5. TIP: If you can print on some pages to indicate where to dry...
... designed for the ink to dry before releasing them. To print a group of addresses on plain paper. If you allow enough time for inkjet printers. The HP All-in-One prints dotted lines on a single envelope, a group of the label sheet or envelope, and hold both up to make notations on labels or... them later without scratching the original, click the Advanced tab, and select the Mirror Image check box. 7. CAUTION: Do not use envelopes with clasps or windows. Click OK, and then click Print or OK in the Size list. 5. TIP: If you can print on some pages to indicate where to dry...

User Guide
Page 64
Click Print or OK to be cancelled. Double-click the product icon. It can also double-click the printer icon in -One for the print job to print the Web page. TIP: To print Web pages correctly, you want to set your keyboard. To stop it , select ... Web browser supports it from the computer 1. To stop , press Cancel again. It can stop a print job from either the HP All-in-One or the computer, HP recommends you want to Landscape. On the Windows taskbar, click Start, and then click Control Panel. 2. Select the print job you stop a print job from the...
Click Print or OK to be cancelled. Double-click the product icon. It can also double-click the printer icon in -One for the print job to print the Web page. TIP: To print Web pages correctly, you want to set your keyboard. To stop it , select ... Web browser supports it from the computer 1. To stop , press Cancel again. It can stop a print job from either the HP All-in-One or the computer, HP recommends you want to Landscape. On the Windows taskbar, click Start, and then click Control Panel. 2. Select the print job you stop a print job from the...
User Guide
Page 71
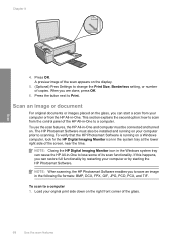
...TIF. Load your computer prior to save an image in the Windows system tray can restore full functionality by starting the HP Photosmart Software. The HP Photosmart Software must be installed and running on . NOTE: When scanning, the HP Photosmart Software enables you are done, press OK. 6. To scan... to Print. Press OK. When you to scanning. To use the scan features, the HP All-in -One to...
...TIF. Load your computer prior to save an image in the Windows system tray can restore full functionality by starting the HP Photosmart Software. The HP Photosmart Software must be installed and running on . NOTE: When scanning, the HP Photosmart Software enables you are done, press OK. 6. To scan... to Print. Press OK. When you to scanning. To use the scan features, the HP All-in -One to...


