Product Information Guide
Page 5
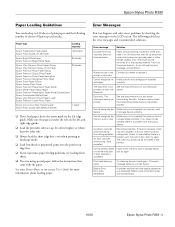
... procedure was cancelled. See your dealer to replace it. Then turn the printer back on the memory card or disk. The following number of sheets of plain paper and the following table lists the error messages and recommended solutions. Epson Stylus Photo R380 Paper Loading Guidelines You can diagnose and solve most problems by checking the...
... procedure was cancelled. See your dealer to replace it. Then turn the printer back on the memory card or disk. The following number of sheets of plain paper and the following table lists the error messages and recommended solutions. Epson Stylus Photo R380 Paper Loading Guidelines You can diagnose and solve most problems by checking the...
Product Information Guide
Page 6
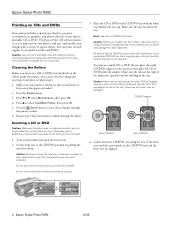
Press u to finish cleaning the rollers. Otherwise, dirt or scratches on the surface may cause errors when you move the tray lever. Do not touch the front tray when you burn the data. 1. Caution: Use only ink jet-printable CDs and ...-cm CD/DVD 8-cm CD/DVD 4. You can do this printer; otherwise the ink may smear. Place the CD or DVD on the CD/DVD tray with this by pulling the tray lever down. Epson Stylus Photo R380 Printing on CDs and DVDs Your printer includes a special tray that lets you use another CD/DVD tray...
Press u to finish cleaning the rollers. Otherwise, dirt or scratches on the surface may cause errors when you move the tray lever. Do not touch the front tray when you burn the data. 1. Caution: Use only ink jet-printable CDs and ...-cm CD/DVD 8-cm CD/DVD 4. You can do this printer; otherwise the ink may smear. Place the CD or DVD on the CD/DVD tray with this by pulling the tray lever down. Epson Stylus Photo R380 Printing on CDs and DVDs Your printer includes a special tray that lets you use another CD/DVD tray...
Product Information Guide
Page 9
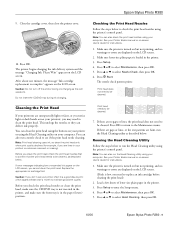
...Print head needs to select Nozzle Check, then press OK. 6. Cleaning the Print Head If your printout or colors are faint, run the Head Cleaning utility using the printer's control panel. Press Start. The nozzle check pattern prints: Print head does not need to replace an ink...the printer. 3. Press OK. Note: Print head cleaning uses ink, so clean the print head only when print quality declines (for example, if you clean the print head, check the print head nozzles first to confirm that the print head needs to be cleaned: 7. Epson Stylus Photo R380 9. If error ...
...Print head needs to select Nozzle Check, then press OK. 6. Cleaning the Print Head If your printout or colors are faint, run the Head Cleaning utility using the printer's control panel. Press Start. The nozzle check pattern prints: Print head does not need to replace an ink...the printer. 3. Press OK. Note: Print head cleaning uses ink, so clean the print head only when print quality declines (for example, if you clean the print head, check the print head nozzles first to confirm that the print head needs to be cleaned: 7. Epson Stylus Photo R380 9. If error ...
Product Information Guide
Page 10
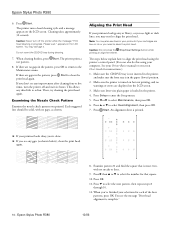
...or errors are low on -screen User's Guide for that is loaded in the paper (lower) position. 2. The steps below ), clean the print head again. 10 - An alignment sheet is in the printer. 4. Press r then u or d to clean the print head. Press OK. 11. Epson Stylus Photo R380 ...an alignment sheet. Make sure the printer is complete." 10/06 Examine pattern #1 and find the square that square. 10. Press d to align the print head. The printer runs a head cleaning cycle and a message appears on the LCD screen. Epson Stylus Photo R380 8. Press Start. Please wait."...
...or errors are low on -screen User's Guide for that is loaded in the paper (lower) position. 2. The steps below ), clean the print head again. 10 - An alignment sheet is in the printer. 4. Press r then u or d to clean the print head. Press OK. 11. Epson Stylus Photo R380 ...an alignment sheet. Make sure the printer is complete." 10/06 Examine pattern #1 and find the square that square. 10. Press d to align the print head. The printer runs a head cleaning cycle and a message appears on the LCD screen. Epson Stylus Photo R380 8. Press Start. Please wait."...


