
Product Information Guide
Page 6
...has gaps, clean or align the print head. ❏ If the page does not print, the printer may have fed into the sheet I feeder, press the paper button to eject any jammed sheets, then open . Load paper and press the I Press the paper button to resume printing. Sheet ... they don't work, contact Epson. CD/DVD tray guide cover 6 - Epson Stylus Photo R1900 Series 11/07 Press I CD/DVD tray and press the paper button. The print head is connected to print on a CD/DVD or close the CD/DVD tray guide I paper button. Running a Printer Check A printer check will help . Loading ...
...has gaps, clean or align the print head. ❏ If the page does not print, the printer may have fed into the sheet I feeder, press the paper button to eject any jammed sheets, then open . Load paper and press the I Press the paper button to resume printing. Sheet ... they don't work, contact Epson. CD/DVD tray guide cover 6 - Epson Stylus Photo R1900 Series 11/07 Press I CD/DVD tray and press the paper button. The print head is connected to print on a CD/DVD or close the CD/DVD tray guide I paper button. Running a Printer Check A printer check will help . Loading ...
Product Information Guide
Page 12
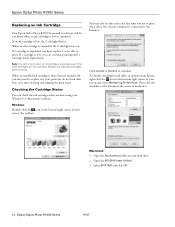
...bottom of your hard drive. 2. Open the EPSON Printer Utility2. 3. Epson Stylus Photo R1900 Series 11/07 When an ink cartridge is expended, the H ink light stays on your screen (the taskbar). Replace any expended cartridges before printing. When an installed ink cartridge is more ...Epson Stylus Photo R1900 Series Replacing an Ink Cartridge Your Epson Stylus Photo R1900 Series and its software will let you know when an ink cartridge is expended, you can check the ink cartridge status anytime using your printouts do not look their best, even after cleaning and aligning the print head....
...bottom of your hard drive. 2. Open the EPSON Printer Utility2. 3. Epson Stylus Photo R1900 Series 11/07 When an ink cartridge is expended, the H ink light stays on your screen (the taskbar). Replace any expended cartridges before printing. When an installed ink cartridge is more ...Epson Stylus Photo R1900 Series Replacing an Ink Cartridge Your Epson Stylus Photo R1900 Series and its software will let you know when an ink cartridge is expended, you can check the ink cartridge status anytime using your printouts do not look their best, even after cleaning and aligning the print head....
Product Information Guide
Page 14
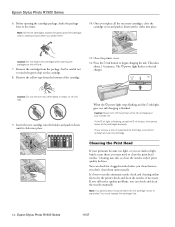
... times. Remove the yellow tape from the package, but be careful not to clean the print head nozzles. Epson Stylus Photo R1900 Series 6. Before opening the packages or ink will leak. 9. This takes about 2 ½ minutes. Close the printer cover. 12. Caution: Never turn off the printer while ink is flashing, press the H ink button, then press down until...
... times. Remove the yellow tape from the package, but be careful not to clean the print head nozzles. Epson Stylus Photo R1900 Series 6. Before opening the packages or ink will leak. 9. This takes about 2 ½ minutes. Close the printer cover. 12. Caution: Never turn off the printer while ink is flashing, press the H ink button, then press down until...
Product Information Guide
Page 15
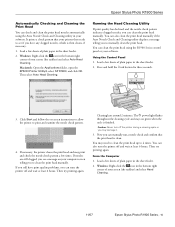
... 6 hours. Load a few times. Epson Stylus Photo R1900 Series Automatically Checking and Cleaning the Print Head You can clean the print head manually. You can manually run a nozzle check and confirm that your software. Using the Control Panel 1. If necessary, the printer cleans the print head and may need to clean the print head up to clean the print head manually. If you can clean the print head using the Auto Nozzle Check...
... 6 hours. Load a few times. Epson Stylus Photo R1900 Series Automatically Checking and Cleaning the Print Head You can clean the print head manually. You can manually run a nozzle check and confirm that your software. Using the Control Panel 1. If necessary, the printer cleans the print head and may need to clean the print head up to clean the print head manually. If you can clean the print head using the Auto Nozzle Check...
Product Information Guide
Page 16
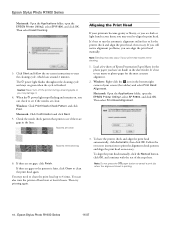
... it. 4. Check the nozzle check pattern that prints to align the print head. Then try printing again. 3. Macintosh: Click Confirmation and click Next. 5. It's best to print the alignment check patterns and align the print head as necessary. Then select Head Cleaning. 3. Epson Stylus Photo R1900 Series Macintosh: Open the Applications folder, open the EPSON Printer Utility2, select SP R1900, and click OK. The P power light...
... it. 4. Check the nozzle check pattern that prints to align the print head. Then try printing again. 3. Macintosh: Click Confirmation and click Next. 5. It's best to print the alignment check patterns and align the print head as necessary. Then select Head Cleaning. 3. Epson Stylus Photo R1900 Series Macintosh: Open the Applications folder, open the EPSON Printer Utility2, select SP R1900, and click OK. The P power light...
Product Information Guide
Page 17
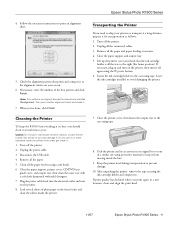
..., CD/DVD tray guide cover, and output tray, then clean the outer case with a soft cloth dampened with mild detergent. 7. Pack the printer and its accessories in a new location, clean and align the print head. 11/07 Epson Stylus Photo R1900 Series - 17 Lift up the printer cover and check that prints and compare it to ship your screen. 6. Fasten the...
..., CD/DVD tray guide cover, and output tray, then clean the outer case with a soft cloth dampened with mild detergent. 7. Pack the printer and its accessories in a new location, clean and align the print head. 11/07 Epson Stylus Photo R1900 Series - 17 Lift up the printer cover and check that prints and compare it to ship your screen. 6. Fasten the...


