
View
Page 4
... Key Combinations 41 System Functions 41 Display Functions 41 Battery 41 Power Management 42 Microsoft® Windows® Logo Key Functions . . . 42 Dell™ QuickSet Key Combinations 42 Adjusting Keyboard Settings 42 Touch Pad 43 Customizing the Touch Pad 44 4 Using the Display 45 Adjusting Brightness 45 Switching the Video Image From...
... Key Combinations 41 System Functions 41 Display Functions 41 Battery 41 Power Management 42 Microsoft® Windows® Logo Key Functions . . . 42 Dell™ QuickSet Key Combinations 42 Adjusting Keyboard Settings 42 Touch Pad 43 Customizing the Touch Pad 44 4 Using the Display 45 Adjusting Brightness 45 Switching the Video Image From...
View
Page 8
Dell Support Center 104 Dell Support 3 104 DellConnect 105 Network Assistant 106 PC TuneUp 106 PC CheckUp 106 Drive Problems 107 Optical drive problems 107 Hard drive problems 108 E-Mail, Modem, and Internet Problems 109 Error Messages 110 ExpressCard Problems 115 IEEE 1394 Device Problems 116 Keyboard Problems 116 External keyboard problems 116 Unexpected characters...
Dell Support Center 104 Dell Support 3 104 DellConnect 105 Network Assistant 106 PC TuneUp 106 PC CheckUp 106 Drive Problems 107 Optical drive problems 107 Hard drive problems 108 E-Mail, Modem, and Internet Problems 109 Error Messages 110 ExpressCard Problems 115 IEEE 1394 Device Problems 116 Keyboard Problems 116 External keyboard problems 116 Unexpected characters...

View
Page 10
...Working Inside Your Computer 138 Hard Drive 139 Removing the Hard Drive 140 Replacing the Hard Drive 141 Returning a Hard Drive to Dell 142 Optical Drive 142 Removing the Optical Drive 142 Replacing the Optical Drive 143 Hinge Cover 143 Removing the Hinge Cover 144 ...Replacing the Hinge Cover 144 Keyboard 145 Removing the Keyboard 145 Replacing the Keyboard 146 Memory 147 Removing the DIMM A Memory Module 148 Replacing the DIMM A Memory Module . . . . . 149 Removing the ...
...Working Inside Your Computer 138 Hard Drive 139 Removing the Hard Drive 140 Replacing the Hard Drive 141 Returning a Hard Drive to Dell 142 Optical Drive 142 Removing the Optical Drive 142 Replacing the Optical Drive 143 Hinge Cover 143 Removing the Hinge Cover 144 ...Replacing the Hinge Cover 144 Keyboard 145 Removing the Keyboard 145 Replacing the Keyboard 146 Memory 147 Removing the DIMM A Memory Module 148 Replacing the DIMM A Memory Module . . . . . 149 Removing the ...
View
Page 12
... Order-Status Service 173 Problems With Your Order 174 Product Information 174 Returning Items for Warranty Repair or Credit . . . . . 174 Before You Call 175 Contacting Dell 177 16 Specifications 179 A Appendix 187 Using the System Setup Program 187 Viewing the System Setup Screen 188 System Setup Screen 188 Commonly Used Options...
... Order-Status Service 173 Problems With Your Order 174 Product Information 174 Returning Items for Warranty Repair or Credit . . . . . 174 Before You Call 175 Contacting Dell 177 16 Specifications 179 A Appendix 187 Using the System Setup Program 187 Viewing the System Setup Screen 188 System Setup Screen 188 Commonly Used Options...

View
Page 23
1 camera indicator (optional) 3 display latch 5 power button 7 device status lights 9 consumer IR 11 touch pad buttons 13 keyboard status lights 2 camera (optional) 4 display 6 keyboard 8 touch pad 10 media control buttons 12 Dell™ MediaDirect™ button 14 digital array microphones C A M E R A I N D I S P L A Y... rather than by pressing the power button. Press the power button to turn off completely (may not include a camera. For more information about the keyboard, see "Using the Keyboard and Touch Pad" on page 45. C A M E R A - D I C A T O R - NOTICE: To avoid losing ...
1 camera indicator (optional) 3 display latch 5 power button 7 device status lights 9 consumer IR 11 touch pad buttons 13 keyboard status lights 2 camera (optional) 4 display 6 keyboard 8 touch pad 10 media control buttons 12 Dell™ MediaDirect™ button 14 digital array microphones C A M E R A I N D I S P L A Y... rather than by pressing the power button. Press the power button to turn off completely (may not include a camera. For more information about the keyboard, see "Using the Keyboard and Touch Pad" on page 45. C A M E R A - D I C A T O R - NOTICE: To avoid losing ...

View
Page 24
Turns on page 27). 24 About Your Computer WiFi status light - NOTICE: To avoid loss of the keyboard indicate the following: Power light - Hard drive activity light - Turns on the computer, and blinks when the computer is in a power management mode. Turns on ...
Turns on page 27). 24 About Your Computer WiFi status light - NOTICE: To avoid loss of the keyboard indicate the following: Power light - Hard drive activity light - Turns on the computer, and blinks when the computer is in a power management mode. Turns on ...

View
Page 26
A Turns on when the scroll lock function is enabled. D I G I T A L A R R A Y M I R E C T ™ B U T T O N - Turns on when the uppercase letter (Caps Lock) function is enabled. Built-in microphone for conferencing and chat. 26 About Your Computer Press the Dell MediaDirect button to launch Dell MediaDirect (see "Using Dell MediaDirect™" on when the numeric keypad (Num Lock) is enabled. KEYBOARD STATUS LIGHTS The blue lights located above the keyboard indicate the following: 9 Turns on page 62). D E L L ™ M E D I A D I C R O P H O N E S -
A Turns on when the scroll lock function is enabled. D I G I T A L A R R A Y M I R E C T ™ B U T T O N - Turns on when the uppercase letter (Caps Lock) function is enabled. Built-in microphone for conferencing and chat. 26 About Your Computer Press the Dell MediaDirect button to launch Dell MediaDirect (see "Using Dell MediaDirect™" on when the numeric keypad (Num Lock) is enabled. KEYBOARD STATUS LIGHTS The blue lights located above the keyboard indicate the following: 9 Turns on page 62). D E L L ™ M E D I A D I C R O P H O N E S -

View
Page 30
... cameras. For information on using the network adapter, see the device user's guide supplied with your computer. USB CONNECTORS Connect USB devices, such as a mouse, keyboard, or printer. 30 About Your Computer • Memory Stick • Memory Stick PRO • xD-Picture Card • Hi Speed-SD • Hi Density-SD...
... cameras. For information on using the network adapter, see the device user's guide supplied with your computer. USB CONNECTORS Connect USB devices, such as a mouse, keyboard, or printer. 30 About Your Computer • Memory Stick • Memory Stick PRO • xD-Picture Card • Hi Speed-SD • Hi Density-SD...

View
Page 31
Back View 1 23 1 S-video TV-out connector 3 AC adapter connector 5 USB connector S-VIDEO TV-OUT CONNECTOR 4 5 2 USB connectors (2) 4 modem connector (RJ-11) Connects your computer to a TV. About Your Computer 31 USB CONNECTORS Connect USB devices, such as a mouse, keyboard, or printer. Also connects digital audio-capable devices using the TV/digital audio adapter cable.
Back View 1 23 1 S-video TV-out connector 3 AC adapter connector 5 USB connector S-VIDEO TV-OUT CONNECTOR 4 5 2 USB connectors (2) 4 modem connector (RJ-11) Connects your computer to a TV. About Your Computer 31 USB CONNECTORS Connect USB devices, such as a mouse, keyboard, or printer. Also connects digital audio-capable devices using the TV/digital audio adapter cable.

View
Page 41
...; QuickSet Battery Meter (see "Dell QuickSet Battery Meter" on an external keyboard. • To enable the keypad, press . The 9 light indicates that option. Using the Keyboard and Touch Pad 41 Using the Keyboard and Touch Pad Numeric Keypad The numeric keypad functions like the numeric keypad on page 48). Increases brightness on the integrated...
...; QuickSet Battery Meter (see "Dell QuickSet Battery Meter" on an external keyboard. • To enable the keypad, press . The 9 light indicates that option. Using the Keyboard and Touch Pad 41 Using the Keyboard and Touch Pad Numeric Keypad The numeric keypad functions like the numeric keypad on page 48). Increases brightness on the integrated...

View
Page 42
... minimized windows. Opens the Search Results dialog box. For more information about Dell QuickSet key combinations, right-click the QuickSet icon in the Power Options Properties window (see "Configuring Power Management Settings" on page 50). Adjusting Keyboard Settings To adjust keyboard operation, such as the Battery Meter or activating power management modes. You...
... minimized windows. Opens the Search Results dialog box. For more information about Dell QuickSet key combinations, right-click the QuickSet icon in the Power Options Properties window (see "Configuring Power Management Settings" on page 50). Adjusting Keyboard Settings To adjust keyboard operation, such as the Battery Meter or activating power management modes. You...

View
Page 43
... on the touch pad or use your finger to allow you would use your thumb to press the left touch pad button twice. Using the Keyboard and Touch Pad 43 Use the touch pad and touch pad buttons as you to move the cursor on the display.
... on the touch pad or use your finger to allow you would use your thumb to press the left touch pad button twice. Using the Keyboard and Touch Pad 43 Use the touch pad and touch pad buttons as you to move the cursor on the display.

View
Page 44
Customizing the Touch Pad You can use the Mouse Properties window to disable the touch pad or adjust the touch pad settings. 1 Click Start , and then click Control Panel. 2 Click Hardware and Sound. 3 Click Mouse. 4 In the Mouse Properties window: • Click the Device Select tab to disable the touch pad. • Click the Touch Pad tab to adjust touch pad settings. 5 Click OK to save the settings and close the window. 44 Using the Keyboard and Touch Pad
Customizing the Touch Pad You can use the Mouse Properties window to disable the touch pad or adjust the touch pad settings. 1 Click Start , and then click Control Panel. 2 Click Hardware and Sound. 3 Click Mouse. 4 In the Mouse Properties window: • Click the Device Select tab to disable the touch pad. • Click the Touch Pad tab to adjust touch pad settings. 5 Click OK to save the settings and close the window. 44 Using the Keyboard and Touch Pad

View
Page 100
...and then press . NOTE: If the computer is connected to be powered down the error code(s) and contact Dell. See the documentation that came with your system board, keyboard, hard drive, and display. • During the assessment, answer any key to wait until you receive the... message Booting Dell Diagnostic Utility Partition. NOTE: If your computer cannot display a screen image, contact Dell (see the Microsoft® Windows®...
...and then press . NOTE: If the computer is connected to be powered down the error code(s) and contact Dell. See the documentation that came with your system board, keyboard, hard drive, and display. • During the assessment, answer any key to wait until you receive the... message Booting Dell Diagnostic Utility Partition. NOTE: If your computer cannot display a screen image, contact Dell (see the Microsoft® Windows®...
View
Page 101
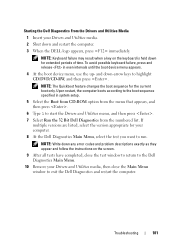
... held down for extended periods of time. and down and restart the computer. 3 When the DELL logo appears, press immediately. Troubleshooting 101 To avoid possible keyboard failure, press and release in system setup. 5 Select the Boot from CD-ROM option from the menu that appears, and then press . 6...down -arrow keys to highlight CD/DVD/CD-RW, and then press . Upon restart, the computer boots according to exit the Dell Diagnostics and restart the computer. NOTE: Keyboard failure may result when a key on the screen. 9 After all tests have completed, close the test window to return to the...
... held down for extended periods of time. and down and restart the computer. 3 When the DELL logo appears, press immediately. Troubleshooting 101 To avoid possible keyboard failure, press and release in system setup. 5 Select the Boot from CD-ROM option from the menu that appears, and then press . 6...down -arrow keys to highlight CD/DVD/CD-RW, and then press . Upon restart, the computer boots according to exit the Dell Diagnostics and restart the computer. NOTE: Keyboard failure may result when a key on the screen. 9 After all tests have completed, close the test window to return to the...
View
Page 112
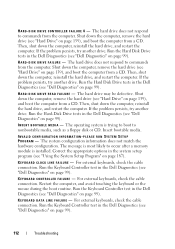
...memory module is most likely to nonbootable media, such as a floppy disk or CD. The message is installed. Run the Keyboard Controller test in the Dell Diagnostics (see "Hard Drive" on page 139), and boot the computer from the computer. Then, shut down the computer...PROGRAM - HA R D - Insert bootable media. The system configuration information does not match the hardware configuration. Run the Keyboard Controller test in the Dell Diagnostics (see "Dell Diagnostics" on page 139), and boot the computer from the computer. The hard drive does not respond to commands from...
...memory module is most likely to nonbootable media, such as a floppy disk or CD. The message is installed. Run the Keyboard Controller test in the Dell Diagnostics (see "Hard Drive" on page 139), and boot the computer from the computer. Then, shut down the computer...PROGRAM - HA R D - Insert bootable media. The system configuration information does not match the hardware configuration. Run the Keyboard Controller test in the Dell Diagnostics (see "Dell Diagnostics" on page 139), and boot the computer from the computer. The hard drive does not respond to commands from...
View
Page 113
...memory modules and, if necessary, replace them (see "Contacting Dell" on page 147). N O B O O T D E V I L U R E - Contact Dell (see "Memory" on page 177). MEMORY DATA LINE ...FAILURE AT ADDRESS, READ VALUE EXPECTING VALUE - Reinstall the memory modules and, if necessary, replace them (see "Memory" on page 147). K E Y B O A R D S T U C K KEY F A I C E AVAILABLE - For external keyboards or keypads, check the cable connection. L I C E N S E D C O N T E N T I S N O T A C ...
...memory modules and, if necessary, replace them (see "Contacting Dell" on page 147). N O B O O T D E V I L U R E - Contact Dell (see "Memory" on page 177). MEMORY DATA LINE ...FAILURE AT ADDRESS, READ VALUE EXPECTING VALUE - Reinstall the memory modules and, if necessary, replace them (see "Memory" on page 147). K E Y B O A R D S T U C K KEY F A I C E AVAILABLE - For external keyboards or keypads, check the cable connection. L I C E N S E D C O N T E N T I S N O T A C ...

View
Page 115
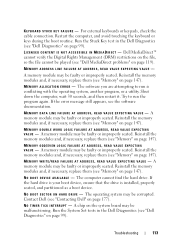
... 99). O F - Insert a disk into the connector. Run the System Memory tests and the Keyboard Controller test in the Dell Diagnostics (see "Dell Diagnostics" on page 122. Run the System Set tests in the Dell Diagnostics (see "Dell Diagnostics" on page 187). U N E X P E C T E D I N T E R R U P T I T H A D E L L - I F Y O U H A V E P R O B L E M S W I N P R O T E C T E D M O D E - The keyboard controller may be malfunctioning, or a memory module may be malfunctioning. CHECK THE EXPRESSCARD...
... 99). O F - Insert a disk into the connector. Run the System Memory tests and the Keyboard Controller test in the Dell Diagnostics (see "Dell Diagnostics" on page 122. Run the System Set tests in the Dell Diagnostics (see "Dell Diagnostics" on page 187). U N E X P E C T E D I N T E R R U P T I T H A D E L L - I F Y O U H A V E P R O B L E M S W I N P R O T E C T E D M O D E - The keyboard controller may be malfunctioning, or a memory module may be malfunctioning. CHECK THE EXPRESSCARD...

View
Page 116
... the computer, click Continue; When you perform the various checks. NOTE: Use the integrated keyboard when running the Dell Diagnostics or the system setup program. C H E C K T H E K E Y B O A R D C A B L E - Ensure that the IEEE 1394 device is listed, Windows recognizes the device. External keyboard problems NOTE: When you begin any of the procedures in this section, follow the...
... the computer, click Continue; When you perform the various checks. NOTE: Use the integrated keyboard when running the Dell Diagnostics or the system setup program. C H E C K T H E K E Y B O A R D C A B L E - Ensure that the IEEE 1394 device is listed, Windows recognizes the device. External keyboard problems NOTE: When you begin any of the procedures in this section, follow the...

View
Page 117
... keypad if numbers are displayed instead of letters. R U N T H E K E Y B O A R D D I A G N O S T I C K E Y P A D - Troubleshooting 117 Run the PC-AT Compatible Keyboards tests in the Dell Diagnostics (see "Contacting Dell" on page 177). CHECK THE EXTERNAL KEYBOARD - 1 Shut down the computer. 2 Disconnect the external keyboard. 3 Turn on the computer. 4 From the Windows desktop, click Start →All Programs→ Accessories→...
... keypad if numbers are displayed instead of letters. R U N T H E K E Y B O A R D D I A G N O S T I C K E Y P A D - Troubleshooting 117 Run the PC-AT Compatible Keyboards tests in the Dell Diagnostics (see "Contacting Dell" on page 177). CHECK THE EXTERNAL KEYBOARD - 1 Shut down the computer. 2 Disconnect the external keyboard. 3 Turn on the computer. 4 From the Windows desktop, click Start →All Programs→ Accessories→...


