
View
Page 37
... Computer 37 For technical assistance, refer to the computer. Setting Up a Printer NOTICE: Complete the operating system setup before you connect a printer to the printer owner's manual or contact the printer manufacturer. See the documentation that came with the printer for transferring data: • Windows Easy Transfer wizard, an Easy Transfer Cable...
... Computer 37 For technical assistance, refer to the computer. Setting Up a Printer NOTICE: Complete the operating system setup before you connect a printer to the printer owner's manual or contact the printer manufacturer. See the documentation that came with the printer for transferring data: • Windows Easy Transfer wizard, an Easy Transfer Cable...
Service Manual
Page 38
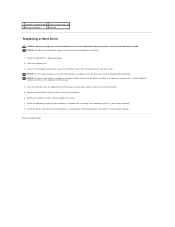
... bay. Exercise care when handling the hard drive. 1. NOTICE: If only one hard drive is installed, or is installed in your Owner's Manual). Install an optional second hard drive in the Product Information Guide. Place the hard drive into place. Replace the hard drive cover, ... begin any of the procedures in this section, follow the safety instructions in the secondary hard drive bay. 4. Follow the procedures in your Owner's Manual). 8. NOTICE: Use firm and even pressure to Contents Page Install the drivers and utilities for your computer, as needed (see "Reinstalling Drivers...
... bay. Exercise care when handling the hard drive. 1. NOTICE: If only one hard drive is installed, or is installed in your Owner's Manual). Install an optional second hard drive in the Product Information Guide. Place the hard drive into place. Replace the hard drive cover, ... begin any of the procedures in this section, follow the safety instructions in the secondary hard drive bay. 4. Follow the procedures in your Owner's Manual). 8. NOTICE: Use firm and even pressure to Contents Page Install the drivers and utilities for your computer, as needed (see "Reinstalling Drivers...
Service Manual
Page 40
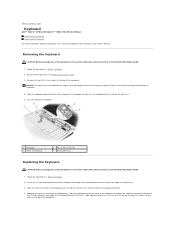
... the palm rest, and then lower the keyboard into the notch at the top of the computer to Contents Page Keyboard Dell™ Vostro™ 1700 and Inspiron™ 1720/1721 Service Manual Removing the Keyboard Replacing the Keyboard For more information about the keyboard, see Removing the Hinge Cover). 3. Align the notch at..." in the Product Information Guide. 1. Removing the Keyboard CAUTION: Before you begin any of the procedures in this section, follow the safety instructions in your Owner's Manual.
... the palm rest, and then lower the keyboard into the notch at the top of the computer to Contents Page Keyboard Dell™ Vostro™ 1700 and Inspiron™ 1720/1721 Service Manual Removing the Keyboard Replacing the Keyboard For more information about the keyboard, see Removing the Hinge Cover). 3. Align the notch at..." in the Product Information Guide. 1. Removing the Keyboard CAUTION: Before you begin any of the procedures in this section, follow the safety instructions in your Owner's Manual.

Service Manual
Page 44
...on the memory supported by your computer has only one accessed from beneath the keyboard (DIMM A), and the other accessed from Dell are intended for information on the system board. Removing a Memory Module CAUTION: Before you install a module in the connector labeled...memory modules that are covered under your computer. See "Specifications" in your Owner's Manual for your computer warranty. Back to Contents Page Memory Dell™ Vostro™ 1700 and Inspiron™ 1720/1721 Service Manual Removing a Memory Module Replacing a Memory Module Your computer has two user-...
...on the memory supported by your computer has only one accessed from beneath the keyboard (DIMM A), and the other accessed from Dell are intended for information on the system board. Removing a Memory Module CAUTION: Before you install a module in the connector labeled...memory modules that are covered under your computer. See "Specifications" in your Owner's Manual for your computer warranty. Back to Contents Page Memory Dell™ Vostro™ 1700 and Inspiron™ 1720/1721 Service Manual Removing a Memory Module Replacing a Memory Module Your computer has two user-...
Service Manual
Page 59
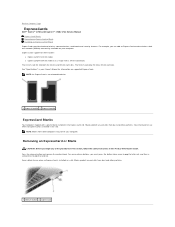
... button twice, once to pop the latch out, and then a second time to Contents Page ExpressCards Dell™ Vostro™ 1700 and Inspiron™ 1720/1721 Service Manual ExpressCard Blanks Removing an ExpressCard or Blank Installing an ExpressCard or Blank ExpressCards provide wired and wireless communications,...in the slot. ExpressCards support two form factors: l ExpressCard/34 (34 mm wide) l ExpressCard/54 (54 mm wide in your Owner's Manual for use when no ExpressCard is installed in the Product Information Guide. For some release buttons, you begin any of the procedures in ...
... button twice, once to pop the latch out, and then a second time to Contents Page ExpressCards Dell™ Vostro™ 1700 and Inspiron™ 1720/1721 Service Manual ExpressCard Blanks Removing an ExpressCard or Blank Installing an ExpressCard or Blank ExpressCards provide wired and wireless communications,...in the slot. ExpressCards support two form factors: l ExpressCard/34 (34 mm wide) l ExpressCard/54 (54 mm wide in your Owner's Manual for use when no ExpressCard is installed in the Product Information Guide. For some release buttons, you begin any of the procedures in ...


