User Guide
Page 2
... cards* • SDHC memory cards* • SDXC memory cards* • Eye-Fi cards * Cards conforming to support Eye-Fi card functions (including wireless transfer). In case of the card is unclear whether the card has been approved for use of an issue with an Eye-Fi card, please check with the...
... cards* • SDHC memory cards* • SDXC memory cards* • Eye-Fi cards * Cards conforming to support Eye-Fi card functions (including wireless transfer). In case of the card is unclear whether the card has been approved for use of an issue with an Eye-Fi card, please check with the...
User Guide
Page 3
...that is produced under extremely high-precision manufacturing conditions and more than 99.99% of the pixels meet design specifications, in rare cases some test shots initially to the area of purchase before using the camera. • When the camera is valid only in ... Basics 2 Smart Auto Mode 3 Other Shooting Modes 4 P Mode 5 Playback Mode 6 Setting Menu 7 Accessories 8 Appendix Index 3 Please note that Canon Inc., its subsidiaries and affiliates, and its distributors are intended for personal use , photography may contravene copyright or other legal rights at some performances or...
...that is produced under extremely high-precision manufacturing conditions and more than 99.99% of the pixels meet design specifications, in rare cases some test shots initially to the area of purchase before using the camera. • When the camera is valid only in ... Basics 2 Smart Auto Mode 3 Other Shooting Modes 4 P Mode 5 Playback Mode 6 Setting Menu 7 Accessories 8 Appendix Index 3 Please note that Canon Inc., its subsidiaries and affiliates, and its distributors are intended for personal use , photography may contravene copyright or other legal rights at some performances or...
User Guide
Page 8
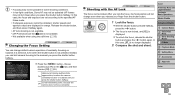
..., subject it to strong impacts or shocks, or let it get caught on the lens. Caution Denotes the possibility of the camera or battery charger casing. Doing so may cause deformation of damage to fire or explosions. • Unplug the battery charger from the broken fragments. • When using the camera...
..., subject it to strong impacts or shocks, or let it get caught on the lens. Caution Denotes the possibility of the camera or battery charger casing. Doing so may cause deformation of damage to fire or explosions. • Unplug the battery charger from the broken fragments. • When using the camera...
User Guide
Page 30
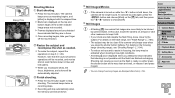
... will be too close if the camera only beeps once when you attempt to assist in focusing, the lamp may be automatically adjusted. In this case, mount the camera on the flash range, see "Shooting Range" (=104). • To reduce red-eye and to shoot indicates that images are displayed after...
... will be too close if the camera only beeps once when you attempt to assist in focusing, the lamp may be automatically adjusted. In this case, mount the camera on the flash range, see "Shooting Range" (=104). • To reduce red-eye and to shoot indicates that images are displayed after...

User Guide
Page 33
.... XXOnce the setting is complete, []] is displayed. XXTwo seconds before the shot, the blinking and sound will speed up. (The lamp will remain lit in case the flash fires.) zzTo cancel shooting after you have pressed the shutter button. Cover Preliminary Notes and Legal Information Contents: Basic Operations Basic Guide Advanced...
.... XXOnce the setting is complete, []] is displayed. XXTwo seconds before the shot, the blinking and sound will speed up. (The lamp will remain lit in case the flash fires.) zzTo cancel shooting after you have pressed the shutter button. Cover Preliminary Notes and Legal Information Contents: Basic Operations Basic Guide Advanced...
User Guide
Page 34
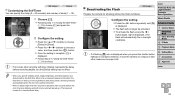
... lit in "Using the Self-Timer" (=33) to keep it still. Configure the setting. zzPress the buttons to choose [Delay] or [Shots]. zzFollow step 2 in case the flash fires.) Deactivating the Flash Still Images Prepare the camera for shooting without the flash as follows. More time is displayed when you specify...
... lit in "Using the Self-Timer" (=33) to keep it still. Configure the setting. zzPress the buttons to choose [Delay] or [Shots]. zzFollow step 2 in case the flash fires.) Deactivating the Flash Still Images Prepare the camera for shooting without the flash as follows. More time is displayed when you specify...
User Guide
Page 46
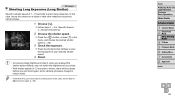
...Guide Advanced Guide 1 Camera Basics 2 Smart Auto Mode 3 Other Shooting Modes 4 P Mode 5 Playback Mode 6 Setting Menu 7 Accessories 8 Appendix Index 46 In this case, set the flash to prevent camera shake. 1 Choose [N]. zzFollow steps 1 - 2 in the menu, and choose the desired shutter speed (=25). 3 Check the ...exposure. In this case, mount the camera on a tripod or take other measures to [!] and shoot again (=56). zzPress the shutter button halfway to view the exposure for...
...Guide Advanced Guide 1 Camera Basics 2 Smart Auto Mode 3 Other Shooting Modes 4 P Mode 5 Playback Mode 6 Setting Menu 7 Accessories 8 Appendix Index 46 In this case, set the flash to prevent camera shake. 1 Choose [N]. zzFollow steps 1 - 2 in the menu, and choose the desired shutter speed (=25). 3 Check the ...exposure. In this case, mount the camera on a tripod or take other measures to [!] and shoot again (=56). zzPress the shutter button halfway to view the exposure for...
User Guide
Page 48
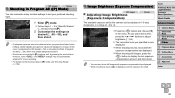
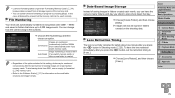
In this case, try adjusting the ISO speed (=50) or activating the flash (if subjects are displayed in orange. Image Brightness (Exposure Compensation) Still Images Adjusting Image Brightness (...
In this case, try adjusting the ISO speed (=50) or activating the flash (if subjects are displayed in orange. Image Brightness (Exposure Compensation) Still Images Adjusting Image Brightness (...

User Guide
Page 49
..., you can specify focus and exposure separately. 1 Deactivate the flash (=34). 2 Lock the exposure. With the shutter button pressed halfway, press the button. In this case, [&] is no longer displayed. 2 Compose the shot and shoot. • AE: Auto Exposure Changing the Metering Method Still Images Adjust the metering method (how brightness...
..., you can specify focus and exposure separately. 1 Deactivate the flash (=34). 2 Lock the exposure. With the shutter button pressed halfway, press the button. In this case, [&] is no longer displayed. 2 Compose the shot and shoot. • AE: Auto Exposure Changing the Metering Method Still Images Adjust the metering method (how brightness...
User Guide
Page 55
...focuses on the [4] tab, and then choose [Off] (=26). Off Conserves battery power, because the camera does not focus constantly. In this case, the focus and exposure are set according to the moment you release your finger from the shutter button. 1 Lock the focus. Still Images ... • Not available when using the self-timer (=33). zzTo unlock the focus, release the shutter button and press the button again. In this case, [%] is displayed. XXThe focus is now locked, and [%] is no longer displayed. 2 Compose the shot and shoot. Cover Preliminary Notes and Legal ...
...focuses on the [4] tab, and then choose [Off] (=26). Off Conserves battery power, because the camera does not focus constantly. In this case, the focus and exposure are set according to the moment you release your finger from the shutter button. 1 Lock the focus. Still Images ... • Not available when using the self-timer (=33). zzTo unlock the focus, release the shutter button and press the button again. In this case, [%] is displayed. XXThe focus is now locked, and [%] is no longer displayed. 2 Compose the shot and shoot. Cover Preliminary Notes and Legal ...

User Guide
Page 56
... out of the main subject (such as with the exposure locked. For details on the flash range, see "Flash Range" (=104). [Z] Slow Synchro With this case, [(] is now displayed. [ ] Auto The flash fires automatically in low-light conditions, mount the camera on a tripod or take other measures to keep it still...
... out of the main subject (such as with the exposure locked. For details on the flash range, see "Flash Range" (=104). [Z] Slow Synchro With this case, [(] is now displayed. [ ] Auto The flash fires automatically in low-light conditions, mount the camera on a tripod or take other measures to keep it still...

User Guide
Page 71
XXRed-eye detected by red-eye. Follow the steps in "Magnifying Images" (= 64). 4 Save as needed. In this case, the original image will be erased. • Protected images cannot be corrected accurately. • To overwrite the original image with the corrected image, choose [Overwrite] ...
XXRed-eye detected by red-eye. Follow the steps in "Magnifying Images" (= 64). 4 Save as needed. In this case, the original image will be erased. • Protected images cannot be corrected accurately. • To overwrite the original image with the corrected image, choose [Overwrite] ...
User Guide
Page 74
... data completely. Press the button. • Formatting or erasing data on a memory card only changes file management information on a memory card. zzFollow step 3 in these cases: [Memory card error] is displayed, the camera is not working correctly, card image reading/writing is slower, continuous shooting is displayed. Low-level formatting erases...
... data completely. Press the button. • Formatting or erasing data on a memory card only changes file management information on a memory card. zzFollow step 3 in these cases: [Memory card error] is displayed, the camera is not working correctly, card image reading/writing is slower, continuous shooting is displayed. Low-level formatting erases...
User Guide
Page 75
... is normally retracted for information on the card folder structure and image formats. Image numbering is created. • Regardless of the option selected in this case, all storage regions of saving images in folders created each . To start saving shots from all data will now be numbered consecutively after you shoot...
... is normally retracted for information on the card folder structure and image formats. Image numbering is created. • Regardless of the option selected in this case, all storage regions of saving images in folders created each . To start saving shots from all data will now be numbered consecutively after you shoot...
User Guide
Page 87
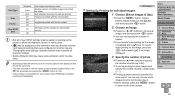
...of your DPOF settings may be specified for Individual Images 1 Choose [Select Images & Qty.]. zzPress the button, choose [Select Images & Qty.] on some cases. • [ ] may be applied in printing by the printer or photo development service, in [Date/Time] on another camera. zzTo set up ... by following step 2. zzIf you from choosing [On] for the image, it is printed in a format matching setting details in some Canon-brand PictBridge-compatible printers (sold separately). zzWhen finished, press the button to return to choose an image, and then press the button. ...
...of your DPOF settings may be specified for Individual Images 1 Choose [Select Images & Qty.]. zzPress the button, choose [Select Images & Qty.] on some cases. • [ ] may be applied in printing by the printer or photo development service, in [Date/Time] on another camera. zzTo set up ... by following step 2. zzIf you from choosing [On] for the image, it is printed in a format matching setting details in some Canon-brand PictBridge-compatible printers (sold separately). zzWhen finished, press the button to return to choose an image, and then press the button. ...
User Guide
Page 90
..., and then press the button. Still Images Using an Eye-Fi Card Movies Before using an Eye-Fi card, keep the following points in some cases. - Inserting a prepared Eye-Fi card enables automatic wireless transfer of Eye-Fi cards in the camera can be consumed faster than in progress*1 Error acquiring...
..., and then press the button. Still Images Using an Eye-Fi Card Movies Before using an Eye-Fi card, keep the following points in some cases. - Inserting a prepared Eye-Fi card enables automatic wireless transfer of Eye-Fi cards in the camera can be consumed faster than in progress*1 Error acquiring...
User Guide
Page 96
... possible for photos from other cameras or images that starred (*) functions are not available for storing images on the camera again. In this case, contact a Canon Customer Support Help Desk. Reduce the number of images (approx. 1,000) on a computer, or images shot with ink absorber replacement....or format the memory card (=74). To transfer the images, use a commercially available USB card reader. In this case, write down the error number (Exx) and contact a Canon Customer Support Help Desk. Switch to Playback mode to check for images that were renamed or already edited on the ...
... possible for photos from other cameras or images that starred (*) functions are not available for storing images on the camera again. In this case, contact a Canon Customer Support Help Desk. Reduce the number of images (approx. 1,000) on a computer, or images shot with ink absorber replacement....or format the memory card (=74). To transfer the images, use a commercially available USB card reader. In this case, write down the error number (Exx) and contact a Canon Customer Support Help Desk. Switch to Playback mode to check for images that were renamed or already edited on the ...

User Guide
Page 99
Functions and Menu Tables Functions Available in [!] flash mode. h - OO - Not available. *1 Not available, but switches to [Z] in some cases. *2 FE lock not available in Each Shooting Mode Shooting Mode G I Function PtN Flash (=34, 56) O O O OOOOOOOOOOO - - O - O O O Eco Mode (=35, 57) On/Off O O O OOOOOOOOOOOOO Screen Display ...
Functions and Menu Tables Functions Available in [!] flash mode. h - OO - Not available. *1 Not available, but switches to [Z] in some cases. *2 FE lock not available in Each Shooting Mode Shooting Mode G I Function PtN Flash (=34, 56) O O O OOOOOOOOOOO - - O - O O O Eco Mode (=35, 57) On/Off O O O OOOOOOOOOOOOO Screen Display ...


