Software Users Manual - English
Page 2
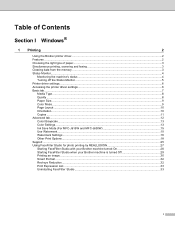
Table of Contents Section I Windows® 1 Printing 2 Using the Brother printer driver...2 Features ...2 Choosing the right type of paper...3 Simultaneous printing, scanning and faxing 3 Clearing data from the memory ...3 Status Monitor...4 Monitoring the machine's status ......4 Turning off the Status Monitor ...5 Printer driver settings...6 Accessing the printer driver settings...6 Basic tab ...7 Media Type...8 Quality ...8 Paper Size ...9 Color Mode ...9 Page Layout ...10 Orientation ...10 Copies ...11 Advanced tab...12 Color/Grayscale ...13 Color Settings ...13 Ink Save...
Table of Contents Section I Windows® 1 Printing 2 Using the Brother printer driver...2 Features ...2 Choosing the right type of paper...3 Simultaneous printing, scanning and faxing 3 Clearing data from the memory ...3 Status Monitor...4 Monitoring the machine's status ......4 Turning off the Status Monitor ...5 Printer driver settings...6 Accessing the printer driver settings...6 Basic tab ...7 Media Type...8 Quality ...8 Paper Size ...9 Color Mode ...9 Page Layout ...10 Orientation ...10 Copies ...11 Advanced tab...12 Color/Grayscale ...13 Color Settings ...13 Ink Save...
Software Users Manual - English
Page 5
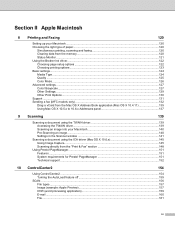
... Apple Macintosh 8 Printing and Faxing 120 Setting up your Macintosh ...120 Choosing the right type of paper...120 Simultaneous printing, scanning and faxing 120 Clearing data from the memory ...120 Status Monitor ...121 Using the Brother Ink driver ...122 Choosing page setup options ...122 Choosing printing options ...123 Basic settings...124 Media...
... Apple Macintosh 8 Printing and Faxing 120 Setting up your Macintosh ...120 Choosing the right type of paper...120 Simultaneous printing, scanning and faxing 120 Clearing data from the memory ...120 Status Monitor ...121 Using the Brother Ink driver ...122 Choosing page setup options ...122 Choosing printing options ...123 Basic settings...124 Media...
Software Users Manual - English
Page 8
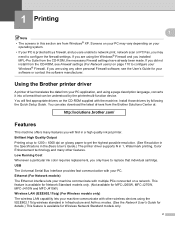
... other wireless devices using the Windows® Firewall and you installed MFL-Pro Suite from the Brother Solutions Center at up to 1200 6000 dpi on glossy paper to replace that can also download the latest drivers from the CD-ROM, the necessary Firewall ...Color Enhancement technology and many features you will find in a high quality ink jet printer. Brilliant High Quality Output Printing at : http://solutions.brother.com/ Features 1 This machine offers many other personal Firewall software, see Firewall settings (For Network users) on page 110 to configure the ...
... other wireless devices using the Windows® Firewall and you installed MFL-Pro Suite from the Brother Solutions Center at up to 1200 6000 dpi on glossy paper to replace that can also download the latest drivers from the CD-ROM, the necessary Firewall ...Color Enhancement technology and many features you will find in a high quality ink jet printer. Brilliant High Quality Output Printing at : http://solutions.brother.com/ Features 1 This machine offers many other personal Firewall software, see Firewall settings (For Network users) on page 110 to configure the ...
Software Users Manual - English
Page 9
... 1 If the LCD shows Data Remaining, you can clear the data that is left in the printer memory by pressing the Stop/Exit key on paper, it is copying or receiving a fax on the control panel. 3 Fax sending will not be stopped during PC printing. Clearing data from your ...computer while sending or receiving a fax in the Basic User's Guide before buying paper. However, when the machine is important to read Loading paper in memory, or while scanning a document into the computer. Printing Choosing the right type of...
... 1 If the LCD shows Data Remaining, you can clear the data that is left in the printer memory by pressing the Stop/Exit key on paper, it is copying or receiving a fax on the control panel. 3 Fax sending will not be stopped during PC printing. Clearing data from your ...computer while sending or receiving a fax in the Basic User's Guide before buying paper. However, when the machine is important to read Loading paper in memory, or while scanning a document into the computer. Printing Choosing the right type of...
Software Users Manual - English
Page 10
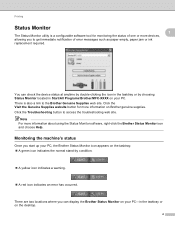
... appears on the tasktray. A green icon indicates the normal stand-by choosing Status Monitor located in the tasktray or on Brother genuine supplies. Note For more devices, allowing you to access the troubleshooting web site. Monitoring the machine's status 1 Once you can... or more information about using the Status Monitor software, right-click the Brother Status Monitor icon and choose Help. Click the Troubleshooting button to get immediate notification of error messages such as paper empty, paper jam or ink replacement required. There are two locations where you start...
... appears on the tasktray. A green icon indicates the normal stand-by choosing Status Monitor located in the tasktray or on Brother genuine supplies. Note For more devices, allowing you to access the troubleshooting web site. Monitoring the machine's status 1 Once you can... or more information about using the Status Monitor software, right-click the Brother Status Monitor icon and choose Help. Click the Troubleshooting button to get immediate notification of error messages such as paper empty, paper jam or ink replacement required. There are two locations where you start...
Software Users Manual - English
Page 12
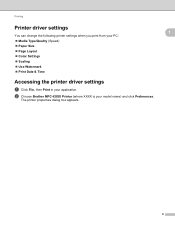
The printer properties dialog box appears. 1 1 1 6 Printing Printer driver settings You can change the following printer settings when you print from your PC: Media Type/Quality (Speed) Paper Size Page Layout Color Settings Scaling Use Watermark Print Date & Time Accessing the printer driver settings a Click File, then Print in your model name) and click Preferences. b Choose Brother MFC-XXXX Printer (where XXXX is your application.
The printer properties dialog box appears. 1 1 1 6 Printing Printer driver settings You can change the following printer settings when you print from your PC: Media Type/Quality (Speed) Paper Size Page Layout Color Settings Scaling Use Watermark Print Date & Time Accessing the printer driver settings a Click File, then Print in your model name) and click Preferences. b Choose Brother MFC-XXXX Printer (where XXXX is your application.
Software Users Manual - English
Page 13
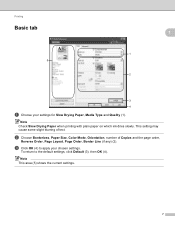
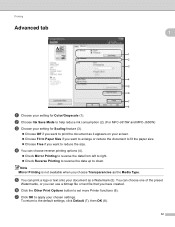
c Click OK (4) to the default settings, click Default (3), then OK (4). b Choose Borderless, Paper Size, Color Mode, Orientation, number of text. Note This area (5) shows the current settings. 7 Printing Basic tab 5 1 1 1 2 3 4 a Choose your chosen settings. Note Check Slow Drying Paper when printing with plain paper on which ink dries slowly. This setting may cause some slight blurring of Copies and the page order, Reverse Order, Page Layout, Page Order, Border Line (if any) (2). To return to apply your settings for Slow Drying Paper, Media Type and Quality (1).
c Click OK (4) to the default settings, click Default (3), then OK (4). b Choose Borderless, Paper Size, Color Mode, Orientation, number of text. Note This area (5) shows the current settings. 7 Printing Basic tab 5 1 1 1 2 3 4 a Choose your chosen settings. Note Check Slow Drying Paper when printing with plain paper on which ink dries slowly. This setting may cause some slight blurring of Copies and the page order, Reverse Order, Page Layout, Page Order, Border Line (if any) (2). To return to apply your settings for Slow Drying Paper, Media Type and Quality (1).
Software Users Manual - English
Page 14
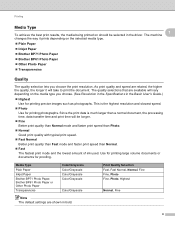
... quality, the longer it prints depending on the selected media type. Plain Paper Inkjet Paper Brother BP71 Photo Paper Brother BP61 Photo Paper Other Photo Paper Transparencies Quality 1 The quality selection lets you choose. (See Resolution in ...being printed on the media type you choose the print resolution. Media Type Plain Paper Inkjet Paper Brother BP71 Photo Paper, Brother BP61 Photo Paper or Other Photo Paper Transparencies Color/Grayscale Color/Grayscale Color/Grayscale Color/Grayscale Color/Grayscale Note The default settings...
... quality, the longer it prints depending on the selected media type. Plain Paper Inkjet Paper Brother BP71 Photo Paper Brother BP61 Photo Paper Other Photo Paper Transparencies Quality 1 The quality selection lets you choose. (See Resolution in ...being printed on the media type you choose the print resolution. Media Type Plain Paper Inkjet Paper Brother BP71 Photo Paper, Brother BP61 Photo Paper or Other Photo Paper Transparencies Color/Grayscale Color/Grayscale Color/Grayscale Color/Grayscale Color/Grayscale Note The default settings...
Software Users Manual - English
Page 15
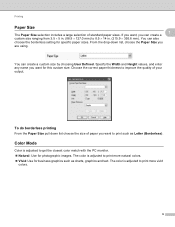
...61550; Natural: Use for business graphics such as Letter (Borderless). Specify the Width and Height values, and enter any name you want for specific paper sizes. The color is adjusted to 8.5 14 in. (215.9 355.6 mm). You can create a custom size by... choosing User Defined. Choose the correct paper thickness to print more vivid colors. 9 To do borderless printing 1 From the Paper Size pull down list, choose the Paper Size you can create a 1 custom size ranging from 3.5 5 in. (88.9 &#...
...61550; Natural: Use for business graphics such as Letter (Borderless). Specify the Width and Height values, and enter any name you want for specific paper sizes. The color is adjusted to 8.5 14 in. (215.9 355.6 mm). You can create a custom size by... choosing User Defined. Choose the correct paper thickness to print more vivid colors. 9 To do borderless printing 1 From the Paper Size pull down list, choose the Paper Size you can create a 1 custom size ranging from 3.5 5 in. (88.9 &#...
Software Users Manual - English
Page 16
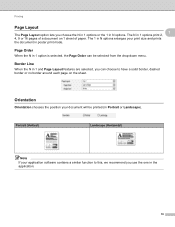
...) Landscape (Horizontal) Note If your application software contains a similar function to have a solid border, dashed border or no border around each page on 1 sheet of paper. The 1 in N options enlarges your document will be selected from the drop-down menu. Printing Page Layout 1 The Page Layout option lets you use the...
...) Landscape (Horizontal) Note If your application software contains a similar function to have a solid border, dashed border or no border around each page on 1 sheet of paper. The 1 in N options enlarges your document will be selected from the drop-down menu. Printing Page Layout 1 The Page Layout option lets you use the...
Software Users Manual - English
Page 18
...; Choose Off if you want to print the document as it appears on your screen. Choose Fit to Paper Size if you want to enlarge or reduce the document to fit the paper size. Choose Free if you want to reduce the size. You can choose one of the preset...
...; Choose Off if you want to print the document as it appears on your screen. Choose Fit to Paper Size if you want to enlarge or reduce the document to fit the paper size. Choose Free if you want to reduce the size. You can choose one of the preset...
Software Users Manual - English
Page 26
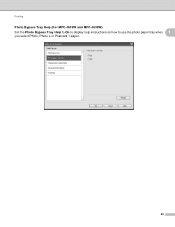
Printing Photo Bypass Tray Help (For MFC-J615W and MFC-J630W) 1 Set the Photo Bypass Tray Help to On to display help instructions on how to use the photo paper tray when 1 you select Photo, Photo L or Postcard 1 paper. 20
Printing Photo Bypass Tray Help (For MFC-J615W and MFC-J630W) 1 Set the Photo Bypass Tray Help to On to display help instructions on how to use the photo paper tray when 1 you select Photo, Photo L or Postcard 1 paper. 20

Software Users Manual - English
Page 29
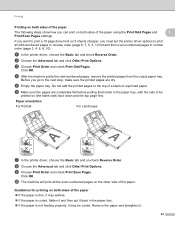
The Print Odd Pages and Print Even Pages settings only support Letter for Paper Size and Plain Paper for Media Type. You can choose to the Basic tab and Advanced tab and then click Default. 23 Choose the number of the Print Odd ...
The Print Odd Pages and Print Even Pages settings only support Letter for Paper Size and Plain Paper for Media Type. You can choose to the Basic tab and Advanced tab and then click Default. 23 Choose the number of the Print Odd ...
Software Users Manual - English
Page 30
...b Choose the Advanced tab and click Other Print Options. f Make sure the pages are dry. Click OK. Click OK. Remove the paper and straighten it may wrinkle. If the paper is curled, flatten it and then put it back in normal order (page 2, 4, 6, 8, 10). a In the printer driver, ...) face down and the top page first. d After the machine prints the odd-numbered pages, remove the printed pages from the output paper tray. e Empty the paper tray. Paper orientation For Portrait For Landscape g In the printer driver, choose the Basic tab and un-check Reverse Order.
...b Choose the Advanced tab and click Other Print Options. f Make sure the pages are dry. Click OK. Click OK. Remove the paper and straighten it may wrinkle. If the paper is curled, flatten it and then put it back in normal order (page 2, 4, 6, 8, 10). a In the printer driver, ...) face down and the top page first. d After the machine prints the odd-numbered pages, remove the printed pages from the output paper tray. e Empty the paper tray. Paper orientation For Portrait For Landscape g In the printer driver, choose the Basic tab and un-check Reverse Order.

Software Users Manual - English
Page 37
d Choose Paper Size, Paper Source, Orientation, number of Copies, Scaling and Printing Area. Note If you want to open the print settings dialog box. Printing b Click the Print icon in the top menu bar to move to the print screen. 1 c Click the Print icon on the left to print a borderless photo, choose Full Page Photo in Scaling and borderless paper in Paper Size. 31
d Choose Paper Size, Paper Source, Orientation, number of Copies, Scaling and Printing Area. Note If you want to open the print settings dialog box. Printing b Click the Print icon in the top menu bar to move to the print screen. 1 c Click the Print icon on the left to print a borderless photo, choose Full Page Photo in Scaling and borderless paper in Paper Size. 31

Software Users Manual - English
Page 38
f Click Print in the Print settings dialog box and your Brother machine. a Open the image file. c Auto Red eye Detection finds all the red eyes in the printer driver dialog. Click OK. 1 Note If you reduce ... Eye Reduction function lets you want to use the RedEye Threshold slider to adjust the color of the skin tone automatically. c You can use photo paper, click Properties and set the Media Type and Quality in the image and marks them as dotted boxes.
f Click Print in the Print settings dialog box and your Brother machine. a Open the image file. c Auto Red eye Detection finds all the red eyes in the printer driver dialog. Click OK. 1 Note If you reduce ... Eye Reduction function lets you want to use the RedEye Threshold slider to adjust the color of the skin tone automatically. c You can use photo paper, click Properties and set the Media Type and Quality in the image and marks them as dotted boxes.
Software Users Manual - English
Page 46
... scanning area. • Height: shows the height of colors used. 40 Enter the Name, Width and Height of the document. You can see the actual paper size you chose on the type of file, resolution and number of scanning area. • Data Size: shows the approximate data size in . (215.9 ...
... scanning area. • Height: shows the height of colors used. 40 Enter the Name, Width and Height of the document. You can see the actual paper size you chose on the type of file, resolution and number of scanning area. • Data Size: shows the approximate data size in . (215.9 ...

Software Users Manual - English
Page 48
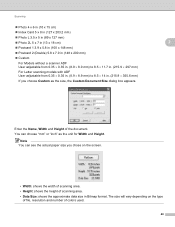
k Choose the Page size from the Paper source drop-down list (4). 42 j Choose the picture type (2). Note If your machine has no Auto Document Feeder (ADF), you cannot choose Document Feeder. Scanning h Adjust the following settings, if needed, in the Scanner Setup dialog box: 2 1 2 3 4 1 Paper source 2 Picture type 3 Adjust the quality of the scanned picture 4 Page size i Choose Document Feeder or Flatbed from the drop-down list (1).
k Choose the Page size from the Paper source drop-down list (4). 42 j Choose the picture type (2). Note If your machine has no Auto Document Feeder (ADF), you cannot choose Document Feeder. Scanning h Adjust the following settings, if needed, in the Scanner Setup dialog box: 2 1 2 3 4 1 Paper source 2 Picture type 3 Adjust the quality of the scanned picture 4 Page size i Choose Document Feeder or Flatbed from the drop-down list (1).
Software Users Manual - English
Page 50
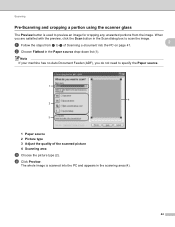
... machine has no Auto Document Feeder (ADF), you are satisfied with the preview, click the Scan button in the Scan dialog box to specify the Paper source. 1 4 2 3 1 Paper source 2 Picture type 3 Adjust the quality of Scanning a document into the PC and appears in the scanning area (4). 44 When you do not need.... Scanning Pre-Scanning and cropping a portion using the scanner glass 2 The Preview button is scanned into the PC on page 41. 2 b Choose Flatbed in the Paper source drop-down list (1).
... machine has no Auto Document Feeder (ADF), you are satisfied with the preview, click the Scan button in the Scan dialog box to specify the Paper source. 1 4 2 3 1 Paper source 2 Picture type 3 Adjust the quality of Scanning a document into the PC and appears in the scanning area (4). 44 When you do not need.... Scanning Pre-Scanning and cropping a portion using the scanner glass 2 The Preview button is scanned into the PC on page 41. 2 b Choose Flatbed in the Paper source drop-down list (1).

Software Users Manual - English
Page 54
The machine starts scanning the document. 48 If you want to scan at higher resolutions, use the Scanner Utility. (See Scanner Utility on page 45.) g Click the Scan button in the Scanner dialog box: 2 1 2 3 4 5 6 7 8 1 Profile 2 Source 3 Paper size 4 Color format 5 File type 6 Resolution 7 Brightness 8 Contrast Note By default, the scanner resolution can be set to a maximum of 1200 dpi. Scanning f Adjust the following settings, if needed, in the Scan dialog box.
The machine starts scanning the document. 48 If you want to scan at higher resolutions, use the Scanner Utility. (See Scanner Utility on page 45.) g Click the Scan button in the Scanner dialog box: 2 1 2 3 4 5 6 7 8 1 Profile 2 Source 3 Paper size 4 Color format 5 File type 6 Resolution 7 Brightness 8 Contrast Note By default, the scanner resolution can be set to a maximum of 1200 dpi. Scanning f Adjust the following settings, if needed, in the Scan dialog box.


