
OmniPage SE User Guide
Page 4
... 26 The OmniPage Toolbox 27 Managing documents 28 Thumbnail view 28 Detail view 29 Customizing columns in Detail view 30 Deleting pages from a document 30 Printing a document 30 Closing a document 31 OmniPage Documents 31 Why save to OPD 32 How to save to OPD 32 Settings 33 3 TUTORIAL: PROCESSING DOCUMENTS 35...
... 26 The OmniPage Toolbox 27 Managing documents 28 Thumbnail view 28 Detail view 29 Customizing columns in Detail view 30 Deleting pages from a document 30 Printing a document 30 Closing a document 31 OmniPage Documents 31 Why save to OPD 32 How to save to OPD 32 Settings 33 3 TUTORIAL: PROCESSING DOCUMENTS 35...

OmniPage SE User Guide
Page 21
... scanned pages or image files into your computer for business correspondence, preparing reports, handling data and an ever-increasing number of information still circulate in printed, paper form and cannot be used immediately in your favorite computer applications. Painstakingly retyping the article is optical character recognition u Documents in a report you are...
... scanned pages or image files into your computer for business correspondence, preparing reports, handling data and an ever-increasing number of information still circulate in printed, paper form and cannot be used immediately in your favorite computer applications. Painstakingly retyping the article is optical character recognition u Documents in a report you are...
OmniPage SE User Guide
Page 22
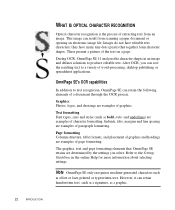
... analyzes the character shapes in the online Help for more information about selecting settings. Text formatting Font types, sizes and styles (such as offset or laser-printed or typewritten text. Page formatting Column structure, table formats, and placement of graphics and headings are determined by the settings you can retain handwritten text...
... analyzes the character shapes in the online Help for more information about selecting settings. Text formatting Font types, sizes and styles (such as offset or laser-printed or typewritten text. Page formatting Column structure, table formats, and placement of graphics and headings are determined by the settings you can retain handwritten text...

OmniPage SE User Guide
Page 25
... zoned, but not proofed yet. Proofread the recognized text. A popup text explains the purpose of its appearance for performing standard tasks. Open an OmniPage Document Print images or recognition results from menus. All these functions can have three states, depending which has been recognized and proofed. Contextsensitive Help The Menu bar...
... zoned, but not proofed yet. Proofread the recognized text. A popup text explains the purpose of its appearance for performing standard tasks. Open an OmniPage Document Print images or recognition results from menus. All these functions can have three states, depending which has been recognized and proofed. Contextsensitive Help The Menu bar...

OmniPage SE User Guide
Page 26
... in on the current image or to a zone or combine zones. Rotate Zoom out images. Font name Font size Bold Underline Paragraph Show/hide nonalignment printing characters. 26 INTRODUCTION Italic Bullets Zoom in a table. The Image toolbar The Image toolbar contains buttons that allow you work with a shortcut menu. from zone...
... in on the current image or to a zone or combine zones. Rotate Zoom out images. Font name Font size Bold Underline Paragraph Show/hide nonalignment printing characters. 26 INTRODUCTION Italic Bullets Zoom in a table. The Image toolbar The Image toolbar contains buttons that allow you work with a shortcut menu. from zone...

OmniPage SE User Guide
Page 30
... the Document Manager (either view) by pressing the Delete key or using the shortcut menu command Clear. Define which columns of information you want to print images or text (that is, recognition results as they appear in the Text Editor). Delete the current page only with the... Print item in the File menu. Click Customize Details... Deleting pages from a document Page deletions must be undone. You can be confirmed and can change the ...
... the Document Manager (either view) by pressing the Delete key or using the shortcut menu command Clear. Define which columns of information you want to print images or text (that is, recognition results as they appear in the Text Editor). Delete the current page only with the... Print item in the File menu. Click Customize Details... Deleting pages from a document Page deletions must be undone. You can be confirmed and can change the ...

OmniPage SE User Guide
Page 65
...because the shape of "g" in the text are likely to appear again in the document. Any training data in an OPD file will be printed in different ways: The first two examples do not need IntelliTrain, because both shapes are not supported in OmniPage SE. The fourth example is... not good for IntelliTrain, because the first "g" is poorly printed, and this . It assesses whether to OmniPage Pro 11. You can turn IntelliTrain on the letter "g", which can be less useful for texts with...
...because the shape of "g" in the text are likely to appear again in the document. Any training data in an OPD file will be printed in different ways: The first two examples do not need IntelliTrain, because both shapes are not supported in OmniPage SE. The fourth example is... not good for IntelliTrain, because the first "g" is poorly printed, and this . It assesses whether to OmniPage Pro 11. You can turn IntelliTrain on the letter "g", which can be less useful for texts with...

OmniPage SE User Guide
Page 68
.... The horizontal ruler is retained. A row of the original document as in all the frame contents. Graphics and tables can also show or hide non-printing characters and header/footer indicators. red underlines for verifying and editing the text. You can appear in the original document. Here are placed in the...
.... The horizontal ruler is retained. A row of the original document as in all the frame contents. Graphics and tables can also show or hide non-printing characters and header/footer indicators. red underlines for verifying and editing the text. You can appear in the original document. Here are placed in the...
OmniPage SE User Guide
Page 89
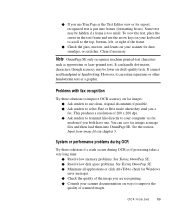
...200 dpi. u If you use True Page as the Text Editor view or for Windows error messages. Note OmniPage SE only recognizes machine printed-text characters such as image files and then load them into frames (formatting boxes). u Ask senders to transmit files directly to use clean..., original documents if possible. However, it can save fax images as typewritten or laser-printed text. u Resolve low disk space problems. See Testing OmniPage SE. u Check the glass, mirrors, and lenses on draft-quality texts. Problems ...
...200 dpi. u If you use True Page as the Text Editor view or for Windows error messages. Note OmniPage SE only recognizes machine printed-text characters such as image files and then load them into frames (formatting boxes). u Ask senders to transmit files directly to use clean..., original documents if possible. However, it can save fax images as typewritten or laser-printed text. u Resolve low disk space problems. See Testing OmniPage SE. u Check the glass, mirrors, and lenses on draft-quality texts. Problems ...

OmniPage SE User Guide
Page 90
Draw zones manually or modify automatically created zones and perform OCR on one page area at once, such as recognizing and printing, OCR may take longer. u Restart Windows 95, 98 and Me and 2000 in safe mode, or Windows NT and in the Windows taskbar and choose ...
Draw zones manually or modify automatically created zones and perform OCR on one page area at once, such as recognizing and printing, OCR may take longer. u Restart Windows 95, 98 and Me and 2000 in safe mode, or Windows NT and in the Windows taskbar and choose ...

OmniPage SE User Guide
Page 93
... version 11 of OmniPage Pro, 18 New file on blank page, 50 No Formatting view, 61, 68, 74 Non-dictionary words in proofing, 62 Non-printing characters, 26 Numeric zone, 56 O OCR AutoOCR, 27 AutoOCR toolbar, 27, 42 checking OCR results, 63 definition, 22 Direct OCR, 33, 47 jobs in Schedule...
... version 11 of OmniPage Pro, 18 New file on blank page, 50 No Formatting view, 61, 68, 74 Non-dictionary words in proofing, 62 Non-printing characters, 26 Numeric zone, 56 O OCR AutoOCR, 27 AutoOCR toolbar, 27, 42 checking OCR results, 63 definition, 22 Direct OCR, 33, 47 jobs in Schedule...

OmniPage SE User Guide
Page 94
... OCR button, 42, 45 Performance problems during OCR, 89 Performing OCR, 23 recognition, 45 Placing dividers in tables, 26 Preparing recognition results for export, 74 Printing a document, 30 images, 25 recognition results, 25 Problems with fax recognition, 89 Process options, 34 Processing automatically, 27, 42 basic steps of, 23 documents automatically...
... OCR button, 42, 45 Performance problems during OCR, 89 Performing OCR, 23 recognition, 45 Placing dividers in tables, 26 Preparing recognition results for export, 74 Printing a document, 30 images, 25 recognition results, 25 Problems with fax recognition, 89 Process options, 34 Processing automatically, 27, 42 basic steps of, 23 documents automatically...

User Guide
Page 4
... 3.2 Size, Input Sources and Capacities 3.2 Guidelines for Paper and Special Materials .......... 3.3 Selecting an Output Location 3.4 Printing to the Front Output Tray (Face down) .... 3.5 Printing to the Rear Output Slot (Face up 3.5 Loading Paper in the Paper Tray 3.6 Using the Bypass Tray 3.8 Setting the Paper Type and Size for the ...
... 3.2 Size, Input Sources and Capacities 3.2 Guidelines for Paper and Special Materials .......... 3.3 Selecting an Output Location 3.4 Printing to the Front Output Tray (Face down) .... 3.5 Printing to the Rear Output Slot (Face up 3.5 Loading Paper in the Paper Tray 3.6 Using the Bypass Tray 3.8 Setting the Paper Type and Size for the ...

User Guide
Page 5
... 5.5 Using a Favorite Setting 5.6 Using Help 5.6 Setting Paper Properties 5.7 Printing Multiple Pages on One Sheet of Paper (N-Up Printing 5.8 Printing a Reduced or Enlarged Document 5.10 Fitting Your Document to a Selected Paper Size ...... 5.11 Printing Posters 5.12 Using Watermarks 5.13 Using an Existing Watermark 5.13 Creating a Watermark 5.14 Editing a Watermark 5.15 Deleting a Watermark 5.15 Using Overlays...
... 5.5 Using a Favorite Setting 5.6 Using Help 5.6 Setting Paper Properties 5.7 Printing Multiple Pages on One Sheet of Paper (N-Up Printing 5.8 Printing a Reduced or Enlarged Document 5.10 Fitting Your Document to a Selected Paper Size ...... 5.11 Printing Posters 5.12 Using Watermarks 5.13 Using an Existing Watermark 5.13 Creating a Watermark 5.14 Editing a Watermark 5.15 Deleting a Watermark 5.15 Using Overlays...
User Guide
Page 6
... Area 8.4 In the Paper Exit Area 8.5 In the Fuser Area or Around the Toner Cartridge . 8.7 In the Bypass Tray 8.8 Tips for Avoiding Paper Jams When Printing on the A5-sized Paper 8.9 Tips for Avoiding Paper Jams 8.10 Clearing LCD Error Messages 8.11 Solving Problems 8.14 Paper Feeding Problems 8.14...
... Area 8.4 In the Paper Exit Area 8.5 In the Fuser Area or Around the Toner Cartridge . 8.7 In the Bypass Tray 8.8 Tips for Avoiding Paper Jams When Printing on the A5-sized Paper 8.9 Tips for Avoiding Paper Jams 8.10 Clearing LCD Error Messages 8.11 Solving Problems 8.14 Paper Feeding Problems 8.14...
User Guide
Page 18
This chapter includes: • Unpacking • Understanding the Component Location • Installing the Toner Cartridge • Loading Paper • Making Connections • Turning the Machine On • Changing the Display Language and Country • Setting the Paper Type and Size • Using the Save Modes 1 GETTING STARTED Thank you step-by-step instructions for purchasing this Xerox multifunctional product. This chapter gives you for setting up your machine. Your machine provides printing, copying, scanning, and faxing functions!
This chapter includes: • Unpacking • Understanding the Component Location • Installing the Toner Cartridge • Loading Paper • Making Connections • Turning the Machine On • Changing the Display Language and Country • Setting the Paper Type and Size • Using the Save Modes 1 GETTING STARTED Thank you step-by-step instructions for purchasing this Xerox multifunctional product. This chapter gives you for setting up your machine. Your machine provides printing, copying, scanning, and faxing functions!

User Guide
Page 25
... STARTED Engages the telephone line. S A Allows you to the upper menu level. Using this E feature, you back to print a Phonebook list. Allows you to send a fax to multiple destinations. • Allows you to print a document. Redials the last number in Standby Mode or inserts a pause into a fax number in edit mode. Allows...
... STARTED Engages the telephone line. S A Allows you to the upper menu level. Using this E feature, you back to print a Phonebook list. Allows you to send a fax to multiple destinations. • Allows you to print a document. Redials the last number in Standby Mode or inserts a pause into a fax number in edit mode. Allows...

User Guide
Page 28
For printing a PC file, you can use A4-, Letter-, or Legal-sized paper only. sized paper. GETTING STARTED 1.11 To load a stack of the paper stack to even it up. The paper tray is preset for using Letter- Then tap the stack on the pressure plate until it locks into place. 3 Fan the edges of Letter-sized paper: 1 Pull open the paper tray. 2 Push down on a flat surface to separate the pages. For copying or faxing, you can use many different sizes of 20 lb plain 1 paper. Loading Paper The paper tray can hold a maximum of 250 sheets of paper.
For printing a PC file, you can use A4-, Letter-, or Legal-sized paper only. sized paper. GETTING STARTED 1.11 To load a stack of the paper stack to even it up. The paper tray is preset for using Letter- Then tap the stack on the pressure plate until it locks into place. 3 Fan the edges of Letter-sized paper: 1 Pull open the paper tray. 2 Push down on a flat surface to separate the pages. For copying or faxing, you can use many different sizes of 20 lb plain 1 paper. Loading Paper The paper tray can hold a maximum of 250 sheets of paper.

User Guide
Page 29
Paper overloading may cause paper jams. 6 Slide the paper tray back in. After you load paper, you need to adjust the paper guides. See page 1.18 for copying and faxing, or page 5.7 for the paper type and size you need to the paper limit mark on the left inside wall of the tray. If you want to load a different sized paper, you loaded. 4 Insert the paper stack into the paper tray. For details, see page 1.13. 5 Pay attention to set up your machine for PC-printing. 1.12 GETTING STARTED
Paper overloading may cause paper jams. 6 Slide the paper tray back in. After you load paper, you need to adjust the paper guides. See page 1.18 for copying and faxing, or page 5.7 for the paper type and size you need to the paper limit mark on the left inside wall of the tray. If you want to load a different sized paper, you loaded. 4 Insert the paper stack into the paper tray. For details, see page 1.13. 5 Pay attention to set up your machine for PC-printing. 1.12 GETTING STARTED

User Guide
Page 35
... on the bottom line. 6 Use the scroll button (¦ or ‹) to find the paper size you are using the control panel buttons. For PC-printing, you need to select the paper type and size in the application program you use. 1 Press Menu. Setting the Paper Type and Size After loading...
... on the bottom line. 6 Use the scroll button (¦ or ‹) to find the paper size you are using the control panel buttons. For PC-printing, you need to select the paper type and size in the application program you use. 1 Press Menu. Setting the Paper Type and Size After loading...


