
Network Connection Quick Setup Guide
Page 3
.... 6. Select Get IP Address, and then press the Enter button. 5. Press the Exit button. When the machine is 11111. The default password is Ready, press the Log In/Out button. 3. Press the Select button until you see IP Address on , it automatically uses DHCP to... obtain its network configuration. Press the Enter button to enter the Password. Turn on the display, and then press the Enter button. 4. Select Manual, and then press the Enter button. 6. Xerox WorkCentre M118/M118i 3 a. Press the Exit button. Turn DHCP Off 1. Press the Select button ...
.... 6. Select Get IP Address, and then press the Enter button. 5. Press the Exit button. When the machine is 11111. The default password is Ready, press the Log In/Out button. 3. Press the Select button until you see IP Address on , it automatically uses DHCP to... obtain its network configuration. Press the Enter button to enter the Password. Turn on the display, and then press the Enter button. 4. Select Manual, and then press the Enter button. 6. Xerox WorkCentre M118/M118i 3 a. Press the Exit button. Turn DHCP Off 1. Press the Select button ...

Network Connection Quick Setup Guide
Page 5
Enter the default user ID and password in the DNS Address 1 field, and then click the Apply New Settings button at the bottom of the page. 6. If you are using a static IP address, enter the DNS server address in the Connect to [ip address] dialog box, and then click the OK button. ■ Default user ID: admin ■ Default password: x-admin. Xerox WorkCentre M118/M118i 5 The user ID and password should be changed after network setup is complete. Verifying Network Setup Using CentreWare Internet Services (CentreWare IS) 5.
Enter the default user ID and password in the DNS Address 1 field, and then click the Apply New Settings button at the bottom of the page. 6. If you are using a static IP address, enter the DNS server address in the Connect to [ip address] dialog box, and then click the OK button. ■ Default user ID: admin ■ Default password: x-admin. Xerox WorkCentre M118/M118i 5 The user ID and password should be changed after network setup is complete. Verifying Network Setup Using CentreWare Internet Services (CentreWare IS) 5.

Network Connection Quick Setup Guide
Page 5
...a Static IP Address Before you see TCP/IP Settings on the machine. 2. Use the numeric keypad to select Confirm. The default password is powered on, it automatically uses DHCP to highlight Print Settings, and then press the Enter button. 2. Press the Select button ...Gateway Address: Subnet Mask: DNS Server Address: Connecting the Machine Using a Static IP Address 1. b. Turn DHCP Off 1. Press the Exit button. Xerox WorkCentre M118/M118i 3 Press the Select button below the display to select Network/Port. 3. Select Get IP Address, and then press the Enter button. 5. Network ...
...a Static IP Address Before you see TCP/IP Settings on the machine. 2. Use the numeric keypad to select Confirm. The default password is powered on, it automatically uses DHCP to highlight Print Settings, and then press the Enter button. 2. Press the Select button ...Gateway Address: Subnet Mask: DNS Server Address: Connecting the Machine Using a Static IP Address 1. b. Turn DHCP Off 1. Press the Exit button. Xerox WorkCentre M118/M118i 3 Press the Select button below the display to select Network/Port. 3. Select Get IP Address, and then press the Enter button. 5. Network ...

Network Connection Quick Setup Guide
Page 7
...your printers over a TCP/IP network using a web browser. Enter the default user ID and password in the Connect to printer status, configuration, and diagnostic functions. Xerox WorkCentre M118/M118i 5 Verifying Network Setup Using CentreWare Internet Services (IS) Verifying Network Setup Using CentreWare Internet Services ...users with access to printer status and special printing functions such as the Xerox WorkCentre M118/M118i. For additional information about using an embedded web server. The user ID and password should be on the same subnet as printing saved jobs. To verify...
...your printers over a TCP/IP network using a web browser. Enter the default user ID and password in the Connect to printer status, configuration, and diagnostic functions. Xerox WorkCentre M118/M118i 5 Verifying Network Setup Using CentreWare Internet Services (IS) Verifying Network Setup Using CentreWare Internet Services ...users with access to printer status and special printing functions such as the Xerox WorkCentre M118/M118i. For additional information about using an embedded web server. The user ID and password should be on the same subnet as printing saved jobs. To verify...
PostScript® User Guide
Page 19
... to make improvements in print speed, when using the printer port to specify User ID. Enter a Password that generates PostScript directly. Set this in the Hardware Options setting. Settings NOTE: You can change authentication related settings. Password - Xerox WorkCentre 118 Postscript® User Guide 19 Enter a User ID. 3 Operation with Windows NT 4.0 Configuration Tab...
... to make improvements in print speed, when using the printer port to specify User ID. Enter a Password that generates PostScript directly. Set this in the Hardware Options setting. Settings NOTE: You can change authentication related settings. Password - Xerox WorkCentre 118 Postscript® User Guide 19 Enter a User ID. 3 Operation with Windows NT 4.0 Configuration Tab...
PostScript® User Guide
Page 28
Specifies if all users or only Administrators can restore defaults by clicking [Restore Defaults]. Enter a User ID. Password - Set this in print speed, when using the printer port to which the printer is used as a network printer ...matches the User ID. Settings NOTE: You can change authentication related settings. Enter a Password that generates PostScript directly. Specify Job Owner Name - Select how to make improvements in the Hardware Options setting. 28 Xerox WorkCentre 118 Postscript® User Guide High Speed Printing - Account Mode - Clicking [Get Information...
Specifies if all users or only Administrators can restore defaults by clicking [Restore Defaults]. Enter a User ID. Password - Set this in print speed, when using the printer port to which the printer is used as a network printer ...matches the User ID. Settings NOTE: You can change authentication related settings. Enter a Password that generates PostScript directly. Specify Job Owner Name - Select how to make improvements in the Hardware Options setting. 28 Xerox WorkCentre 118 Postscript® User Guide High Speed Printing - Account Mode - Clicking [Get Information...

PostScript® User Guide
Page 37
... uses the Adobe PostScript driver that the machine is on page 37 to Enable. Open the [Mac OS X] folder. Enter the Administrator's user name and password, then click [OK]. When the dialog box showing installation has completed appears, click [Quit]. Proceed to Adding a Printer (Mac OS X) on . 2. ...necessary, then click [Install]. 8. Double-click [WorkCent-PS]. The License screen opens. 6. This completes the installation. The WorkCent-PS window opens. 3. Xerox WorkCentre 118 Postscript® User Guide 37 The installer starts and the Authenticate window opens. 5. Procedure 1.
... uses the Adobe PostScript driver that the machine is on page 37 to Enable. Open the [Mac OS X] folder. Enter the Administrator's user name and password, then click [OK]. When the dialog box showing installation has completed appears, click [Quit]. Proceed to Adding a Printer (Mac OS X) on . 2. ...necessary, then click [Install]. 8. Double-click [WorkCent-PS]. The License screen opens. 6. This completes the installation. The WorkCent-PS window opens. 3. Xerox WorkCentre 118 Postscript® User Guide 37 The installer starts and the Authenticate window opens. 5. Procedure 1.
Quick Reference Guide
Page 34
Changing the Default Time Settings This section describes how to 239 minutes. Enter the Key Operator password using the button, or press the button. 5. The factory default setting of 1 minute is on. Press the button on the [System Settings] screen using ...Saver in the Setups chapter on User Guide. 1. Select [Common Settings] on the control panel. 2. For more information, refer to the Low Power Mode. Xerox CopyCentre/WorkCentre 118 Quick Reference Guide 33 The Sleep Mode is cancelled when the button is pressed, or a fax or print job is "11111". 4. NOTE: The ...
Changing the Default Time Settings This section describes how to 239 minutes. Enter the Key Operator password using the button, or press the button. 5. The factory default setting of 1 minute is on. Press the button on the [System Settings] screen using ...Saver in the Setups chapter on User Guide. 1. Select [Common Settings] on the control panel. 2. For more information, refer to the Low Power Mode. Xerox CopyCentre/WorkCentre 118 Quick Reference Guide 33 The Sleep Mode is cancelled when the button is pressed, or a fax or print job is "11111". 4. NOTE: The ...
Quick Reference Guide
Page 36
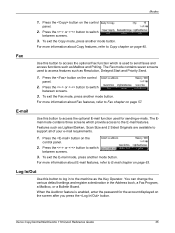
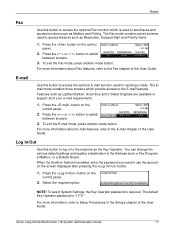
.... E-mail Use this button to support all of your e-mail requirements. 1. The Email mode contains three screens which is enabled, enter the password for sending e-mails. Features such as Resolution, Delayed Start and Priority Send. 1. Press the or button to E-mail chapter on the control ... press another mode button. To exit the Copy mode, press another mode button. Press the button on the control panel. 2. Xerox CopyCentre/WorkCentre 118 Quick Reference Guide 35 You can change the various default settings and register a destination in to send faxes and access functions ...
.... E-mail Use this button to support all of your e-mail requirements. 1. The Email mode contains three screens which is enabled, enter the password for sending e-mails. Features such as Resolution, Delayed Start and Priority Send. 1. Press the or button to E-mail chapter on the control ... press another mode button. To exit the Copy mode, press another mode button. Press the button on the control panel. 2. Xerox CopyCentre/WorkCentre 118 Quick Reference Guide 35 You can change the various default settings and register a destination in to send faxes and access functions ...
Quick Reference Guide
Page 37
...Key Operator password is "11111". For more information, refer to exit. All Jobs Stop (Delete) Stops the job in progress and deletes it from this button to select a job. The contents of each screen may differ depending on the type or status of the job. 36 Xerox CopyCentre/WorkCentre 118 Quick ...type or status of the job. Press the button on the control panel to view the progress of the list. 1. The default Key Operator password is required. Use the button on the control panel. 2. The latest job will be at any time to Setups Procedure in the system. ...
...Key Operator password is "11111". For more information, refer to exit. All Jobs Stop (Delete) Stops the job in progress and deletes it from this button to select a job. The contents of each screen may differ depending on the type or status of the job. 36 Xerox CopyCentre/WorkCentre 118 Quick ...type or status of the job. Press the button on the control panel to view the progress of the list. 1. The default Key Operator password is required. Use the button on the control panel. 2. The latest job will be at any time to Setups Procedure in the system. ...

Quick Reference Guide
Page 40
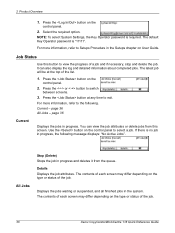
...about the F Code receive settings for each job includes: the recipient name, the transmission time, the modes, and the transmission result. Xerox CopyCentre/WorkCentre 118 Quick Reference Guide 39 Prints out contents of copies, for the mailboxes registered. in list form. Copy Meter Confirm the account data... Settings Confirm the status of registered bulletin boards. Bulletin Board List Prints out a report as the F Code or password, or information about the forwarding destination. The list includes reception information such as a list of settings on this machine.
...about the F Code receive settings for each job includes: the recipient name, the transmission time, the modes, and the transmission result. Xerox CopyCentre/WorkCentre 118 Quick Reference Guide 39 Prints out contents of copies, for the mailboxes registered. in list form. Copy Meter Confirm the account data... Settings Confirm the status of registered bulletin boards. Bulletin Board List Prints out a report as the F Code or password, or information about the forwarding destination. The list includes reception information such as a list of settings on this machine.

Quick Reference Guide
Page 43
Select the paper tray to decrease jags and enhance the visual appearance. 42 Xerox CopyCentre/WorkCentre 118 Quick Reference Guide Select the paper size for printing. • Paper Size - When [On] is selected, select which edge of the paper is to ... on long edge] or [Flip on a paper size that is a feature that makes the boundary line between 1 to be performed only when the file password matches the password specified here. • Collated - Specify the copies to 999. • Image Enhancement - Select the print mode from [A4] or [Auto]. Specify the font symbols...
Select the paper tray to decrease jags and enhance the visual appearance. 42 Xerox CopyCentre/WorkCentre 118 Quick Reference Guide Select the paper size for printing. • Paper Size - When [On] is selected, select which edge of the paper is to ... on long edge] or [Flip on a paper size that is a feature that makes the boundary line between 1 to be performed only when the file password matches the password specified here. • Collated - Specify the copies to 999. • Image Enhancement - Select the print mode from [A4] or [Auto]. Specify the font symbols...
Quick Reference Guide
Page 44
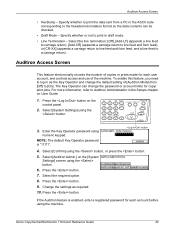
... the Auditron feature is "11111". For more information, refer to log in as required. 10. Change the settings as the Key Operator and change the password or account limits for each account before using numeric keypad. Select [Auditron Admin.] on the control panel. 2. Press the button. 9. Auditron Access Screen • HexDump... the default setting of the machine. Specify whether or not to a carriage return). The Key Operator can be checked. • Draft Mode - Press the button. 7. Xerox CopyCentre/WorkCentre 118 Quick Reference Guide 43
... the Auditron feature is "11111". For more information, refer to log in as required. 10. Change the settings as the Key Operator and change the password or account limits for each account before using numeric keypad. Select [Auditron Admin.] on the control panel. 2. Press the button. 9. Auditron Access Screen • HexDump... the default setting of the machine. Specify whether or not to a carriage return). The Key Operator can be checked. • Draft Mode - Press the button. 7. Xerox CopyCentre/WorkCentre 118 Quick Reference Guide 43

Quick Reference Guide
Page 45
Recycled Paper The use of recycled paper in performance. Enter the password of recycled paper. 44 Xerox CopyCentre/WorkCentre 118 Quick Reference Guide Xerox recommends recycled paper with no degradation in the machine benefits the environment with 20% post consumer content which can be obtained both through Xerox and other types of each registered account using the alphanumeric keypad on other office suppliers. Contact your Xerox representative or go to www.xerox.com for more information on the control panel. 2. 2 Product Overview 1. Press the button.
Recycled Paper The use of recycled paper in performance. Enter the password of recycled paper. 44 Xerox CopyCentre/WorkCentre 118 Quick Reference Guide Xerox recommends recycled paper with no degradation in the machine benefits the environment with 20% post consumer content which can be obtained both through Xerox and other types of each registered account using the alphanumeric keypad on other office suppliers. Contact your Xerox representative or go to www.xerox.com for more information on the control panel. 2. 2 Product Overview 1. Press the button.

Quick Reference Guide
Page 46
... are two types of document feeder for single documents or bound originals NOTE: The document glass cover will prompt you need a registered password for single-sided scanning, the other types is used for each account before using the machine. One type is the Automatic Document Feeder...is the Duplex Automatic Document Feeder (DADF) and can hold up to When Using the Copy Feature in the non-document feeder configuration. Xerox CopyCentre/WorkCentre 118 Quick Reference Guide 45 3 Copy This chapter describes how to Auditron Access Screen in the Job Status - Before making copies on...
... are two types of document feeder for single documents or bound originals NOTE: The document glass cover will prompt you need a registered password for single-sided scanning, the other types is used for each account before using the machine. One type is the Automatic Document Feeder...is the Duplex Automatic Document Feeder (DADF) and can hold up to When Using the Copy Feature in the non-document feeder configuration. Xerox CopyCentre/WorkCentre 118 Quick Reference Guide 45 3 Copy This chapter describes how to Auditron Access Screen in the Job Status - Before making copies on...

Quick Reference Guide
Page 58
...or multiple documents as [Resolution], [Lighten/Darken], or [Reduce/Enlarge]. page 60 Stop the Fax Job - Otherwise, image loss may need a password before you to transmit multiple or mixed size documents as a stack when selecting [Auto Detect] on your machine configuration. page 57 2. In ...Printer Kit is enabled, you may occur for each page. This allows you have the same width. page 59 4. page 60 5. Xerox CopyCentre/WorkCentre 118 Quick Reference Guide 57 page 60 NOTE: If the Auditron feature is installed. Direct Fax allows you can change the settings such...
...or multiple documents as [Resolution], [Lighten/Darken], or [Reduce/Enlarge]. page 60 Stop the Fax Job - Otherwise, image loss may need a password before you to transmit multiple or mixed size documents as a stack when selecting [Auto Detect] on your machine configuration. page 57 2. In ...Printer Kit is enabled, you may occur for each page. This allows you have the same width. page 59 4. page 60 5. Xerox CopyCentre/WorkCentre 118 Quick Reference Guide 57 page 60 NOTE: If the Auditron feature is installed. Direct Fax allows you can change the settings such...

Quick Reference Guide
Page 105
...the machine to print again. 9 Problem Solving Code Description and Corrective Action S10025 The document has jammed. Select print language. 104 Xerox CopyCentre/WorkCentre 118 Quick Reference Guide Also, check that the DNS server is not set correctly. 016-505 Failed to login to POP3 server ... buffer. Close the document feeder cover. S10027 During document scanning, the document feeder cover opened . Check if the user name and password used for the POP3 server are set correctly. Instruct the machine to print again. 016-719 There is not set correctly. 016-...
...the machine to print again. 9 Problem Solving Code Description and Corrective Action S10025 The document has jammed. Select print language. 104 Xerox CopyCentre/WorkCentre 118 Quick Reference Guide Also, check that the DNS server is not set correctly. 016-505 Failed to login to POP3 server ... buffer. Close the document feeder cover. S10027 During document scanning, the document feeder cover opened . Check if the user name and password used for the POP3 server are set correctly. Instruct the machine to print again. 016-719 There is not set correctly. 016-...

Quick Reference Guide
Page 106
...syntax error occurred. The password entered is incorrect. Enter the correct password. The maximum number of insufficient memory. An error occurred during image processing. If this does not fix the problem, set for highest compatibility to the high speed mode. Xerox CopyCentre/WorkCentre 118 Quick Reference Guide ... Check the print settings, or correct the PJL command. Open the file in the document security settings, and print again. A password entered for copying. The machine could not print the PDF file using the following actions. • Set for optimized speed in the...
...syntax error occurred. The password entered is incorrect. Enter the correct password. The maximum number of insufficient memory. An error occurred during image processing. If this does not fix the problem, set for highest compatibility to the high speed mode. Xerox CopyCentre/WorkCentre 118 Quick Reference Guide ... Check the print settings, or correct the PJL command. Open the file in the document security settings, and print again. A password entered for copying. The machine could not print the PDF file using the following actions. • Set for optimized speed in the...

System Administration Guide
Page 11
... use. Related Information Sources The following additional sources of information are available for the machine. • Xerox CopyCentre/WorkCentre 118 Quick Reference Guide • Xerox CopyCentre/WorkCentre 118 User Guide • The On-line Help system (Print Drivers and CentreWare Utilities) •... the button on the power switch label. For further assistance, contact your Xerox Welcome Center. Notes Notes are statements that these are statements that you change the password from the default one. Related Information Sources Text in Indicate that provide additional...
... use. Related Information Sources The following additional sources of information are available for the machine. • Xerox CopyCentre/WorkCentre 118 Quick Reference Guide • Xerox CopyCentre/WorkCentre 118 User Guide • The On-line Help system (Print Drivers and CentreWare Utilities) •... the button on the power switch label. For further assistance, contact your Xerox Welcome Center. Notes Notes are statements that these are statements that you change the password from the default one. Related Information Sources Text in Indicate that provide additional...
System Administration Guide
Page 17
... to switch between screens. 3. Press the button on the control panel. 2. The Email mode contains three screens which is enabled, enter the password you need to use the account on the control panel. 2. To exit the E-mail mode, press another mode button. E-mail Use this ...the control panel. 2. You can change the various default settings and register a destination in to the machine as Mailbox and Polling. Xerox CopyCentre/WorkCentre 118 System Administration Guide 17 Modes Fax Use this button to access the optional Fax function which provide access to the E-mail features....
... to switch between screens. 3. Press the button on the control panel. 2. The Email mode contains three screens which is enabled, enter the password you need to use the account on the control panel. 2. To exit the E-mail mode, press another mode button. E-mail Use this ...the control panel. 2. You can change the various default settings and register a destination in to the machine as Mailbox and Polling. Xerox CopyCentre/WorkCentre 118 System Administration Guide 17 Modes Fax Use this button to access the optional Fax function which provide access to the E-mail features....


