Quick Use Guide
Page 26
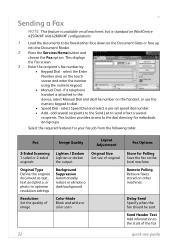
...the fax on the local machine Remote Polling Retrieve faxes stored on the touch screen and enter the number using the numeric keypad. • Manual Dial - Select the required features for your fax job from the following table: Fax 2-Sided Scanning 1-sided or 2-sided originals Original Type Define...Size Set size of the fax 22 quick use the numeric keypad to dial. • Speed Dial - if a telephone handset is standard on WorkCentre 4250X/XF and 4260X/XF configurations. 1 Load the documents to be sent Send Header Text Add information to the start of original Background Suppression ...
...the fax on the local machine Remote Polling Retrieve faxes stored on the touch screen and enter the number using the numeric keypad. • Manual Dial - Select the required features for your fax job from the following table: Fax 2-Sided Scanning 1-sided or 2-sided originals Original Type Define...Size Set size of the fax 22 quick use the numeric keypad to dial. • Speed Dial - if a telephone handset is standard on WorkCentre 4250X/XF and 4260X/XF configurations. 1 Load the documents to be sent Send Header Text Add information to the start of original Background Suppression ...
System Administration Guide
Page 4
... Checklist 45 Procedure 45 Configure your Print Driver 46 Information Checklist 46 Procedure 46 Configure the Windows Printer Driver 48 Bi-Directional Communication 48 Manual Print Driver Configuration 50 Apple Mac 50 TCP/IP Printing (OSX 50 Information Checklist 50 Install the Print Driver 50 iv Xerox WorkCentre 4250/4260 Series System Administration Guide
... Checklist 45 Procedure 45 Configure your Print Driver 46 Information Checklist 46 Procedure 46 Configure the Windows Printer Driver 48 Bi-Directional Communication 48 Manual Print Driver Configuration 50 Apple Mac 50 TCP/IP Printing (OSX 50 Information Checklist 50 Install the Print Driver 50 iv Xerox WorkCentre 4250/4260 Series System Administration Guide
System Administration Guide
Page 7
... Enable Embedded Fax from Phonebook 103 Setting up a Cover Sheet 104 Setup Fax Options 104 Setup Phonebook Preferences 105 User Preferences 105 Xerox WorkCentre 4250/4260 Series System Administration Guide vii Manually 102 Use the Feature 102 Windows 102 Mac OS Users 103 Add Fax Recipient 103 Add Recipient from the Machine 98 Test...
... Enable Embedded Fax from Phonebook 103 Setting up a Cover Sheet 104 Setup Fax Options 104 Setup Phonebook Preferences 105 User Preferences 105 Xerox WorkCentre 4250/4260 Series System Administration Guide vii Manually 102 Use the Feature 102 Windows 102 Mac OS Users 103 Add Fax Recipient 103 Add Recipient from the Machine 98 Test...
System Administration Guide
Page 11
...MIB 187 Enable/Disable System Timer Values 188 At the machine 188 Xerox WorkCentre 4250/4260 Series System Administration Guide xi TABLE OF CONTENTS Alert Notification 167 General Device Alerts 167 To Edit Xerox or Administrator Support Contact Details 168 18 Software Upgrade ...169 Overview ...169 When should I upgrade the software 169 How do I upgrade the software 169 1. Manual Upgrade using Print File Submission 170 Manual upgrade using CentreWare Internet ...
...MIB 187 Enable/Disable System Timer Values 188 At the machine 188 Xerox WorkCentre 4250/4260 Series System Administration Guide xi TABLE OF CONTENTS Alert Notification 167 General Device Alerts 167 To Edit Xerox or Administrator Support Contact Details 168 18 Software Upgrade ...169 Overview ...169 When should I upgrade the software 169 How do I upgrade the software 169 1. Manual Upgrade using Print File Submission 170 Manual upgrade using CentreWare Internet ...
System Administration Guide
Page 30
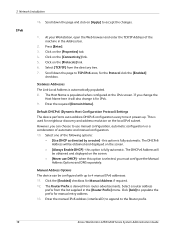
.... The DHCPv6 Address will be obtained and displayed on the screen. • [Always Enable DHCP] - The Host Name is automatically populated. 8. This is used for manual entry address. 13. The DHCPv6 Address will also change it for IPv4. 9. Click the [Enabled] checkbox for the Protocol click the [Enabled] checkbox. Scroll down...; [Use DHCP as directed by a router] - when this option is selected, you change the Host Name here it powers up to the Router prefix. 18 Xerox WorkCentre 4250/4260 Series System Administration Guide
.... The DHCPv6 Address will be obtained and displayed on the screen. • [Always Enable DHCP] - The Host Name is automatically populated. 8. This is used for manual entry address. 13. The DHCPv6 Address will also change it for IPv4. 9. Click the [Enabled] checkbox for the Protocol click the [Enabled] checkbox. Scroll down...; [Use DHCP as directed by a router] - when this option is selected, you change the Host Name here it powers up to the Router prefix. 18 Xerox WorkCentre 4250/4260 Series System Administration Guide

System Administration Guide
Page 47
... on [Control Panel]. 5. From your Workstation, load the CentreWare Print and Fax Drivers CD into your computer. Click on your CD drive. Xerox WorkCentre 4250/4260 Series System Administration Guide 35 The following areas are covered: • LPR Printing on page 35 • Internet Printing Protocol (IPP) ...Windows XP/2000/2003) on page 45 • Configure your Print Driver on page 46 • Bi-Directional Communication on page 48 • Manual Print Driver Configuration on page 50 • TCP/IP Printing (OSX) on page 50 • Configure your Apple Mac Print Driver on page...
... on [Control Panel]. 5. From your Workstation, load the CentreWare Print and Fax Drivers CD into your computer. Click on your CD drive. Xerox WorkCentre 4250/4260 Series System Administration Guide 35 The following areas are covered: • LPR Printing on page 35 • Internet Printing Protocol (IPP) ...Windows XP/2000/2003) on page 45 • Configure your Print Driver on page 46 • Bi-Directional Communication on page 48 • Manual Print Driver Configuration on page 50 • TCP/IP Printing (OSX) on page 50 • Configure your Apple Mac Print Driver on page...
System Administration Guide
Page 58
... further information, see Chapter 12, Network Accounting on [Properties]. 4. Click on [Automatic] to have an Accounting feature such as Xerox Standard Accounting or Network Accounting installed, you can be installed on [Manual] and enter the IP address or host name of the device. 2. If Bi-directional Setup is not enabled, select the... address of the device or click on your Printers folder. 2. NOTE: LAN Fax requires the Embedded Fax feature to close your print driver Properties. 46 Xerox WorkCentre 4250/4260 Series System Administration Guide Click on [Configuration].
... further information, see Chapter 12, Network Accounting on [Properties]. 4. Click on [Automatic] to have an Accounting feature such as Xerox Standard Accounting or Network Accounting installed, you can be installed on [Manual] and enter the IP address or host name of the device. 2. If Bi-directional Setup is not enabled, select the... address of the device or click on your Printers folder. 2. NOTE: LAN Fax requires the Embedded Fax feature to close your print driver Properties. 46 Xerox WorkCentre 4250/4260 Series System Administration Guide Click on [Configuration].
System Administration Guide
Page 59
...allows you to set default settings for the covers. NOTE: Click on the [Paper] menu. Click on the [Help] button in the driver to manually or automatically scale the output so that you want to customize the sizes. To set up a custom paper: a) in the [Advanced Paper Selection] ... on . c) In [Paper], select the paper you require, or set up a custom size paper supply, as require, then click the [OK] button. Xerox WorkCentre 4250/4260 Series System Administration Guide 47 If you want to use blank or pre-printed covers, select [Blank or Pre-printed]. The Paper menu allows...
...allows you to set default settings for the covers. NOTE: Click on the [Paper] menu. Click on the [Help] button in the driver to manually or automatically scale the output so that you want to customize the sizes. To set up a custom paper: a) in the [Advanced Paper Selection] ... on . c) In [Paper], select the paper you require, or set up a custom size paper supply, as require, then click the [OK] button. Xerox WorkCentre 4250/4260 Series System Administration Guide 47 If you want to use blank or pre-printed covers, select [Blank or Pre-printed]. The Paper menu allows...

System Administration Guide
Page 61
...about the printer's operational status, active jobs, completed jobs and paper status. 5. e) Change any default printer settings, as required. Xerox WorkCentre 4250/4260 Series System Administration Guide 49 b) Right-click on [Printing Preferences]. Click on [Automatic] to your operating system: 4. e) ...Ensure that the test page is selected and click on [Manual] and enter the IP Address or Host Name of the window. SNMP Settings 1. f) Change any default printer settings, as required...
...about the printer's operational status, active jobs, completed jobs and paper status. 5. e) Change any default printer settings, as required. Xerox WorkCentre 4250/4260 Series System Administration Guide 49 b) Right-click on [Printing Preferences]. Click on [Automatic] to your operating system: 4. e) ...Ensure that the test page is selected and click on [Manual] and enter the IP Address or Host Name of the window. SNMP Settings 1. f) Change any default printer settings, as required...

System Administration Guide
Page 62
... Drivers CD into your machine. Click on [Installable Options]. 4. Open the CD and select the required language, if necessary. 50 Xerox WorkCentre 4250/4260 Series System Administration Guide Click on the [General] tab. 7. Verify that are specific to close the [Test Page] window.... 9. Install the Print Driver 1. Change any default printer settings, as required. 11. 4 Print Drivers Manual Print Driver Configuration To configure the printer driver without using Bi-Directional communication: 1. Windows 2000/2003 a) From the [Start] menu, click...
... Drivers CD into your machine. Click on [Installable Options]. 4. Open the CD and select the required language, if necessary. 50 Xerox WorkCentre 4250/4260 Series System Administration Guide Click on the [General] tab. 7. Verify that are specific to close the [Test Page] window.... 9. Install the Print Driver 1. Change any default printer settings, as required. 11. 4 Print Drivers Manual Print Driver Configuration To configure the printer driver without using Bi-Directional communication: 1. Windows 2000/2003 a) From the [Start] menu, click...
System Administration Guide
Page 67
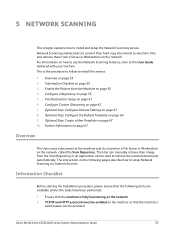
.... Information Checklist on page 67 10. Information Checklist Before starting the Installation procedure, please ensure that the machine's web browser can manually retrieve their hard copy documents to install this service: 1. Optional Step: Create a New Template on page 55 3. The instructions.../IP and HTTP protocols must be enabled on the following items are available and/or the tasks have been performed: 1. Xerox WorkCentre 4250/4260 Series System Administration Guide 55 5 Network Scanning This chapter explains how to the User Guide delivered with your machine. ...
.... Information Checklist on page 67 10. Information Checklist Before starting the Installation procedure, please ensure that the machine's web browser can manually retrieve their hard copy documents to install this service: 1. Optional Step: Create a New Template on page 55 3. The instructions.../IP and HTTP protocols must be enabled on the following items are available and/or the tasks have been performed: 1. Xerox WorkCentre 4250/4260 Series System Administration Guide 55 5 Network Scanning This chapter explains how to the User Guide delivered with your machine. ...
System Administration Guide
Page 76
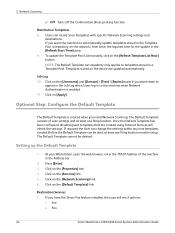
... on the device are created using Internet Services will see 2 options: • File • Fax 64 Xerox WorkCentre 4250/4260 Series System Administration Guide Turns off the Confirmation Sheet printing function. To update the Template Pool List manually, click on the [Network Scanning] link. 6. Job Log 10. Click on the [Services] link. 5. Click on...
... on the device are created using Internet Services will see 2 options: • File • Fax 64 Xerox WorkCentre 4250/4260 Series System Administration Guide Turns off the Confirmation Sheet printing function. To update the Template Pool List manually, click on the [Network Scanning] link. 6. Job Log 10. Click on the [Services] link. 5. Click on...
System Administration Guide
Page 87
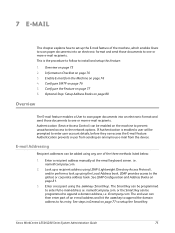
... Control) can be prompted to enter user account details, before they can then enter part of the three methods listed below: 1. Xerox WorkCentre 4250/4260 Series System Administration Guide 75 Optional Step: Setup Address Books on page 80 Overview The E-mail feature enables a User to scan...access the E-mail feature. See steps in General on the machine to prevent unauthorised access to the network options. Enter a recipient address manually at the email keyboard screen. Overview on page 81. 3. Configure the Feature on page 76 5. Authentication prevents a user from sending an...
... Control) can be prompted to enter user account details, before they can then enter part of the three methods listed below: 1. Xerox WorkCentre 4250/4260 Series System Administration Guide 75 Optional Step: Setup Address Books on page 80 Overview The E-mail feature enables a User to scan...access the E-mail feature. See steps in General on the machine to prevent unauthorised access to the network options. Enter a recipient address manually at the email keyboard screen. Overview on page 81. 3. Configure the Feature on page 76 5. Authentication prevents a user from sending an...
System Administration Guide
Page 91
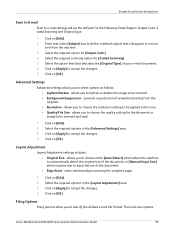
...]. 4. allows you to lighten or darken the image to be scanned and mail. 1. Click on [OK]. There are two options: Xerox WorkCentre 4250/4260 Series System Administration Guide 79 allows you to choose the quality setting for the following: Email Subject, Output Color, 2 sided Scanning and...on [OK]. allows you to choose either [Auto Detect] which allows the machine to automatically detect the original size of the document, or [Manual Input Size] which requires user to input the size of your e-mail documents. 6. Select the required options in the [Advanced Settings] area. ...
...]. 4. allows you to lighten or darken the image to be scanned and mail. 1. Click on [OK]. There are two options: Xerox WorkCentre 4250/4260 Series System Administration Guide 79 allows you to choose the quality setting for the following: Email Subject, Output Color, 2 sided Scanning and...on [OK]. allows you to choose either [Auto Detect] which allows the machine to automatically detect the original size of the document, or [Manual Input Size] which requires user to input the size of your e-mail documents. 6. Select the required options in the [Advanced Settings] area. ...

System Administration Guide
Page 113
...page 105 Overview LAN (Local Area Network) Fax enables Users to send documents to be enabled automatically, with Bi-directional communication or manually. 11 LAN Fax This chapter explains how to install and setup this feature: 1. Overview on page 102 5. Use the Feature .... For full instructions, see Chapter 4, Print Drivers on page 104 6. Enable LAN Fax (Windows Printer Drivers) on page 101 3. Xerox WorkCentre 4250/4260 Series System Administration Guide 101 Information Checklist on page 101 4. Once enabled, Users select the Fax option from their printer driver. ...
...page 105 Overview LAN (Local Area Network) Fax enables Users to send documents to be enabled automatically, with Bi-directional communication or manually. 11 LAN Fax This chapter explains how to install and setup this feature: 1. Overview on page 102 5. Use the Feature .... For full instructions, see Chapter 4, Print Drivers on page 104 6. Enable LAN Fax (Windows Printer Drivers) on page 101 3. Xerox WorkCentre 4250/4260 Series System Administration Guide 101 Information Checklist on page 101 4. Once enabled, Users select the Fax option from their printer driver. ...
System Administration Guide
Page 114
...]. • Windows 2003 - [Settings] then [Printers and Faxes]. 2. Enter the IP Address of [Installed]. 9. Manually To configure the printer driver without using bi-directional communication return to fax. 2. Click on [Properties]. 3. 11 LAN ...Manual] and enter the Device Name or IP Address. Click on [OK]. 7. Click on [OK] to Automatic, or click on it. 5. Ensure Bi-directional Communication is set to close the printer driver Properties. Click on [Installed]. 4. Click on [Installable Options]. 2. Configure the Printer Driver - Click on [Fax]. 102 Xerox WorkCentre 4250...
...]. • Windows 2003 - [Settings] then [Printers and Faxes]. 2. Enter the IP Address of [Installed]. 9. Manually To configure the printer driver without using bi-directional communication return to fax. 2. Click on [Properties]. 3. 11 LAN ...Manual] and enter the Device Name or IP Address. Click on [OK]. 7. Click on [OK] to Automatic, or click on it. 5. Ensure Bi-directional Communication is set to close the printer driver Properties. Click on [Installed]. 4. Click on [Installable Options]. 2. Configure the Printer Driver - Click on [Fax]. 102 Xerox WorkCentre 4250...

System Administration Guide
Page 138
...deactivate SMart eSolutions enrollment. Communication with Xerox. Machine Serial Number displays the serial number of manual settings. 14 SMart eSolutions SMart eSolutions Information 1. When you click [Not Enrolled] a window appears to stop communications with Xerox. 8. If the HTTP Proxy Server...this fails it will be prompted to save changes. 126 Xerox WorkCentre 4250/4260 Series System Administration Guide Click [OK] to deactivate, then click [Apply] to enter the administrator user name and password. Manual settings will then try a direct connection. In the ...
...deactivate SMart eSolutions enrollment. Communication with Xerox. Machine Serial Number displays the serial number of manual settings. 14 SMart eSolutions SMart eSolutions Information 1. When you click [Not Enrolled] a window appears to stop communications with Xerox. 8. If the HTTP Proxy Server...this fails it will be prompted to save changes. 126 Xerox WorkCentre 4250/4260 Series System Administration Guide Click [OK] to deactivate, then click [Apply] to enter the administrator user name and password. Manual settings will then try a direct connection. In the ...
System Administration Guide
Page 153
..., under Standard Overwrite or Full Overwrite depending on the network. 2. The Internet Services function is accessed through the embedded HTTP server on [Manual] to access CentreWare Internet Services. The On Demand Image Overwrite screen will be taken offline and will print. Click on the machine. 3. Xerox WorkCentre 4250/4260 Series System Administration Guide 141
..., under Standard Overwrite or Full Overwrite depending on the network. 2. The Internet Services function is accessed through the embedded HTTP server on [Manual] to access CentreWare Internet Services. The On Demand Image Overwrite screen will be taken offline and will print. Click on the machine. 3. Xerox WorkCentre 4250/4260 Series System Administration Guide 141
System Administration Guide
Page 181
Manual Upgrade using CentreWare Internet Services on the side. 3. Press the button on the machine. Xerox WorkCentre 4250/4260 Series System Administration Guide 169 Xerox is continually seeking to improve its products and a software revision may become available ...to improve functionality on the Control Panel. 2. How do I upgrade the software? Touch [System Configuration]. 4. For more instruction refer to Manual...
Manual Upgrade using CentreWare Internet Services on the side. 3. Press the button on the machine. Xerox WorkCentre 4250/4260 Series System Administration Guide 169 Xerox is continually seeking to improve its products and a software revision may become available ...to improve functionality on the Control Panel. 2. How do I upgrade the software? Touch [System Configuration]. 4. For more instruction refer to Manual...
System Administration Guide
Page 182
... or on the machine so that the following items have , click here. 2. Procedure 1. Click on [Firmware Upgrade]. 8. Manual Upgrade using CentreWare Internet Services NOTE: This procedure will delete any current jobs in the Address bar. 2. Information Checklist Before starting... as a print ready file to locate the software upgrade file [.hd] obtained earlier. 170 Xerox WorkCentre 4250/4260 Series System Administration Guide Click on the [Properties] tab. 4. At your Xerox Customer Support Representative. Click on [Browse] to a printer port, example Port 9100. Press ...
... or on the machine so that the following items have , click here. 2. Procedure 1. Click on [Firmware Upgrade]. 8. Manual Upgrade using CentreWare Internet Services NOTE: This procedure will delete any current jobs in the Address bar. 2. Information Checklist Before starting... as a print ready file to locate the software upgrade file [.hd] obtained earlier. 170 Xerox WorkCentre 4250/4260 Series System Administration Guide Click on the [Properties] tab. 4. At your Xerox Customer Support Representative. Click on [Browse] to a printer port, example Port 9100. Press ...


