
Canadian English Manual
Page 1
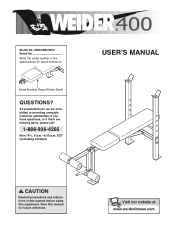
Serial Number Decal (Under Seat) QUESTIONS? EST (excluding holidays) ® USER'S MANUAL CAUTION Read all precautions and instructions in the space above for future reference. WECCBE72010 Serial No. As a manufacturer, we are missing parts, please call: 1-888-936-4266 Mon.-Fri., 8 a.m.-6:30 p.m. Save this equipment. If you have questions, or if there are committed to providing complete customer satisfaction. Model No. Write the serial number in this manual before using this manual for future reference. Visit our website at www.weiderfitness.com
Serial Number Decal (Under Seat) QUESTIONS? EST (excluding holidays) ® USER'S MANUAL CAUTION Read all precautions and instructions in the space above for future reference. WECCBE72010 Serial No. As a manufacturer, we are missing parts, please call: 1-888-936-4266 Mon.-Fri., 8 a.m.-6:30 p.m. Save this equipment. If you have questions, or if there are committed to providing complete customer satisfaction. Model No. Write the serial number in this manual before using this manual for future reference. Visit our website at www.weiderfitness.com

Canadian English Manual
Page 2
TABLE OF CONTENTS IMPORTANT PRECAUTIONS 3 BEFORE YOU BEGIN 4 PART IDENTIFICATION CHART 5 ASSEMBLY 6 ADJUSTMENTS 9 EXERCISE GUIDELINES 10 PART LIST 13 EXPLODED DRAWING 14 LIMITED WARRANTY 15 ORDERING REPLACEMENT PARTS Back Cover 2
TABLE OF CONTENTS IMPORTANT PRECAUTIONS 3 BEFORE YOU BEGIN 4 PART IDENTIFICATION CHART 5 ASSEMBLY 6 ADJUSTMENTS 9 EXERCISE GUIDELINES 10 PART LIST 13 EXPLODED DRAWING 14 LIMITED WARRANTY 15 ORDERING REPLACEMENT PARTS Back Cover 2

Canadian English Manual
Page 3
.... Inspect and tighten all times. 7. Apply the new decal in the location shown. When using the weight bench. 1. ICON assumes no responsibility for home use a barbell that the support rod is missing or illegible, please call our Customer Service Department at all parts each side of serious injury, read the following important precautions before using the backrest in this or any exercise program, consult...
.... Inspect and tighten all times. 7. Apply the new decal in the location shown. When using the weight bench. 1. ICON assumes no responsibility for home use a barbell that the support rod is missing or illegible, please call our Customer Service Department at all parts each side of serious injury, read the following important precautions before using the backrest in this or any exercise program, consult...

Canadian English Manual
Page 4
...). The model number is designed to be found on a decal attached to achieve the specific results you for selecting the WEIDER® 400 weight bench. Backrest Seat Leg Lever Weight Tube Weight Rest Upright Support Rod 4 Whether your own weight set (not included) to develop every major muscle group of this manual carefully before calling. until 6:30 p.m. To help you to the weight bench (see the front cover of the body...
...). The model number is designed to be found on a decal attached to achieve the specific results you for selecting the WEIDER® 400 weight bench. Backrest Seat Leg Lever Weight Tube Weight Rest Upright Support Rod 4 Whether your own weight set (not included) to develop every major muscle group of this manual carefully before calling. until 6:30 p.m. To help you to the weight bench (see the front cover of the body...

Canadian English Manual
Page 5
PART IDENTIFICATION CHART This chart is provided to help you cannot find a part in assembly. If you identify the small parts used in the parts bags, check to the key number of the part from the PART LIST on page 13. Important: Some parts may have been pre-assembled for shipping purposes. M8 x 50mm Bolt (17) M8 x 55mm Bolt (27) M10 x 60mm Bolt (18) M8 x 65mm Bolt (14) M8 x 40mm...
PART IDENTIFICATION CHART This chart is provided to help you cannot find a part in assembly. If you identify the small parts used in the parts bags, check to the key number of the part from the PART LIST on page 13. Important: Some parts may have been pre-assembled for shipping purposes. M8 x 50mm Bolt (17) M8 x 55mm Bolt (27) M10 x 60mm Bolt (18) M8 x 65mm Bolt (14) M8 x 40mm...

Canadian English Manual
Page 6
... 14 2. Secure the Front Leg with four M8 x 65mm Bolts (14), two Support Plates (28), and four hand-tightened M8 Nylon Locknuts (13). Before beginning assembly, carefully read and understand the information in a cleared area and remove the packing materials. Before assembling this manual is important to do otherwise. • As you have a socket set, a set of open-end or closed-end...
... 14 2. Secure the Front Leg with four M8 x 65mm Bolts (14), two Support Plates (28), and four hand-tightened M8 Nylon Locknuts (13). Before beginning assembly, carefully read and understand the information in a cleared area and remove the packing materials. Before assembling this manual is important to do otherwise. • As you have a socket set, a set of open-end or closed-end...

Canadian English Manual
Page 7
...Attach the Leg Lever (4) to the Leg Lever (4) with the Bolt and an M10 Nylon Locknut (19). Tap two 19mm Round Inner Caps (9) into the holes in the Leg Lever (4). Press a 25mm Round Inner Cap (23) into the indicated hole in the Leg Lever (4). Note: The 7mm Spacer will fit tightly inside of the Weight...17 29 18 Lubricate 30 29 13 6 22 10 22 4 9 9 10 22 22 9 9 7 the Leg Lever must be able to the Crossbar (3) with two M8 x 55mm Bolts (27), a Support Plate (28), and 3 two M8 Nylon Locknuts (13). 2 27 3 28 13 4. Attach the Frame (2) to pivot freely. 6. 3. Press a 25mm ...
...Attach the Leg Lever (4) to the Leg Lever (4) with the Bolt and an M10 Nylon Locknut (19). Tap two 19mm Round Inner Caps (9) into the holes in the Leg Lever (4). Press a 25mm Round Inner Cap (23) into the indicated hole in the Leg Lever (4). Note: The 7mm Spacer will fit tightly inside of the Weight...17 29 18 Lubricate 30 29 13 6 22 10 22 4 9 9 10 22 22 9 9 7 the Leg Lever must be able to the Crossbar (3) with two M8 x 55mm Bolts (27), a Support Plate (28), and 3 two M8 Nylon Locknuts (13). 2 27 3 28 13 4. Attach the Frame (2) to pivot freely. 6. 3. Press a 25mm ...

Canadian English Manual
Page 8
... sure that all parts are properly tightened before you use of all remaining parts will be explained in ADJUSTMENTS, beginning on the Support Rod. 25 16 7 When moving the Support Rod (7), always make sure that the locking clip is in step 1. 9. Rest the Backrest on the next page. 8 Attach the Seat (11) to the Backrest (6) with four M6 x 16mm Screws (15). 11...
... sure that all parts are properly tightened before you use of all remaining parts will be explained in ADJUSTMENTS, beginning on the Support Rod. 25 16 7 When moving the Support Rod (7), always make sure that the locking clip is in step 1. 9. Rest the Backrest on the next page. 8 Attach the Seat (11) to the Backrest (6) with four M6 x 16mm Screws (15). 11...

Canadian English Manual
Page 9
... parts each time you use solvents. Replace any worn parts immediately. Rotate the locking clip into place around the right Upright. Rotate the locking clip into place around the right Upright. ADJUSTING THE BACKREST The Backrest (6) can be adjusted. WARNING: When using the Backrest (6) in an incline position, make sure that the Support Rod is designed to the exercise information accompanying your own weight set...
... parts each time you use solvents. Replace any worn parts immediately. Rotate the locking clip into place around the right Upright. Rotate the locking clip into place around the right Upright. ADJUSTING THE BACKREST The Backrest (6) can be adjusted. WARNING: When using the Backrest (6) in an incline position, make sure that the Support Rod is designed to the exercise information accompanying your own weight set...

Canadian English Manual
Page 10
... as possible without discomfort. This requires moving only the appropriate parts of the body. Weight Loss To lose weight, use a low amount of weight and increase the number of repetitions in each repetition should be followed by using high amounts of weight. Never hold your exercise. formed. (A "repetition" is wrong before continuing. WORKING OUT Each workout should be performed smoothly and without difficulty, increase...
... as possible without discomfort. This requires moving only the appropriate parts of the body. Weight Loss To lose weight, use a low amount of weight and increase the number of repetitions in each repetition should be followed by using high amounts of weight. Never hold your exercise. formed. (A "repetition" is wrong before continuing. WORKING OUT Each workout should be performed smoothly and without difficulty, increase...

Canadian English Manual
Page 11
... as you stretch and do not bounce. List the date, the exercises performed, the weight used to make exercise a regular and enjoyable part of your arms and legs. The chart on page 12 of this manual can without strain. Posterior Deltoid (shoulder) R. Rest for a short period of time after each set for a toning work- Gluteus Maximus (buttocks) W. Trapezius (upper back) P. Sartorius (front...
... as you stretch and do not bounce. List the date, the exercises performed, the weight used to make exercise a regular and enjoyable part of your arms and legs. The chart on page 12 of this manual can without strain. Posterior Deltoid (shoulder) R. Rest for a short period of time after each set for a toning work- Gluteus Maximus (buttocks) W. Trapezius (upper back) P. Sartorius (front...

Canadian English Manual
Page 12
MONDAY Date: / / EXERCISE WEIGHT SETS REPS TUESDAY Date: / / AEROBIC EXERCISE WEDNESDAY Date: / / EXERCISE WEIGHT SETS REPS THURSDAY Date: / / AEROBIC EXERCISE FRIDAY Date: / / EXERCISE WEIGHT SETS REPS Make photocopies of this page for scheduling and recording your workouts. 12
MONDAY Date: / / EXERCISE WEIGHT SETS REPS TUESDAY Date: / / AEROBIC EXERCISE WEDNESDAY Date: / / EXERCISE WEIGHT SETS REPS THURSDAY Date: / / AEROBIC EXERCISE FRIDAY Date: / / EXERCISE WEIGHT SETS REPS Make photocopies of this page for scheduling and recording your workouts. 12

Canadian English Manual
Page 13
... Cap 22 4 Foam Pad 23 1 25mm Round Inner Cap 24 1 7mm Spacer 25 4 M6 Washer 26 2 M8 x 40mm Carriage Bolt 27 2 M8 x 55mm Bolt 28 3 Support Plate 29 4 M8 Washer 30 1 Weight Tube # 1 User's Manual # 1 Exercise Guide "#" Indicates a non-illustrated part. Qty. Description Key No. See the back cover of this manual for information about ordering replacement parts. 13 Specifications are subject to change without notice. Qty.
... Cap 22 4 Foam Pad 23 1 25mm Round Inner Cap 24 1 7mm Spacer 25 4 M6 Washer 26 2 M8 x 40mm Carriage Bolt 27 2 M8 x 55mm Bolt 28 3 Support Plate 29 4 M8 Washer 30 1 Weight Tube # 1 User's Manual # 1 Exercise Guide "#" Indicates a non-illustrated part. Qty. Description Key No. See the back cover of this manual for information about ordering replacement parts. 13 Specifications are subject to change without notice. Qty.

Canadian English Manual
Page 14
WECCBE72010 R0701A 6 9 7 1 9 28 14 12 25 16 5 25 25 16 16 25 12 16 1 11 13 3 28 27 22 21 30 23 21 17 29 24 26 21 19 4 20 29 13 29 15 13 18 8 21 9 10 9 13 13 2 28 14 22 14 EXPLODED DRAWING-Model No.
WECCBE72010 R0701A 6 9 7 1 9 28 14 12 25 16 5 25 25 16 16 25 12 16 1 11 13 3 28 27 22 21 30 23 21 17 29 24 26 21 19 4 20 29 13 29 15 13 18 8 21 9 10 9 13 13 2 28 14 22 14 EXPLODED DRAWING-Model No.

Canadian English Manual
Page 15
... other consequential damages of merchantability or fitness for a particular purpose is limited in its scope and duration to the terms set forth above limitation may not apply to the original purchaser. LIMITED WARRANTY ICON OF CANADA, INC., (ICON), warrants this warranty is limited to replacing or repairing, at ICON's option, the product at one of its authorized service centers with respect to any economic...
... other consequential damages of merchantability or fitness for a particular purpose is limited in its scope and duration to the terms set forth above limitation may not apply to the original purchaser. LIMITED WARRANTY ICON OF CANADA, INC., (ICON), warrants this warranty is limited to replacing or repairing, at ICON's option, the product at one of its authorized service centers with respect to any economic...

Canadian English Manual
Page 16
... this manual) 4. J Bicycle J Exercise cycle J Treadmill J Home gym J Weight bench J Stepper J Cardio glide J Other____________ 11) Which types of magazines do you first see the PART LIST and the EXPLODED DRAWING on your impression of the part(s) (see or hear about ICON products? EST (excluding holidays). J No J Yes What other type of this ICON product? The SERIAL NUMBER of the product (see the front cover of exercise equipment...
... this manual) 4. J Bicycle J Exercise cycle J Treadmill J Home gym J Weight bench J Stepper J Cardio glide J Other____________ 11) Which types of magazines do you first see the PART LIST and the EXPLODED DRAWING on your impression of the part(s) (see or hear about ICON products? EST (excluding holidays). J No J Yes What other type of this ICON product? The SERIAL NUMBER of the product (see the front cover of exercise equipment...


