

User Guide
Page 9
... The term "IC" before the equipment certification number only signifies that this product to be operated indoors and away from windows to provide maximum shielding. Equipment (or its operation in compliance with the essential requirements and other relevant provisions of Information ...Fournier un ecram de blindage maximal. Digital Media Network Company, declares that the Industry Canada technical specifications were met. English: Hereby, TOSHIBA Corp. L'utilisation de ce dispositif est autorisée seulement aux conditions suivantes: (1) il ne doit pas produire de brouillage et ...
... The term "IC" before the equipment certification number only signifies that this product to be operated indoors and away from windows to provide maximum shielding. Equipment (or its operation in compliance with the essential requirements and other relevant provisions of Information ...Fournier un ecram de blindage maximal. Digital Media Network Company, declares that the Industry Canada technical specifications were met. English: Hereby, TOSHIBA Corp. L'utilisation de ce dispositif est autorisée seulement aux conditions suivantes: (1) il ne doit pas produire de brouillage et ...

User Guide
Page 27
... the Electronic Industries Alliance at www.eiae.org. ConfigFree is a trademark of Infineon Technologies AG. MultiMediaCard is a trademark of Toshiba Corporation. Windows Media is a registered trademark of Traveling Software, Inc. 27 Trademarks Noteworthy and Tecra are registered trademarks, and FreedomWare and SmartMedia are trademarks of Dolby Laboratories. Dolby - LapLink is a registered trademark of...
... the Electronic Industries Alliance at www.eiae.org. ConfigFree is a trademark of Infineon Technologies AG. MultiMediaCard is a trademark of Toshiba Corporation. Windows Media is a registered trademark of Traveling Software, Inc. 27 Trademarks Noteworthy and Tecra are registered trademarks, and FreedomWare and SmartMedia are trademarks of Dolby Laboratories. Dolby - LapLink is a registered trademark of...

User Guide
Page 30
... Using the keyboard 83 Character keys 83 Making your keyboard emulate a full-size keyboard 84 Ctrl, Fn, and Alt keys 84 Function keys 84 Windows special keys 85 Overlay keys 85 Using the overlay to type numeric data 86 Starting a program 87 Starting a program from the Start menu...........87... Starting a program from Windows® Explorer....88 Starting a program from the Run dialog box ....89 Saving your work 90 Printing your work 92 Using the DVD-ROM or ...
... Using the keyboard 83 Character keys 83 Making your keyboard emulate a full-size keyboard 84 Ctrl, Fn, and Alt keys 84 Function keys 84 Windows special keys 85 Overlay keys 85 Using the overlay to type numeric data 86 Starting a program 87 Starting a program from the Start menu...........87... Starting a program from Windows® Explorer....88 Starting a program from the Run dialog box ....89 Saving your work 90 Printing your work 92 Using the DVD-ROM or ...
User Guide
Page 33
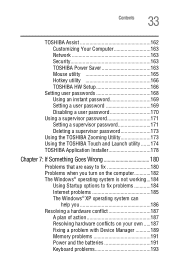
... Utility 173 Using the TOSHIBA Touch and Launch utility .......174 TOSHIBA Application Installer 178 Chapter 7: If Something Goes Wrong 180 Problems that are easy to fix 180 Problems when you turn on the computer............182 The Windows® operating system is not working...184 Using Startup options to fix problems 184 Internet problems...
... Utility 173 Using the TOSHIBA Touch and Launch utility .......174 TOSHIBA Application Installer 178 Chapter 7: If Something Goes Wrong 180 Problems that are easy to fix 180 Problems when you turn on the computer............182 The Windows® operating system is not working...184 Using Startup options to fix problems 184 Internet problems...
User Guide
Page 36
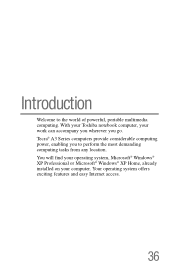
Tecra® A3 Series computers provide considerable computing power, enabling you go. Your operating system offers exciting features and easy Internet access. 36 You will find your operating system, Microsoft® Windows® XP Professional or Microsoft® Windows® XP Home, already installed on your work can accompany you wherever you to the world of powerful, portable multimedia computing. Introduction Welcome to perform the most demanding computing tasks from any location. With your Toshiba notebook computer, your computer.
Tecra® A3 Series computers provide considerable computing power, enabling you go. Your operating system offers exciting features and easy Internet access. 36 You will find your operating system, Microsoft® Windows® XP Professional or Microsoft® Windows® XP Home, already installed on your work can accompany you wherever you to the world of powerful, portable multimedia computing. Introduction Welcome to perform the most demanding computing tasks from any location. With your Toshiba notebook computer, your computer.

User Guide
Page 39
... user's guide. ❖ Guides for installation on your Recovery media (if applicable to your system). ❖ For accessory information, visit Toshiba's Web site at accessories.toshiba.com. ❖ The Microsoft® Windows® operating system documentation which explains the features of a term used Additional icons highlight other programs that may come preinstalled on...
... user's guide. ❖ Guides for installation on your Recovery media (if applicable to your system). ❖ For accessory information, visit Toshiba's Web site at accessories.toshiba.com. ❖ The Microsoft® Windows® operating system documentation which explains the features of a term used Additional icons highlight other programs that may come preinstalled on...

User Guide
Page 44
... you are available at many office supply stores. ❖ Sit with your shoulders relaxed and your forearms parallel to provide extra back support. Use tinted windows or shades to prevent possible strain on the back of your thighs. ❖ Adjust the back of your spine. We recommend that you adjust the...
... you are available at many office supply stores. ❖ Sit with your shoulders relaxed and your forearms parallel to provide extra back support. Use tinted windows or shades to prevent possible strain on the back of your thighs. ❖ Adjust the back of your spine. We recommend that you adjust the...

User Guide
Page 49
...Wizard guides you click the final screen, your computer name and network settings. 6 Follow the remaining screen prompts to complete the setup process. A window will pause for a moment while checking for an internet connection. Getting Started Setting up your software 49 Setting up your software. 1 From the ...welcome screen, click Next to enter the Setup Wizard. 2 Confirm acceptance of windows displayed, and the order in which windows appear, may vary according to your computer will connect to the internet and click Next.
...Wizard guides you click the final screen, your computer name and network settings. 6 Follow the remaining screen prompts to complete the setup process. A window will pause for a moment while checking for an internet connection. Getting Started Setting up your software 49 Setting up your software. 1 From the ...welcome screen, click Next to enter the Setup Wizard. 2 Confirm acceptance of windows displayed, and the order in which windows appear, may vary according to your computer will connect to the internet and click Next.
User Guide
Page 57
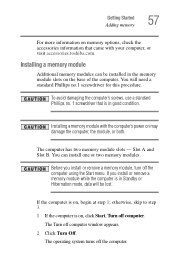
... damage the computer, the module, or both. Installing a memory module with your computer, or visit accessories.toshiba.com. You can be lost. The computer has two memory module slots - The operating system turns off computer window appears. 2 Click Turn Off. Getting Started Adding memory 57 For more information on memory options, check...
... damage the computer, the module, or both. Installing a memory module with your computer, or visit accessories.toshiba.com. You can be lost. The computer has two memory module slots - The operating system turns off computer window appears. 2 Click Turn Off. Getting Started Adding memory 57 For more information on memory options, check...
User Guide
Page 63
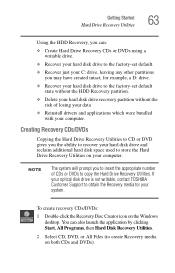
...number of losing your data ❖ Reinstall drivers and applications which were bundled with your computer. If your optical disk drive is not writable, contact TOSHIBA Customer Support to obtain the Recovery media for example, a D: drive. ❖ Recover your hard disk drive to the factory-set default state ...of CDs or DVDs to copy the Hard Drive Recovery Utilities. To create recovery CDs/DVDs: 1 Double-click the Recovery Disc Creator icon on the Windows desktop. You can : ❖ Create Hard Drive Recovery CDs or DVDs using a writable drive. ❖ Recover your hard disk drive to the...
...number of losing your data ❖ Reinstall drivers and applications which were bundled with your computer. If your optical disk drive is not writable, contact TOSHIBA Customer Support to obtain the Recovery media for example, a D: drive. ❖ Recover your hard disk drive to the factory-set default state ...of CDs or DVDs to copy the Hard Drive Recovery Utilities. To create recovery CDs/DVDs: 1 Double-click the Recovery Disc Creator icon on the Windows desktop. You can : ❖ Create Hard Drive Recovery CDs or DVDs using a writable drive. ❖ Recover your hard disk drive to the...

User Guide
Page 72
... sensitive to touch and enables you to move it to the left . To reinstall drivers and applications: 1 Double-click the Toshiba Application Installer icon on -screen prompts to complete the installation process. 72 Getting Started Using the TouchPad™ Installing drivers and applications The... TOSHIBA Application Installer allows you to reinstall the drivers and applications that were originally bundled with the stroke of a finger. Using the ...
... sensitive to touch and enables you to move it to the left . To reinstall drivers and applications: 1 Double-click the Toshiba Application Installer icon on -screen prompts to complete the installation process. 72 Getting Started Using the TouchPad™ Installing drivers and applications The... TOSHIBA Application Installer allows you to reinstall the drivers and applications that were originally bundled with the stroke of a finger. Using the ...

User Guide
Page 74
The Control Panel window appears. 2 Click Printers and Other Hardware. 3 Click the Mouse icon. 4 Click the TouchPAD ON/OFF tab. Sample TouchPAD ON/OFF screen 5 Select Disable or Enable, whichever is enabled by default. The TouchPAD ON/OFF tab view window appears. 74 Getting Started Using the TouchPad™ Disabling or enabling the TouchPad The TouchPad is appropriate. 6 Click Apply. 7 Click OK. The Mouse Properties window closes. 8 Close the Printers and Other Hardware window. To change the enable/ disable TouchPad setting: 1 Click Start, and then Control Panel.
The Control Panel window appears. 2 Click Printers and Other Hardware. 3 Click the Mouse icon. 4 Click the TouchPAD ON/OFF tab. Sample TouchPAD ON/OFF screen 5 Select Disable or Enable, whichever is enabled by default. The TouchPAD ON/OFF tab view window appears. 74 Getting Started Using the TouchPad™ Disabling or enabling the TouchPad The TouchPad is appropriate. 6 Click Apply. 7 Click OK. The Mouse Properties window closes. 8 Close the Printers and Other Hardware window. To change the enable/ disable TouchPad setting: 1 Click Start, and then Control Panel.
User Guide
Page 75
... Off command when not connected to a domain server or the Shut down command if you are using the Windows XP Professional operating system and are connected to a domain server. ❖ If you have three options to fully charge the main battery. For more information, ... and result in use . Getting Started Turning off , it for a longer period, you have work in progress and are not connected to a network, use the Windows Standby or Hibernate commands to save your computer when you are using it may damage the media in loss of data. If you left off...
... Off command when not connected to a domain server or the Shut down command if you are using the Windows XP Professional operating system and are connected to a domain server. ❖ If you have three options to fully charge the main battery. For more information, ... and result in use . Getting Started Turning off , it for a longer period, you have work in progress and are not connected to a network, use the Windows Standby or Hibernate commands to save your computer when you are using it may damage the media in loss of data. If you left off...

User Guide
Page 78
..., the mouse cursor may want to use a full-size keyboard, you can choose to adjust the video settings. If this occurs, push the Esc or Windows key to return it to the upper-right side of the computer's builtin TouchPad. See the video device documentation for additional configuration steps. NOTE After...
..., the mouse cursor may want to use a full-size keyboard, you can choose to adjust the video settings. If this occurs, push the Esc or Windows key to return it to the upper-right side of the computer's builtin TouchPad. See the video device documentation for additional configuration steps. NOTE After...

User Guide
Page 83
Using the keyboard Your computer's keyboard contains character keys, control keys, function keys, and special Windows® keys, providing all the functionality of the page. ❖ The lowercase letter l (el) and the number 1 are not interchangeable. ❖ The uppercase letter... the Basics Using the keyboard 83 "Powering down normally, details such as your desktop setup, during its shutdown procedure. If you do not let the Windows® XP operating system shut down the computer" on a typewriter, except that: ❖ The space bar creates a space character instead of just ...
Using the keyboard Your computer's keyboard contains character keys, control keys, function keys, and special Windows® keys, providing all the functionality of the page. ❖ The lowercase letter l (el) and the number 1 are not interchangeable. ❖ The uppercase letter... the Basics Using the keyboard 83 "Powering down normally, details such as your desktop setup, during its shutdown procedure. If you do not let the Windows® XP operating system shut down the computer" on a typewriter, except that: ❖ The space bar creates a space character instead of just ...

User Guide
Page 85
...or "Hot Keys" on the front of them form the numeric and cursor overlay. For example, Fn+F9 turns off the TouchPad. Used in Windows: ❖ Start key-Opens the Start menu ❖ Application key-Has the same function as you enter numeric data or control the cursor as ... specific functions on a desktop computer's keyboard. This overlay lets you would using the 10-key keypad on the computer. Windows special keys Start key Application key Sample Windows special keys Your computer's keyboard has two keys that have special functions in combination with the Fn key, function keys marked...
...or "Hot Keys" on the front of them form the numeric and cursor overlay. For example, Fn+F9 turns off the TouchPad. Used in Windows: ❖ Start key-Opens the Start menu ❖ Application key-Has the same function as you enter numeric data or control the cursor as ... specific functions on a desktop computer's keyboard. This overlay lets you would using the 10-key keypad on the computer. Windows special keys Start key Application key Sample Windows special keys Your computer's keyboard has two keys that have special functions in combination with the Fn key, function keys marked...

User Guide
Page 87
... groups. Learning the Basics Starting a program 87 . Starting a program The easiest way to All Programs. The Windows® XP operating system displays the All Programs menu, which use My Computer or Windows® Explorer. You can: ❖ Double-click the icon for the program on . To find the file...then point to start a program from the Start menu When you want to work on your desktop ❖ Use the Start menu ❖ Use Windows® Explorer or My Computer to locate the program file ❖ Use the Run dialog box The next three sections explain how to start a...
... groups. Learning the Basics Starting a program 87 . Starting a program The easiest way to All Programs. The Windows® XP operating system displays the All Programs menu, which use My Computer or Windows® Explorer. You can: ❖ Double-click the icon for the program on . To find the file...then point to start a program from the Start menu When you want to work on your desktop ❖ Use the Start menu ❖ Use Windows® Explorer or My Computer to locate the program file ❖ Use the Run dialog box The next three sections explain how to start a...

User Guide
Page 88
... Start, then point to All Programs. 2 Click Accessories. 3 Click Windows Explorer. 4 Click My Computer to expand the window. 5 In the left part of the window, click the line that ends in "(C:)." 6 In the left part of the window, under the C: icon, doubleclick the folder containing the program, in... this file ends with .exe). Windows® Explorer shows the contents of the Accessories folder on your computer's contents as a hierarchy or "tree." Starting a program from Windows® Explorer. To use this method, you can easily see the content...
... Start, then point to All Programs. 2 Click Accessories. 3 Click Windows Explorer. 4 Click My Computer to expand the window. 5 In the left part of the window, click the line that ends in "(C:)." 6 In the left part of the window, under the C: icon, doubleclick the folder containing the program, in... this file ends with .exe). Windows® Explorer shows the contents of the Accessories folder on your computer's contents as a hierarchy or "tree." Starting a program from Windows® Explorer. To use this method, you can easily see the content...

User Guide
Page 89
... the Run dialog box: ❖ If you know the location, you do not know the program's location, type the command line. For a program in the Windows® folder, type just the program name. HINT: To run the same program again, click the arrow to the right of the text box and... select the command line from the Run dialog box This example uses the Run command to access WordPad, type: c:\Program Files\Windows NT\Accessories\Wordpad.exe, then click OK. ❖ If you can search for it by clicking Start, and then Search.
... the Run dialog box: ❖ If you know the location, you do not know the program's location, type the command line. For a program in the Windows® folder, type just the program name. HINT: To run the same program again, click the arrow to the right of the text box and... select the command line from the Run dialog box This example uses the Run command to access WordPad, type: c:\Program Files\Windows NT\Accessories\Wordpad.exe, then click OK. ❖ If you can search for it by clicking Start, and then Search.

User Guide
Page 90
... all you return to work. TECHNICAL NOTE: Save your data even when you are working with a document that saves documents at regular intervals. Check your Windows® program, click Save. Saving files 1 On the File menu of saving frequently. This is a good idea to give it has an automatic save your...
... all you return to work. TECHNICAL NOTE: Save your data even when you are working with a document that saves documents at regular intervals. Check your Windows® program, click Save. Saving files 1 On the File menu of saving frequently. This is a good idea to give it has an automatic save your...


