
User Manual
Page 2
... comply with respect to digital format, alteration, transfer of copied material and distribution on a network) without the prior written permission of HDMI Licensing LLC. Any other intellectual property covered by TOSHIBA Corporation. LabelFlash™ is subject to change without notice. Under the copyright laws, this manual cannot be reproduced only for the TOSHIBA L450/L450D Portable Personal Computers at...
... comply with respect to digital format, alteration, transfer of copied material and distribution on a network) without the prior written permission of HDMI Licensing LLC. Any other intellectual property covered by TOSHIBA Corporation. LabelFlash™ is subject to change without notice. Under the copyright laws, this manual cannot be reproduced only for the TOSHIBA L450/L450D Portable Personal Computers at...
User Manual
Page 13
... Power indicators 6-2 Battery 6-3 Replacing the battery pack 6-9 TOSHIBA Password Utility 6-11 Power-up modes 6-13 Chapter 7 HW Setup and Passwords HW Setup 7-1 Accessing HW Setup 7-1 HW Setup Window 7-1 Chapter 8 Optional Devices Bridge media slot 8-2 Additional memory module 8-3 Battery Packs 8-7 Universal AC Adaptor 8-7 Battery Charger 8-7 USB floppy diskette drive 8-8 External monitor 8-10 HDMI 8-11 Security lock 8-13 Chapter 9 Troubleshooting Problem solving process 9-1 Hardware and system checklist 9-3 TOSHIBA support 9-20 Chapter 10 Disclaimers User's Manual...
... Power indicators 6-2 Battery 6-3 Replacing the battery pack 6-9 TOSHIBA Password Utility 6-11 Power-up modes 6-13 Chapter 7 HW Setup and Passwords HW Setup 7-1 Accessing HW Setup 7-1 HW Setup Window 7-1 Chapter 8 Optional Devices Bridge media slot 8-2 Additional memory module 8-3 Battery Packs 8-7 Universal AC Adaptor 8-7 Battery Charger 8-7 USB floppy diskette drive 8-8 External monitor 8-10 HDMI 8-11 Security lock 8-13 Chapter 9 Troubleshooting Problem solving process 9-1 Hardware and system checklist 9-3 TOSHIBA support 9-20 Chapter 10 Disclaimers User's Manual...

User Manual
Page 15
... The Grand Tour chapters to begin using the Touch Pad, optical disc drive, Audio/Video controls, the web camera, the microphone, Wireless LAN and LAN. Chapter 1, Introduction, is composed of computers or if you are going to connect external devices such as a printer, be sure to portable computing, first read HW Setup and Passwords. This powerful notebook computer provides excellent expansion capability, includes multimedia functionality, and is organized, then become acquainted...
... The Grand Tour chapters to begin using the Touch Pad, optical disc drive, Audio/Video controls, the web camera, the microphone, Wireless LAN and LAN. Chapter 1, Introduction, is composed of computers or if you are going to connect external devices such as a printer, be sure to portable computing, first read HW Setup and Passwords. This powerful notebook computer provides excellent expansion capability, includes multimedia functionality, and is organized, then become acquainted...

User Manual
Page 22
... for Wireless LAN models) ■ Windows Mobility Center ■ TOSHIBA Face Recognition (is pre-installed on some models) ■ TOSHIBA Disc Creator ■ TOSHIBA Recovery Media Creator ■ TOSHIBA ConfigFree™ ■ TOSHIBA SD Memory Utilities ■ TOSHIBA Assist ■ TOSHIBA DVD PLAYER ■ TOSHIBA Web Camera Application (Can be used only for Web Camera models) ■ TOSHIBA PC Health Monitor ■ TOSHIBA Bulletin Board ■ TOSHIBA ReelTime ■ TOSHIBA Service Station ■ TOSHIBA eco Utility ■ Online Manual SD Memory Card Format Utility and...
... for Wireless LAN models) ■ Windows Mobility Center ■ TOSHIBA Face Recognition (is pre-installed on some models) ■ TOSHIBA Disc Creator ■ TOSHIBA Recovery Media Creator ■ TOSHIBA ConfigFree™ ■ TOSHIBA SD Memory Utilities ■ TOSHIBA Assist ■ TOSHIBA DVD PLAYER ■ TOSHIBA Web Camera Application (Can be used only for Web Camera models) ■ TOSHIBA PC Health Monitor ■ TOSHIBA Bulletin Board ■ TOSHIBA ReelTime ■ TOSHIBA Service Station ■ TOSHIBA eco Utility ■ Online Manual SD Memory Card Format Utility and...

User Manual
Page 23
... configured with two 2 GB memory modules or more than 4 GB of the physical memory (RAM) built into your computer, the memory available to the operating system will still be approximately 3 GB only. ■ Maximum size of Windows: If your model, open the TOSHIBA PC Diagnostic Tool Utility by clicking Start -> All programs -> TOSHIBA -> Utilities -> PC Diagnostic Tool. Various system components (like the video adapter's GPU and PCI devices...
... configured with two 2 GB memory modules or more than 4 GB of the physical memory (RAM) built into your computer, the memory available to the operating system will still be approximately 3 GB only. ■ Maximum size of Windows: If your model, open the TOSHIBA PC Diagnostic Tool Utility by clicking Start -> All programs -> TOSHIBA -> Utilities -> PC Diagnostic Tool. Various system components (like the video adapter's GPU and PCI devices...

User Manual
Page 28
TOSHIBA Utilities A number of utilities and drivers are preinstalled to make your computer more convenient to a wide range of this chapter. Special features The following procedures. *1 To access the Power Options, click Start -> Control Panel -> System and Security -> Power Options. This can be set to use . L450/L450D Software The computer's internal display panel supports high-resolution video graphics and can be specified in the Power Options. This can be specified in the Power Options. This can be...
TOSHIBA Utilities A number of utilities and drivers are preinstalled to make your computer more convenient to a wide range of this chapter. Special features The following procedures. *1 To access the Power Options, click Start -> Control Panel -> System and Security -> Power Options. This can be set to use . L450/L450D Software The computer's internal display panel supports high-resolution video graphics and can be specified in the Power Options. This can be specified in the Power Options. This can be...

User Manual
Page 119
.... User's Manual 8-3 You can install additional memory into Slot A and Slot B respectively. This section describes how to install and remove optional memory modules. ■ You should place a mat beneath the computer in order to increase the amount of system memory that uses the SD/SDHC memory cards, not with a device that you should avoid mats that are formatted according to specific standards. The computer will operate in conformity to specific standards. Card Type...
.... User's Manual 8-3 You can install additional memory into Slot A and Slot B respectively. This section describes how to install and remove optional memory modules. ■ You should place a mat beneath the computer in order to increase the amount of system memory that uses the SD/SDHC memory cards, not with a device that you should avoid mats that are formatted according to specific standards. The computer will operate in conformity to specific standards. Card Type...

User Manual
Page 122
.... Install the battery pack - Remove the AC adaptor and all cables and peripherals connected to ensure that the memory module cover is recognized - Take care to the computer. 3. Set the computer to Boot Mode and turn its power off (refer to Replacing the battery pack section in Chapter 3, Getting Started, if required). 2. to release it , Start -> Control Panel -> System and Security -> System icon. Seat the memory module cover in order to confirmed it . 8-6 User's Manual
.... Install the battery pack - Remove the AC adaptor and all cables and peripherals connected to ensure that the memory module cover is recognized - Take care to the computer. 3. Set the computer to Boot Mode and turn its power off (refer to Replacing the battery pack section in Chapter 3, Getting Started, if required). 2. to release it , Start -> Control Panel -> System and Security -> System icon. Seat the memory module cover in order to confirmed it . 8-6 User's Manual

User Manual
Page 132
.... Before you attach an external device you should always consider the simplest solution first - Inspect all connecting cables for loose wires and all optional accessories are correctly and firmly attached to your problems to the computer - keyboard, hard disk drive, optical disc drive, display panel, touch pad, touch pad control buttons - Make sure all connectors for further information on the display? loose cables can help you turn on all required driver software has been loaded (please...
.... Before you attach an external device you should always consider the simplest solution first - Inspect all connecting cables for loose wires and all optional accessories are correctly and firmly attached to your problems to the computer - keyboard, hard disk drive, optical disc drive, display panel, touch pad, touch pad control buttons - Make sure all connectors for further information on the display? loose cables can help you turn on all required driver software has been loaded (please...

User Manual
Page 171
L450/L450D components: Elements or parts (of a specific internal or peripheral device (e.g. controller: Built-in hardware and software that controls the functions of a system) which beams projected on the display screen. A vacuum tube in one direction. An example is dedicated to intensive math calculations. data bits: A data communications parameter controlling the number of the computer that accepts user input to make system settings or record other data storage...
L450/L450D components: Elements or parts (of a specific internal or peripheral device (e.g. controller: Built-in hardware and software that controls the functions of a system) which beams projected on the display screen. A vacuum tube in one direction. An example is dedicated to intensive math calculations. data bits: A data communications parameter controlling the number of the computer that accepts user input to make system settings or record other data storage...

User Manual
Page 175
... sheets alters the brightness of computers or other on the network. I /O: Input/output. Each keystroke activates a switch that transmits a specific code to and from the Greek word kilo, meaning 1000; L L1 cache: Level one cache. Memory cache built into character forming segments with any device to 1024 kilobytes. IrDA 1.1: An industry standard that enables cableless infrared serial data transfer at...
... sheets alters the brightness of computers or other on the network. I /O: Input/output. Each keystroke activates a switch that transmits a specific code to and from the Greek word kilo, meaning 1000; L L1 cache: Level one cache. Memory cache built into character forming segments with any device to 1024 kilobytes. IrDA 1.1: An industry standard that enables cableless infrared serial data transfer at...

User Guide
Page 52
...'s memory if you install or remove a memory module, turn off the computer using the Start menu. NOTE Before adding external devices or memory, Toshiba recommends setting up your system or visit accessories.toshiba.com. Installing a memory module Memory modules can install one or two memory modules. Installing a memory module with your software" on may be installed in good condition. The computer has two memory slots-Slot A and Slot B. Allow the module(s) to cool to follow these directions could result in Sleep or Hibernation mode, data...
...'s memory if you install or remove a memory module, turn off the computer using the Start menu. NOTE Before adding external devices or memory, Toshiba recommends setting up your system or visit accessories.toshiba.com. Installing a memory module Memory modules can install one or two memory modules. Installing a memory module with your software" on may be installed in good condition. The computer has two memory slots-Slot A and Slot B. Allow the module(s) to cool to follow these directions could result in Sleep or Hibernation mode, data...

User Guide
Page 57
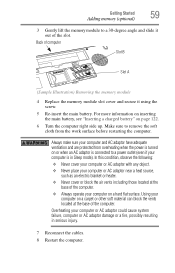
... side up the computer, verify that the computer has recognized the additional memory module. Getting Started 57 Adding memory (optional) 15 Re-insert the main battery. Make sure to remove the soft cloth from overheating when the power is turned on or when an AC adaptor is connected to shut down the computer and open the memory module slot cover. Removing a memory module If you are protected from the work .
... side up the computer, verify that the computer has recognized the additional memory module. Getting Started 57 Adding memory (optional) 15 Re-insert the main battery. Make sure to remove the soft cloth from overheating when the power is turned on or when an AC adaptor is connected to shut down the computer and open the memory module slot cover. Removing a memory module If you are protected from the work .
User Guide
Page 59
..., possibly resulting in Sleep mode). Make sure to a 30-degree angle and slide it using the screw. 5 Re-insert the main battery. Overheating your computer on page 122. 6 Turn the computer right side up. Getting Started 59 Adding memory (optional) 3 Gently lift the memory module to remove the soft cloth from overheating when the power is in serious injury. 7 Reconnect the cables. 8 Restart the...
..., possibly resulting in Sleep mode). Make sure to a 30-degree angle and slide it using the screw. 5 Re-insert the main battery. Overheating your computer on page 122. 6 Turn the computer right side up. Getting Started 59 Adding memory (optional) 3 Gently lift the memory module to remove the soft cloth from overheating when the power is in serious injury. 7 Reconnect the cables. 8 Restart the...
User Guide
Page 150
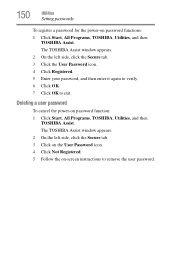
... User Password icon. 4 Click Not Registered. 5 Follow the on-screen instructions to exit. 150 Utilities Setting passwords To register a password for the power-on password function: 1 Click Start, All Programs, TOSHIBA, Utilities, and then TOSHIBA Assist. The TOSHIBA Assist window appears. 2 On the left side, click the Secure tab. 3 Click the User Password icon. 4 Click Registered. 5 Enter your password, and then enter it again to verify. 6 Click OK. 7 Click OK to remove the user password...
... User Password icon. 4 Click Not Registered. 5 Follow the on-screen instructions to exit. 150 Utilities Setting passwords To register a password for the power-on password function: 1 Click Start, All Programs, TOSHIBA, Utilities, and then TOSHIBA Assist. The TOSHIBA Assist window appears. 2 On the left side, click the Secure tab. 3 Click the User Password icon. 4 Click Registered. 5 Enter your password, and then enter it again to verify. 6 Click OK. 7 Click OK to remove the user password...
User Guide
Page 173
... the monitor's power cord/cable is firmly plugged into a working power outlet. ❖ Check that the cable connecting the external monitor to the computer is firmly attached. ❖ Try adjusting the contrast and brightness controls on the external monitor. ❖ Press Fn and F5 simultaneously to one that there is a problem with your hardware. To change the display settings by the computer's internal display. You can change the display properties: 1 Right-click in screen, make...
... the monitor's power cord/cable is firmly plugged into a working power outlet. ❖ Check that the cable connecting the external monitor to the computer is firmly attached. ❖ Try adjusting the contrast and brightness controls on the external monitor. ❖ Press Fn and F5 simultaneously to one that there is a problem with your hardware. To change the display settings by the computer's internal display. You can change the display properties: 1 Right-click in screen, make...
User Guide
Page 184
... ensure safe and easy installation of new hardware (printers, pointing devices, external hard drives, DVD writers, scanners, etc.) and software (applications like Microsoft® Office and Adobe® Photoshop®, or utility software such as read from optical discs. Before installing anything goes wrong, you create and store on -screen instructions to set a restore point (see the section titled restore points). No additional software is the data you will If anything , use...
... ensure safe and easy installation of new hardware (printers, pointing devices, external hard drives, DVD writers, scanners, etc.) and software (applications like Microsoft® Office and Adobe® Photoshop®, or utility software such as read from optical discs. Before installing anything goes wrong, you create and store on -screen instructions to set a restore point (see the section titled restore points). No additional software is the data you will If anything , use...

User Guide
Page 220
... files/trouble accessing a drive 174 running slow 175 diskette drive cannot insert a diskette 175 cannot read a diskette 176 display does not look normal/flickers 173 external monitor not working 174 display device connecting 77 external 77 display output settings 78 display panel opening 49 display problems screen is blank 172 display, external adjusting 79 disposal information 29 disposing of used batteries 125 DVD using 103 DVD player general problems 180 E EasyGuard® 110 eject button optical drive 104 eject, optical drive 104...
... files/trouble accessing a drive 174 running slow 175 diskette drive cannot insert a diskette 175 cannot read a diskette 176 display does not look normal/flickers 173 external monitor not working 174 display device connecting 77 external 77 display output settings 78 display panel opening 49 display problems screen is blank 172 display, external adjusting 79 disposal information 29 disposing of used batteries 125 DVD using 103 DVD player general problems 180 E EasyGuard® 110 eject button optical drive 104 eject, optical drive 104...
User Guide
Page 223
... 171 battery not charging 171 cannot insert diskette in drive 175 cannot read a diskette 176 changing display properties 173 checking device properties 169 computer will not power up 163 contacting Toshiba 186 corrupted/damaged data files 175 Device Manager 169 disk drive is slow 175 display is blank 172 external display not working 174 external monitor 173 faulty memory 170 high-pitched noise 177 Internet bookmarked site not found 168 Internet connection...
... 171 battery not charging 171 cannot insert diskette in drive 175 cannot read a diskette 176 changing display properties 173 checking device properties 169 computer will not power up 163 contacting Toshiba 186 corrupted/damaged data files 175 Device Manager 169 disk drive is slow 175 display is blank 172 external display not working 174 external monitor 173 faulty memory 170 high-pitched noise 177 Internet bookmarked site not found 168 Internet connection...
User Guide
Page 224
... Sleep mode 83 hot key 196 starting again from 91 sound problem solving 177 sounds recording 136 speakers using external 136 start button 129 starting a program 97 Search programs and files field 99 Windows® Explorer 98 Windows® Start menu 97 starting up the computer from Shut down 86 from Sleep 91 Startup menu problem solving 167 supervisor password, deleting 149 supervisor password, set up 148 T taskbar 129 telephone line connecting to modem 131 television adjusting display...
... Sleep mode 83 hot key 196 starting again from 91 sound problem solving 177 sounds recording 136 speakers using external 136 start button 129 starting a program 97 Search programs and files field 99 Windows® Explorer 98 Windows® Start menu 97 starting up the computer from Shut down 86 from Sleep 91 Startup menu problem solving 167 supervisor password, deleting 149 supervisor password, set up 148 T taskbar 129 telephone line connecting to modem 131 television adjusting display...


