Datasheet
Page 1
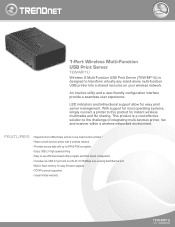
... environment. LED indicators and bidirectional support allow for easy firmware upgrade • TCP/IP protocol supported • 3-year limited warranty TEW-MP1U rev: 10.08.2009 wireless 1-Port Wireless Multi-Function USB Print Server TEW-MP1U Wireless G Multi-Function USB Print Server (TEW-MP1U) is a cost effective solution to transform virtually any stand-alone multi-function USB printer into a shared resource on your...
... environment. LED indicators and bidirectional support allow for easy firmware upgrade • TCP/IP protocol supported • 3-year limited warranty TEW-MP1U rev: 10.08.2009 wireless 1-Port Wireless Multi-Function USB Print Server TEW-MP1U Wireless G Multi-Function USB Print Server (TEW-MP1U) is a cost effective solution to transform virtually any stand-alone multi-function USB printer into a shared resource on your...
Datasheet
Page 2
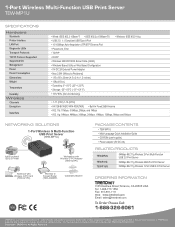
For the most recent product information please visit http://www.trendnet.com. Copyright © TRENDnet. 1-Port Wireless Multi-Function USB Print Server TEW-MP1U SPECIFICATIONS Hardware Standards Printer Interface LAN Port Diagnostic LEDs Transport Protocols TCP/IP Protocol Supported Supported OS Management Power Power Consumption Dimensions Weight Temperature Humidity Wireless Channels Encryption Data Rate • Wired: IEEE 802.3 10Base...
For the most recent product information please visit http://www.trendnet.com. Copyright © TRENDnet. 1-Port Wireless Multi-Function USB Print Server TEW-MP1U SPECIFICATIONS Hardware Standards Printer Interface LAN Port Diagnostic LEDs Transport Protocols TCP/IP Protocol Supported Supported OS Management Power Power Consumption Dimensions Weight Temperature Humidity Wireless Channels Encryption Data Rate • Wired: IEEE 802.3 10Base...
User's Guide
Page 2
Table of Contents Chapter 1 Introduction 1 Features...1 Safety Instructions ...1 Package Contents...2 Physical Details ...3 Chapter 2 Setup 5 Overview ...5 Using the Windows Wizard 5 Chapter 3 Web-Based Management 12 Overview ...12 Preparation...12 Connecting to the Wireless Print Server 12 Configuration Screens 13 Appendix A Specifications 19 General Specifications 19 Page ii
Table of Contents Chapter 1 Introduction 1 Features...1 Safety Instructions ...1 Package Contents...2 Physical Details ...3 Chapter 2 Setup 5 Overview ...5 Using the Windows Wizard 5 Chapter 3 Web-Based Management 12 Overview ...12 Preparation...12 Connecting to the Wireless Print Server 12 Configuration Screens 13 Appendix A Specifications 19 General Specifications 19 Page ii
User's Guide
Page 3
... simple and efficient network printing solution. Page 1 The Wireless Print Server supports print, copy, scan and storage functions of your local power supply, consult your new Wireless Print Server. This allows the Wireless Print Server to dangerous voltage points or other risks. Your Wireless Print Server was designed to foot ...spilled onto the product. • The product has been exposed to the device. 4. Do not place the Wireless Print Server on the marking label. If you to be serviced by qualified service personnel under the following safety advice. 1. ...
... simple and efficient network printing solution. Page 1 The Wireless Print Server supports print, copy, scan and storage functions of your local power supply, consult your new Wireless Print Server. This allows the Wireless Print Server to dangerous voltage points or other risks. Your Wireless Print Server was designed to foot ...spilled onto the product. • The product has been exposed to the device. 4. Do not place the Wireless Print Server on the marking label. If you to be serviced by qualified service personnel under the following safety advice. 1. ...
User's Guide
Page 4
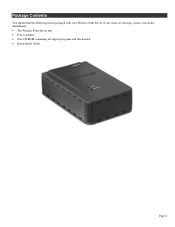
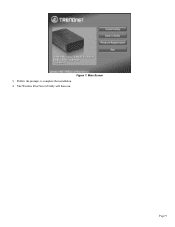
Package Contents You should find the following items packaged with your dealer immediately. • The Wireless Print Server unit • Power Adapter • One CD-ROM containing all support programs and this manual • Quick Install Guide Page 2 If any items are missing, contact your Wireless Print Server.
Package Contents You should find the following items packaged with your dealer immediately. • The Wireless Print Server unit • Power Adapter • One CD-ROM containing all support programs and this manual • Quick Install Guide Page 2 If any items are missing, contact your Wireless Print Server.

User's Guide
Page 6
.... If you continue pressing the button for 2 seconds. 3. Normal operation - transmitting or receiving packets from the network. While pressing the button, switch the Wireless Print Server ON. 3. LED Indicators The Wireless Print Server has LED indicators on the top. No printer connected. The Error LED is recessed; The Status indicator LED is green. Status LED (Green...
.... If you continue pressing the button for 2 seconds. 3. Normal operation - transmitting or receiving packets from the network. While pressing the button, switch the Wireless Print Server ON. 3. LED Indicators The Wireless Print Server has LED indicators on the top. No printer connected. The Error LED is recessed; The Status indicator LED is green. Status LED (Green...
User's Guide
Page 7
...the CD-ROM to simplify this task. • PCs wishing to use the printer attached to the Wireless Print Server always require configuration. it may be used configure the Wireless Print Server for your drive. If the setup program does not start automatically, run Autorun.exe in which your ... plug-and-play. It consists of the device. Insert the supplied CD-ROM into your Wireless Print Server. Do not connect the Wireless Print Server while power is On. • Find the Default Server Name for your PC is connecting to. Using this name; Record this Wizard is also...
...the CD-ROM to simplify this task. • PCs wishing to use the printer attached to the Wireless Print Server always require configuration. it may be used configure the Wireless Print Server for your drive. If the setup program does not start automatically, run Autorun.exe in which your ... plug-and-play. It consists of the device. Insert the supplied CD-ROM into your Wireless Print Server. Do not connect the Wireless Print Server while power is On. • Find the Default Server Name for your PC is connecting to. Using this name; Record this Wizard is also...
User's Guide
Page 8
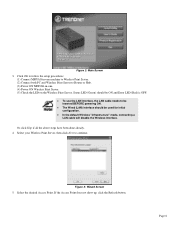
Click OK to follow the setup procedures: (1) Connect MFP/All-in-one machine to Wireless Print Server. (2) Connect both PC and Wireless Print Server to continue. Select the desired Access Point. If the Access Point does not show up, click the Refresh button. Page...Or click Skip if all the above steps have been done already. 4. Select your Wireless Print Server, then click Next to Router or Hub. (3) Power ON MFP/All-in-one. (4) Power ON Wireless Print Server. (5) Check the LED on the Wireless Print Server. Figure 3: Wizard Screen 5. Status LED (Green) should be ON and Error LED ...
Click OK to follow the setup procedures: (1) Connect MFP/All-in-one machine to Wireless Print Server. (2) Connect both PC and Wireless Print Server to continue. Select the desired Access Point. If the Access Point does not show up, click the Refresh button. Page...Or click Skip if all the above steps have been done already. 4. Select your Wireless Print Server, then click Next to Router or Hub. (3) Power ON MFP/All-in-one. (4) Power ON Wireless Print Server. (5) Check the LED on the Wireless Print Server. Figure 3: Wizard Screen 5. Status LED (Green) should be ON and Error LED ...

User's Guide
Page 10
Click Finish. Insert the supplied CD-ROM into your drive. If the desired Wireless Print Server is configured already, and you will see the following procedure: 1. If the setup program does not start, run Autorun.exe in the root folder. 2. Click... bus driver. Click PC Install to use it, do the following prompt. 11. Page 8 Figure 6: Status Screen 10. Other PCs Setup If the Wireless Print Server is not listed: • Check that both the Wireless Print Server and the printer are properly connected, and powered on. • Check that the proper Printer Driver has been installed.
Click Finish. Insert the supplied CD-ROM into your drive. If the desired Wireless Print Server is configured already, and you will see the following procedure: 1. If the setup program does not start, run Autorun.exe in the root folder. 2. Click... bus driver. Click PC Install to use it, do the following prompt. 11. Page 8 Figure 6: Status Screen 10. Other PCs Setup If the Wireless Print Server is not listed: • Check that both the Wireless Print Server and the printer are properly connected, and powered on. • Check that the proper Printer Driver has been installed.
User's Guide
Page 11
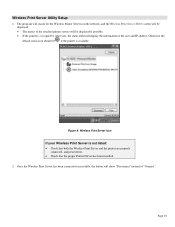
The Wireless Print Server Utility will then run. Page 9 Figure 7: Main Screen 3. Follow the prompts to complete the installation. 4.
The Wireless Print Server Utility will then run. Page 9 Figure 7: Main Screen 3. Follow the prompts to complete the installation. 4.
User's Guide
Page 12
... available. Page 10 The program will search for the Wireless Printer Servers on . • Check that both the Wireless Print Server and the printer are properly connected, and powered on the network, and the Wireless Print Server Utility screen will be displayed. • The names ... show "Disconnect" instead of the user and IP address. Once the Wireless Print Server has been connected successfully, the button will display the information of "Connect". Figure 8: Wireless Print Server Icon If your Wireless Print Server is not listed: • Check that the proper Printer Driver has ...
... available. Page 10 The program will search for the Wireless Printer Servers on . • Check that both the Wireless Print Server and the printer are properly connected, and powered on the network, and the Wireless Print Server Utility screen will be displayed. • The names ... show "Disconnect" instead of the user and IP address. Once the Wireless Print Server has been connected successfully, the button will display the information of "Connect". Figure 8: Wireless Print Server Icon If your Wireless Print Server is not listed: • Check that the proper Printer Driver has ...

User's Guide
Page 13
Page 11 Configuration is now complete. Figure 10: Idle Message The Wireless Print Server will see the following message. Figure 9: Utility Screen 3. Note: If Wireless Print Server has been idled for 5 minutes after connected, you will be disconnected automatically if you don't respond to the message within 1minute.
Page 11 Configuration is now complete. Figure 10: Idle Message The Wireless Print Server will see the following message. Figure 9: Utility Screen 3. Note: If Wireless Print Server has been idled for 5 minutes after connected, you will be disconnected automatically if you don't respond to the message within 1minute.
User's Guide
Page 14
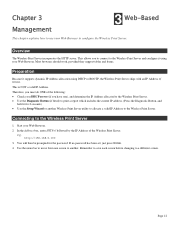
...screen. e.g. Use the menu bar to move from one ), and determine the IP Address allocated to the Wireless Print Server. • Use the Diagnostic Button (if fitted) to the Wireless Print Server. In the Address box, enter HTTP:// followed by the IP Address of the following: • Check.... 4. Page 12 This is NOT a valid IP Address. Start your DHCP server (if you to connect to configure the Wireless Print Server. Remember to save each screen before changing to the Wireless Print Server 1. http://192.168.0.100 3. Chapter 3 3 Web-Based Management This chapter explains...
...screen. e.g. Use the menu bar to move from one ), and determine the IP Address allocated to the Wireless Print Server. • Use the Diagnostic Button (if fitted) to the Wireless Print Server. In the Address box, enter HTTP:// followed by the IP Address of the following: • Check.... 4. Page 12 This is NOT a valid IP Address. Start your DHCP server (if you to connect to configure the Wireless Print Server. Remember to save each screen before changing to the Wireless Print Server 1. http://192.168.0.100 3. Chapter 3 3 Web-Based Management This chapter explains...
User's Guide
Page 15
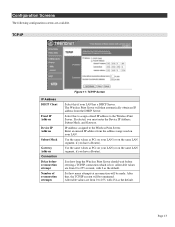
..., with 254 as the default. Enter an unused IP address from the DHCP Server. Allowable values are from 0 to 255, with 2 as the default. Sets how long the Wireless Print Server should wait before reconnection attempt Number of reconnection attempts Figure 11: TCP/IP Screen... Select this to assign a fixed IP address to the Wireless Print Server. Set how many attempts at reconnection will be made. Select this if your LAN. IP Address assigned to the Wireless Print Server. The Wireless Print Server will then automatically obtain an IP address from the address range ...
..., with 254 as the default. Enter an unused IP address from the DHCP Server. Allowable values are from 0 to 255, with 2 as the default. Sets how long the Wireless Print Server should wait before reconnection attempt Number of reconnection attempts Figure 11: TCP/IP Screen... Select this to assign a fixed IP address to the Wireless Print Server. Set how many attempts at reconnection will be made. Select this if your LAN. IP Address assigned to the Wireless Print Server. The Wireless Print Server will then automatically obtain an IP address from the address range ...
Quick Installation Guide
Page 3
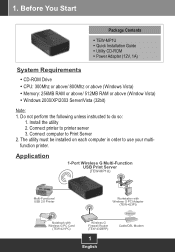
..., 1A) System Requirements ? Application 1-Port Wireless G Multi-Function USB Print Server (TEW-MP1U) Multi-Functional USB 2.0 Printer Workstation with Wireless G PCI Adapter (TEW-423PI) Internet Notebook with Wireless G PC Card (TEW-421PC) Wireless G Firewall Router (TEW-432BRP) Cable/DSL Modem 1 English Windows 2000/XP/2003 Server/Vista (32bit) Note: 1. Do not perform the following unless instructed to Print Server 2. Connect computer to do so...
..., 1A) System Requirements ? Application 1-Port Wireless G Multi-Function USB Print Server (TEW-MP1U) Multi-Functional USB 2.0 Printer Workstation with Wireless G PCI Adapter (TEW-423PI) Internet Notebook with Wireless G PC Card (TEW-421PC) Wireless G Firewall Router (TEW-432BRP) Cable/DSL Modem 1 English Windows 2000/XP/2003 Server/Vista (32bit) Note: 1. Do not perform the following unless instructed to Print Server 2. Connect computer to do so...

Quick Installation Guide
Page 6
4. Configure the IP address of the print server to and then click Next. 5. Choose a wireless network to connect to be in the same subnet as your network and then click Next. 6. Click Finish. 4 English
4. Configure the IP address of the print server to and then click Next. 5. Choose a wireless network to connect to be in the same subnet as your network and then click Next. 6. Click Finish. 4 English
Quick Installation Guide
Page 12
...Make sure the RJ-45 network cable is powered on the Utility CD-ROM or contact TRENDnet's Technical Support Department. 10 Second, connect the printer with another user is using the print server, you do ? Q4. A6. Then open up ownership of encryption (e.g. First, ... as ZoneAlarm or Norton Internet Security. Third, click Refresh. Second, after configuring your wireless network settings, make sure that your print server's IP Address. Second, disable any questions regarding the TEW-MP1U, please refer to the User's Guide included on and properly connected to locate your ...
...Make sure the RJ-45 network cable is powered on the Utility CD-ROM or contact TRENDnet's Technical Support Department. 10 Second, connect the printer with another user is using the print server, you do ? Q4. A6. Then open up ownership of encryption (e.g. First, ... as ZoneAlarm or Norton Internet Security. Third, click Refresh. Second, after configuring your wireless network settings, make sure that your print server's IP Address. Second, disable any questions regarding the TEW-MP1U, please refer to the User's Guide included on and properly connected to locate your ...