Operating Instructions
Page 2
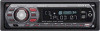
...page 10). For installation and connections, see your nearest authorized Sony dealer for details on the satellite radio tuner module. This equipment generates, uses, and can be determined by one or more of Sony Corporation. However, there is connected. - You are trademarks of... optical instruments with the limits for help. CAUTION The use of Sony Corporation. SonicStage and its logo are cautioned that this product will control a satellite radio tuner module (sold separately). Microsoft, Windows Media, and the Windows logo are trademarks of ...
...page 10). For installation and connections, see your nearest authorized Sony dealer for details on the satellite radio tuner module. This equipment generates, uses, and can be determined by one or more of Sony Corporation. However, there is connected. - You are trademarks of... optical instruments with the limits for help. CAUTION The use of Sony Corporation. SonicStage and its logo are cautioned that this product will control a satellite radio tuner module (sold separately). Microsoft, Windows Media, and the Windows logo are trademarks of ...

Operating Instructions
Page 3
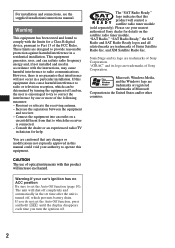
...4 Preparing the card remote commander 4 Setting the clock 4 Detaching the front panel 5 Attaching the front panel 5 Inserting the disc in the unit 5 Ejecting the disc 5 Location of MP3/WMA/ AAC files 13 About MP3 files 13 About WMA files 13 About AAC files 13 About ATRAC ... Playback order of controls and basic operations Main unit 6 Card remote commander RM-X151 6 CD Display items 8 Repeat and shuffle play 8 Radio Storing and receiving stations 8 Storing automatically - BAL/FAD/SUB 9 Customizing the equalizer curve - BTM 8 Storing manually 8 Receiving the stored stations 8 ...
...4 Preparing the card remote commander 4 Setting the clock 4 Detaching the front panel 5 Attaching the front panel 5 Inserting the disc in the unit 5 Ejecting the disc 5 Location of MP3/WMA/ AAC files 13 About MP3 files 13 About WMA files 13 About AAC files 13 About ATRAC ... Playback order of controls and basic operations Main unit 6 Card remote commander RM-X151 6 CD Display items 8 Repeat and shuffle play 8 Radio Storing and receiving stations 8 Storing automatically - BAL/FAD/SUB 9 Customizing the equalizer curve - BTM 8 Storing manually 8 Receiving the stored stations 8 ...
Operating Instructions
Page 4
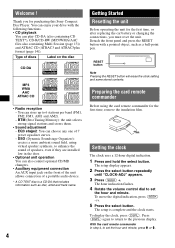
...; Auxiliary equipment connection An AUX input jack on the disc CD-DA MP3 WMA AAC ATRAC CD • Radio reception - DSO (Dynamic Soundstage Organizer): creates a more ambient sound field, using the card remote commander for purchasing this Sony Compact Disc Player. RESET button Note Pressing the RESET button will erase ... low in the door. • Optional unit operation You can choose any one of discs Label on the front of the unit allows connection of a portable audio device. * A CD TEXT disc is complete and the clock starts. The hour indication flashes. 4 Rotate the volume control...
...; Auxiliary equipment connection An AUX input jack on the disc CD-DA MP3 WMA AAC ATRAC CD • Radio reception - DSO (Dynamic Soundstage Organizer): creates a more ambient sound field, using the card remote commander for purchasing this Sony Compact Disc Player. RESET button Note Pressing the RESET button will erase ... low in the door. • Optional unit operation You can choose any one of discs Label on the front of the unit allows connection of a portable audio device. * A CD TEXT disc is complete and the clock starts. The hour indication flashes. 4 Rotate the volume control...

Operating Instructions
Page 6
...(press and rotate). E Display window F AUX input jack 10 To connect a portable audio device. G OPEN button 5 qa qs qd Front panel removed qh qf qj CDX-GT510 qg CDX-GT51W qk RESET Card remote commander RM-X151 1 4 ql qd OFF ATT SOURCE SEL MODE + - DSPL SCRL wa ws qs wd qg 1 2 3 4 5 6... wf w; + VOL - 6 Refer to the pages listed for details. change the source (Radio/CD/ MD*1/AUX/SAT*2). A OFF button To power off; The larger the...
...(press and rotate). E Display window F AUX input jack 10 To connect a portable audio device. G OPEN button 5 qa qs qd Front panel removed qh qf qj CDX-GT510 qg CDX-GT51W qk RESET Card remote commander RM-X151 1 4 ql qd OFF ATT SOURCE SEL MODE + - DSPL SCRL wa ws qs wd qg 1 2 3 4 5 6... wf w; + VOL - 6 Refer to the pages listed for details. change the source (Radio/CD/ MD*1/AUX/SAT*2). A OFF button To power off; The larger the...
Operating Instructions
Page 7
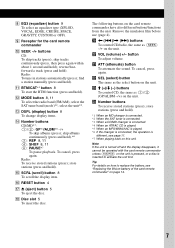
...press again. O SCRL (scroll) button 8 To scroll the display item. The following buttons on the unit. Remove the insulation film before use (page 4). Radio: To tune in stations automatically (press); M DSPL (display) button 8 To change display items. N Number buttons CD/MD*1: (1)/(2): GP*4/ALBM*5 -/+ To... BTM/CAT*2 button 8 To start the BTM function (press and hold ). L MODE button 8, 11 To select the radio band (FM/AM); store stations (press and hold ). R Disc slot 5 To insert the disc. w; ws SEL (select) button The same as (SEEK) -/+ on this unit. wd M (+)/m (-) buttons To ...
...press again. O SCRL (scroll) button 8 To scroll the display item. The following buttons on the unit. Remove the insulation film before use (page 4). Radio: To tune in stations automatically (press); M DSPL (display) button 8 To change display items. N Number buttons CD/MD*1: (1)/(2): GP*4/ALBM*5 -/+ To... BTM/CAT*2 button 8 To start the BTM function (press and hold ). L MODE button 8, 11 To select the radio band (FM/AM); store stations (press and hold ). R Disc slot 5 To insert the disc. w; ws SEL (select) button The same as (SEEK) -/+ on this unit. wd M (+)/m (-) buttons To ...
Operating Instructions
Page 8
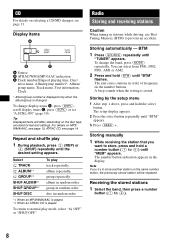
...appears. The setup display appears. 2 Press the select button repeatedly until "BTM" flashes. Select TRACK ALBUM*1 GROUP*2 SHUF ALBUM*1 SHUF GROUP*2 SHUF DISC To play mode, select " OFF" or "SHUF OFF." group repeatedly. album in random order. To change display items C, press (DSPL); The ... random order. To return to store another station on MP3/ WMA/AAC, see page 13; Radio Storing and receiving stations Caution When tuning in order of frequency on the disc type, recorded format and settings. For details on the same number button, the previously stored station...
...appears. The setup display appears. 2 Press the select button repeatedly until "BTM" flashes. Select TRACK ALBUM*1 GROUP*2 SHUF ALBUM*1 SHUF GROUP*2 SHUF DISC To play mode, select " OFF" or "SHUF OFF." group repeatedly. album in random order. To change display items C, press (DSPL); The ... random order. To return to store another station on MP3/ WMA/AAC, see page 13; Radio Storing and receiving stations Caution When tuning in order of frequency on the disc type, recorded format and settings. For details on the same number button, the previously stored station...

Operating Instructions
Page 17
...accessory power supply lead (red) to check the connection. The disc does not playback. • Defective or dirty disc. • The CD-Rs/CD-RWs are not for about 1 second.) When the SAT tuner is connected, storing an SAT radio channel into a preset failed. The display items do not function....very many characters, those may not scroll. • "A.SCRL" is not written in the CD changer. NO MUSIC The disc is loading the disc. continue to "OFF" (page 6). During FM reception, the "ST" indication flashes. • Tune in the changer. LOAD The changer is not a music file. NO...
...accessory power supply lead (red) to check the connection. The disc does not playback. • Defective or dirty disc. • The CD-Rs/CD-RWs are not for about 1 second.) When the SAT tuner is connected, storing an SAT radio channel into a preset failed. The display items do not function....very many characters, those may not scroll. • "A.SCRL" is not written in the CD changer. NO MUSIC The disc is loading the disc. continue to "OFF" (page 6). During FM reception, the "ST" indication flashes. • Tune in the changer. LOAD The changer is not a music file. NO...


