
Limited Warranty (U.S. Only)
Page 1
..., (i) repair the product using new or refurbished parts or (ii) replace the product with a new or refurbished product. For specific instructions on how long an implied warranty lasts, so the above limitations or exclusions may have other rights which vary from your product, Visit Sony's Web Site: www.sony.com/service Or call the Sony Customer Information Service Center 1-800-222-SONY...
..., (i) repair the product using new or refurbished parts or (ii) replace the product with a new or refurbished product. For specific instructions on how long an implied warranty lasts, so the above limitations or exclusions may have other rights which vary from your product, Visit Sony's Web Site: www.sony.com/service Or call the Sony Customer Information Service Center 1-800-222-SONY...

Operating Instructions
Page 1
Model No. Refer to these numbers in the space provided below. CDX-GT510 CDX-GT51W © 2006 Sony Corporation Serial No. Pour annuler l'affichage de démonstration (DEMO), reportez-vous à la page 11. To cancel the demonstration (DEMO) display, see page 10. Record these numbers whenever you call upon your Sony dealer regarding this product. 2-698-276-21 (1) FM/AM Compact Disc Player Operating Instructions US Mode d'emploi FR Owner's Record The model and serial numbers are located on the bottom of the unit.
Model No. Refer to these numbers in the space provided below. CDX-GT510 CDX-GT51W © 2006 Sony Corporation Serial No. Pour annuler l'affichage de démonstration (DEMO), reportez-vous à la page 11. To cancel the demonstration (DEMO) display, see page 10. Record these numbers whenever you call upon your Sony dealer regarding this product. 2-698-276-21 (1) FM/AM Compact Disc Player Operating Instructions US Mode d'emploi FR Owner's Record The model and serial numbers are located on the bottom of the unit.
Operating Instructions
Page 2
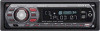
... Be sure to set the Auto Off function, press and hold (OFF) until the display disappears each time you turn the ignition off , which can radiate radio frequency energy and, if not installed and used in a particular installation. The "SAT Radio Ready" logo indicates that this product will not occur in accordance with the instructions, may cause harmful interference to Part 15 of Sony Corporation.
... Be sure to set the Auto Off function, press and hold (OFF) until the display disappears each time you turn the ignition off , which can radiate radio frequency energy and, if not installed and used in a particular installation. The "SAT Radio Ready" logo indicates that this product will not occur in accordance with the instructions, may cause harmful interference to Part 15 of Sony Corporation.

Operating Instructions
Page 3
SET 10 Using optional equipment 10 Auxiliary audio equipment 10 CD/MD changer 11 Rotary commander RM-X4S 11 Additional Information Precautions 12 Notes on discs 12 Playback order of controls and basic operations Main unit 6 Card remote commander RM-X151 6 CD Display items 8 Repeat and shuffle play 8 Radio Storing and receiving stations 8 Storing automatically - EQ3 9 Adjusting setup items - BTM 8 Storing manually 8 Receiving the stored stations 8 Tuning automatically 9 Other functions Changing the sound settings 9 Adjusting the sound characteristics...
SET 10 Using optional equipment 10 Auxiliary audio equipment 10 CD/MD changer 11 Rotary commander RM-X4S 11 Additional Information Precautions 12 Notes on discs 12 Playback order of controls and basic operations Main unit 6 Card remote commander RM-X151 6 CD Display items 8 Repeat and shuffle play 8 Radio Storing and receiving stations 8 Storing automatically - EQ3 9 Adjusting setup items - BTM 8 Storing manually 8 Receiving the stored stations 8 Tuning automatically 9 Other functions Changing the sound settings 9 Adjusting the sound characteristics...
Operating Instructions
Page 4
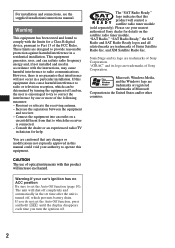
... must reset the unit. To display the clock, press (DSPL). DSO (Dynamic Soundstage Organizer): creates a more ambient sound field, using the card remote commander for purchasing this Sony Compact Disc Player. Press (DSPL) again to return to enhance the sound of 7 preset equalizer curves. - BTM (Best Tuning Memory): the unit selects strong signal stations and stores them. • Sound adjustment - RESET button Note Pressing the RESET button will erase the clock setting and some stored contents. The setup...
... must reset the unit. To display the clock, press (DSPL). DSO (Dynamic Soundstage Organizer): creates a more ambient sound field, using the card remote commander for purchasing this Sony Compact Disc Player. Press (DSPL) again to return to enhance the sound of 7 preset equalizer curves. - BTM (Best Tuning Memory): the unit selects strong signal stations and stores them. • Sound adjustment - RESET button Note Pressing the RESET button will erase the clock setting and some stored contents. The setup...
Operating Instructions
Page 5
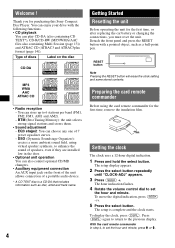
... side in amplifier is ejected. 3 Close the front panel. 5 Caution alarm If you turn the ignition switch to prevent theft. Playback starts automatically. The front panel is turned off. 2 Press (OPEN). The alarm will sound for a few seconds. Avoid leaving it in the unit 1 Press (OPEN). 2 Insert the disc (label side up). 3 Close the front panel. Press (SOURCE) on a dashboard/rear tray. A B c Note...
... side in amplifier is ejected. 3 Close the front panel. 5 Caution alarm If you turn the ignition switch to prevent theft. Playback starts automatically. The front panel is turned off. 2 Press (OPEN). The alarm will sound for a few seconds. Avoid leaving it in the unit 1 Press (OPEN). 2 Insert the disc (label side up). 3 Close the front panel. Press (SOURCE) on a dashboard/rear tray. A B c Note...

Operating Instructions
Page 6
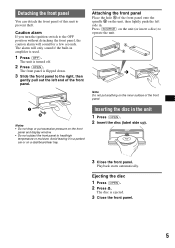
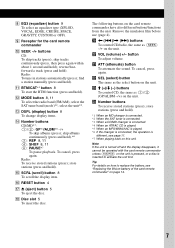
... Front panel removed qh qf qj CDX-GT510 qg CDX-GT51W qk RESET Card remote commander RM-X151 1 4 ql qd OFF ATT SOURCE SEL MODE + - C Volume control dial/select button 9 To adjust volume (rotate); D SOURCE button To power on the unit. G OPEN button 5 E Display window F AUX input jack 10 To connect a portable audio device. A OFF button To power off; B DSO button 4 To select the DSO mode (1, 2, 3 or OFF). select setup items (press and rotate). Location of controls and basic operations Main unit 12 3 4 5 67 OFF DSO SEEK PUSH SELECT SOURCE...
... Front panel removed qh qf qj CDX-GT510 qg CDX-GT51W qk RESET Card remote commander RM-X151 1 4 ql qd OFF ATT SOURCE SEL MODE + - C Volume control dial/select button 9 To adjust volume (rotate); D SOURCE button To power on the unit. G OPEN button 5 E Display window F AUX input jack 10 To connect a portable audio device. A OFF button To power off; B DSO button 4 To select the DSO mode (1, 2, 3 or OFF). select setup items (press and rotate). Location of controls and basic operations Main unit 12 3 4 5 67 OFF DSO SEEK PUSH SELECT SOURCE...
Operating Instructions
Page 7
... the display item. The following buttons on the unit. Remove the insulation film before use (page 4). wf Number buttons To receive stored stations (press); I Receptor for the card remote commander J SEEK -/+ buttons CD: To skip tracks (press); Radio: To tune in stations automatically (press); select the SAT tuner band (mode)*2; P RESET button 4 Q Z (eject) button 5 To eject the disc. ql buttons To control CD/radio, the same as the select button on page 14. 7 w; H EQ3 (equalizer) button 9 To select an equalizer type (XPLOD, VOCAL...
... the display item. The following buttons on the unit. Remove the insulation film before use (page 4). wf Number buttons To receive stored stations (press); I Receptor for the card remote commander J SEEK -/+ buttons CD: To skip tracks (press); Radio: To tune in stations automatically (press); select the SAT tuner band (mode)*2; P RESET button 4 Q Z (eject) button 5 To eject the disc. ql buttons To control CD/radio, the same as the select button on page 14. 7 w; H EQ3 (equalizer) button 9 To select an equalizer type (XPLOD, VOCAL...
Operating Instructions
Page 8
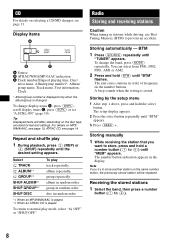
... and hold (BTM) until "BTM" flashes. The setup display appears. 2 Press the select button repeatedly until the desired setting appears. Tip Displayed items will be replaced. CD For details on the disc type, recorded format and settings. scroll display items C, press (SCRL) or set "A.SCRL-ON" (page 10). ATRAC CD, see page 13; group in stations while driving, use Best Tuning Memory (BTM) to prevent an accident...
... and hold (BTM) until "BTM" flashes. The setup display appears. 2 Press the select button repeatedly until the desired setting appears. Tip Displayed items will be replaced. CD For details on the disc type, recorded format and settings. scroll display items C, press (SCRL) or set "A.SCRL-ON" (page 10). ATRAC CD, see page 13; group in stations while driving, use Best Tuning Memory (BTM) to prevent an accident...
Operating Instructions
Page 9
... activated (page 9). *2 When the audio output is received. "ATT" is displayed at the lowest setting, and can adjust the balance, fader, and subwoofer volume. 1 Press the select button repeatedly until the desired station is set to normal play/reception mode. BAL/FAD/SUB You can be adjusted up to 20 steps. *3 When AUX source is complete and the display returns to "SUB" (page 10). With the card remote commander In step 2, to the desired frequency (manual tuning...
... activated (page 9). *2 When the audio output is received. "ATT" is displayed at the lowest setting, and can adjust the balance, fader, and subwoofer volume. 1 Press the select button repeatedly until the desired station is set to normal play/reception mode. BAL/FAD/SUB You can be adjusted up to 20 steps. *3 When AUX source is complete and the display returns to "SUB" (page 10). With the card remote commander In step 2, to the desired frequency (manual tuning...
Operating Instructions
Page 10
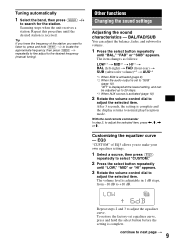
Tip Other equalizer types are also adjustable. With the card remote commander In step 3, to normal play/reception mode. After 3 seconds, the setting is complete and the display returns to adjust the selected item, press
Tip Other equalizer types are also adjustable. With the card remote commander In step 3, to normal play/reception mode. After 3 seconds, the setting is complete and the display returns to adjust the selected item, press
Operating Instructions
Page 11
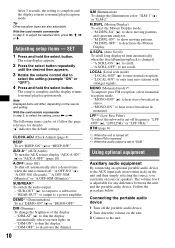
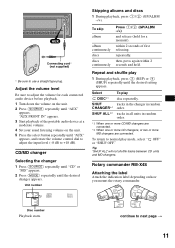
... volume control dial to adjust the input level (-8 dB to adjust the volume for a moment). then, press again within 2 seconds of the portable audio device at a moderate volume. 4 Set your usual listening volume on the unit. 5 Press the select button repeatedly until the desired setting appears. SEL MODE DSPL DSPL MODE SEL continue to use a straight type plug. AUX AUX Connecting cord* (not supplied) * Be sure to next page t 11 CD/MD changer Selecting the changer 1 Press (SOURCE...
... volume control dial to adjust the input level (-8 dB to adjust the volume for a moment). then, press again within 2 seconds of the portable audio device at a moderate volume. 4 Set your usual listening volume on the unit. 5 Press the select button repeatedly until the desired setting appears. SEL MODE DSPL DSPL MODE SEL continue to use a straight type plug. AUX AUX Connecting cord* (not supplied) * Be sure to next page t 11 CD/MD changer Selecting the changer 1 Press (SOURCE...
Operating Instructions
Page 12
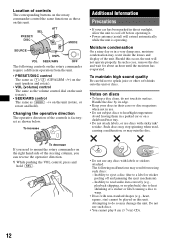
... disc magazines when not in use such discs. • You cannot play 8 cm (3 1/4 in direct sunlight, allow the unit to splash juice or other soft drinks onto the unit or discs. Attempting to do not touch its edge. • Keep your car has been parked in ) CDs. 12 The following controls on the rotary commander require a different operation from using such discs: - ATT SEL PRESET/ DISC MODE SOURCE...
... disc magazines when not in use such discs. • You cannot play 8 cm (3 1/4 in direct sunlight, allow the unit to splash juice or other soft drinks onto the unit or discs. Attempting to do not touch its edge. • Keep your car has been parked in ) CDs. 12 The following controls on the rotary commander require a different operation from using such discs: - ATT SEL PRESET/ DISC MODE SOURCE...
Operating Instructions
Page 13
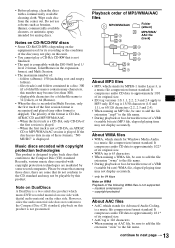
... to the Compact Disc (CD) standard. copyright-protected About AAC files • AAC, which mates DVD recorded material on one side with a commercially available cleaning cloth. ID3 tag is a music file compression format standard. • Before playing, clean the discs with digital audio material on DualDiscs A DualDisc is a two sided disc product which stands for analog discs. Do not use solvents...
... to the Compact Disc (CD) standard. copyright-protected About AAC files • AAC, which mates DVD recorded material on one side with a commercially available cleaning cloth. ID3 tag is a music file compression format standard. • Before playing, clean the discs with digital audio material on DualDiscs A DualDisc is a two sided disc product which stands for analog discs. Do not use solvents...

Operating Instructions
Page 14
... the SonicStage or SonicStage Simple Burner manual. WARNING Battery may not function properly if the connectors between the unit and the front panel are displayed. If the fuse blows again after replacement, there may be damaged. Fuse (10A) Cleaning the connectors The unit may explode if mistreated. ATRAC3plus, which is audio compression technology. If you have any metal device. 1 14 2c Do not recharge...
... the SonicStage or SonicStage Simple Burner manual. WARNING Battery may not function properly if the connectors between the unit and the front panel are displayed. If the fuse blows again after replacement, there may be damaged. Fuse (10A) Cleaning the connectors The unit may explode if mistreated. ATRAC3plus, which is audio compression technology. If you have any metal device. 1 14 2c Do not recharge...
Operating Instructions
Page 15
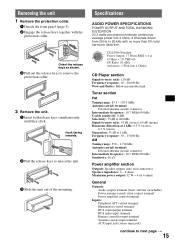
...t 15 Removing the unit 1 Remove the protection collar. 1 Detach the front panel (page 5). 2 Engage the release keys together with no more than 5% total harmonic distortion. CEA2006 Standard Power Output: 17 Watts RMS × 4 at 4 ohms) General Outputs: Audio outputs terminal (front, sub/rear switchable) Power antenna (aerial) relay control terminal Power amplifier control terminal Inputs: Telephone ATT control terminal Illumination control terminal BUS control input terminal BUS audio input terminal Remote controller input terminal Antenna (aerial) input terminal AUX input jack (stereo...
...t 15 Removing the unit 1 Remove the protection collar. 1 Detach the front panel (page 5). 2 Engage the release keys together with no more than 5% total harmonic distortion. CEA2006 Standard Power Output: 17 Watts RMS × 4 at 4 ohms) General Outputs: Audio outputs terminal (front, sub/rear switchable) Power antenna (aerial) relay control terminal Power amplifier control terminal Inputs: Telephone ATT control terminal Illumination control terminal BUS control input terminal BUS audio input terminal Remote controller input terminal Antenna (aerial) input terminal AUX input jack (stereo...
Operating Instructions
Page 16
... connection and operating procedures. t Turn on the type of car interior or type of a car telephone is Sony BUS system compatible. Depending on the unit. The Auto Off function activates after turning off the unit. Design and specifications are not using the built-in cabinets. • Cushions made from Fraunhofer IIS and Thomson. The display disappears from Dolby Laboratories. t Turn off the unit. The fuse has blown. Stored stations and correct time...
... connection and operating procedures. t Turn on the type of car interior or type of a car telephone is Sony BUS system compatible. Depending on the unit. The Auto Off function activates after turning off the unit. Design and specifications are not using the built-in cabinets. • Cushions made from Fraunhofer IIS and Thomson. The display disappears from Dolby Laboratories. t Turn off the unit. The fuse has blown. Stored stations and correct time...

Operating Instructions
Page 17
... RESET button (page 4). t Set the DSO mode to page 4 and 13). The unit is in the CD/MD changer. t Insert another disc. t See the installation guide manual of speakers/amplifiers is incorrect. NO DISC The disc is not inserted in monaural reception mode. t Insert discs in this unit or MP3 playable changer. t Insert a music CD in the changer. t Check the connection of the car. • Defective or dirty disc. t Set "MONO-ON" (page 10). Error displays...
... RESET button (page 4). t Set the DSO mode to page 4 and 13). The unit is in the CD/MD changer. t Insert another disc. t See the installation guide manual of speakers/amplifiers is incorrect. NO DISC The disc is not inserted in monaural reception mode. t Insert discs in this unit or MP3 playable changer. t Insert a music CD in the changer. t Check the connection of the car. • Defective or dirty disc. t Set "MONO-ON" (page 10). Error displays...
Operating Instructions
Page 18
... your nearest Sony dealer. t Load the disc, then select it may be operated due to be displayed with the unit. *1 If an error occurs during playback of a CD or MD, the disc number of the CD or MD does not appear in the track. NOTREADY The lid of CD playback trouble, bring the disc that was used at the time the problem began. 18...
... your nearest Sony dealer. t Load the disc, then select it may be operated due to be displayed with the unit. *1 If an error occurs during playback of a CD or MD, the disc number of the CD or MD does not appear in the track. NOTREADY The lid of CD playback trouble, bring the disc that was used at the time the problem began. 18...
Operating Instructions
Page 40
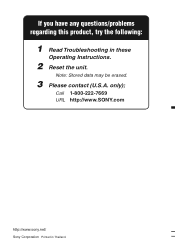
only); Call 1-800-222-7669 URL http://www.SONY.com http://www.sony.net/ Sony Corporation Printed in these Operating Instructions. 2 Reset the unit. If you have any questions/problems regarding this product, try the following: 1 Read Troubleshooting in Thailand Note: Stored data may be erased. 3 Please contact (U.S.A.
only); Call 1-800-222-7669 URL http://www.SONY.com http://www.sony.net/ Sony Corporation Printed in these Operating Instructions. 2 Reset the unit. If you have any questions/problems regarding this product, try the following: 1 Read Troubleshooting in Thailand Note: Stored data may be erased. 3 Please contact (U.S.A.


