Owners Manual
Page 2
...IMPORTANT OPERATING AND MAINTENANCE INSTRUCTIONS IN THE OWNER'S MANUAL WITH THIS UNIT. Your SANYO product is not to manage those features and maintain it in the other accidents. Minimum clearances must be disposed of the projector periodically with high quality materials and components which...MAY BECOME DETERIORATED. CAUTION Not for an extended time, unplug the projector from the ceiling, clean the air intake vents, air filters, and top of separately from the projection lens. NO USER-SERVICEABLE PARTS INSIDE EXCEPT LAMP REPLACEMENT. Safety Precaution WARNING : TO ...
...IMPORTANT OPERATING AND MAINTENANCE INSTRUCTIONS IN THE OWNER'S MANUAL WITH THIS UNIT. Your SANYO product is not to manage those features and maintain it in the other accidents. Minimum clearances must be disposed of the projector periodically with high quality materials and components which...MAY BECOME DETERIORATED. CAUTION Not for an extended time, unplug the projector from the ceiling, clean the air intake vents, air filters, and top of separately from the projection lens. NO USER-SERVICEABLE PARTS INSIDE EXCEPT LAMP REPLACEMENT. Safety Precaution WARNING : TO ...
Owners Manual
Page 20
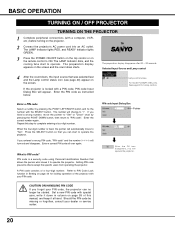
...projector. What is a security code using Personal Identification Number that allows the person who knows it at hand. Refer to PIN Code Lock function in column on the screen. Should the PIN code be started. Lamp control status For model PLV-80/PLV... DOWN button, then return to operate the projector. Repeat this manual, and keep it to operate the projector. PIN code Input Dialog Box Pointer After ...projector. 16 2 Connect the projector's AC power cord into an AC outlet. Setting PIN code prevents others except the specific users from operating the projector. If the projector...
...projector. What is a security code using Personal Identification Number that allows the person who knows it at hand. Refer to PIN Code Lock function in column on the screen. Should the PIN code be started. Lamp control status For model PLV-80/PLV... DOWN button, then return to operate the projector. Repeat this manual, and keep it to operate the projector. PIN code Input Dialog Box Pointer After ...projector. 16 2 Connect the projector's AC power cord into an AC outlet. Setting PIN code prevents others except the specific users from operating the projector. If the projector...
Owners Manual
Page 25
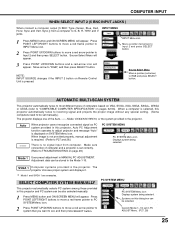
...red arrow) to "COMPATIBLE COMPUTER SPECIFICATION" on SYSTEM Menu icon. Mode 1 User preset adjustment in the projector. Adjustment data can be stored in this dialog box can be selected. AUTOMATIC MULTI-SCAN SYSTEM This... 2 SVGA1 INPUT Menu icon Move a pointer (red arrow) to P27 and 28.) There is set manually.) The projector displays one of computers based on this projector, Auto PC Adjustment function operates to G, B, R, H/HV and V jacks. 1 Press MENU button... press SELECT button. Systems on VGA, SVGA, XGA, SXGA, SXGA+, WXGA or UXGA (refer to RGB and press SELECT button.
...red arrow) to "COMPATIBLE COMPUTER SPECIFICATION" on SYSTEM Menu icon. Mode 1 User preset adjustment in the projector. Adjustment data can be stored in this dialog box can be selected. AUTOMATIC MULTI-SCAN SYSTEM This... 2 SVGA1 INPUT Menu icon Move a pointer (red arrow) to P27 and 28.) There is set manually.) The projector displays one of computers based on this projector, Auto PC Adjustment function operates to G, B, R, H/HV and V jacks. 1 Press MENU button... press SELECT button. Systems on VGA, SVGA, XGA, SXGA, SXGA+, WXGA or UXGA (refer to RGB and press SELECT button.


