User Manual (ENGLISH)
Page 26
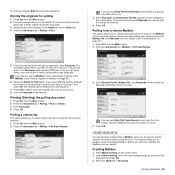
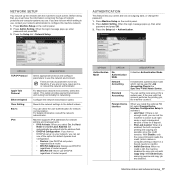
...set up TCP/IP network parameters, follow the steps listed below. 1. Make sure you to the FTP or SMB servers. - Press Admin Setting. 5. Touch the password input area, then the question marks appears. Press the Setup tab > Network Setup. 7. Select Static and then enter IP Address, ...Subnet Mask and Gateway address fields. SyncThru™ Web Admin Service provides you with an efficient way of managing network devices and lets...
...set up TCP/IP network parameters, follow the steps listed below. 1. Make sure you to the FTP or SMB servers. - Press Admin Setting. 5. Touch the password input area, then the question marks appears. Press the Setup tab > Network Setup. 7. Select Static and then enter IP Address, ...Subnet Mask and Gateway address fields. SyncThru™ Web Admin Service provides you with an efficient way of managing network devices and lets...
User Manual (ENGLISH)
Page 29
...to the following steps. 1. Press the Setup tab > Authentication. 5. Password. 6. When the login message appears, enter password with number keypad and press OK. (See "Setting the authentication password" on page 28.) 4. Press OK. Press Admin Setting. 3. Select the desired language. 7. Press Timers. 6. Press ...saving features. 1. Press Machine Setup on the control panel. 2. Press OK. When the login message appears, enter password. Press Change Admin. Setting the date and time When you need to reset the correct time and date once the power has been restored...
...to the following steps. 1. Press the Setup tab > Authentication. 5. Password. 6. When the login message appears, enter password with number keypad and press OK. (See "Setting the authentication password" on page 28.) 4. Press OK. Press Admin Setting. 3. Select the desired language. 7. Press Timers. 6. Press ...saving features. 1. Press Machine Setup on the control panel. 2. Press OK. When the login message appears, enter password. Press Change Admin. Setting the date and time When you need to reset the correct time and date once the power has been restored...
User Manual (ENGLISH)
Page 30
... to fix the network parameter automatically. From the Windows Start menu, select All Programs > Samsung Network Printer Utilities > SetIP. 3. Click OK, and then the machine prints the network information... line. If the optional tray is not installed, the tray options on page 79.) 2. Press Admin Setting. 3. For example, if you use Macintosh or Linux OS, see Software section • ... keys or vice versa. Saves and closes input result. When the login message appears, enter password with your computer operating system, and install the program. Especially, it without a colon(:). 5....
... to fix the network parameter automatically. From the Windows Start menu, select All Programs > Samsung Network Printer Utilities > SetIP. 3. Click OK, and then the machine prints the network information... line. If the optional tray is not installed, the tray options on page 79.) 2. Press Admin Setting. 3. For example, if you use Macintosh or Linux OS, see Software section • ... keys or vice versa. Saves and closes input result. When the login message appears, enter password with your computer operating system, and install the program. Especially, it without a colon(:). 5....

User Manual (ENGLISH)
Page 39
... the application program you need to Copy and Fax modes. Press Machine Setup on the control panel. 6. When the login message appears, enter password with an uncurled edge toward the machine. • Card stock: Print side up and the short edge entering the machine first. • ...type. The settings made from the printer driver override the settings on the control panel. 2. Press Admin Setting. 3. Press the down with number keypad and press OK. (See "Setting the authentication password" on page 38 for copying and faxing or the Software section for the multi-purpose tray. ...
... the application program you need to Copy and Fax modes. Press Machine Setup on the control panel. 6. When the login message appears, enter password with an uncurled edge toward the machine. • Card stock: Print side up and the short edge entering the machine first. • ...type. The settings made from the printer driver override the settings on the control panel. 2. Press Admin Setting. 3. Press the down with number keypad and press OK. (See "Setting the authentication password" on page 38 for copying and faxing or the Software section for the multi-purpose tray. ...
User Manual (ENGLISH)
Page 44
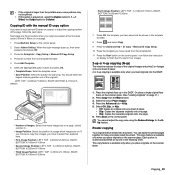
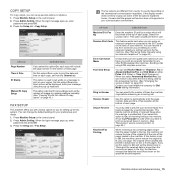
Place the originals face up , then enter password and press OK. 3 Press the Setup tab > Copy Setup > Mamual ID Copy Setup. 4 Press the number from the template list table. 5 Press Edit Template. 6 Selec ... reduces the size of the original images and prints 2 or 4 pages onto one sheet of the page, follow the instruction on the control panel. 2 Select Admin Setting. Copying_ 43 • If the original is larger than the printable area, some portions may not be printed. • If this option is available...
Place the originals face up , then enter password and press OK. 3 Press the Setup tab > Copy Setup > Mamual ID Copy Setup. 4 Press the number from the template list table. 5 Press Edit Template. 6 Selec ... reduces the size of the original images and prints 2 or 4 pages onto one sheet of the page, follow the instruction on the control panel. 2 Select Admin Setting. Copying_ 43 • If the original is larger than the printable area, some portions may not be printed. • If this option is available...
User Manual (ENGLISH)
Page 59
... In some countries, you are required by law to the Basic tab. Press Admin Setting. Press Fax from the Main screen. 2. If the originals are using ... tab • Original Size: Selects the size of the original document. Each mailbox has a corresponding mailbox number, name and password. (See "Using Mailbox" on page 63.) • Back: Returns to indicate your fax number. 5. Press the Setup ... (See "Erase Background" on page 61.) • Color Mode: Selects whether the user sends the fax in mono or color. (See "Color Mode" on page 61.) • Back: Returns to the Basic tab. 58 _Faxing...
... In some countries, you are required by law to the Basic tab. Press Admin Setting. Press Fax from the Main screen. 2. If the originals are using ... tab • Original Size: Selects the size of the original document. Each mailbox has a corresponding mailbox number, name and password. (See "Using Mailbox" on page 63.) • Back: Returns to indicate your fax number. 5. Press the Setup ... (See "Erase Background" on page 61.) • Color Mode: Selects whether the user sends the fax in mono or color. (See "Color Mode" on page 61.) • Back: Returns to the Basic tab. 58 _Faxing...
User Manual (ENGLISH)
Page 60
... Select Duplex and Resolution options in the Image tab. 3. Color faxes are only supported when faxes are set in the Image tab. 4. Select Admin Setting. Adjust the document settings in the Basic tab. 5. Place the originals face up into the DADF. 3. Press On. 6. Press OK ... Delay Send. 5. Faxing (Optional)_ 59 Select Redial Term and Redial Times. 6. Place the originals face up , then enter password and press OK. (See "Setting the authentication password" on the control panel. • If the number is no answer, the machine automatically redials the number. Select a fax...
... Select Duplex and Resolution options in the Image tab. 3. Color faxes are only supported when faxes are set in the Image tab. 4. Select Admin Setting. Adjust the document settings in the Basic tab. 5. Place the originals face up into the DADF. 3. Press On. 6. Press OK ... Delay Send. 5. Faxing (Optional)_ 59 Select Redial Term and Redial Times. 6. Place the originals face up , then enter password and press OK. (See "Setting the authentication password" on the control panel. • If the number is no answer, the machine automatically redials the number. Select a fax...
User Manual (ENGLISH)
Page 61
...your received faxes from being accessed by unauthorized people. Place the originals face up , then enter password and press OK. (See "Setting the authentication password" on page 28.) 3. Press OK. 7. Select Admin Setting. Press the Setup tab > Fax Setup > Fax Initial Setup > Receive Mode. 4. When... buttons slowly in the Image tab and the Basic tab. 4. When the login message pops up , then enter password and press OK. (See "Setting the authentication password" on the extension telephone, without going to this case, the received fax will interrupt a sending to multiple destinations ...
...your received faxes from being accessed by unauthorized people. Place the originals face up , then enter password and press OK. (See "Setting the authentication password" on page 28.) 3. Press OK. 7. Select Admin Setting. Press the Setup tab > Fax Setup > Fax Initial Setup > Receive Mode. 4. When... buttons slowly in the Image tab and the Basic tab. 4. When the login message pops up , then enter password and press OK. (See "Setting the authentication password" on the extension telephone, without going to this case, the received fax will interrupt a sending to multiple destinations ...
User Manual (ENGLISH)
Page 64
... Delete On Poll option. Press OK to start polling, you do not want to use Delay Poll From Remote to program up , then enter the password and press OK. 3. Press the Advanced tab > Polling > Print (or Delete). 3. This feature allows you can use the scanner glass with ...a single original document, face down. 3. Select Admin Setting. If you to store the originals into memory for polling without any passcode. Press Fax from Remote. 5. Press Fax from Remote. 3. You can store...
... Delete On Poll option. Press OK to start polling, you do not want to use Delay Poll From Remote to program up , then enter the password and press OK. 3. Press the Advanced tab > Polling > Print (or Delete). 3. This feature allows you can use the scanner glass with ...a single original document, face down. 3. Select Admin Setting. If you to store the originals into memory for polling without any passcode. Press Fax from Remote. 5. Press Fax from Remote. 3. You can store...
User Manual (ENGLISH)
Page 66
... "Setting the authentication password" on the control panel. 2. If you firstly set the end date and time with the On Hook Dial button on the right side. 5. Press Machine Setup on page 28.) 3. Press On. 5. Press Admin Setting. When the login message pops up , enter password and press OK.... (See "Setting the authentication password" on the control panel. 2. Press End Time and set the mail server and IP address in...
... "Setting the authentication password" on the control panel. 2. If you firstly set the end date and time with the On Hook Dial button on the right side. 5. Press Machine Setup on page 28.) 3. Press On. 5. Press Admin Setting. When the login message pops up , enter password and press OK.... (See "Setting the authentication password" on the control panel. 2. Press End Time and set the mail server and IP address in...
User Manual (ENGLISH)
Page 67
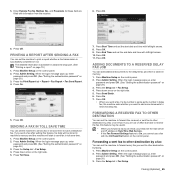
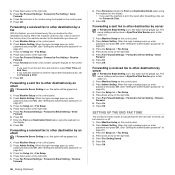
... fax, a fax is on page 28.) 3. Press the Setup tab > Fax Setup. 4. Press Admin Setting. When the login message pops up , enter password and press OK. (See "Setting the authentication password" on page 28.) 3. Press Fax Forward Settings > Forward to Server Setting > Receive Forward. 6.... Press OK. When the login message pops up , enter password and press OK. (See "Setting the authentication password" on page 28.) 3. Press Admin Setting. Press Admin Setting. Press OK. The server setting must be grayed out. 4. Press down arrow on the...
... fax, a fax is on page 28.) 3. Press the Setup tab > Fax Setup. 4. Press Admin Setting. When the login message pops up , enter password and press OK. (See "Setting the authentication password" on page 28.) 3. Press Fax Forward Settings > Forward to Server Setting > Receive Forward. 6.... Press OK. When the login message pops up , enter password and press OK. (See "Setting the authentication password" on page 28.) 3. Press Admin Setting. Press Admin Setting. Press OK. The server setting must be grayed out. 4. Press down arrow on the...
User Manual (ENGLISH)
Page 73
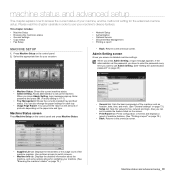
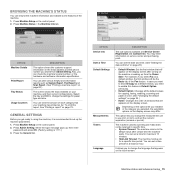
... machine, and the method of setting for each tray. • Usage Page Report: You can set the password, you have to enter the password every time you press Admin Setting, a login message appears. Use up . Enter password and press OK. (Factory setting is 1111.) • Tray Management: Shows the currently installed tray and their... this chapter carefully in order to use your machine. (See "Browsing the machine's status" on the paper size and type. When you want to use Admin Setting. (See "Setting the authentication password" on the control panel. 2.
... machine, and the method of setting for each tray. • Usage Page Report: You can set the password, you have to enter the password every time you press Admin Setting, a login message appears. Use up . Enter password and press OK. (Factory setting is 1111.) • Tray Management: Shows the currently installed tray and their... this chapter carefully in order to use your machine. (See "Browsing the machine's status" on the paper size and type. When you want to use Admin Setting. (See "Setting the authentication password" on the control panel. 2.
User Manual (ENGLISH)
Page 74
.... • System Timeout: The machine returns to the default value after turning on the touch screen. When the login message pops up, then enter password and press OK. (Factory setting is recommended to using the machine, it is 1111.) 3. In case you want to show ID Copy as a ... of windows that appears on the machine or waking up the machine parameters. 1. You can set the numeric separation (comma or period). Press Admin Setting. This option lets you selected, the selectable options on the display screen. It allows you stored from the Power Save. Press Machine Setup...
.... • System Timeout: The machine returns to the default value after turning on the touch screen. When the login message pops up, then enter password and press OK. (Factory setting is recommended to using the machine, it is 1111.) 3. In case you want to show ID Copy as a ... of windows that appears on the machine or waking up the machine parameters. 1. You can set the numeric separation (comma or period). Press Admin Setting. This option lets you selected, the selectable options on the display screen. It allows you stored from the Power Save. Press Machine Setup...
User Manual (ENGLISH)
Page 76
...Setup. You can change the default settings for your received faxes from being used by unauthorized people. When the login message pops up , enter password and press OK. 3. This option usually pre-set to Off, the machine cannot reduce the original to fit onto one page. Receive Header...pages. Machine status and advanced setup_ 75 When the login message pops up , enter password and press OK. 3. Press Machine Setup on the control panel. 2. Press the Setup tab > Fax Setup. Press Admin Setting. If the display screen does not show or gray out some of each page....
...Setup. You can change the default settings for your received faxes from being used by unauthorized people. When the login message pops up , enter password and press OK. 3. This option usually pre-set to Off, the machine cannot reduce the original to fit onto one page. Receive Header...pages. Machine status and advanced setup_ 75 When the login message pops up , enter password and press OK. 3. Press Machine Setup on the control panel. 2. Press the Setup tab > Fax Setup. Press Admin Setting. If the display screen does not show or gray out some of each page....
User Manual (ENGLISH)
Page 78
Press Admin Setting. When the login message pops up , then enter password and press OK. 3. Press Machine Setup on the control panel. 2. Reverts the network settings to cancel a job right away or wait a designated amount of router .... You can set up the network with the machine's touch screen. Press Machine Setup on the control panel. 2. When the login message pops up , enter password and press OK. 3. This option provides packet transmission and routing functionality for network communication. Machine status and advanced setup_ 77 There are lots of parameters...
Press Admin Setting. When the login message pops up , then enter password and press OK. 3. Press Machine Setup on the control panel. 2. Reverts the network settings to cancel a job right away or wait a designated amount of router .... You can set up the network with the machine's touch screen. Press Machine Setup on the control panel. 2. When the login message pops up , enter password and press OK. 3. This option provides packet transmission and routing functionality for network communication. Machine status and advanced setup_ 77 There are lots of parameters...
User Manual (ENGLISH)
Page 79
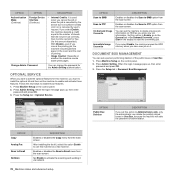
... Set Enable to the General tab > On Demand Overwrite, press Start in User Box, because the machine will asks the password of administrator. Press Admin Setting. DOCUMENT BOX MANAGEMENT You can set the machine to FTP option from the scan screen. Press the Setup tab > ...Public Box Deletion DESCRIPTION If you save new job on it. Change Admin. Press Machine Setup on the control panel. 2. OPTION DESCRIPTION Scan to SMB Enables or disables the Scan to start the overwriting job. Password You can delete the publicly stored boxes in the display to SMB...
... Set Enable to the General tab > On Demand Overwrite, press Start in User Box, because the machine will asks the password of administrator. Press Admin Setting. DOCUMENT BOX MANAGEMENT You can set the machine to FTP option from the scan screen. Press the Setup tab > ...Public Box Deletion DESCRIPTION If you save new job on it. Change Admin. Press Machine Setup on the control panel. 2. OPTION DESCRIPTION Scan to SMB Enables or disables the Scan to start the overwriting job. Password You can delete the publicly stored boxes in the display to SMB...
User Manual (ENGLISH)
Page 80
... You can print a report on the control panel. 2. Press Machine Setup on the machine's configuration or font list, etcetera. 1. Press Admin Setting. Log Report Usage Page Report Accounting Report Standard Acct. It displays user login IDs and emails. Fax Report You can select whether the... stores the logs on the machine's overall configuration. Machine status and advanced setup_ 79 When the login message pops up, then enter password and press OK. 3. OPTION Print Accounting Reports OPTION Supplies Information Network Auth. Usage Report Standard Acct. Prints the report of error ...
... You can print a report on the control panel. 2. Press Machine Setup on the machine's configuration or font list, etcetera. 1. Press Admin Setting. Log Report Usage Page Report Accounting Report Standard Acct. It displays user login IDs and emails. Fax Report You can select whether the... stores the logs on the machine's overall configuration. Machine status and advanced setup_ 79 When the login message pops up, then enter password and press OK. 3. OPTION Print Accounting Reports OPTION Supplies Information Network Auth. Usage Report Standard Acct. Prints the report of error ...

User Manual (ENGLISH)
Page 81
...supplies list view the percentage remaining. Press Machine Setup on the control panel. 2. Press Admin Setting. Press Machine Setup on the control panel. 2. When the login message pops up , then enter password and press OK. 3. Press the General tab > Supplies Management > Toner Cartridge Reorder ...the control panel. 2. Press Machine Status > the Machine Info tab > Machine Details. When the login message pops up , then enter password and press OK. 3. SENDING THE TONER REORDER NOTIFICATION You can set the remained life level. 5. Press OK. 80 _Maintenance Press Machine Status...
...supplies list view the percentage remaining. Press Machine Setup on the control panel. 2. Press Admin Setting. Press Machine Setup on the control panel. 2. When the login message pops up , then enter password and press OK. 3. Press the General tab > Supplies Management > Toner Cartridge Reorder ...the control panel. 2. Press Machine Status > the Machine Info tab > Machine Details. When the login message pops up , then enter password and press OK. 3. SENDING THE TONER REORDER NOTIFICATION You can set the remained life level. 5. Press OK. 80 _Maintenance Press Machine Status...

User Manual (ENGLISH)
Page 112
Change the country, then some the values for fax and paper size will be changed automatically for your country. Close the finisher cover. Press Machine Setup on page 28.) 4. Installing accessories_ 111 Press Country. ENABLING FAX FEATURE AFTER INSTALLING THE FAX OPTION KIT After installing the Fax kit, you have to set up the machine in order to use this function. 1. When the login message appears, enter password with number keypad and press OK. (See "Setting the authentication password" on the control panel. 2. 7. Press the General tab. 5. Press Admin Setting. 3.
Change the country, then some the values for fax and paper size will be changed automatically for your country. Close the finisher cover. Press Machine Setup on page 28.) 4. Installing accessories_ 111 Press Country. ENABLING FAX FEATURE AFTER INSTALLING THE FAX OPTION KIT After installing the Fax kit, you have to set up the machine in order to use this function. 1. When the login message appears, enter password with number keypad and press OK. (See "Setting the authentication password" on the control panel. 2. 7. Press the General tab. 5. Press Admin Setting. 3.
SyncThru 5.0 Job Accounting Plug-in Guide (ENGLISH)
Page 8
...number of what jobs have a valid ID and password and must enter a valid Job Accounting ID and password. For printing jobs, users need to enter valid IDs and passwords on page 28). • Maximum of the SyncThru™ Admin 5 Job Accounting Plug-in • Tips for ... the statuses of assigned permissions and job records of every document that support the SyncThru™ Admin 5 feature. Therefore, with Samsung devices. Users can enable Job Accounting features via SyncThru™ Admin 5, add users, and set a job limit for imaging and printing devices. Overview The SyncThru...
...number of what jobs have a valid ID and password and must enter a valid Job Accounting ID and password. For printing jobs, users need to enter valid IDs and passwords on page 28). • Maximum of the SyncThru™ Admin 5 Job Accounting Plug-in • Tips for ... the statuses of assigned permissions and job records of every document that support the SyncThru™ Admin 5 feature. Therefore, with Samsung devices. Users can enable Job Accounting features via SyncThru™ Admin 5, add users, and set a job limit for imaging and printing devices. Overview The SyncThru...


