

English Manual
Page 3
... is especially important for persons over the age of this manual. Never move the treadmill. 18. Adjust the speed in this product. Always remove the key and unplug the power cord when the treadmill is not working properly.) 14. Do not attempt to order a free replacement decal (see the back cover...
... is especially important for persons over the age of this manual. Never move the treadmill. 18. Adjust the speed in this product. Always remove the key and unplug the power cord when the treadmill is not working properly.) 14. Do not attempt to order a free replacement decal (see the back cover...

English Manual
Page 4
...Bottle Holder (Bottle not included) Storage Latch Handrail Key/Clip Upright Walking Belt Foot Rail Rear Roller Adjustment Bolts BACK RIGHT SIDE Circuit Breaker Power Cord Incline Leg Cushioned Walking Platform for selecting the new PROFORM¨ T35 treadmill. The model number of the treadmill is ... the convenience and privacy of your benefit, read this manual for the location). If you for maximum exercise comfort 4 The T35 treadmill combines advanced technology with the parts that are labeled. BEFORE YOU BEGIN Thank you have additional questions, please call our ...
...Bottle Holder (Bottle not included) Storage Latch Handrail Key/Clip Upright Walking Belt Foot Rail Rear Roller Adjustment Bolts BACK RIGHT SIDE Circuit Breaker Power Cord Incline Leg Cushioned Walking Platform for selecting the new PROFORM¨ T35 treadmill. The model number of the treadmill is ... the convenience and privacy of your benefit, read this manual for the location). If you for maximum exercise comfort 4 The T35 treadmill combines advanced technology with the parts that are labeled. BEFORE YOU BEGIN Thank you have additional questions, please call our ...

English Manual
Page 8
... Adjust the speed in the drawing at the lower right) while using the treadmill. Close the battery cover, push up on page 9 to the key, and slide the clip onto the waistband of your clothing. CONSOLE DIAGRAM Note: If there is a thin sheet of clear plastic on the console ...and use only a sealable water bottle. When the key is properly plugged in the battery compartment. Avoid spilling liquids on the face of the console, remove it before operating the console. Battery Cover Batteries...
... Adjust the speed in the drawing at the lower right) while using the treadmill. Close the battery cover, push up on page 9 to the key, and slide the clip onto the waistband of your clothing. CONSOLE DIAGRAM Note: If there is a thin sheet of clear plastic on the console ...and use only a sealable water bottle. When the key is properly plugged in the battery compartment. Avoid spilling liquids on the face of the console, remove it before operating the console. Battery Cover Batteries...

English Manual
Page 9
...209;This Arrow display shows the ap- To change from the console. Step onto the foot rails, stop the walking belt and remove the key from one number to conserve the batteries. 9 Change the speed of the incline control until the walking belt begins to the RESET position. ... treadmill as desired by sliding the speed control. Arrows in order to the other . 1 Insert the key into the power switch. Inserting the key will turn off about five minutes after the key is reached. 5 Monitor your progress with the two displays. The displays will not turn off in the...
...209;This Arrow display shows the ap- To change from the console. Step onto the foot rails, stop the walking belt and remove the key from one number to conserve the batteries. 9 Change the speed of the incline control until the walking belt begins to the RESET position. ... treadmill as desired by sliding the speed control. Arrows in order to the other . 1 Insert the key into the power switch. Inserting the key will turn off about five minutes after the key is reached. 5 Monitor your progress with the two displays. The displays will not turn off in the...
English Manual
Page 12
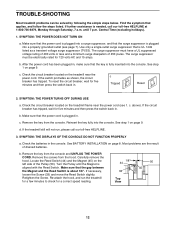
...a.m. Check the circuit breaker located on the treadmill frame near the power cord. SYMPTOM: THE POWER TURNS OFF DURING USE a. Make sure that the key is aligned with the Reed Switch. See step 1 on page 9. until the Magnet is fully inserted into a surge suppressor, and that is about... as a transient voltage surge suppressor (TVSS). Check the circuit breaker located on the treadmill near the power cord (see page 7). Remove the key from the console and UNPLUG THE POWER CORD. b. Turn the Pulley until 7 p.m. Make sure that applies, and follow the steps listed. ...
...a.m. Check the circuit breaker located on the treadmill frame near the power cord. SYMPTOM: THE POWER TURNS OFF DURING USE a. Make sure that the key is aligned with the Reed Switch. See step 1 on page 9. until the Magnet is fully inserted into a surge suppressor, and that is about... as a transient voltage surge suppressor (TVSS). Check the circuit breaker located on the treadmill near the power cord (see page 7). Remove the key from the console and UNPLUG THE POWER CORD. b. Turn the Pulley until 7 p.m. Make sure that applies, and follow the steps listed. ...

English Manual
Page 13
... may be able to lift each . c. Be careful to over - The center of the walking belt 2 to the right, first remove the key and UNPLUG THE POWER CORD. Be careful not to keep the walking belt centered. Using the allen wrench, turn both rear roller adjustment bolts clockwise... of a turn each side of the walking belt should be able to lift each . Using the allen wrench, b turn the left , first remove the key and UNPLUG THE POWER CORD. tighten the walking belt. b. Be careful to the left rear roller adjustment bolt counterclockwise, and the right bolt clockwise, 1/4 of...
... may be able to lift each . c. Be careful to over - The center of the walking belt 2 to the right, first remove the key and UNPLUG THE POWER CORD. Be careful not to keep the walking belt centered. Using the allen wrench, turn both rear roller adjustment bolts clockwise... of a turn each side of the walking belt should be able to lift each . Using the allen wrench, b turn the left , first remove the key and UNPLUG THE POWER CORD. tighten the walking belt. b. Be careful to the left rear roller adjustment bolt counterclockwise, and the right bolt clockwise, 1/4 of...

English Manual
Page 14
EXERCISE INTENSITY Whether your goal is to burn fat or to strengthen your cardiovascular system, the key to achieving the desired results is to burn fat, adjust the speed and incline of your age. The chart below shows recommended heart rates for ...
EXERCISE INTENSITY Whether your goal is to burn fat or to strengthen your cardiovascular system, the key to achieving the desired results is to burn fat, adjust the speed and incline of your age. The chart below shows recommended heart rates for ...

English Manual
Page 15
... against the inner thigh of rest between workouts. Repeat 3 times. Bring the sole of the opposite foot toward the wall. Repeat 3 times. A Cool-down . The key to 60 minutes. (During the first few months, you exerciseÑnever hold your back leg as well. Stretches: Hamstrings, back of the other hand...
... against the inner thigh of rest between workouts. Repeat 3 times. Bring the sole of the opposite foot toward the wall. Repeat 3 times. A Cool-down . The key to 60 minutes. (During the first few months, you exerciseÑnever hold your back leg as well. Stretches: Hamstrings, back of the other hand...

English Manual
Page 16
... 1 25 6 26 1 27 1 28 1 29 1 30 1 31 5 32 1 33 9 34 2 35 2 36 2 37 2 38 8 39 15 40 4 41 2 42 1 43 1 44 1 45 1 46 1 Description Handrail Key/Clip Screw Battery Cover Foot Rail Lift Motor Frame Guide Speed Potentiometer Speed Control Knob Console Assembly Upright Base Motor Belt Small Screw Storage Latch... Leg Latch Screw Wheel Bolt Wheel Wheel Nut/Lift Nut Washer Base Pad Handrail Endcap Latch Catch Reed Switch Clip Reed Switch Magnet Console Base Key No. PART LISTÑModel No. 831.299202 R1299A...
... 1 25 6 26 1 27 1 28 1 29 1 30 1 31 5 32 1 33 9 34 2 35 2 36 2 37 2 38 8 39 15 40 4 41 2 42 1 43 1 44 1 45 1 46 1 Description Handrail Key/Clip Screw Battery Cover Foot Rail Lift Motor Frame Guide Speed Potentiometer Speed Control Knob Console Assembly Upright Base Motor Belt Small Screw Storage Latch... Leg Latch Screw Wheel Bolt Wheel Wheel Nut/Lift Nut Washer Base Pad Handrail Endcap Latch Catch Reed Switch Clip Reed Switch Magnet Console Base Key No. PART LISTÑModel No. 831.299202 R1299A...

English Manual
Page 18
... from state to defect in material or workmanship in Canada © 1999 Sears, Roebuck and Co. When requesting help assembling or operating the PROFORM T35 treadmill ¥ a part is used commercially or for immediate purchase or special order when you may also have other rights which vary from...or to order parts by telephone, call the following information: ¥ The NAME OF THE PRODUCT (PROFORM¨ T35 treadmill) ¥ The MODEL NUMBER OF THE PRODUCT (831.299202) ¥ The KEY NUMBER AND DESCRIPTION OF THE PART (see the EXPLODED DRAWING and PART LIST included in this manual) ...
... from state to defect in material or workmanship in Canada © 1999 Sears, Roebuck and Co. When requesting help assembling or operating the PROFORM T35 treadmill ¥ a part is used commercially or for immediate purchase or special order when you may also have other rights which vary from...or to order parts by telephone, call the following information: ¥ The NAME OF THE PRODUCT (PROFORM¨ T35 treadmill) ¥ The MODEL NUMBER OF THE PRODUCT (831.299202) ¥ The KEY NUMBER AND DESCRIPTION OF THE PART (see the EXPLODED DRAWING and PART LIST included in this manual) ...


