
User Manual
Page 1
... Display Menus 18 How to operate ...18 Language ...19 Image-I ...20 Image-II (Computer Mode 22 Image-II (Video Mode 24 Audio ...26 Management ...27 Lamp Setting ...29 Appendices 30 Troubleshooting 30 Replacing the lamp 34 Compatibility Modes 35 Ceiling Mount Installation 36 RS232 Commands 37 Optoma Global Offices 38 1 ...
... Display Menus 18 How to operate ...18 Language ...19 Image-I ...20 Image-II (Computer Mode 22 Image-II (Video Mode 24 Audio ...26 Management ...27 Lamp Setting ...29 Appendices 30 Troubleshooting 30 Replacing the lamp 34 Compatibility Modes 35 Ceiling Mount Installation 36 RS232 Commands 37 Optoma Global Offices 38 1 ...
User Manual
Page 2
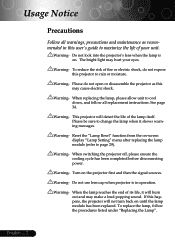
...signal sources. Warning- Warning- Warning- Reset the "Lamp Reset" function from the on until the lamp module has been replaced. Warning- Warning- The bright light may cause electric shock. Warning- Warning- To replace the lamp, follow all warnings, precautions and maintenance as this ...or moisture. This projector will not turn back on -screen display "Lamp Setting" menu after replacing the lamp module (refer to cool down, and follow the procedures listed under "Replacing the Lamp". When the lamp reaches the end of your eyes. See page 34. Warning- ...
...signal sources. Warning- Warning- Warning- Reset the "Lamp Reset" function from the on until the lamp module has been replaced. Warning- Warning- The bright light may cause electric shock. Warning- Warning- To replace the lamp, follow all warnings, precautions and maintenance as this ...or moisture. This projector will not turn back on -screen display "Lamp Setting" menu after replacing the lamp module (refer to cool down, and follow the procedures listed under "Replacing the Lamp". When the lamp reaches the end of your eyes. See page 34. Warning- ...
User Manual
Page 30
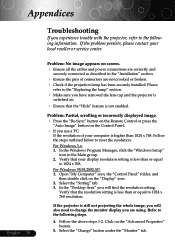
... Panel. If you use a PC: If the resolution of connectors are not crooked or broken. Check if the projection lamp has been securely installed. Verify that the resolution setting is less than or equal to 1024 x 768 resolution. Select the "Change" button under..."Setting" tab. 3. Refer to the following information. Follow the above steps 1-2. For Windows 3.x: 1. Follow the steps outlined below to the "Replacing the lamp" section. Make sure you have removed the lens cap and the projector is switched on screen. Ensure all the cables and ...
... Panel. If you use a PC: If the resolution of connectors are not crooked or broken. Check if the projection lamp has been securely installed. Verify that the resolution setting is less than or equal to 1024 x 768 resolution. Select the "Change" button under..."Setting" tab. 3. Refer to the following information. Follow the above steps 1-2. For Windows 3.x: 1. Follow the steps outlined below to the "Replacing the lamp" section. Make sure you have removed the lens cap and the projector is switched on screen. Ensure all the cables and ...
User Manual
Page 32
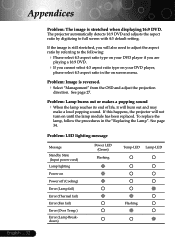
...player if you are playing a 16:9 DVD. If you will burn out and may make a loud popping sound. To replace the lamp, follow the procedures in the on screen menu. The projector automatically detects 16:9 DVD and adjusts the aspect ratio by referring to ...setting. Problem: Image is stretched when displaying 16:9 DVD. Problem: LED lighting message Message Standby State (Input power cord) Lamp lighting Power on until the lamp module has been replaced. Appendices English ... 32 Problem: The image is reversed. Select "Management" from the OSD and adjust the projection...
...player if you are playing a 16:9 DVD. If you will burn out and may make a loud popping sound. To replace the lamp, follow the procedures in the on screen menu. The projector automatically detects 16:9 DVD and adjusts the aspect ratio by referring to ...setting. Problem: Image is stretched when displaying 16:9 DVD. Problem: LED lighting message Message Standby State (Input power cord) Lamp lighting Power on until the lamp module has been replaced. Appendices English ... 32 Problem: The image is reversed. Select "Management" from the OSD and adjust the projection...

User Manual
Page 33
Replacement Suggested!" Lamp will automatically turn off soon." will be shown when the system temperature is nearing end of life. "Projector Overheated. English will be shown about 10 seconds, when lamp is too high. "Fan failure. will automatically turn off soon." Lamp will be shown when the fan is approaching the end of its useful life in full power opera- tion. Appendices Problem: Message Reminders "Lamp is out of order. 33 ...
Replacement Suggested!" Lamp will automatically turn off soon." will be shown when the system temperature is nearing end of life. "Projector Overheated. English will be shown about 10 seconds, when lamp is too high. "Fan failure. will automatically turn off soon." Lamp will be shown when the fan is approaching the end of its useful life in full power opera- tion. Appendices Problem: Message Reminders "Lamp is out of order. 33 ...
User Manual
Page 34
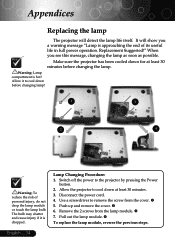
... the projector to cool down before changing the lamp. Disconnect the power cord. 4. Lamp Changing Procedure: 1. Remove the 2 screws from the cover. 5. It will detect the lamp life itself. Warning: Lamp compartment is dropped. Pull out the lamp module. To replace the lamp module, reverse the previous steps. Replacement Suggested!" Allow it is hot! Use a screwdriver...
... the projector to cool down before changing the lamp. Disconnect the power cord. 4. Lamp Changing Procedure: 1. Remove the 2 screws from the cover. 5. It will detect the lamp life itself. Warning: Lamp compartment is dropped. Pull out the lamp module. To replace the lamp module, reverse the previous steps. Replacement Suggested!" Allow it is hot! Use a screwdriver...

