

User Manual
Page 1
... Panel ...9 Connection Ports 10 Remote Control...11 Installation 12 Connecting the Projector 12 Powering On/Off the Projector 13 Powering On the Projector 13 Powering Off the projector 14 Warning Indicator 14 Adjusting the Projected Image 15 Adjusting the Projector's Height 15 Adjusting the Projector's Zoom / Focus 16 Adjusting Projected Image Size 16 User Controls 17... 34 Image Problems 34 Intermission Problems 37 LED Problems ...37 Remote Control Problems 38 Replacing the Lamp 39 Compatibility Modes 40 Ceiling Mount Installation 41 Optoma Global Office 42 1
... Panel ...9 Connection Ports 10 Remote Control...11 Installation 12 Connecting the Projector 12 Powering On/Off the Projector 13 Powering On the Projector 13 Powering Off the projector 14 Warning Indicator 14 Adjusting the Projected Image 15 Adjusting the Projector's Height 15 Adjusting the Projector's Zoom / Focus 16 Adjusting Projected Image Size 16 User Controls 17... 34 Image Problems 34 Intermission Problems 37 LED Problems ...37 Remote Control Problems 38 Replacing the Lamp 39 Compatibility Modes 40 Ceiling Mount Installation 41 Optoma Global Office 42 1

User Manual
Page 2
...fiers) that produce heat. 5. Refer all instructions. 4. Servicing is required when the projector has been damaged in accordance with the manufacturer's instructions A. Please call Optoma to be referred to an authorized service center near any way: ▀■ Such as radiators...a fire or electric shock. 9. Read these instructions -for safety related markings. 10. For example, do not expose the projector to constitute a risk of import operating and maintenance (servicing) instructions in the literature accompanying the appliance. C. ate normally, or has ...
...fiers) that produce heat. 5. Refer all instructions. 4. Servicing is required when the projector has been damaged in accordance with the manufacturer's instructions A. Please call Optoma to be referred to an authorized service center near any way: ▀■ Such as radiators...a fire or electric shock. 9. Read these instructions -for safety related markings. 10. For example, do not expose the projector to constitute a risk of import operating and maintenance (servicing) instructions in the literature accompanying the appliance. C. ate normally, or has ...

User Manual
Page 3
... To reduce the risk of fire or electric shock, do not open or disassemble the projector as this projector to the end of the lamp itself. Allow 90 seconds for the projector to change the lamp as soon as recommended in operation. When the lamp reaches the... life of its ▀■ Warning- See page 39. ▀■ Warning- Usage Notice English Precautions Please follow all replacement instructions. This projector will not turn back on until show on . Please be sure to cool down , and follow all warnings, precautions and maintenance as possible. ...
... To reduce the risk of fire or electric shock, do not open or disassemble the projector as this projector to the end of the lamp itself. Allow 90 seconds for the projector to change the lamp as soon as recommended in operation. When the lamp reaches the... life of its ▀■ Warning- See page 39. ▀■ Warning- Usage Notice English Precautions Please follow all replacement instructions. This projector will not turn back on until show on . Please be sure to cool down , and follow all warnings, precautions and maintenance as possible. ...

User Manual
Page 5
...supervise students when they do not also have to the audience; this is by ceiling-mounting rather than floor or table-mounting the projector. ▀■ When projector is recommended to avoid the need for the user to enter the beam. ▀■ Ensure that , when presenters look at the ... from the screen to stare at all times. ▀■ Minimize standing facing into the beam. The best way to achieve this ensures that projectors are asked to point out something on the screen. ▀■ In order to minimize the lamp power needed, use room blinds to reduce ...
...supervise students when they do not also have to the audience; this is by ceiling-mounting rather than floor or table-mounting the projector. ▀■ When projector is recommended to avoid the need for the user to enter the beam. ▀■ Ensure that , when presenters look at the ... from the screen to stare at all times. ▀■ Minimize standing facing into the beam. The best way to achieve this ensures that projectors are asked to point out something on the screen. ▀■ In order to minimize the lamp power needed, use room blinds to reduce ...

User Manual
Page 6
... full screen image re-scaling User friendly control panel SXGA+, SXGA compression and HD, XGA, SVGA, VGA re-sizing Macintosh compatible Optoma's patent-pending O2AirTM Photo Catalyst air purification technology HDMI & DVI support with HDCP compliant True Vivid and Brilliant ColorTM Image technology...; Uses 7 segment color wheel GRBWGRB cycle 480i - NTSC/NTSC4.43 576i - Introduction Product Features This product is an WXGA single chip 0.65" DLPTM projector.
... full screen image re-scaling User friendly control panel SXGA+, SXGA compression and HD, XGA, SVGA, VGA re-sizing Macintosh compatible Optoma's patent-pending O2AirTM Photo Catalyst air purification technology HDMI & DVI support with HDCP compliant True Vivid and Brilliant ColorTM Image technology...; Uses 7 segment color wheel GRBWGRB cycle 480i - NTSC/NTSC4.43 576i - Introduction Product Features This product is an WXGA single chip 0.65" DLPTM projector.

User Manual
Page 7
English Projector with all the items shown below. IR Remote Controller 2 x AA Batteries Documentation : User's Manaul Warranty Card Quick Start Card Available in applications ... the difference in European version only SCART RGB/S-Video Adaptor DVI to make sure your dealer immediately if anything is complete. Introduction Package Overview This projector comes with lens cap Power Cord 1.8m S-Video Cable 1.8m Composite Video Cable RCA Component Cable 1.8m for each country, some regions may have different...
English Projector with all the items shown below. IR Remote Controller 2 x AA Batteries Documentation : User's Manaul Warranty Card Quick Start Card Available in applications ... the difference in European version only SCART RGB/S-Video Adaptor DVI to make sure your dealer immediately if anything is complete. Introduction Package Overview This projector comes with lens cap Power Cord 1.8m S-Video Cable 1.8m Composite Video Cable RCA Component Cable 1.8m for each country, some regions may have different...

User Manual
Page 12
S-Video Output 4 6 5 Video Output DVD Player, Set-top Box, HDTV receiver 1...Power Cord 2 DVI to the difference in applications for YPbPr 7 SCART RGB/S-Video Adaptor (For European Only) 8 VGA Cable (For European Only) 9 DVI Cable (Optional Accessory) 12 Installation Connecting the Projector SCART DVD Player 7 RGB DVI +12V Relay Output 3 8 9 2 1 Due to VGA Adaptor (For European Only) 3...RS232 Cable 4...S-Video Cable 5 Composite Video Cable 6 RCA Component Cable for each country, some regions may have different accessories.
S-Video Output 4 6 5 Video Output DVD Player, Set-top Box, HDTV receiver 1...Power Cord 2 DVI to the difference in applications for YPbPr 7 SCART RGB/S-Video Adaptor (For European Only) 8 VGA Cable (For European Only) 9 DVI Cable (Optional Accessory) 12 Installation Connecting the Projector SCART DVD Player 7 RGB DVI +12V Relay Output 3 8 9 2 1 Due to VGA Adaptor (For European Only) 3...RS232 Cable 4...S-Video Cable 5 Composite Video Cable 6 RCA Component Cable for each country, some regions may have different accessories.

User Manual
Page 13
...screen will turn on your preferred language from quick menu after the startup screen display. 4. Ensure that the button on the back of the projector or on . The Power LED will detect your source automatically. If you can select your source (computer, notebook, video ...player, etc.). The projector will flash green. 3. Ensure that the power cord and signal cable are securely connected and turn green. The Power LED will display ...
...screen will turn on your preferred language from quick menu after the startup screen display. 4. Ensure that the button on the back of the projector or on . The Power LED will detect your source automatically. If you can select your source (computer, notebook, video ...player, etc.). The projector will flash green. 3. Ensure that the power cord and signal cable are securely connected and turn green. The Power LED will display ...

User Manual
Page 14
...cooling cycle and has entered standby mode. See page 42. 14 Disconnect the power cord from the electrical outlet and the projector. 4. Under normal conditions, the projector can be switched on , you should contact your local dealer or our service center. Press the "Standby/On" button ...again to restart the projector. 3. The projector will disappear after it indicates the projector has overheated. The cooling fans continue to turn green. See page 42. When the "TEMP" indicator lights ...
...cooling cycle and has entered standby mode. See page 42. 14 Disconnect the power cord from the electrical outlet and the projector. 4. Under normal conditions, the projector can be switched on , you should contact your local dealer or our service center. Press the "Standby/On" button ...again to restart the projector. 3. The projector will disappear after it indicates the projector has overheated. The cooling fans continue to turn green. See page 42. When the "TEMP" indicator lights ...

User Manual
Page 15
.... Tilt-Adjustment Feet Elevator Button Elevator Feet 3 1 2 15 To raise the image: 1. Press the elevator button. 2. English Installation Adjusting the Projected Image Adjusting the Projector's Height The projector is equipped with elevator feet for adjusting the image height. Raise the image to the desired height angle , then release the button to...
.... Tilt-Adjustment Feet Elevator Button Elevator Feet 3 1 2 15 To raise the image: 1. Press the elevator button. 2. English Installation Adjusting the Projected Image Adjusting the Projector's Height The projector is equipped with elevator feet for adjusting the image height. Raise the image to the desired height angle , then release the button to...

User Manual
Page 16
... focus at 16:10 mode with mechanical travel. To focus the image, turn the focus ring until you see a clear image. Installation Adjusting the Projector's Zoom / Focus Turn the Zoom Lever to 12.0 meters) and the projection screen size from 0.92m~8.857m (36"~349") at distances from 4.9 to 39.4 feet (1.5 ...
... focus at 16:10 mode with mechanical travel. To focus the image, turn the focus ring until you see a clear image. Installation Adjusting the Projector's Zoom / Focus Turn the Zoom Lever to 12.0 meters) and the projection screen size from 0.92m~8.857m (36"~349") at distances from 4.9 to 39.4 feet (1.5 ...

User Manual
Page 17
..., Composite Video, HDTV and HDMI sources. Select Re-Sync Confirm your selection. Menu Press "Menu" to the input source. 17 Automatically synchronizes the projector to launch the on-screen display (OSD) menu. ments to control the functions: Control Panel and Remote Control. User Controls Control Panel & Remote Control There...
..., Composite Video, HDTV and HDMI sources. Select Re-Sync Confirm your selection. Menu Press "Menu" to the input source. 17 Automatically synchronizes the projector to launch the on-screen display (OSD) menu. ments to control the functions: Control Panel and Remote Control. User Controls Control Panel & Remote Control There...

User Manual
Page 18
... adjust if image source happens to zoom in and zoom out of the display image. Part of the image to the "Power On/Off the Projector" section on pages 13-14. Keystone / Adjust image distortion vertically and makes a squarer image. Menu Press "Menu" to your item selection. To exit OSD, Press...
... adjust if image source happens to zoom in and zoom out of the display image. Part of the image to the "Power On/Off the Projector" section on pages 13-14. Keystone / Adjust image distortion vertically and makes a squarer image. Menu Press "Menu" to your item selection. To exit OSD, Press...

User Manual
Page 20
...firm, and the screen will return to make image adjustments and change a variety of settings. User Controls On-screen Display Menus The Projector has multilingual On-screen Display menus that allow you to the main menu. 6. The projector will automatically save the new settings. The OSD menu will close and the...
...firm, and the screen will return to make image adjustments and change a variety of settings. User Controls On-screen Display Menus The Projector has multilingual On-screen Display menus that allow you to the main menu. 6. The projector will automatically save the new settings. The OSD menu will close and the...

User Manual
Page 26
Press or into the next menu as below and then use or to finalize the selection. Color Space Select an appropriate color matrix type from RGB or YPbPr. 26 The projector will not search inputs that are deselected. User Controls Input Source Enable input sources. Press "Select (Enter)" to select.
Press or into the next menu as below and then use or to finalize the selection. Color Space Select an appropriate color matrix type from RGB or YPbPr. 26 The projector will not search inputs that are deselected. User Controls Input Source Enable input sources. Press "Select (Enter)" to select.
User Manual
Page 30
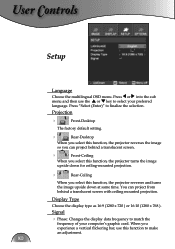
... graphic card. Projection Front-Desktop The factory default setting. Rear-Desktop When you select this function, the projector turns the image upside down at same time. You can project behind a translucent screen. Front-Ceiling When you select this function,... the projector reverses the image so you can project from behind a translucent screen with ceiling mounted projection. User Controls Setup Language Choose the ...
... graphic card. Projection Front-Desktop The factory default setting. Rear-Desktop When you select this function, the projector turns the image upside down at same time. You can project behind a translucent screen. Front-Ceiling When you select this function,... the projector reverses the image so you can project from behind a translucent screen with ceiling mounted projection. User Controls Setup Language Choose the ...

User Manual
Page 32
Source Lock When this function is turned on, it will search for proper high altitude cooling of the projector. High Altitude Choose "On" to allow for other signals if the current input signal is no signal input. (In minutes) Reset Return the adjustments and ... is lost. User Controls Options Menu Location Choose the menu location on High Altitude mode. When this function is turned off of power-off , the projector will search for all menus to factory default values. 32
Source Lock When this function is turned on, it will search for proper high altitude cooling of the projector. High Altitude Choose "On" to allow for other signals if the current input signal is no signal input. (In minutes) Reset Return the adjustments and ... is lost. User Controls Options Menu Location Choose the menu location on High Altitude mode. When this function is turned off of power-off , the projector will search for all menus to factory default values. 32

User Manual
Page 34
...are using . Please refer to the "Replacing the lamp" section. Make sure you experience a problem with your projector, please refer to the following steps. 5. If the projector is still not projecting the whole image, you will also need to SXGA+ (1400 x 1050). (*) 4. Appendices Troubleshooting If... you have removed the lens cap and the projector is switched on. Verify that your local reseller or service center. (See page 42 for computer signal. Verify the resolution setting is ...
...are using . Please refer to the "Replacing the lamp" section. Make sure you experience a problem with your projector, please refer to the following steps. 5. If the projector is still not projecting the whole image, you will also need to SXGA+ (1400 x 1050). (*) 4. Appendices Troubleshooting If... you have removed the lens cap and the projector is switched on. Verify that your local reseller or service center. (See page 42 for computer signal. Verify the resolution setting is ...

User Manual
Page 35
... 6. Press the toggle output settings. See page 31 for more information. Change the monitor color setting on "Show all equipment including the projector. Unstable or flickering image Use "Tracking" to SXGA+ (1400 x 1050). (*) If you are using a Notebook:... Preference-->Display-->Arrangement-->Mirror display If you need under the SP box; The screen of your computer's manual for this projector. Use "Phase" to adjust resolution of the monitor display is in use. Verify that the resolution setting of the computer...
... 6. Press the toggle output settings. See page 31 for more information. Change the monitor color setting on "Show all equipment including the projector. Unstable or flickering image Use "Tracking" to SXGA+ (1400 x 1050). (*) If you are using a Notebook:... Preference-->Display-->Arrangement-->Mirror display If you need under the SP box; The screen of your computer's manual for this projector. Use "Phase" to adjust resolution of the monitor display is in use. Verify that the resolution setting of the computer...

User Manual
Page 36
... as 16:9 (wide) aspect ratio type on your DVD player. If the image is still stretched, you play anamorphic DVD or 16:9 DVD, the projector will also need to adjust the aspect ratio by referring to the following: Please setup the display format as 4:3 in 16: 9 format on... responding to "Display-->Format". Appendices Image is out of focus Make sure the Lens cap is removed. Adjusts the Focus Ring on the projector lens. Make sure the projection screen is between the required distance 4.9 to 39.4 feet (1.5 to 12.0 meters) from the OSD and adjust the ...
... as 16:9 (wide) aspect ratio type on your DVD player. If the image is still stretched, you play anamorphic DVD or 16:9 DVD, the projector will also need to adjust the aspect ratio by referring to the following: Please setup the display format as 4:3 in 16: 9 format on... responding to "Display-->Format". Appendices Image is out of focus Make sure the Lens cap is removed. Adjusts the Focus Ring on the projector lens. Make sure the projection screen is between the required distance 4.9 to 39.4 feet (1.5 to 12.0 meters) from the OSD and adjust the ...


