Optoma H79 Support and Manuals
Get Help and Manuals for this Optoma item

Popular Optoma H79 Manual Pages
User Manual - Page 2
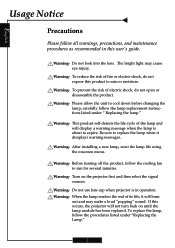
... expire.
Warning-
Before turning off the product, follow the procedures listed under " Replacing the lamp." Warning-
After installing a new lamp, reset the lamp life using the onscreen menu. Do not use lens cap when projector is about to run for several minutes. If this user's guide. Do not look into the lens. To reduce the risk of electric...
User Manual - Page 5
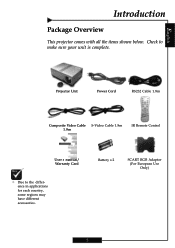
Battery x 2
SCART RGB Adaptor (For European Use Only)
5
English
Introduction
Package Overview
This projector comes with all the items shown below. Check to the difference in applications for each country, some regions may have different accessories. Projector Unit
Power Cord
RS232 Cable 1.8m
Composite Video Cable S-Video Cable 1.8m 1.8m
IR Remote Control...
User Manual - Page 10
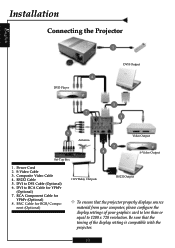
... DVI Cable (Optional) 6. S-Video Cable 3. Be sure that the projector properly displays source
material from your computer, please configure the display settings of the display setting is compatible with the projector.
10 DVI to 1280 x 720 resolution.
Composite Video Cable 4. English
Installation
Connecting the Projector
1
6 DVD Player
DVI-I Output
5 7
3
8 Antenna
2 4
Video Output...
User Manual - Page 12
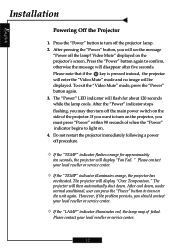
... Fail. Do not restart the projector immediately following a power off the projector lamp. 2. Press the "Power" button to turn on the side of the projector. The projector will be displayed. After cool down . However, if the problem persists, you want to turn off the lamp? Video Mute" displayed on . 4. English
Installation
Powering Off the Projector
1. Please note that if...
User Manual - Page 13
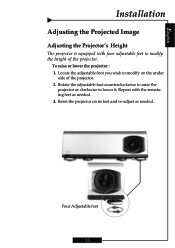
... adjustable foot counterclockwise to raise the
projector or clockwise to modify on its feet and re-adjust as needed . Reset the projector on the under
side of the projector.
Locate the adjustable foot you wish to lower it. English
Installation
Adjusting the Projected Image
Adjusting the Projector's Height
The projector is equipped with the remaining feet...
User Manual - Page 17
...
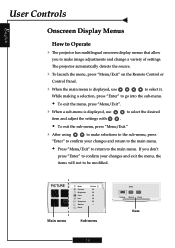
to make image adjustments and change a variety of settings. If you to make selections to the sub-menu, press
"Enter" to confirm your changes and exit the menu, the
items will not to be modified.
English
User Controls
Onscreen Display Menus
How to Operate
4 The projector has multilingual onscreen display menus that allow
you...
User Manual - Page 19
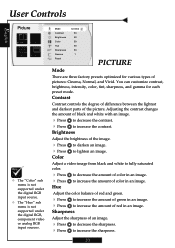
...of color in an image. Contrast
Contrast controls the degree of difference between the lightest and darkest parts of an image.
4 Press 4 Press
to decrease the amount of pictures: Cinema, Normal,...Controls
English
Picture
™ The "Color" sub menu is not supported under the digital RGB input source.
™ The "Hue" sub menu is not supported under the digital RGB, component video or analog...
User Manual - Page 20
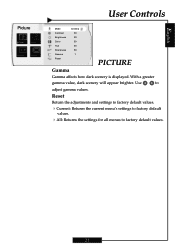
With a greater
gamma value, dark scenery will appear brighter. Reset
Return the adjustments and settings to factory default values.
4Current: Returns the current menu's settings to factory default
values.
4All: Returns the settings for all menus to
adjust gamma values. Use
to factory default values.
21
English
Picture
User Controls
Mode Contrast Brightness Color Hue...
User Manual - Page 21

If you experience an unstable or flickering image, use this function to make an adjustment.
4Phase : Synchronizes the signal timing of...Image
™ The "Signal" sub menu is from "1" to set the white peaking level of your computer's graphic card. If you experience a vertical flickering bar, use this function to correct it.
22 The range is supported under the Analog RGB and Analog ...
User Manual - Page 22
English
Image
User Controls
White Peaking
10
Color Temp.
1
Image Mode
Film
Advanced Adjustment
Signal
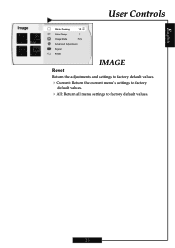
Reset
IMAGE
Reset
Return the adjustments and settings to factory default values.
4Current: Return the current menu's settings to factory
default values.
4All: Return all menu settings to factory default values.
23
User Manual - Page 23
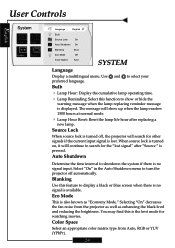
... find this feature to turn the projector off , the projector will show or hide the
warning message when the lamp replacing reminder message is no signal input. Select "On" in the Auto Shutdown menu to display a black or blue screen when there is displayed. Bulb
4 Lamp Hour: Display the cumulative lamp operating time. 4 Lamp Reminding: Select this function to...
User Manual - Page 24
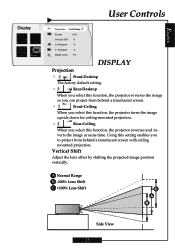
... the lens offset by shifting the projected image position vertically. Keystone
0
Digital zoom
10
DISPLAY
Projection
4
Front-Desktop
The factory default setting.
4
Rear-Desktop
When you select this function, the projector reverses the image
so you can project from behind a translucent screen with ceiling
mounted projection. verts the image at same time.
User Manual - Page 26
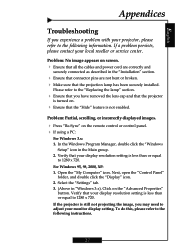
... "Windows
Setup" icon in "Windows 3.x). If the projector is less than or equal
to 1280 x 720. Select the "Settings" tab. 3. (Above in the Main group. 2. To do this, please refer to the following information.
For Windows 95, 98, 2000, XP: 1.
Verify that the projection lamp has been securely installed. Open the "My Computer" icon. Problem: No...
User Manual - Page 27
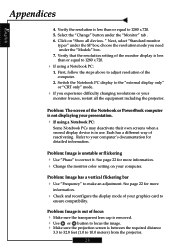
.... 4 Change the monitor color setting on "Show all the equipment including the projector. " Next, select "Standard monitor
types" under the SP box; See page 22 for detailed information. Problem: Image is in use. First, follow the steps above to adjust resolution of the Notebook or PowerBook computer is unstable or flickering 4 Use "Phase" to...
User Manual - Page 29
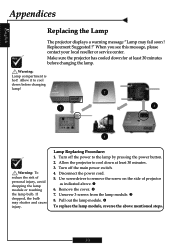
... the power button. 2. q
To replace the lamp module, reverse the above . English
Appendices
Replacing the Lamp
The projector displays a warning message "Lamp may shatter and cause injury. Make sure the projector has cooled down before changing the lamp. Lamp Replacing Procedure: 1. Unscrew 3 screws from the lamp module. Replacement Suggested !" If dropped, the bulb may fail soon !
Optoma H79 Reviews
We have not received any reviews for Optoma yet.