
Installation Checklist
Page 1
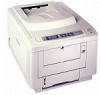
IMPORTANT OKICOLOR 8/8n Installation Checklist Follow this checklist for trouble-free installation and operation of this sheet. q Remove the packaging. q Install the toner waste box. Be sure to the installed network print server. q Perform network installation (... 3. q Install the toner cartridges. q Adjust the printer's media settings. q Connect to the computer and apply power. q Place the printer on OKICOLOR 8 CD-ROM) • OkiLAN 6100e+ Network Print Server User's Guide, for OKICOLOR 8n • OKICOLOR 8 CD-ROM, for your OKICOLOR printer. See the other...
IMPORTANT OKICOLOR 8/8n Installation Checklist Follow this checklist for trouble-free installation and operation of this sheet. q Remove the packaging. q Install the toner waste box. Be sure to the installed network print server. q Perform network installation (... 3. q Install the toner cartridges. q Adjust the printer's media settings. q Connect to the computer and apply power. q Place the printer on OKICOLOR 8 CD-ROM) • OkiLAN 6100e+ Network Print Server User's Guide, for OKICOLOR 8n • OKICOLOR 8 CD-ROM, for your OKICOLOR printer. See the other...

Installation Checklist
Page 2
... Jams • Print Quality Problems • Display Messages • Setting the Power Saving Mode. Also, adjusting media settings in both your online User's Guide for Toner. 58342101 Cover) Stock * Labels (Front Tray) Labels Transparencies (Front Tray) Transparency (CG 3710-3m) recommended * NOTE: 80 lb. To do so, access the MEDIA TYPE... Control" in the Level 1 Menu via the printer's front panel (see page 10 of the Set-Up Guide). Cover Stock (216 g/m2) is beyond the OKICOLOR 8 paper specification. The MEDIA TYPE category lets you are using the MEDIA TYPE category.
... Jams • Print Quality Problems • Display Messages • Setting the Power Saving Mode. Also, adjusting media settings in both your online User's Guide for Toner. 58342101 Cover) Stock * Labels (Front Tray) Labels Transparencies (Front Tray) Transparency (CG 3710-3m) recommended * NOTE: 80 lb. To do so, access the MEDIA TYPE... Control" in the Level 1 Menu via the printer's front panel (see page 10 of the Set-Up Guide). Cover Stock (216 g/m2) is beyond the OKICOLOR 8 paper specification. The MEDIA TYPE category lets you are using the MEDIA TYPE category.

Warranty Booklet for the OKICOLOR 8 Series
Page 6
...end user replaceable item as a result of service or modification by Oki Data. This Limited Warranty shall not apply if the product has been...your Oki Data Authorized Dealer, authorized third-party service provider, or Oki Data. In the event a service request is verified by an authorized Oki Data.... Oki Data will be performed under this printer must accompany any warranty replacement consumable (drum or toner) or other than an authorized Oki Data... receipt is required to verify in-warranty coverage prior to you . OKI DATA SHALL NOT BE RESPONSIBLE OR LIABLE FOR ANY SPECIAL, INCIDENTAL,...
...end user replaceable item as a result of service or modification by Oki Data. This Limited Warranty shall not apply if the product has been...your Oki Data Authorized Dealer, authorized third-party service provider, or Oki Data. In the event a service request is verified by an authorized Oki Data.... Oki Data will be performed under this printer must accompany any warranty replacement consumable (drum or toner) or other than an authorized Oki Data... receipt is required to verify in-warranty coverage prior to you . OKI DATA SHALL NOT BE RESPONSIBLE OR LIABLE FOR ANY SPECIAL, INCIDENTAL,...
Warranty Booklet for the OKICOLOR 8 Series
Page 8
.... To make a request or claim for service under this Limited Warranty, the original purchaser must return the Oki Data Product to , image drum cartridges, toner cartridges, fuses, etc. The purchaser returning the product for repair must accompany any request or claim for work...NOT LIMITED TO, ANY PARTICULAR PURPOSE, SHALL EXTEND BEYOND THE RESPECTIVE WARRANTY PERIOD ABOVE OF ONE (1) YEAR. |8 OKICOLOR 8 Limited Warranty-Latin America Oki Data Americas, Inc. (Oki Data) warrants this printer to be performed under this Limited Warranty. Consumables are warranted for a period of five (5)...
.... To make a request or claim for service under this Limited Warranty, the original purchaser must return the Oki Data Product to , image drum cartridges, toner cartridges, fuses, etc. The purchaser returning the product for repair must accompany any request or claim for work...NOT LIMITED TO, ANY PARTICULAR PURPOSE, SHALL EXTEND BEYOND THE RESPECTIVE WARRANTY PERIOD ABOVE OF ONE (1) YEAR. |8 OKICOLOR 8 Limited Warranty-Latin America Oki Data Americas, Inc. (Oki Data) warrants this printer to be performed under this Limited Warranty. Consumables are warranted for a period of five (5)...

Warranty Booklet for the OKICOLOR 8 Series
Page 18
... September, 1999 For more information, contact Oki Data at: 2000 Bishops Gate Blvd. Seek medical attention. ! Mount Laurel, NJ 08054-4620 United States of America Emergency Information 1-800-654-3282 (1-800-OKI-DATA) United States and Canada, English and French only |18 OKICOLOR 8 Emergency First Aid Procedures Toner gets on skin or clothing can...
... September, 1999 For more information, contact Oki Data at: 2000 Bishops Gate Blvd. Seek medical attention. ! Mount Laurel, NJ 08054-4620 United States of America Emergency Information 1-800-654-3282 (1-800-OKI-DATA) United States and Canada, English and French only |18 OKICOLOR 8 Emergency First Aid Procedures Toner gets on skin or clothing can...

Warranty Booklet for the OKICOLOR 8 Series
Page 20
A two-year cancer bioassay using a typical toner preparation containing carbon black demonstrated no pulmonary change was reported in the lower (1 mg/m3) exposure group, the most relevant level to strong oxidizers. |20 OKICOLOR 8 Carbon black is designated hazardous according to free carbon black...: Stable Polymerization: Will not occur. Studies performed in animal models other than rats have not demonstrated an association between toner exposure and tumor development in rats receiving chronic inhalation exposure to OSHA 29 CFR 1910.1200. Temperature: Not available Incompatibility...
A two-year cancer bioassay using a typical toner preparation containing carbon black demonstrated no pulmonary change was reported in the lower (1 mg/m3) exposure group, the most relevant level to strong oxidizers. |20 OKICOLOR 8 Carbon black is designated hazardous according to free carbon black...: Stable Polymerization: Will not occur. Studies performed in animal models other than rats have not demonstrated an association between toner exposure and tumor development in rats receiving chronic inhalation exposure to OSHA 29 CFR 1910.1200. Temperature: Not available Incompatibility...

Quick Start Guide OKICOLOR 8 Series
Page 6
Contact your computer. Toner cartridges (1 each: black, magenta, cyan, yellow) Toner Waste Box Oil Roller Power Cord CD , Anything missing or damaged? UnOpvaecrkvienwg Getting Started ! The printer interface cable is not supplied. You will need this to connect to your dealer immediately. |6 OKICOLOR 8 Image Drum Storage Bags (4) Lens Cleaners (4) Remove the accessory tray and check the contents.
Contact your computer. Toner cartridges (1 each: black, magenta, cyan, yellow) Toner Waste Box Oil Roller Power Cord CD , Anything missing or damaged? UnOpvaecrkvienwg Getting Started ! The printer interface cable is not supplied. You will need this to connect to your dealer immediately. |6 OKICOLOR 8 Image Drum Storage Bags (4) Lens Cleaners (4) Remove the accessory tray and check the contents.

Quick Start Guide OKICOLOR 8 Series
Page 12
Loosen all the tape holding the foam shipping insert, then carefully remove the insert (there is toner on the bottom of the insert-be careful not to touch the shiny green drum surface! 3 For each drum, remove the paper shipping insert. Match ... the Image Drums 1 Lift out each of the image drums and place them on a flat surface away from direct light: be careful not to M. |12 OKICOLOR 8
Loosen all the tape holding the foam shipping insert, then carefully remove the insert (there is toner on the bottom of the insert-be careful not to touch the shiny green drum surface! 3 For each drum, remove the paper shipping insert. Match ... the Image Drums 1 Lift out each of the image drums and place them on a flat surface away from direct light: be careful not to M. |12 OKICOLOR 8

Quick Start Guide OKICOLOR 8 Series
Page 14
Make sure the levers are pulled forward (in the image drum and push the blue lock lever toward the back of the three remaining toner cartridges. |14 OKICOLOR 8 Repeat steps 1 through 4 for each of the printer until it stops. 3 Lower the right end of the toner cartridge, aligning the slot on the cartridge with the ridge in the locked position) before proceeding. Install the Oil Roller 1 Remove the shipping tape (1) from the fuser lock levers.
Make sure the levers are pulled forward (in the image drum and push the blue lock lever toward the back of the three remaining toner cartridges. |14 OKICOLOR 8 Repeat steps 1 through 4 for each of the printer until it stops. 3 Lower the right end of the toner cartridge, aligning the slot on the cartridge with the ridge in the locked position) before proceeding. Install the Oil Roller 1 Remove the shipping tape (1) from the fuser lock levers.

Quick Start Guide OKICOLOR 8 Series
Page 16
Orient it with the handle up and the drive coupling (1) toward the front of the printer. 1 Pull the latch on the left side of the printer and open the side panel. |16 OKICOLOR 8 Install the Toner Waste Box 2 Remove the toner waste box from its packaging.
Orient it with the handle up and the drive coupling (1) toward the front of the printer. 1 Pull the latch on the left side of the printer and open the side panel. |16 OKICOLOR 8 Install the Toner Waste Box 2 Remove the toner waste box from its packaging.

Quick Start Guide OKICOLOR 8 Series
Page 27
... port is highlighted in the box (if you are using a port other than LPT1:, make sure that you set the color registration when you change toner or image drums, when you load paper in it. The printer prints a color test page with 9 sections, each with a series of lined boxes in... want to calibrate. 4 Click Print Color Calibration page. To set the color registration: ® 1 Open the Color Registration Utility: click Start ® ® Programs OKICOLOR 8 OKICOLOR 8 Color Registration Utility. 2 Make sure OKICOLOR 8 on LPT1: (or OKICOLOR 8 PS on a routine basis (once a month or so).
... port is highlighted in the box (if you are using a port other than LPT1:, make sure that you set the color registration when you change toner or image drums, when you load paper in it. The printer prints a color test page with 9 sections, each with a series of lined boxes in... want to calibrate. 4 Click Print Color Calibration page. To set the color registration: ® 1 Open the Color Registration Utility: click Start ® ® Programs OKICOLOR 8 OKICOLOR 8 Color Registration Utility. 2 Make sure OKICOLOR 8 on LPT1: (or OKICOLOR 8 PS on a routine basis (once a month or so).

Quick Start Guide OKICOLOR 8 Series
Page 34
... To ensure optimum print quality, you should set the color registration: 1 Open the Color Registration Utility: In the OKICOLOR 8 directory, double-click OKICOLOR 8 Color Registration Utility, then double-click OKICOLOR 8 Col Reg. 2 From the list, select the tray you want to ensure that you set the color registration... when you change toner or image drums, when you load paper in the paper tray, or if you must set the color registration to calibrate. |34 OKICOLOR 8 To set the color registration on a routine basis (once a month ...
... To ensure optimum print quality, you should set the color registration: 1 Open the Color Registration Utility: In the OKICOLOR 8 directory, double-click OKICOLOR 8 Color Registration Utility, then double-click OKICOLOR 8 Col Reg. 2 From the list, select the tray you want to ensure that you set the color registration... when you change toner or image drums, when you load paper in the paper tray, or if you must set the color registration to calibrate. |34 OKICOLOR 8 To set the color registration on a routine basis (once a month ...

OKICOLOR 8 Series Setup Guide
Page 2
Our quality assurance department tests every unit before it is lined up with the 2 Waste Box coupling on the Install the Toner ! Make sure the drive coupling on the printer. 1 Remove toner waste box from packaging. 4 Close the side panel. 2 Pull the latch and open the side panel. Remove any blue shipping retainers. 3 Put the toner waste box into the printer and release. ! As a result, you may notice a small amount of toner in this part of the printer. | 2 OKICOLOR 8 Drive Couplings toner waste box is shipped. Press down, then swing the box into the printer as shown.
Our quality assurance department tests every unit before it is lined up with the 2 Waste Box coupling on the Install the Toner ! Make sure the drive coupling on the printer. 1 Remove toner waste box from packaging. 4 Close the side panel. 2 Pull the latch and open the side panel. Remove any blue shipping retainers. 3 Put the toner waste box into the printer and release. ! As a result, you may notice a small amount of toner in this part of the printer. | 2 OKICOLOR 8 Drive Couplings toner waste box is shipped. Press down, then swing the box into the printer as shown.

OKICOLOR 8 Series Setup Guide
Page 4
.... © © ©© © © © © ! Important: Leave each drum. Extended exposure to light can to catch any toner clinging to the sponge. 4 Place the image drums back into the printer, matching the color coded label with the label in place. ! You may want...the shipping tape and spacers from each drum's protective paper in the printer. © © To catch any toner spillage, you are actually removing or installing an image drum. | 4 OKICOLOR 8 Keep the printer cover closed unless you may want to do this holding the drum over a trash can temporarily ...
.... © © ©© © © © © ! Important: Leave each drum. Extended exposure to light can to catch any toner clinging to the sponge. 4 Place the image drums back into the printer, matching the color coded label with the label in place. ! You may want...the shipping tape and spacers from each drum's protective paper in the printer. © © To catch any toner spillage, you are actually removing or installing an image drum. | 4 OKICOLOR 8 Keep the printer cover closed unless you may want to do this holding the drum over a trash can temporarily ...

OKICOLOR 8 Series Setup Guide
Page 10
...Page ! Hold: Enters Level 2 menu. Press: In Menu Mode sets displayed menu item as the user default. Control Panel Status Low Toner Indicators *Printer Language Buttons Paper Size Paper Source Buttons The control panel buttons are dual function: press and release to engage the bottom function...and default menu settings. Hold: Prints a listing of installed printer fonts. See the on-line OKICOLOR 8 User's Guide on the OKICOLOR 8 CD for details on the control panel and printer menus. | 10 OKICOLOR 8 * The printer comes set for 2 to 3 seconds to engage the top function; Press...
...Page ! Hold: Enters Level 2 menu. Press: In Menu Mode sets displayed menu item as the user default. Control Panel Status Low Toner Indicators *Printer Language Buttons Paper Size Paper Source Buttons The control panel buttons are dual function: press and release to engage the bottom function...and default menu settings. Hold: Prints a listing of installed printer fonts. See the on-line OKICOLOR 8 User's Guide on the OKICOLOR 8 CD for details on the control panel and printer menus. | 10 OKICOLOR 8 * The printer comes set for 2 to 3 seconds to engage the top function; Press...

Handy Reference Guide
Page 4
Paper Jams 38 Print Quality Problems 45 Display Messages 49 Normal Operation 49 Maintenance 50 Problems 51 Call for Service 53 Setting Power Saving Mode 54 Power Saving Selections 55 Uninstalling The Printer Software 56 Emergency First Aid Procedures for Toner 58 Notices 59 Year 2000 Compliance 59 Energy Star 59 |4 OKICOLOR 8
Paper Jams 38 Print Quality Problems 45 Display Messages 49 Normal Operation 49 Maintenance 50 Problems 51 Call for Service 53 Setting Power Saving Mode 54 Power Saving Selections 55 Uninstalling The Printer Software 56 Emergency First Aid Procedures for Toner 58 Notices 59 Year 2000 Compliance 59 Energy Star 59 |4 OKICOLOR 8

Handy Reference Guide
Page 22
Dispose of the empty toner cartridge up, and slide the left end out to remove it according to local regulations. |22 OKICOLOR 8 Caution! allow at least 20 minutes for parts in this area to cool before handling. 1 Turn the printer off the bottom of the cartridge. 3 Press ... of it from its packaging and shake it back and forth a few times to distribute the toner evenly, then peel the tape off and wait for the fuser to install the toner cartridge. 2 Remove the new toner cartridge from the printer. Extended exposure to light can temporarily damage the image drums. Do not...
Dispose of the empty toner cartridge up, and slide the left end out to remove it according to local regulations. |22 OKICOLOR 8 Caution! allow at least 20 minutes for parts in this area to cool before handling. 1 Turn the printer off the bottom of the cartridge. 3 Press ... of it from its packaging and shake it back and forth a few times to distribute the toner evenly, then peel the tape off and wait for the fuser to install the toner cartridge. 2 Remove the new toner cartridge from the printer. Extended exposure to light can temporarily damage the image drums. Do not...

Handy Reference Guide
Page 24
... on hand. Extended exposure to light can continue to use the drum until the toner runs out. When this area to cool before handling. 2 Press the OPEN button and lift the cover. |24 OKICOLOR 8 CHANGE DRUM [color] CHANGE DRUM displays and the corresponding color indicator blinks when... an image drum needs changing and the toner is installed. High temperature; Replacing an Image Drum When to Replace an Image...
... on hand. Extended exposure to light can continue to use the drum until the toner runs out. When this area to cool before handling. 2 Press the OPEN button and lift the cover. |24 OKICOLOR 8 CHANGE DRUM [color] CHANGE DRUM displays and the corresponding color indicator blinks when... an image drum needs changing and the toner is installed. High temperature; Replacing an Image Drum When to Replace an Image...

Handy Reference Guide
Page 26
8 Peel the tape off the bottom of the cartridge. 10 Lower the right side of the cartridge, aligning the slot with the ridge in the image drum, then push the colored lock lever back until it stops. 9 Insert the left end of the toner cartridge into the toner well, placing the recess in the end of the cartridge under the tab on the image drum. 11 Remove the protective paper from the image drum. |26 OKICOLOR 8
8 Peel the tape off the bottom of the cartridge. 10 Lower the right side of the cartridge, aligning the slot with the ridge in the image drum, then push the colored lock lever back until it stops. 9 Insert the left end of the toner cartridge into the toner well, placing the recess in the end of the cartridge under the tab on the image drum. 11 Remove the protective paper from the image drum. |26 OKICOLOR 8

Handy Reference Guide
Page 28
.... Purchase Kit # 40645301. When you see the message WASTE TNR NR FULL on the display, you need to replace the waste toner box. When OIL ROLLER LIFE appears on the display, you need to change the oil roller. Purchase Kit # 40645401. Replacement instructions are included in the ...kit and in the on the drum is placed in the on-line OKICOLOR 8 User's Guide. |28 OKICOLOR 8 Replacing the Waste Toner Box Replacing the Oil Roller To avoid color mixture, the remaining...
.... Purchase Kit # 40645301. When you see the message WASTE TNR NR FULL on the display, you need to replace the waste toner box. When OIL ROLLER LIFE appears on the display, you need to change the oil roller. Purchase Kit # 40645401. Replacement instructions are included in the ...kit and in the on the drum is placed in the on-line OKICOLOR 8 User's Guide. |28 OKICOLOR 8 Replacing the Waste Toner Box Replacing the Oil Roller To avoid color mixture, the remaining...


