
Instruction Manual
Page 1
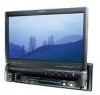
... of the unit, in the spaces designated on the product. Familiarity with installation and operation procedures will help you call upon your Kenwood dealer for information or service on the warranty card, and in the space provided below. Model KVT-617DVD/KVT-647DVD Serial number... US Residence Only Register Online Register your Kenwood product at www.kenwoodusa.com © B64-3466-00/00 (KV/RV) Refer to read through this instruction manual. MONITOR WITH DVD RECEIVER KVT-617DVD KVT-647DVD INSTRUCTION MANUAL Take the time...
... of the unit, in the spaces designated on the product. Familiarity with installation and operation procedures will help you call upon your Kenwood dealer for information or service on the warranty card, and in the space provided below. Model KVT-617DVD/KVT-647DVD Serial number... US Residence Only Register Online Register your Kenwood product at www.kenwoodusa.com © B64-3466-00/00 (KV/RV) Refer to read through this instruction manual. MONITOR WITH DVD RECEIVER KVT-617DVD KVT-647DVD INSTRUCTION MANUAL Take the time...
Instruction Manual
Page 4
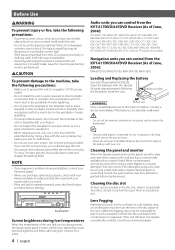
..., check with your Kenwood dealer to make sure that they work to professionals. 2CAUTION To prevent damage to malfunction. • Do not use in operation checking, and it off with the prescribed rating. Cleaning the panel and monitor When the operator panel and monitor panels are dirty, ...get scratched if you can control from the LCD contacts your body or clothing, wash it 's service life may be impossible to play. In such a situation, remove the disc and wait for a while. 4 | English Audio units you can control from the KVT-617DVD/647DVD Receiver (As of June, 2006): KTC-SR901,...
..., check with your Kenwood dealer to make sure that they work to professionals. 2CAUTION To prevent damage to malfunction. • Do not use in operation checking, and it off with the prescribed rating. Cleaning the panel and monitor When the operator panel and monitor panels are dirty, ...get scratched if you can control from the LCD contacts your body or clothing, wash it 's service life may be impossible to play. In such a situation, remove the disc and wait for a while. 4 | English Audio units you can control from the KVT-617DVD/647DVD Receiver (As of June, 2006): KTC-SR901,...
Instruction Manual
Page 74
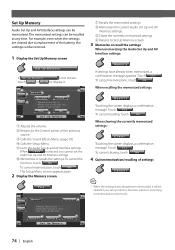
... memorized settings. 4 Returns to display it. 1 3 4 5 1 5 If settings have already been memorized, it will be cleared if you cannot set up memory function without connecting a monitor and a receiver unit. 4 Please Select the Desired Function from the Choices Below. 1 2 3 74 | English To cancel recalling, touch . Touch . To cancel the function, touch . Before Use Set...
... memorized settings. 4 Returns to display it. 1 3 4 5 1 5 If settings have already been memorized, it will be cleared if you cannot set up memory function without connecting a monitor and a receiver unit. 4 Please Select the Desired Function from the Choices Below. 1 2 3 74 | English To cancel recalling, touch . Touch . To cancel the function, touch . Before Use Set...
Instruction Manual
Page 85
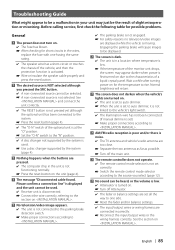
...activated. Separate the two antennas as far as possible. Nothing happens when the buttons are displayed while the vehicle is used . ✔ Receiver unit is NOT selected although you select (page 12). ? The message "Disconnected cable found. Engaging the parking brake will return. ? AM...General ? See the section on . ✔ The fuse has blown. If the temperature of the monitor unit drops, the screen may just be displayed. ? Turn off the main unit. ? See and connect the unit correctly. ✔ The RESET button is at the "O" position. Press the reset button (page 4). ...
...activated. Separate the two antennas as far as possible. Nothing happens when the buttons are displayed while the vehicle is used . ✔ Receiver unit is NOT selected although you select (page 12). ? The message "Disconnected cable found. Engaging the parking brake will return. ? AM...General ? See the section on . ✔ The fuse has blown. If the temperature of the monitor unit drops, the screen may just be displayed. ? Turn off the main unit. ? See and connect the unit correctly. ✔ The RESET button is at the "O" position. Press the reset button (page 4). ...


