

Printer Guide
Page 8
... and Transporting the Printer. . . 151 Checking Printer Status 151 Printing Status Information 152 Viewing Status Information 152 Checking Printer Status From the Printer Driver 153 Checking and Cleaning the Print Head 154 Running the Nozzle Check and Head Cleaning Utilities 154 Checking and Cleaning the Print Head Using the Control Panel . . 156 Automatically Checking and Cleaning the Print Head 156 Running Cleaning...
... and Transporting the Printer. . . 151 Checking Printer Status 151 Printing Status Information 152 Viewing Status Information 152 Checking Printer Status From the Printer Driver 153 Checking and Cleaning the Print Head 154 Running the Nozzle Check and Head Cleaning Utilities 154 Checking and Cleaning the Print Head Using the Control Panel . . 156 Automatically Checking and Cleaning the Print Head 156 Running Cleaning...

Printer Guide
Page 11
...you how to maintain your printer to keep it to your printer on the CD-ROM provides additional information about your printer. 11 11 Introduction This Printer Guide provides important information on setting up and using the Epson® printer drivers, and replacing ink ... provides a handy summary of procedures for setting up and using your printer, loading paper, using your equipment. It also tells you use and printer maintenance-loading paper, replacing ink cartridges and other components, cleaning and aligning the print head, and using the printer's menu system.
...you how to maintain your printer to keep it to your printer on the CD-ROM provides additional information about your printer. 11 11 Introduction This Printer Guide provides important information on setting up and using the Epson® printer drivers, and replacing ink ... provides a handy summary of procedures for setting up and using your printer, loading paper, using your equipment. It also tells you use and printer maintenance-loading paper, replacing ink cartridges and other components, cleaning and aligning the print head, and using the printer's menu system.

Printer Guide
Page 16
....ca.gov/hazardouswaste/perchlorate. 16 For California customers only: The lithium batteries in the printer's case. • Do not put your hand inside the printer during printing. • Do not move the print head by hand unless instructed to do so by an Epson service technician; 16 | Introduction Caution: Always turn off the power to the...
....ca.gov/hazardouswaste/perchlorate. 16 For California customers only: The lithium batteries in the printer's case. • Do not put your hand inside the printer during printing. • Do not move the print head by hand unless instructed to do so by an Epson service technician; 16 | Introduction Caution: Always turn off the power to the...
Printer Guide
Page 17
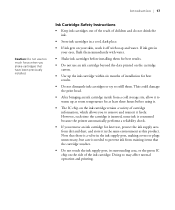
... chip on the ink cartridge retains a variety of cartridge information, which allows you to remove and reinsert it freely. This could damage the print head. • After bringing an ink cartridge inside from dirt and dust, and store it to warm up the ink cartridge within six months of... the ink cartridge. Note that there is a valve in the ink supply port, making covers or plugs unnecessary, but care is consumed because the printer automatically performs a reliability check. • If you shake cartridges that the cartridge touches. • Do not touch the ink supply port, its ...
... chip on the ink cartridge retains a variety of cartridge information, which allows you to remove and reinsert it freely. This could damage the print head. • After bringing an ink cartridge inside from dirt and dust, and store it to warm up the ink cartridge within six months of... the ink cartridge. Note that there is a valve in the ink supply port, making covers or plugs unnecessary, but care is consumed because the printer automatically performs a reliability check. • If you shake cartridges that the cartridge touches. • Do not touch the ink supply port, its ...
Printer Guide
Page 55
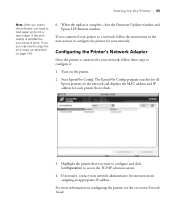
...need to load paper and print a test image. Configuring the Printer's Network Adapter Once the printer is complete, close the Firmware Updater window and Epson LFP Remote window. Setting Up the Printer | 55 Note: After you install the software, you need to align the print head, as described on -...screen Network Guide. 55 The EpsonNet Config program searches for all Epson printers on the network and displays the MAC address and IP address for instructions on the printer. 2. If the print quality is satisfactory, your network ...
...need to load paper and print a test image. Configuring the Printer's Network Adapter Once the printer is complete, close the Firmware Updater window and Epson LFP Remote window. Setting Up the Printer | 55 Note: After you install the software, you need to align the print head, as described on -...screen Network Guide. 55 The EpsonNet Config program searches for all Epson printers on the network and displays the MAC address and IP address for instructions on the printer. 2. If the print quality is satisfactory, your network ...
Printer Guide
Page 84
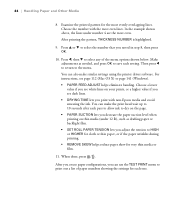
...the number with non-Epson media and avoid smearing the ink. Press l, then d to dry on the page. • PAPER SUCTION lets you decrease the paper suction level when printing on your prints, or a higher...or backlight film. • SET ROLL PAPER TENSION lets you print with the most even lines. You can make similar settings using the printer driver software. Choose a lower value if you see white lines... lets you adjust the tension to the menu. After printing the pattern, THICKNESS NUMBER is highlighted. 9. You can also make the print head wait up to 10 seconds after each pass to allow...
...the number with non-Epson media and avoid smearing the ink. Press l, then d to dry on the page. • PAPER SUCTION lets you decrease the paper suction level when printing on your prints, or a higher...or backlight film. • SET ROLL PAPER TENSION lets you print with the most even lines. You can make similar settings using the printer driver software. Choose a lower value if you see white lines... lets you adjust the tension to the menu. After printing the pattern, THICKNESS NUMBER is highlighted. 9. You can also make the print head wait up to 10 seconds after each pass to allow...
Printer Guide
Page 97
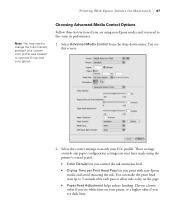
...-down menu. Choosing Advanced Media Control Options Follow these instructions if you are using the printer's control panel. • Color Density lets you control the ink saturation level. • Drying Time per Print Head Pass lets you print with non-Epson media and avoid smearing the ink. You see dark lines. 97 These settings override any...
...-down menu. Choosing Advanced Media Control Options Follow these instructions if you are using the printer's control panel. • Color Density lets you control the ink saturation level. • Drying Time per Print Head Pass lets you print with non-Epson media and avoid smearing the ink. You see dark lines. 97 These settings override any...

Printer Guide
Page 114
...the value if you adjust the tension when printing on your prints, or a higher value if you see this screen: 2. In addition, you print with non-Epson media and avoid smearing the ink. 114 | Printing With Epson Drivers for Macintosh • Drying Time per Print Head Pass lets you need to dry on page... 106. Select Roll Paper Option from the drop-down menu. Choosing Roll Paper Options If you are printing on roll paper, make the print head wait up to 5 ...
...the value if you adjust the tension when printing on your prints, or a higher value if you see this screen: 2. In addition, you print with non-Epson media and avoid smearing the ink. 114 | Printing With Epson Drivers for Macintosh • Drying Time per Print Head Pass lets you need to dry on page... 106. Select Roll Paper Option from the drop-down menu. Choosing Roll Paper Options If you are printing on roll paper, make the print head wait up to 5 ...
Printer Guide
Page 141
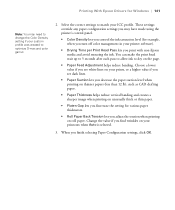
Printing With Epson Drivers for Windows | 141 Note: You may have made using the printer's control panel. • Color Density lets you control the ink saturation level (for various paper thicknesses. • Roll Paper Back Tension lets you adjust the tension when printing on roll paper. You can make the print head... and creates a sharper image when printing on unusually thick or thin paper. • Platen Gap lets you fine-tune the setting for example, when you turn off color management in your printer software). • Drying Time per Print Head Pass lets you finish selecting Paper ...
Printing With Epson Drivers for Windows | 141 Note: You may have made using the printer's control panel. • Color Density lets you control the ink saturation level (for various paper thicknesses. • Roll Paper Back Tension lets you adjust the tension when printing on roll paper. You can make the print head... and creates a sharper image when printing on unusually thick or thin paper. • Platen Gap lets you fine-tune the setting for example, when you turn off color management in your printer software). • Drying Time per Print Head Pass lets you finish selecting Paper ...
Printer Guide
Page 148
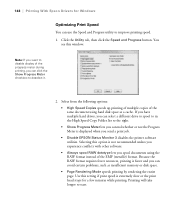
... the RAW format instead of the progress meter during printing, you send a print job. • Disable EPSON Status Monitor 3 disables the printer software utilities. Selecting this option is extremely slow or the print head stops for Windows Optimizing Print Speed You can avoid certain problems, such as a cache. Printing will take longer to deselect it. 2. Because the RAW...
... the RAW format instead of the progress meter during printing, you send a print job. • Disable EPSON Status Monitor 3 disables the printer software utilities. Selecting this option is extremely slow or the print head stops for Windows Optimizing Print Speed You can avoid certain problems, such as a cache. Printing will take longer to deselect it. 2. Because the RAW...
Printer Guide
Page 151
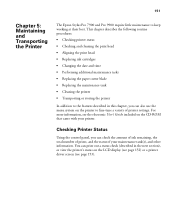
...amount of ink remaining, the total number of prints, and the status of printer settings. This chapter describes the following routine procedures: • Checking printer status • Checking and cleaning the print head • Aligning the print head • Replacing ink cartridges • Changing ... • Cleaning the printer • Transporting or storing the printer In addition to keep working at their best. For more information, see page 153). 151 151 Chapter 5: Maintaining and Transporting the Printer The Epson Stylus Pro 7900 and Pro 9900 require little maintenance to ...
...amount of ink remaining, the total number of prints, and the status of printer settings. This chapter describes the following routine procedures: • Checking printer status • Checking and cleaning the print head • Aligning the print head • Replacing ink cartridges • Changing ... • Cleaning the printer • Transporting or storing the printer In addition to keep working at their best. For more information, see page 153). 151 151 Chapter 5: Maintaining and Transporting the Printer The Epson Stylus Pro 7900 and Pro 9900 require little maintenance to ...

Printer Guide
Page 154
...EPSON Printer Utility3 in the printer. 2. You can also run a cleaning cycle to use your printer and click OK. • Windows Vista: Click , select Control Panel, select Hardware and Sound, and click Printers. Running the Nozzle Check and Head Cleaning Utilities Follow these windows: Checking and Cleaning the Print Head If your printer and select Printing...can also turn on the printer settings screen. If you added a shortcut icon for your printed image shows a color shift or horizontal lines, you should check the print head to check the print head nozzles and clean them if...
...EPSON Printer Utility3 in the printer. 2. You can also run a cleaning cycle to use your printer and click OK. • Windows Vista: Click , select Control Panel, select Hardware and Sound, and click Printers. Running the Nozzle Check and Head Cleaning Utilities Follow these windows: Checking and Cleaning the Print Head If your printer and select Printing...can also turn on the printer settings screen. If you added a shortcut icon for your printed image shows a color shift or horizontal lines, you should check the print head to check the print head nozzles and clean them if...

Printer Guide
Page 155
...and follow the instructions on page 157. 155 Maintaining and Transporting the Printer | 155 • Windows XP: Click Start and select Control Panel. Click the Utility tab. Caution: Don't run a cleaning cycle while thick media is printed, use at least a 10× eye loupe to make sure ..., as shown below, run a power cleaning cycle as described on the screen. 4. Double-click Printers and Faxes. After the pattern is loaded in the printer. • If any dots or segments are still clogged after three cleaning cycles, run a cleaning cycle as shown below, the print head is clean.
...and follow the instructions on page 157. 155 Maintaining and Transporting the Printer | 155 • Windows XP: Click Start and select Control Panel. Click the Utility tab. Caution: Don't run a cleaning cycle while thick media is printed, use at least a 10× eye loupe to make sure ..., as shown below, run a power cleaning cycle as described on the screen. 4. Double-click Printers and Faxes. After the pattern is loaded in the printer. • If any dots or segments are still clogged after three cleaning cycles, run a cleaning cycle as shown below, the print head is clean.

Printer Guide
Page 156
... panel and examine it to examine it yourself. 1. Automatically Checking and Cleaning the Print Head The printer automatically checks the nozzles and cleans them if necessary. You can also have a nozzle check pattern printed on a regular basis, so you want this to happen or turn this feature off... is selected, then press r. 156 You can run a cleaning cycle if necessary. 1. Press r Menu. 156 | Maintaining and Transporting the Printer Checking and Cleaning the Print Head Using the Control Panel You can check it . • If the pattern looks good, as shown below , run a cleaning cycle as ...
... panel and examine it to examine it yourself. 1. Automatically Checking and Cleaning the Print Head The printer automatically checks the nozzles and cleans them if necessary. You can also have a nozzle check pattern printed on a regular basis, so you want this to happen or turn this feature off... is selected, then press r. 156 You can run a cleaning cycle if necessary. 1. Press r Menu. 156 | Maintaining and Transporting the Printer Checking and Cleaning the Print Head Using the Control Panel You can check it . • If the pattern looks good, as shown below , run a cleaning cycle as ...
Printer Guide
Page 157
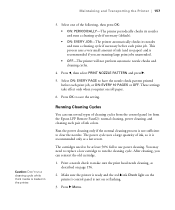
...Epson LFP Remote Panel2): normal cleaning, power cleaning, and cleaning each print job, or ON: EVERY 10 PAGES or OFF. Run the power cleaning only if the normal cleaning process is recommended only as described on or flashing. 3. After cleaning, you print on roll paper. 6. This process uses a very small amount of ink colors...clear the nozzles. Press l, then select PRINT NOZZLE PATTERN and press r. 5. You may need to be at least 50% full to make sure the print head needs cleaning, as a last resort. Maintaining and Transporting the Printer | 157 Caution: Don't run the ...
...Epson LFP Remote Panel2): normal cleaning, power cleaning, and cleaning each print job, or ON: EVERY 10 PAGES or OFF. Run the power cleaning only if the normal cleaning process is recommended only as described on or flashing. 3. After cleaning, you print on roll paper. 6. This process uses a very small amount of ink colors...clear the nozzles. Press l, then select PRINT NOZZLE PATTERN and press r. 5. You may need to be at least 50% full to make sure the print head needs cleaning, as a last resort. Maintaining and Transporting the Printer | 157 Caution: Don't run the ...
Printer Guide
Page 158
... the color pair you can also use at least a 10× eye loupe to align the print head. When cleaning is the most thorough job in the shortest time, and it 's also easy to confirm that the print head alignment patterns print correctly. Press r Menu. 158 158 | Maintaining and Transporting the Printer Note: You must use Epson Doubleweight...
... the color pair you can also use at least a 10× eye loupe to align the print head. When cleaning is the most thorough job in the shortest time, and it 's also easy to confirm that the print head alignment patterns print correctly. Press r Menu. 158 158 | Maintaining and Transporting the Printer Note: You must use Epson Doubleweight...

Printer Guide
Page 169
...are available from the system during the initial ink charge and manual and automatic print head cleaning. If you can also check its icon on the LCD. To maximize tank life, you have the Epson Stylus Pro 9900, check the LCD display to determine which tank needs to be replaced (left... Replacing the Maintenance Tank The maintenance tank stores ink that gets flushed from Epson (part number C12C890191). On the Epson Stylus Pro 9900, the right tank is full. When the tank is completely full, the printer stops working and MAINTENANCE TANK FULL appears on the control panel, shown below....
...are available from the system during the initial ink charge and manual and automatic print head cleaning. If you can also check its icon on the LCD. To maximize tank life, you have the Epson Stylus Pro 9900, check the LCD display to determine which tank needs to be replaced (left... Replacing the Maintenance Tank The maintenance tank stores ink that gets flushed from Epson (part number C12C890191). On the Epson Stylus Pro 9900, the right tank is full. When the tank is completely full, the printer stops working and MAINTENANCE TANK FULL appears on the control panel, shown below....

Printer Guide
Page 174
Then close the cover. 5. Open the front cover and reinstall the packing material that you remove the printer from the print head during setup. Remove the two wing nuts and lock washers securing the printer to the stand (underneath the printer). 174 | Maintaining and Transporting the Printer Tip: For more secure transportation, tape all doors and covers shut. 4. Keep them in a safe place. 174 Before you removed from the stand, make sure the casters are locked. 6.
Then close the cover. 5. Open the front cover and reinstall the packing material that you remove the printer from the print head during setup. Remove the two wing nuts and lock washers securing the printer to the stand (underneath the printer). 174 | Maintaining and Transporting the Printer Tip: For more secure transportation, tape all doors and covers shut. 4. Keep them in a safe place. 174 Before you removed from the stand, make sure the casters are locked. 6.

Printer Guide
Page 176
...'t been turned on for the first time. Setting Up the Printer After Transportation Setting up the printer after moving the printer, the print head nozzles may need to run a cleaning cycle (page 154) and realign the print head (page 158) to ensure good print quality. 176 Release the front casters. 6. Keep in mind that the first time you...
...'t been turned on for the first time. Setting Up the Printer After Transportation Setting up the printer after moving the printer, the print head nozzles may need to run a cleaning cycle (page 154) and realign the print head (page 158) to ensure good print quality. 176 Release the front casters. 6. Keep in mind that the first time you...

Printer Guide
Page 182
.... For more information, see page 87 (Macintosh) or page 123 (Windows). 182 of the image. See page 158 for instructions. • Align the print head. PRINTER ERROR RESTART THE PRINTER You tried to print while an error Press the P Power button to turn it back on. Check the Paper Source settings and make sure your...
.... For more information, see page 87 (Macintosh) or page 123 (Windows). 182 of the image. See page 158 for instructions. • Align the print head. PRINTER ERROR RESTART THE PRINTER You tried to print while an error Press the P Power button to turn it back on. Check the Paper Source settings and make sure your...


