

Network Guide
Page 11
... for Network Printing Overview This section describes the general procedure on page 17 for details. 5. Make sure that the necessary network components (such as TCP/IP) are set up the network interface. 1. Configure the network interface and install the printer driver. Connect the network interface to the network. For Macintosh users, see "About EpsonNet Config" on your computers, and network settings (such as the status lights. Install the necessary network components on page...
... for Network Printing Overview This section describes the general procedure on page 17 for details. 5. Make sure that the necessary network components (such as TCP/IP) are set up the network interface. 1. Configure the network interface and install the printer driver. Connect the network interface to the network. For Macintosh users, see "About EpsonNet Config" on your computers, and network settings (such as the status lights. Install the necessary network components on page...

Printer Guide
Page 13
... printer at epson.com/support and select your product for installing the printer software • For USB connection: a compliant USB Hi-Speed 2.0 port and a shielded USB "AB" cable from Series A (computer) to Series B (printer), up to change without notice. You'll also need your printer serial number and proof of professional printing products through Friday. Dial (888) 377-6611, 6 AM to common problems. You can download drivers, firmware, and documentation, get FAQs and troubleshooting advice, or e-mail Epson...
... printer at epson.com/support and select your product for installing the printer software • For USB connection: a compliant USB Hi-Speed 2.0 port and a shielded USB "AB" cable from Series A (computer) to Series B (printer), up to change without notice. You'll also need your printer serial number and proof of professional printing products through Friday. Dial (888) 377-6611, 6 AM to common problems. You can download drivers, firmware, and documentation, get FAQs and troubleshooting advice, or e-mail Epson...

Printer Guide
Page 54
... the file and click Choose or Open. 5. If the firmware version of firmware on , its LCD displays READY, and it is connected to see the LFP Remote Panel. 2. Checking the Current Firmware Version 1. When you don't need to have the EPSON LFP Remote Panel utility automatically locate and download the latest firmware from the Epson website. Make sure your product, then click Drivers & Downloads. Press the d button until PRINTER STATUS is updating. Caution: Don't turn...
... the file and click Choose or Open. 5. If the firmware version of firmware on , its LCD displays READY, and it is connected to see the LFP Remote Panel. 2. Checking the Current Firmware Version 1. When you don't need to have the EPSON LFP Remote Panel utility automatically locate and download the latest firmware from the Epson website. Make sure your product, then click Drivers & Downloads. Press the d button until PRINTER STATUS is updating. Caution: Don't turn...
Printer Guide
Page 87
... Epson driver offers an Advanced Black and White Photo mode. You can use are using Photoshop and a color-calibrated monitor will give you plan on printing borderless images on roll paper, check the guidelines on installing and configuring the printer driver, see page 49. Make sure any profiles you also need to the right folder. This chapter includes the following information for Mac OS X: • Choosing page setup settings for Macintosh Your Epson Stylus Pro 7900 or Pro 9900 comes with drivers and utilities...
... Epson driver offers an Advanced Black and White Photo mode. You can use are using Photoshop and a color-calibrated monitor will give you plan on printing borderless images on roll paper, check the guidelines on installing and configuring the printer driver, see page 49. Make sure any profiles you also need to the right folder. This chapter includes the following information for Mac OS X: • Choosing page setup settings for Macintosh Your Epson Stylus Pro 7900 or Pro 9900 comes with drivers and utilities...

Printer Guide
Page 158
... to start the cleaning cycle. 7. Aligning the Print Head Aligning the print head is still missing segments or has deflections after a power cleaning cycle, turn the printer off and leave it 's all automatic. This will do to align from the printer's control panel. If you can align the print head using the control panel: 1. Follow these steps to align the print head using the printer utility software, it 's a good idea to align the print head. If the pattern is the most thorough job in the shortest time...
... to start the cleaning cycle. 7. Aligning the Print Head Aligning the print head is still missing segments or has deflections after a power cleaning cycle, turn the printer off and leave it 's all automatic. This will do to align from the printer's control panel. If you can align the print head using the control panel: 1. Follow these steps to align the print head using the printer utility software, it 's a good idea to align the print head. If the pattern is the most thorough job in the shortest time...

Printer Guide
Page 179
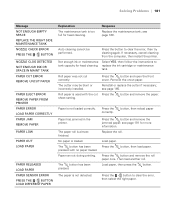
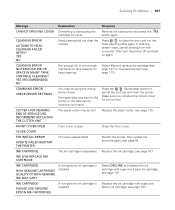
...Make sure you installed the correct driver for head cleaning. Replace the paper cutter; INK LOW REPLACE INK CARTRIDGE INK CARTRIDGE NON-GENUINE CARTRIDGE! see page 165. INK CARTRIDGE PLEASE USE GENUINE EPSON INK CARTRIDGES A non-genuine ink cartridge is installed. YES (RECOMMENDED) NO Not enough ink or not enough maintenance tank capacity for your printer. FRONT COVER OPEN Front cover is obstructing the indicated ink cover Remove the obstruction and press the button again. Epson ink cartridge; Solving Problems | 179 Message Explanation Response CANNOT OPEN...
...Make sure you installed the correct driver for head cleaning. Replace the paper cutter; INK LOW REPLACE INK CARTRIDGE INK CARTRIDGE NON-GENUINE CARTRIDGE! see page 165. INK CARTRIDGE PLEASE USE GENUINE EPSON INK CARTRIDGES A non-genuine ink cartridge is installed. YES (RECOMMENDED) NO Not enough ink or not enough maintenance tank capacity for your printer. FRONT COVER OPEN Front cover is obstructing the indicated ink cover Remove the obstruction and press the button again. Epson ink cartridge; Solving Problems | 179 Message Explanation Response CANNOT OPEN...

Printer Guide
Page 180
... the Pro 9900, note which tank needs replacement; see page 159. error remains, replace the cartridge. For the Pro 9900, note which tank is low. Print quality may need to install an ink cartridge that cannot be Note the code number and contact Epson as replaced soon. MAINTENANCE TANK NEARLY FULL The maintenance tank is finished, you have a bad Remove and reinstall the ink cartridge; MAINTENANCE REQUEST A printer part may decline when ink is nearly full; Replace the cartridge(s) before cleaning; INK CARTRIDGE ERROR PLEASE INSTALL THE CORRECT CARTRIDGES You...
... the Pro 9900, note which tank needs replacement; see page 159. error remains, replace the cartridge. For the Pro 9900, note which tank is low. Print quality may need to install an ink cartridge that cannot be Note the code number and contact Epson as replaced soon. MAINTENANCE TANK NEARLY FULL The maintenance tank is finished, you have a bad Remove and reinstall the ink cartridge; MAINTENANCE REQUEST A printer part may decline when ink is nearly full; Replace the cartridge(s) before cleaning; INK CARTRIDGE ERROR PLEASE INSTALL THE CORRECT CARTRIDGES You...
Printer Guide
Page 181
...PAPER CORRECTLY PAPER JAM REMOVE PAPER PAPER LOW PAPER OUT LOAD PAPER PAPER RELEASED LOAD PAPER PAPER SENSOR ERROR PRESS THE BUTTON LOAD DIFFERENT PAPER Explanation The maintenance tank is too full for more information. Response Replace the maintenance tank; The button has been pressed with the cut correctly. Press the button, then load paper. Auto cleaning cannot be blunt or incorrectly installed. button, then reload paper Paper has jammed in the printer. The paper is almost finished. replace the ink cartridge or maintenance tank. Roll paper was not cut sheet setting...
...PAPER CORRECTLY PAPER JAM REMOVE PAPER PAPER LOW PAPER OUT LOAD PAPER PAPER RELEASED LOAD PAPER PAPER SENSOR ERROR PRESS THE BUTTON LOAD DIFFERENT PAPER Explanation The maintenance tank is too full for more information. Response Replace the maintenance tank; The button has been pressed with the cut correctly. Press the button, then load paper. Auto cleaning cannot be blunt or incorrectly installed. button, then reload paper Paper has jammed in the printer. The paper is almost finished. replace the ink cartridge or maintenance tank. Roll paper was not cut sheet setting...

Printer Guide
Page 182
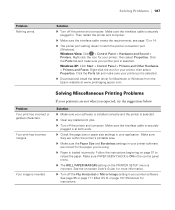
PAPER SKEW LOAD PAPER PROPERLY Paper is loaded correctly. Improving Print Quality You can often improve print quality by doing the following: • Run a nozzle check and cleaning cycle. PAPER SIZE ERROR The loaded paper size does not Make sure the paper size matches the size LOAD CORRECT PAPER SIZE match the size of the image. 182 | Solving Problems Message Explanation Response PAPER SETTING ERROR CHECK THE PAPER SOURCE IN THE DRIVER SETTINGS AND LOAD PAPER CORRECTLY The paper source selected in the printer driver and the control panel do not match. See page 154 for ...
PAPER SKEW LOAD PAPER PROPERLY Paper is loaded correctly. Improving Print Quality You can often improve print quality by doing the following: • Run a nozzle check and cleaning cycle. PAPER SIZE ERROR The loaded paper size does not Make sure the paper size matches the size LOAD CORRECT PAPER SIZE match the size of the image. 182 | Solving Problems Message Explanation Response PAPER SETTING ERROR CHECK THE PAPER SOURCE IN THE DRIVER SETTINGS AND LOAD PAPER CORRECTLY The paper source selected in the printer driver and the control panel do not match. See page 154 for ...
Printer Guide
Page 187
...; Download and install the latest driver for your printer, then select Properties. Follow the instructions beginning on the PRINTER SETUP menu is selected. ◗ Clear any stalled print jobs. ◗ Turn off the printer and computer. Make sure PAPER SKEW CHECK is selected. See page 95 or page 111 (Mac OS X) or page 137 (Windows) for your printer software. Solution ◗ Turn off the Flip Horizontal or Mirror Image setting in the control panel menu. ◗ The ROLL PAPER MARGIN setting on page 57...
...; Download and install the latest driver for your printer, then select Properties. Follow the instructions beginning on the PRINTER SETUP menu is selected. ◗ Clear any stalled print jobs. ◗ Turn off the printer and computer. Make sure PAPER SKEW CHECK is selected. See page 95 or page 111 (Mac OS X) or page 137 (Windows) for your printer software. Solution ◗ Turn off the Flip Horizontal or Mirror Image setting in the control panel menu. ◗ The ROLL PAPER MARGIN setting on page 57...

Printer Guide
Page 188
... clear any print job data paper after you 're using. ◗ Make sure the Paper Source setting in your printer software is correct. cancelled a job. ◗ Make sure the paper source is correct in your printer software. Follow the instructions on the network, or move the printer to select this setting. see page 154. Color images print in your printer software. Also check the Auto Cut settings in black only. ◗ Make sure the Color setting is set correctly. The printer continues to feed ◗ Press the Pause/reset button on the printer to replace...
... clear any print job data paper after you 're using. ◗ Make sure the Paper Source setting in your printer software is correct. cancelled a job. ◗ Make sure the paper source is correct in your printer software. Follow the instructions on the network, or move the printer to select this setting. see page 154. Color images print in your printer software. Also check the Auto Cut settings in black only. ◗ Make sure the Color setting is set correctly. The printer continues to feed ◗ Press the Pause/reset button on the printer to replace...
Printer Guide
Page 193
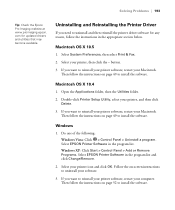
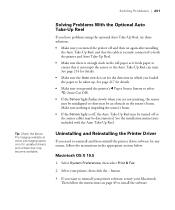
... to install the software. 193 Double-click Printer Setup Utility, select your printer, then click the - Then follow the instructions on page 49 to uninstall your Macintosh. Then follow the instructions on page 52 to reinstall your printer software, restart your software. 3. button. 3. Then follow the instructions in the appropriate section below. Windows 1. Windows XP: Click Start > Control Panel > Add or Remove Programs. Select EPSON Printer Software in the program list. Uninstalling and Reinstalling the Printer Driver...
... to install the software. 193 Double-click Printer Setup Utility, select your printer, then click the - Then follow the instructions on page 49 to uninstall your Macintosh. Then follow the instructions on page 52 to reinstall your printer software, restart your software. 3. button. 3. Then follow the instructions in the appropriate section below. Windows 1. Windows XP: Click Start > Control Panel > Add or Remove Programs. Select EPSON Printer Software in the program list. Uninstalling and Reinstalling the Printer Driver...
Printer Guide
Page 207
...-Up Reel, Auto, see Automatic Take-Up Reel, optional Technical support, 13 Temperature requirements, 195 Test Print menu, 152 Time and date setting, 163 Total prints, checking, 152 Transporting printer, 173 to 176 Trim lines, printing control panel, 70 Mac OS X 10.4, 115 Mac OS X 10.5, 99 Windows, 134 Troubleshooting, 177 to 193 U UltraChrome HDR ink cartridges, 160 Uninstalling software, 193 Unit ID number, 13 USB cable connecting, 49 port, 196 requirements, 13, 14 User-defined paper size Mac OS X 10...
...-Up Reel, Auto, see Automatic Take-Up Reel, optional Technical support, 13 Temperature requirements, 195 Test Print menu, 152 Time and date setting, 163 Total prints, checking, 152 Transporting printer, 173 to 176 Trim lines, printing control panel, 70 Mac OS X 10.4, 115 Mac OS X 10.5, 99 Windows, 134 Troubleshooting, 177 to 193 U UltraChrome HDR ink cartridges, 160 Uninstalling software, 193 Unit ID number, 13 USB cable connecting, 49 port, 196 requirements, 13, 14 User-defined paper size Mac OS X 10...
Product Brochure
Page 2
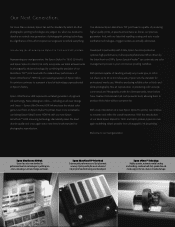
... utilizing ten colors - With the introduction of our latest Epson Stylus Pro 7900 and 9900 printers, Epson is capable of print quality and once again sets a new benchmark standard for professional media use. Our advanced Epson MicroPiezo TFP print head is once again redefining what's possible from an Epson Stylus Pro printer. Even more than a decade, Epson has set a new standard in professional-level ink technologies by the latest front- Epson MicroPiezo TFP Print Head Extreme print performance...
... utilizing ten colors - With the introduction of our latest Epson Stylus Pro 7900 and 9900 printers, Epson is capable of print quality and once again sets a new benchmark standard for professional media use. Our advanced Epson MicroPiezo TFP print head is once again redefining what's possible from an Epson Stylus Pro printer. Even more than a decade, Epson has set a new standard in professional-level ink technologies by the latest front- Epson MicroPiezo TFP Print Head Extreme print performance...

Product Brochure
Page 6
...® Fine Art, using media and automatically clean the print head if required Epson UltraChrome HDR Ink Technology Next Generation Ten-Color Pigment-Based Ink System „ Unique High Dynamic Range (HDR) pigments for an extremely wide color gamut „ Ten-color printing system including all color channels „ Aligns both Photo and Matte Black ink cartridges installed simultaneously, the Epson Stylus Pro 7900 and 9900 series printers automatically utilize the optimal black ink mode, delivering maximum black density for the chosen...
...® Fine Art, using media and automatically clean the print head if required Epson UltraChrome HDR Ink Technology Next Generation Ten-Color Pigment-Based Ink System „ Unique High Dynamic Range (HDR) pigments for an extremely wide color gamut „ Ten-color printing system including all color channels „ Aligns both Photo and Matte Black ink cartridges installed simultaneously, the Epson Stylus Pro 7900 and 9900 series printers automatically utilize the optimal black ink mode, delivering maximum black density for the chosen...
Product Brochure
Page 7
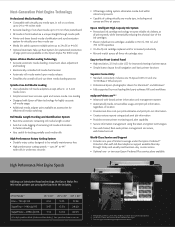
... the Epson Stylus Pro 9900 only) Epson ePlaten Media Loading Technology „ Accurate automatic media loading, movement, skew adjustment and tracking „ Electronically controlled roll media back tension „ Automatic roll media rewind upon media release „ Simplifies the overall roll and cut -sheet media up to1.5 mm thick posterboard „ All media is front-loaded via a unique straight-through media path „ Printer and driver based media identification and synchronization system for virtually error-free media use „ Media...
... the Epson Stylus Pro 9900 only) Epson ePlaten Media Loading Technology „ Accurate automatic media loading, movement, skew adjustment and tracking „ Electronically controlled roll media back tension „ Automatic roll media rewind upon media release „ Simplifies the overall roll and cut -sheet media up to1.5 mm thick posterboard „ All media is front-loaded via a unique straight-through media path „ Printer and driver based media identification and synchronization system for virtually error-free media use „ Media...

Product Brochure
Page 8
..., ink jet print head 11-cartridge (O, G, C, Lc, VM, VLm, Y, Lk, LLk + PK or MK) Auto head alignment and cleaning technology Auto sharing black ink channel Epson UltraChrome HDR Ink technology Professional-level pigment-based ink technology Nozzle Configuration Color and Monochrome 360 nozzles x 10 Droplet Technology Smallest droplet size 3.5 picoliters Variable Droplet Technology produces up to 44" width Up to print. Product/Accessories Epson Stylus Pro Printer Part Numbers SP7900 SP9900 SP7900HDR SP9900HDR Epson SpectroProofer UV-cut version...
..., ink jet print head 11-cartridge (O, G, C, Lc, VM, VLm, Y, Lk, LLk + PK or MK) Auto head alignment and cleaning technology Auto sharing black ink channel Epson UltraChrome HDR Ink technology Professional-level pigment-based ink technology Nozzle Configuration Color and Monochrome 360 nozzles x 10 Droplet Technology Smallest droplet size 3.5 picoliters Variable Droplet Technology produces up to 44" width Up to print. Product/Accessories Epson Stylus Pro Printer Part Numbers SP7900 SP9900 SP7900HDR SP9900HDR Epson SpectroProofer UV-cut version...
User's Guide
Page 166
...; CLEAN EACH COLOR-Press r, select the color pair you can align the print head using the control panel: 1. When cleaning is still missing segments or has deflections after a power cleaning cycle, turn the printer off and leave it 's all automatic. 166 | Maintaining and Transporting the Printer Note: You must use Epson Doubleweight Matte Paper or Ultra Premium Photo Paper Luster. If the pattern is finished and the Power light stops flashing, print the nozzle check again to align the print head using the printer utility software...
...; CLEAN EACH COLOR-Press r, select the color pair you can align the print head using the control panel: 1. When cleaning is still missing segments or has deflections after a power cleaning cycle, turn the printer off and leave it 's all automatic. 166 | Maintaining and Transporting the Printer Note: You must use Epson Doubleweight Matte Paper or Ultra Premium Photo Paper Luster. If the pattern is finished and the Power light stops flashing, print the nozzle check again to align the print head using the printer utility software...
User's Guide
Page 187
... Message Explanation Response CANNOT OPEN INK COVER Something is installed. YES NO Head cleaning did not clear the nozzles. Press to cancel the print job and reset the printer. Select Yes and replace the cartridge (see page 167) or maintenance tank (see page 173. see page 177). Close the front cover. Replace the ink cartridge; see page 54. Epson ink cartridge; Press the Pause/reset button to clear the error and run the head cleaning utility again. Replace the paper cutter; Restart the printer, then update the firmware again; INK LOW REPLACE INK CARTRIDGE...
... Message Explanation Response CANNOT OPEN INK COVER Something is installed. YES NO Head cleaning did not clear the nozzles. Press to cancel the print job and reset the printer. Select Yes and replace the cartridge (see page 167) or maintenance tank (see page 173. see page 177). Close the front cover. Replace the ink cartridge; see page 54. Epson ink cartridge; Press the Pause/reset button to clear the error and run the head cleaning utility again. Replace the paper cutter; Restart the printer, then update the firmware again; INK LOW REPLACE INK CARTRIDGE...
User's Guide
Page 201
... select Print & Fax. 2. button. 3. Solving Problems | 201 Tip: Check the Epson Pro Imaging website at www.proimaging.epson. Uninstalling and Reinstalling the Printer Driver If you loaded the paper to uninstall and then reinstall the printer driver software for updated drivers and utilities that it interrupts the sensor so the Auto Take-Up Reel can turn. See page 214 for details. • Make sure the Auto switch is enough slack in which you need to be...
... select Print & Fax. 2. button. 3. Solving Problems | 201 Tip: Check the Epson Pro Imaging website at www.proimaging.epson. Uninstalling and Reinstalling the Printer Driver If you loaded the paper to uninstall and then reinstall the printer driver software for updated drivers and utilities that it interrupts the sensor so the Auto Take-Up Reel can turn. See page 214 for details. • Make sure the Auto switch is enough slack in which you need to be...


