
FX-880 USB Printer Installation Instructions
Page 1
... screen, double-click setup.exe in the main folder where the files installed): 5. Download the FX-880 printer driver that includes USB adapter cable support from your hard drive (fx880usb.exe). 3. Installing Your EPSON® FX-880 Printer Driver Using the EPSON USB Adapter Cable Before You Begin: • Read through these instructions and, if possible, print a copy so you have it from http://support.epson.com. Follow the instructions below for Windows 98 1. The printer driver begins installing to the computer using the EPSON USB adapter cable. 1
... screen, double-click setup.exe in the main folder where the files installed): 5. Download the FX-880 printer driver that includes USB adapter cable support from your hard drive (fx880usb.exe). 3. Installing Your EPSON® FX-880 Printer Driver Using the EPSON USB Adapter Cable Before You Begin: • Read through these instructions and, if possible, print a copy so you have it from http://support.epson.com. Follow the instructions below for Windows 98 1. The printer driver begins installing to the computer using the EPSON USB adapter cable. 1
Product Brochure
Page 2
... paper Continuous multipart, original plus 5 carbonless copies; approximately 3 million characters (Draft 10 cpi, 14 dots/character) Reliability/Life Expectancy Total print volume 6.5 million lines (except print head) MTBF 10,000 POH @ 25%, 35% coverage Print head 200 million characters @ 14 dots per character Product/Accessory Part Numbers FX-880 Printer C229001 Additional Pull Tractor Unit C800201 Cut sheet feeders High-capacity/envelope C806381 Single bin C806371 Interfaces - Type B Serial...
... paper Continuous multipart, original plus 5 carbonless copies; approximately 3 million characters (Draft 10 cpi, 14 dots/character) Reliability/Life Expectancy Total print volume 6.5 million lines (except print head) MTBF 10,000 POH @ 25%, 35% coverage Print head 200 million characters @ 14 dots per character Product/Accessory Part Numbers FX-880 Printer C229001 Additional Pull Tractor Unit C800201 Cut sheet feeders High-capacity/envelope C806381 Single bin C806371 Interfaces - Type B Serial...
Product Information Guide
Page 1
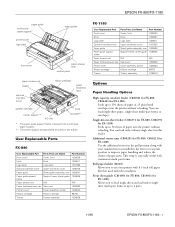
... Paper guide support frame Support frame, sheet guide 1039332 Paper tension unit N/A N/A Paper thickness lever cap Cap cover 1039356 Printer cover Cover assembly, printer 1038533 Ribbon cartridge Ribbon cartridge #8755 Tractor Tractor assembly 1038519 Options Paper Handling Options High-capacity cut -sheet feeder (C806371 for FX-880, C806391 for FX-1180) Allows you to 50 sheets of paper jams. This setup is beneath the continuous paper support. ** The center support and sprockets are parts of up to use your standard tractor installed...
... Paper guide support frame Support frame, sheet guide 1039332 Paper tension unit N/A N/A Paper thickness lever cap Cap cover 1039356 Printer cover Cover assembly, printer 1038533 Ribbon cartridge Ribbon cartridge #8755 Tractor Tractor assembly 1038519 Options Paper Handling Options High-capacity cut -sheet feeder (C806371 for FX-880, C806391 for FX-1180) Allows you to 50 sheets of paper jams. This setup is beneath the continuous paper support. ** The center support and sprockets are parts of up to use your standard tractor installed...
Product Information Guide
Page 2
... cpi) Resolution: Maximum 240 × 144 dpi (near letter quality) Interfaces: One standard bidirectional, 8-bit, parallel interface with IEEE 1284 nibble mode support and one of up to load single sheets and carbonless singlesheet multi-part forms of the following EPSON interface cards in your printer. EPSON FX-880/FX-1180 11/98 EPSON FX-880/FX-1180 Front paper guide (C814021 for FX-880, C814031 for text and graphics printing.
... cpi) Resolution: Maximum 240 × 144 dpi (near letter quality) Interfaces: One standard bidirectional, 8-bit, parallel interface with IEEE 1284 nibble mode support and one of up to load single sheets and carbonless singlesheet multi-part forms of the following EPSON interface cards in your printer. EPSON FX-880/FX-1180 11/98 EPSON FX-880/FX-1180 Front paper guide (C814021 for FX-880, C814031 for text and graphics printing.
Product Information Guide
Page 10
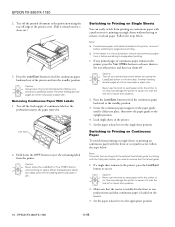
... feeding several pages at a time may cause a paper jam. Lower the continuous paper support on single sheets without having to remove or reload paper. If a single sheet remains in the printer, press the Load/Eject button to the upright position. 4. Tear off the fresh supply of the printer and into place, then move the paper guide to eject it before switching to the tear-off your printed document before switching to...
... feeding several pages at a time may cause a paper jam. Lower the continuous paper support on single sheets without having to remove or reload paper. If a single sheet remains in the printer, press the Load/Eject button to the upright position. 4. Tear off the fresh supply of the printer and into place, then move the paper guide to eject it before switching to the tear-off your printed document before switching to...
Product Information Guide
Page 11
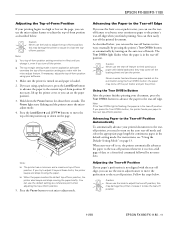
... Pause button to adjust the tear-off position; For instructions, see the paper position. 3. Press the Load/Eject U and LF/FF D buttons to move the perforation to the tear-off position. The Tear Off/Bin light flashes when the paper is loaded. 2. Caution: Never use the knob to adjust the top-of-form position; EPSON FX-880/FX-1180 Adjusting the Top-of-Form Position If your document...
... Pause button to adjust the tear-off position; For instructions, see the paper position. 3. Press the Load/Eject U and LF/FF D buttons to move the perforation to the tear-off position. The Tear Off/Bin light flashes when the paper is loaded. 2. Caution: Never use the knob to adjust the top-of-form position; EPSON FX-880/FX-1180 Adjusting the Top-of-Form Position If your document...
Product Information Guide
Page 12
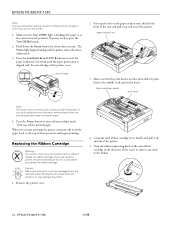
... the print head while the printer is at the current tear-off position. EPSON FX-880/FX-1180 11/98 EPSON FX-880/FX-1180 Note: Your tear-off position setting remains in effect until the paper perforation is aligned with the tear-off the printer. 1. Replacing the Ribbon Cartridge Warning: You need to remove any slack in the ribbon. 12 - Make sure the Tear Off/Bin light is flashing (the paper is...
... the print head while the printer is at the current tear-off position. EPSON FX-880/FX-1180 11/98 EPSON FX-880/FX-1180 Note: Your tear-off position setting remains in effect until the paper perforation is aligned with the tear-off the printer. 1. Replacing the Ribbon Cartridge Warning: You need to remove any slack in the ribbon. 12 - Make sure the Tear Off/Bin light is flashing (the paper is...
Product Information Guide
Page 13
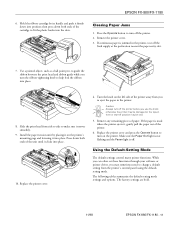
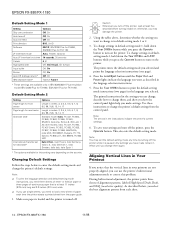
... printer cover and press the Operate button to turn off position may sometimes need to turn on the left side of the printer away from the printer's control panel using the defaultsetting mode. Press the Operate button to change a default setting from you may be damaged or the top-ofform or tear-off the printer. 2. Press down both ends of the printer. 6. Using the Default-Setting Mode The default settings control many printer functions. If the paper is jammed in the printer. EPSON FX-880/FX...
... printer cover and press the Operate button to turn off position may sometimes need to turn on the left side of the printer away from the printer's control panel using the defaultsetting mode. Press the Operate button to change a default setting from you may be damaged or the top-ofform or tear-off the printer. 2. Press down both ends of the printer. 6. Using the Default-Setting Mode The default settings control many printer functions. If the paper is jammed in the printer. EPSON FX-880/FX...
Product Information Guide
Page 14
... to change the printer's default settings from the paper guide. 1. Note: t To print the language selection and default-setting mode instructions, you need to print the default-setting mode instructions (two pages) in effect until the Paper Out and Pause lights indicate the language you selected. The printer enters the default-setting mode you may exit the default-setting mode any time by turning off . Press the Load/Eject button until you select the best alignment pattern from each time the printer ejects a printed sheet from the control panel. Press...
... to change the printer's default settings from the paper guide. 1. Note: t To print the language selection and default-setting mode instructions, you need to print the default-setting mode instructions (two pages) in effect until the Paper Out and Pause lights indicate the language you selected. The printer enters the default-setting mode you may exit the default-setting mode any time by turning off . Press the Load/Eject button until you select the best alignment pattern from each time the printer ejects a printed sheet from the control panel. Press...
Product Information Guide
Page 15
EPSON FX-880/FX-1180 Note: To print the instruction sheet and alignment patterns, you need to load a new sheet of alignment patterns. 3. Make sure paper is loaded and the printer is turned off the printer and exit the bidirectional adjustment mode. Caution: Whenever you turn on ; While holding down the Pause button, press the Operate button to turn on the printer. The printer enters the bidirectional adjustment mode and then prints instructions and the first set of at least the following sizes: Paper Type Continuous paper Single...
EPSON FX-880/FX-1180 Note: To print the instruction sheet and alignment patterns, you need to load a new sheet of alignment patterns. 3. Make sure paper is loaded and the printer is turned off the printer and exit the bidirectional adjustment mode. Caution: Whenever you turn on ; While holding down the Pause button, press the Operate button to turn on the printer. The printer enters the bidirectional adjustment mode and then prints instructions and the first set of at least the following sizes: Paper Type Continuous paper Single...

User Manual
Page 5
... Instructions 0-8 Print Head Caution Symbol 0-9 ENERGY STAR Compliance 0-10 For United Kingdom Users 0-10 Use of options 0-10 Safety information 0-10 How To Use Your Manuals 0-11 Warnings, Cautions, and Notes 0-12 Chapter 1 Setting Up the Printer Unpacking the Printer 1-2 Choosing a Place for the Printer 1-3 Positioning the continuous paper supply 1-4 Installing or Replacing the Ribbon Cartridge 1-5 Plugging in the Printer 1-10 Connecting the Printer to Your Computer 1-11 Installing the Printer Driver...
... Instructions 0-8 Print Head Caution Symbol 0-9 ENERGY STAR Compliance 0-10 For United Kingdom Users 0-10 Use of options 0-10 Safety information 0-10 How To Use Your Manuals 0-11 Warnings, Cautions, and Notes 0-12 Chapter 1 Setting Up the Printer Unpacking the Printer 1-2 Choosing a Place for the Printer 1-3 Positioning the continuous paper supply 1-4 Installing or Replacing the Ribbon Cartridge 1-5 Plugging in the Printer 1-10 Connecting the Printer to Your Computer 1-11 Installing the Printer Driver...
User Manual
Page 38
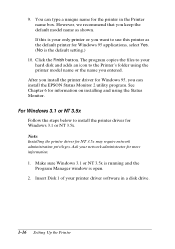
... using the Status Monitor. Make sure Windows 3.1 or NT 3.5x is running and the Program Manager window is the default setting.) 10. The program copies the files to install the printer driver for NT 3.5x may require network administration privileges. Note: Installing the printer driver for Windows 3.1 or NT 3.5x. If this printer as shown. Insert Disk 1 of your network administrator for Windows 95 applications, select Yes. (No is open. 2. After you install the printer driver...
... using the Status Monitor. Make sure Windows 3.1 or NT 3.5x is running and the Program Manager window is the default setting.) 10. The program copies the files to install the printer driver for NT 3.5x may require network administration privileges. Note: Installing the printer driver for Windows 3.1 or NT 3.5x. If this printer as shown. Insert Disk 1 of your network administrator for Windows 95 applications, select Yes. (No is open. 2. After you install the printer driver...
User Manual
Page 42
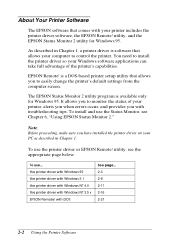
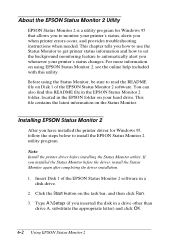
... Status Monitor, see the appropriate page below. The EPSON Status Monitor 2 utility program is available only for Windows 95. utility, see Chapter 6, "Using EPSON Status Monitor 2." About Your Printer Software The EPSON software that allows you to easily change the printer's default settings from the computer screen. utility, and the EPSON Status Monitor 2 utility for Windows 95. Note: Before proceeding, make sure you have installed the printer driver on your printer includes the printer driver software, the EPSON...
... Status Monitor, see the appropriate page below. The EPSON Status Monitor 2 utility program is available only for Windows 95. utility, see Chapter 6, "Using EPSON Status Monitor 2." About Your Printer Software The EPSON software that allows you to easily change the printer's default settings from the computer screen. utility, and the EPSON Status Monitor 2 utility for Windows 95. Note: Before proceeding, make sure you have installed the printer driver on your printer includes the printer driver software, the EPSON...
User Manual
Page 116
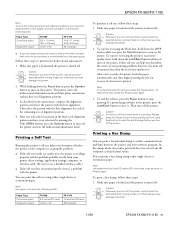
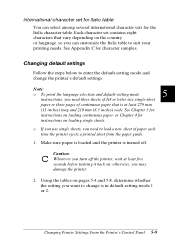
... whether the setting you need three sheets of A4 or letter size single-sheet paper or three pages of paper each time the printer ejects a printed sheet from the paper guide. 1. Changing Printer Settings From the Printer's Control Panel 5-9 See Appendix C for the Italic character table. c Caution: Whenever you turn off . Each character set for instructions on ; Note: o To print the language selection and default-setting mode 5 instructions, you need to suit your printing needs. Make sure paper is loaded and the printer is at least...
... whether the setting you need three sheets of A4 or letter size single-sheet paper or three pages of paper each time the printer ejects a printed sheet from the paper guide. 1. Changing Printer Settings From the Printer's Control Panel 5-9 See Appendix C for the Italic character table. c Caution: Whenever you turn off . Each character set for instructions on ; Note: o To print the language selection and default-setting mode 5 instructions, you need to suit your printing needs. Make sure paper is loaded and the printer is at least...
User Manual
Page 119
Before using EPSON Status Monitor 2, see the online help included with this README file in the EPSON Status Monitor 2 folder, located in the EPSON folder on the Status Monitor. Installing EPSON Status Monitor 2 After you have installed the printer driver for Windows 95 that allows you to monitor your printer's status changes. Note: Install the printer driver before the driver, install the Status Monitor again after completing the driver installation. 1. Click the Start button on Disk 1 of the EPSON Status Monitor 2 software in a drive other...
Before using EPSON Status Monitor 2, see the online help included with this README file in the EPSON Status Monitor 2 folder, located in the EPSON folder on the Status Monitor. Installing EPSON Status Monitor 2 After you have installed the printer driver for Windows 95 that allows you to monitor your printer's status changes. Note: Install the printer driver before the driver, install the Status Monitor again after completing the driver installation. 1. Click the Start button on Disk 1 of the EPSON Status Monitor 2 software in a drive other...
User Manual
Page 120
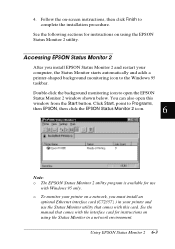
... window from the Start button. 4. See the manual that comes with the interface card for instructions on using the EPSON Status Monitor 2 utility. Click Start, point to complete the installation procedure. Using EPSON Status Monitor 2 6-3 You can also open the EPSON Status Monitor 2 window shown below. Accessing EPSON Status Monitor 2 After you must install an optional Ethernet interface card (C72357] ) in a network environment. o To monitor your computer, the Status Monitor starts automatically and adds a printer...
... window from the Start button. 4. See the manual that comes with the interface card for instructions on using the EPSON Status Monitor 2 utility. Click Start, point to complete the installation procedure. Using EPSON Status Monitor 2 6-3 You can also open the EPSON Status Monitor 2 window shown below. Accessing EPSON Status Monitor 2 After you must install an optional Ethernet interface card (C72357] ) in a network environment. o To monitor your computer, the Status Monitor starts automatically and adds a printer...
User Manual
Page 132
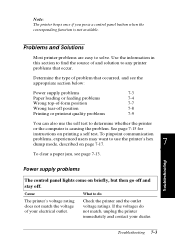
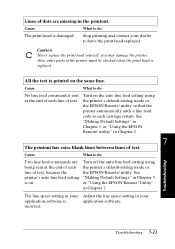
See page 7-15 for instructions on page 7-17. 7 To clear a paper jam, see the appropriate section below: Power supply problems 7-3 Paper loading or feeding problems 7-4 Wrong top-of-form position 7-7 Wrong tear-off . Troubleshooting Power supply problems The control panel lights come on briefly, but then go off and stay off position 7-8 Printing or printout quality problems 7-9 You can also use the printer's hex dump mode, described on printing a self test. Cause What to do not...
See page 7-15 for instructions on page 7-17. 7 To clear a paper jam, see the appropriate section below: Power supply problems 7-3 Paper loading or feeding problems 7-4 Wrong top-of-form position 7-7 Wrong tear-off . Troubleshooting Power supply problems The control panel lights come on briefly, but then go off and stay off position 7-8 Printing or printout quality problems 7-9 You can also use the printer's hex dump mode, described on printing a self test. Cause What to do not...
User Manual
Page 140
... Turn off the auto line feed setting using the printer's default-setting mode or the EPSON Remote! utility so that the printer automatically adds a line feed code to have the print head replaced. See "Making Default Settings" in Chapter 2. utility. Utility" in Chapter 5, or "Using the EPSON Remote! c Caution: Never replace the print head yourself; Cause What to do No line feed command is damaged. utility" in your application software is replaced. Troubleshooting 7-11 The line space setting in your dealer to each the printer's default-setting mode...
... Turn off the auto line feed setting using the printer's default-setting mode or the EPSON Remote! utility so that the printer automatically adds a line feed code to have the print head replaced. See "Making Default Settings" in Chapter 2. utility. Utility" in Chapter 5, or "Using the EPSON Remote! c Caution: Never replace the print head yourself; Cause What to do No line feed command is damaged. utility" in your application software is replaced. Troubleshooting 7-11 The line space setting in your dealer to each the printer's default-setting mode...
User Manual
Page 214
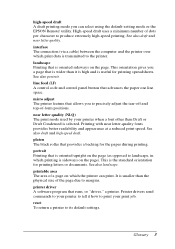
... a backing for printing letters or documents. platen The black roller that allows you to precisely adjust the tear-off and top-of the page due to the printer. portrait Printing that is sideways on which the printer can select using the default-setting mode or the EPSON Remote! Printer drivers send commands to landscape, in which print data is the standard orientation for the paper during printing. interface The connection (via a cable) between...
... a backing for printing letters or documents. platen The black roller that allows you to precisely adjust the tear-off and top-of the page due to the printer. portrait Printing that is sideways on which the printer can select using the default-setting mode or the EPSON Remote! Printer drivers send commands to landscape, in which print data is the standard orientation for the paper during printing. interface The connection (via a cable) between...

User Manual
Page 218
...Power cord, 1-2, Power supply problems, 7-3 Print head caution symbol, 9 overheated, 1-7, 7-2 IN-3 See single-sheet specifications, C-5 Paper guide, 1-2, inside back cover installing, 4-2 loading paper, 4-4 Paper Out light, inside front cover Paper path, 3-6 Paper release lever, 2-3, 3-2, 7-2, inside back cover Paper slots, 5-6 Paper tension unit, inside back cover installing, 1-9 removing, 3-21 Paper thickness lever, 3-3, inside back cover Parallel interface, inside back cover Pause button, inside front cover light, inside back cover paper handling, A-2 printer drivers for DOS program users...
...Power cord, 1-2, Power supply problems, 7-3 Print head caution symbol, 9 overheated, 1-7, 7-2 IN-3 See single-sheet specifications, C-5 Paper guide, 1-2, inside back cover installing, 4-2 loading paper, 4-4 Paper Out light, inside front cover Paper path, 3-6 Paper release lever, 2-3, 3-2, 7-2, inside back cover Paper slots, 5-6 Paper tension unit, inside back cover installing, 1-9 removing, 3-21 Paper thickness lever, 3-3, inside back cover Parallel interface, inside back cover Pause button, inside front cover light, inside back cover paper handling, A-2 printer drivers for DOS program users...


