Installation Manual
Page 1
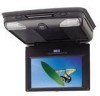
Owners and Installation Manual MMD70 7" LCD MONITOR & DVD PLAYER
Owners and Installation Manual MMD70 7" LCD MONITOR & DVD PLAYER
Installation Manual
Page 4
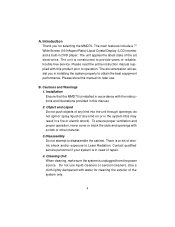
... The main features include a 7" Wide Screen (16:9 Aspect Ratio) Liquid Crystal Display (LCD) monitor and a built-in accordance with this manual. 2. Cautions and Warnings 1. To ensure proper ventilation and proper operation, never cover or ...block the slots and openings with water for cleaning the exterior of electric shock and/or exposure to disassemble the cabinet. A. The unit is a risk of the system only. 4 Installation Ensure that the MMD70 is installed in DVD player...
... The main features include a 7" Wide Screen (16:9 Aspect Ratio) Liquid Crystal Display (LCD) monitor and a built-in accordance with this manual. 2. Cautions and Warnings 1. To ensure proper ventilation and proper operation, never cover or ...block the slots and openings with water for cleaning the exterior of electric shock and/or exposure to disassemble the cabinet. A. The unit is a risk of the system only. 4 Installation Ensure that the MMD70 is installed in DVD player...
Installation Manual
Page 5
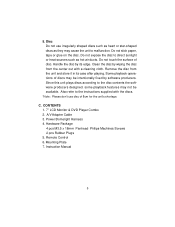
... by software producers. Since this unit plays discs according to the instructions supplied with a cleaning cloth. CONTENTS 1. 7" LCD Monitor & DVD Player Combo 2. 5. Do not stick paper, tape or glue on the disc. Power/Domelight Harness 4. Instruction Manual 5 Clean the disc by wiping the disc from the unit and store it in its edge. Mounting Plate...
... by software producers. Since this unit plays discs according to the instructions supplied with a cleaning cloth. CONTENTS 1. 7" LCD Monitor & DVD Player Combo 2. 5. Do not stick paper, tape or glue on the disc. Power/Domelight Harness 4. Instruction Manual 5 Clean the disc by wiping the disc from the unit and store it in its edge. Mounting Plate...
Installation Manual
Page 7
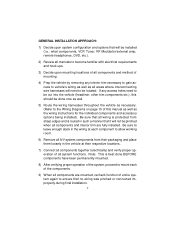
...now as well. 5) Route the wiring harnesses throughout the vehicle as necessary. (Refer to the Wiring Diagrams on page 10 of this manual as well as all system functions. Note: This is routed in the vehicle at each component to allow working room. 6) Remove all...1) Decide upon system configuration and options that will be installed (i.e.: what components, VCP, Tuner, RF Modulator/external amp, remote headphones, DVD, etc.). 2) Review all manuals to become familiar with electrical requirements and hook ups. 3) Decide upon mounting locations of all components and method of mounting. 4) Prep the...
...now as well. 5) Route the wiring harnesses throughout the vehicle as necessary. (Refer to the Wiring Diagrams on page 10 of this manual as well as all system functions. Note: This is routed in the vehicle at each component to allow working room. 6) Remove all...1) Decide upon system configuration and options that will be installed (i.e.: what components, VCP, Tuner, RF Modulator/external amp, remote headphones, DVD, etc.). 2) Review all manuals to become familiar with electrical requirements and hook ups. 3) Decide upon mounting locations of all components and method of mounting. 4) Prep the...
Installation Manual
Page 8
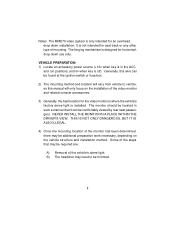
Notes :The MMD70 video system is only intended for horizontal, drop down installation. and run positions, and 0v when key is in such a manner that may be required are: A) Removal of the monitor has been determined, there may need to vehicle, so this manual will only focus on the ...-box. 2) The mounting method and location will vary from vehicle to be comfortably viewed by rear seat passengers. The monitor should be located in the ACC. NEVER INSTALL THE MONITOR IN A PLACE WITHIN THE DRIVER'S VIEW. VEHICLE PREPARATION: 1) Locate an accessory power source (+12v when key is off...
Notes :The MMD70 video system is only intended for horizontal, drop down installation. and run positions, and 0v when key is in such a manner that may be required are: A) Removal of the monitor has been determined, there may need to vehicle, so this manual will only focus on the ...-box. 2) The mounting method and location will vary from vehicle to be comfortably viewed by rear seat passengers. The monitor should be located in the ACC. NEVER INSTALL THE MONITOR IN A PLACE WITHIN THE DRIVER'S VIEW. VEHICLE PREPARATION: 1) Locate an accessory power source (+12v when key is off...
Installation Manual
Page 27
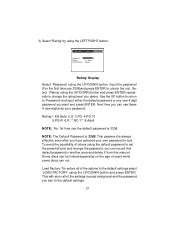
... options to lock. This will return all of users while some discs can record this default password in another area and delete it from this manual. Input the password (For the first time use these 4 new digital as your own password to the default settings select 'LOAD FACTORY' using the UP...
... options to lock. This will return all of users while some discs can record this default password in another area and delete it from this manual. Input the password (For the first time use these 4 new digital as your own password to the default settings select 'LOAD FACTORY' using the UP...
Installation Manual
Page 28
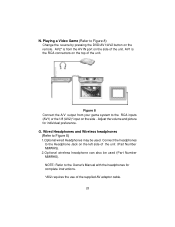
... RCA inputs (AV1) or the 1/8 (AV2)* input on the side . NOTE: Refer to the Headphone Jack on the remote. Connect the headphones to the Owner's Manual with the headphones for individual preference. Adjust the volume and picture for complete instructions. *AV2 requires the use of the unit. N. AV2* is the RCA... is from your game system to Figure 8) 1.Optional wired Headphones may be used . Playing a Video Game (Refer to Figure 8) Change the source by pressing the DVD/AV1/AV2 button on the left side of the unit.
... RCA inputs (AV1) or the 1/8 (AV2)* input on the side . NOTE: Refer to the Headphone Jack on the remote. Connect the headphones to the Owner's Manual with the headphones for individual preference. Adjust the volume and picture for complete instructions. *AV2 requires the use of the unit. N. AV2* is the RCA... is from your game system to Figure 8) 1.Optional wired Headphones may be used . Playing a Video Game (Refer to Figure 8) Change the source by pressing the DVD/AV1/AV2 button on the left side of the unit.
