
User Manual
Page 4
... the first time 3-3 3.2 Powering off the computer 3-4 3.2.1 Using the OS shut down function 3-4 3.2.2 Using the dual function power switch 3-4 Chapter 4: BIOS setup 4.1 Managing and updating your BIOS 4-3 4.1.1 ASUS EZ Flash 2 utility 4-3 4.1.2 BUPDATER utility 4-4 4.1.3 ASUS CrashFree BIOS 3 utility 4-6 4.2 BIOS setup program 4-7 4.2.1 BIOS menu screen 4-8 4.2.2 Menu bar 4-8 4.2.3 Navigation keys 4-8 4.2.4 Menu items 4-9 4.2.5 Sub-menu items 4-9 4.2.6 Configuration fields 4-9 4.2.7 Pop-up window 4-9 4.2.8 Scroll bar 4-9 4.2.9 General...
... the first time 3-3 3.2 Powering off the computer 3-4 3.2.1 Using the OS shut down function 3-4 3.2.2 Using the dual function power switch 3-4 Chapter 4: BIOS setup 4.1 Managing and updating your BIOS 4-3 4.1.1 ASUS EZ Flash 2 utility 4-3 4.1.2 BUPDATER utility 4-4 4.1.3 ASUS CrashFree BIOS 3 utility 4-6 4.2 BIOS setup program 4-7 4.2.1 BIOS menu screen 4-8 4.2.2 Menu bar 4-8 4.2.3 Navigation keys 4-8 4.2.4 Menu items 4-9 4.2.5 Sub-menu items 4-9 4.2.6 Configuration fields 4-9 4.2.7 Pop-up window 4-9 4.2.8 Scroll bar 4-9 4.2.9 General...

User Manual
Page 5
... Priority 4-32 4.6.2 Boot Settings Configuration 4-33 4.6.3 Security 4-34 4.7 Tools menu 4-36 4.7.1 ASUS EZ Flash 2 4-36 4.8 Exit menu 4-37 Chapter 5: RAID configuration 5.1 Setting up RAID 5-3 5.1.1 RAID definitions 5-3 5.1.2 Installing hard disk drives 5-4 5.1.3 Setting the RAID item in BIOS 5-4 5.2 Intel® Matrix Storage Manager Option ROM Utility 5-5 5.2.1 Creating a RAID set 5-6 5.2.2 Creating a Recovery set 5-7 5.2.3 Deleting a RAID set...
... Priority 4-32 4.6.2 Boot Settings Configuration 4-33 4.6.3 Security 4-34 4.7 Tools menu 4-36 4.7.1 ASUS EZ Flash 2 4-36 4.8 Exit menu 4-37 Chapter 5: RAID configuration 5.1 Setting up RAID 5-3 5.1.1 RAID definitions 5-3 5.1.2 Installing hard disk drives 5-4 5.1.3 Setting the RAID item in BIOS 5-4 5.2 Intel® Matrix Storage Manager Option ROM Utility 5-5 5.2.1 Creating a RAID set 5-6 5.2.2 Creating a Recovery set 5-7 5.2.3 Deleting a RAID set...

User Manual
Page 6
...11 Exiting the Intel® Matrix Storage Manager 5-12 Rebuilding the RAID 5-12 Setting the Boot array in the BIOS Setup Utility 5-14 Chapter 6: Driver installation 6.1 RAID driver installation 6-3 6.1.1 Creating a RAID driver disk 6-3 6.1.2 Installing the... device installation 6-8 6.3 LAN driver installation 6-10 6.4 Management applications and utilities installation 6-13 6.4.1 Running the support DVD 6-13 6.4.2 Drivers menu 6-13 6.4.3 Utilities menu 6-14 6.4.4 Make disk menu 6-14 6.4.5 Contact information 6-14 Appendix: Reference information A.1 P7F-M WS block diagram A-3 vi
...11 Exiting the Intel® Matrix Storage Manager 5-12 Rebuilding the RAID 5-12 Setting the Boot array in the BIOS Setup Utility 5-14 Chapter 6: Driver installation 6.1 RAID driver installation 6-3 6.1.1 Creating a RAID driver disk 6-3 6.1.2 Installing the... device installation 6-8 6.3 LAN driver installation 6-10 6.4 Management applications and utilities installation 6-13 6.4.1 Running the support DVD 6-13 6.4.2 Drivers menu 6-13 6.4.3 Utilities menu 6-14 6.4.4 Make disk menu 6-14 6.4.5 Contact information 6-14 Appendix: Reference information A.1 P7F-M WS block diagram A-3 vi
User Manual
Page 9
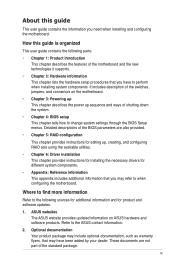
... installing and configuring the motherboard. ASUS websites The ASUS website provides updated information on the motherboard. • Chapter 3: Powering up This chapter describes the power up , creating, and configuring RAID sets using the available utilities. • Chapter 6: Driver ...introduction This chapter describes the features of shutting down the system. • Chapter 4: BIOS setup This chapter tells how to perform when installing system components. Refer to the ASUS contact information. 2. These documents are also provided. • Chapter 5: RAID configuration This...
... installing and configuring the motherboard. ASUS websites The ASUS website provides updated information on the motherboard. • Chapter 3: Powering up This chapter describes the power up , creating, and configuring RAID sets using the available utilities. • Chapter 6: Driver ...introduction This chapter describes the features of shutting down the system. • Chapter 4: BIOS setup This chapter tells how to perform when installing system components. Refer to the ASUS contact information. 2. These documents are also provided. • Chapter 5: RAID configuration This...

User Manual
Page 55
... disk.) 2. ASUSTek EZ Flash 2 BIOS ROM Utility V4.06 FLASH TYPE: MXIC 25L1605A Current ROM BOARD: P7F-M WS VER: 0202 DATE: 08/24/2009 Update ROM BOARD: Unknown VER: Unknown DATE: Unknown PATH: A:\ A: Note [Enter] Select or Load [Up/Down/Home/End] Move [Tab] Switch [B] Backup [V] Drive Info [Esc] Exit ASUS P7F-M WS 4-3 Save a copy...
... disk.) 2. ASUSTek EZ Flash 2 BIOS ROM Utility V4.06 FLASH TYPE: MXIC 25L1605A Current ROM BOARD: P7F-M WS VER: 0202 DATE: 08/24/2009 Update ROM BOARD: Unknown VER: Unknown DATE: Unknown PATH: A:\ A: Note [Enter] Select or Load [Up/Down/Home/End] Move [Tab] Switch [B] Backup [V] Drive Info [Esc] Exit ASUS P7F-M WS 4-3 Save a copy...

User Manual
Page 56
... displays may not be the same as a USB flash disk with the updated BIOS file. Visit the ASUS website at support.asus.com to prevent system boot failure! Boot the system in DOS environment using the BUPDATER utility: 1. Ensure to load the BIOS default settings to a bootable�U��S��B��fl...
... displays may not be the same as a USB flash disk with the updated BIOS file. Visit the ASUS website at support.asus.com to prevent system boot failure! Boot the system in DOS environment using the BUPDATER utility: 1. Ensure to load the BIOS default settings to a bootable�U��S��B��fl...

User Manual
Page 57
C:\> ASUS P7F-M WS 4-5 4. The utility returns to prevent system boot failure! 5. ASUSTek BIOS Update for DOS V1.06 (09/08/04) FLASH TYPE: MXIC 25L1605A Current ROM BOARD: P7F-M WS VER: 0205 DATE: 07/23/2009 Update ROM BOARD: P7F-M WS VER: 0206 DATE: 08/10/2009 PATH: WARNING! The BIOS update is ...Reboot the system from the hard disk drive. Do not turn off power during flash BIOS Note Writing BIOS: DO NOT shut down or reset the system while updating the BIOS to the DOS prompt after the BIOS update process is finished! The utility verifies the file, then starts updating the...
C:\> ASUS P7F-M WS 4-5 4. The utility returns to prevent system boot failure! 5. ASUSTek BIOS Update for DOS V1.06 (09/08/04) FLASH TYPE: MXIC 25L1605A Current ROM BOARD: P7F-M WS VER: 0205 DATE: 07/23/2009 Update ROM BOARD: P7F-M WS VER: 0206 DATE: 08/10/2009 PATH: WARNING! The BIOS update is ...Reboot the system from the hard disk drive. Do not turn off power during flash BIOS Note Writing BIOS: DO NOT shut down or reset the system while updating the BIOS to the DOS prompt after the BIOS update process is finished! The utility verifies the file, then starts updating the...

User Manual
Page 58
4.1.3 ASUS CrashFree BIOS 3 utility The ASUS CrashFree BIOS 3 is an auto recovery tool that contains the updated BIOS file. You can update a corrupted BIOS file using this motherboard. It resets the system when the BIOS recovery finished. DO NOT shut down or reset the system while recovering the BIOS! Visit the ASUS website at www.asus.com to restore the BIOS file when...
4.1.3 ASUS CrashFree BIOS 3 utility The ASUS CrashFree BIOS 3 is an auto recovery tool that contains the updated BIOS file. You can update a corrupted BIOS file using this motherboard. It resets the system when the BIOS recovery finished. DO NOT shut down or reset the system while recovering the BIOS! Visit the ASUS website at www.asus.com to restore the BIOS file when...

User Manual
Page 59
...under the Exit Menu. ASUS P7F-M WS 4-7 Even if you can also restart by pressing the reset button on your screen. • Visit the ASUS website (www.asus.com) to download the latest BIOS file for most conditions to reconfigure your system using this utility. otherwise, POST continues... with the opportunity to enter the Setup utility; If the system becomes unstable after POST, ...
...under the Exit Menu. ASUS P7F-M WS 4-7 Even if you can also restart by pressing the reset button on your screen. • Visit the ASUS website (www.asus.com) to download the latest BIOS file for most conditions to reconfigure your system using this utility. otherwise, POST continues... with the opportunity to enter the Setup utility; If the system becomes unstable after POST, ...

User Manual
Page 60
... The navigation keys differ from one screen to select items in the menu and change the settings. 4.2.1 BIOS menu screen Menu items Menu bar Configuration fields General help Main Advanced Power BIOS SETUP UTILITY Boot Tools Exit System Time [13:44:30] System Date [Wed, 08/05/2009] SATA 1 SATA 2 SATA 3 SATA 4 SATA...
... The navigation keys differ from one screen to select items in the menu and change the settings. 4.2.1 BIOS menu screen Menu items Menu bar Configuration fields General help Main Advanced Power BIOS SETUP UTILITY Boot Tools Exit System Time [13:44:30] System Date [Wed, 08/05/2009] SATA 1 SATA 2 SATA 3 SATA 4 SATA...

User Manual
Page 62
..., Inc. 4.3.1 System Time [xx:xx:xx] Allows you to set the system date. 4-10 Chapter 4: BIOS setup Use [+] or [-] to select a field. 4.3 Main menu When you enter the BIOS Setup program, the Main menu screen appears, giving you to set the system time. 4.3.2 System Date [Day xx.../xx/xxxx] Allows you an overview of the basic system information. Main Advanced Power BIOS SETUP UTILITY Boot Tools Exit System Time [13:44:30] System Date [Wed, 08/05/2009] SATA 1 SATA 2 SATA 3 SATA 4 SATA 5 SATA 6 : [ST3160812AS] : ...
..., Inc. 4.3.1 System Time [xx:xx:xx] Allows you to set the system date. 4-10 Chapter 4: BIOS setup Use [+] or [-] to select a field. 4.3 Main menu When you enter the BIOS Setup program, the Main menu screen appears, giving you to set the system time. 4.3.2 System Date [Day xx.../xx/xxxx] Allows you an overview of the basic system information. Main Advanced Power BIOS SETUP UTILITY Boot Tools Exit System Time [13:44:30] System Date [Wed, 08/05/2009] SATA 1 SATA 2 SATA 3 SATA 4 SATA 5 SATA 6 : [ST3160812AS] : ...

User Manual
Page 63
...Installed] [Auto] [CDROM] [ARMD] LBA/Large Mode [Auto] Enables or disables the LBA mode. Configuration options: [Auto] [0] [1] [2] [3] [4] ASUS P7F-M WS 4-11 Type [Auto] LBA/Large Mode [Auto] Block(Multi-Sector Transfer)M [Auto] PIO Mode [Auto] DMA Mode [Auto] SMART Monitoring [...DMA, Ultra DMA, and S.M.A.R.T. monitoring). 4.3.3 SATA1-6 While entering Setup, the BIOS automatically detects the presence of device connected to display the SATA device information. Main BIOS SETUP UTILITY SATA1 Device :Hard Disk Vendor :xxxxxxxxx Size :xx.xGB LBA Mode :Supported Block...
...Installed] [Auto] [CDROM] [ARMD] LBA/Large Mode [Auto] Enables or disables the LBA mode. Configuration options: [Auto] [0] [1] [2] [3] [4] ASUS P7F-M WS 4-11 Type [Auto] LBA/Large Mode [Auto] Block(Multi-Sector Transfer)M [Auto] PIO Mode [Auto] DMA Mode [Auto] SMART Monitoring [...DMA, Ultra DMA, and S.M.A.R.T. monitoring). 4.3.3 SATA1-6 While entering Setup, the BIOS automatically detects the presence of device connected to display the SATA device information. Main BIOS SETUP UTILITY SATA1 Device :Hard Disk Vendor :xxxxxxxxx Size :xx.xGB LBA Mode :Supported Block...

User Manual
Page 65
...configurations for detecting ATA/ATAPI devices. This will be effective only if the device is accessed through BIOS. Configuration options: [0] [5] [10] [15] [20] [25] [30] [35] ASUS P7F-M WS 4-13 The AHCI allows the onboard storage driver to enable advanced Serial ATA features that ...[Enabled] IDE Detect Time Out (Sec) [35] Selects the time out value for the IDE devices installed in the system. Main BIOS SETUP UTILITY Storage Configuration SATA Configuration [Enhanced] Configure SATA as Parallel ATA physical storage devices, keep the default setting [IDE]. • If you...
...configurations for detecting ATA/ATAPI devices. This will be effective only if the device is accessed through BIOS. Configuration options: [0] [5] [10] [15] [20] [25] [30] [35] ASUS P7F-M WS 4-13 The AHCI allows the onboard storage driver to enable advanced Serial ATA features that ...[Enabled] IDE Detect Time Out (Sec) [35] Selects the time out value for the IDE devices installed in the system. Main BIOS SETUP UTILITY Storage Configuration SATA Configuration [Enhanced] Configure SATA as Parallel ATA physical storage devices, keep the default setting [IDE]. • If you...

User Manual
Page 66
Configuration options: [Disabled] [Enabled] 4-14 Chapter 4: BIOS setup Main BIOS SETUP UTILITY SATA Port1 Device :Not Detected SATA Port1 [Auto] SMART Monitoring [Enabled] Select the type of SATA Configuration to wait ready longer. It appears only when... status of auto-detection of device connected to the system. SATA Port1 [Auto] Allows you to select the type of SATA devices. Main AHCI Settings BIOS SETUP UTILITY SATA Port1 [Not Detected] SATA Port2 [Not Detected] SATA Port3 [Not Detected] SATA Port4 [Not Detected] SATA Port5 [Not Detected] SATA Port6 [Not Detected...
Configuration options: [Disabled] [Enabled] 4-14 Chapter 4: BIOS setup Main BIOS SETUP UTILITY SATA Port1 Device :Not Detected SATA Port1 [Auto] SMART Monitoring [Enabled] Select the type of SATA Configuration to wait ready longer. It appears only when... status of auto-detection of device connected to the system. SATA Port1 [Auto] Allows you to select the type of SATA devices. Main AHCI Settings BIOS SETUP UTILITY SATA Port1 [Not Detected] SATA Port2 [Not Detected] SATA Port3 [Not Detected] SATA Port4 [Not Detected] SATA Port5 [Not Detected] SATA Port6 [Not Detected...

User Manual
Page 67
... the items in this menu. Processor Displays the auto-detected CPU specification. Main System Memory Information Speed DDR3 800 BIOS SETUP UTILITY DIMM_A1 DIMM_A2 DIMM_B1 DIMM_B2 512 MB, 1R, 800 N/A 512 MB, 1R, 800 N/A ASUS P7F-M WS 4-15 System Memory Displays the auto-detected system memory. 4.3.6 System Information This menu gives you an overview...
... the items in this menu. Processor Displays the auto-detected CPU specification. Main System Memory Information Speed DDR3 800 BIOS SETUP UTILITY DIMM_A1 DIMM_A2 DIMM_B1 DIMM_B2 512 MB, 1R, 800 N/A 512 MB, 1R, 800 N/A ASUS P7F-M WS 4-15 System Memory Displays the auto-detected system memory. 4.3.6 System Information This menu gives you an overview...

User Manual
Page 68
... and Exit Exit v02.61 (C)Copyright 1985-2009, American Megatrends, Inc. 4-16 Chapter 4: BIOS setup Some items may differ. Main Advanced Power BIOS SETUP UTILITY Boot Tools Exit CPU Configuration Chipset Onboard Device Configuration USB Configuration PCIPnP ACPI Configuration Event Log Configuration...your CPU does not support the related functions. 4.4 Advanced menu The Advanced menu items allow you to malfunction. Advanced BIOS SETUP UTILITY Configure advanced CPU settings Module Version:01.04 Manufacturer:Intel Brand String:Intel(R) Xeon(R) CPU Frequency :2.53GHz BCLK Speed ...
... and Exit Exit v02.61 (C)Copyright 1985-2009, American Megatrends, Inc. 4-16 Chapter 4: BIOS setup Some items may differ. Main Advanced Power BIOS SETUP UTILITY Boot Tools Exit CPU Configuration Chipset Onboard Device Configuration USB Configuration PCIPnP ACPI Configuration Event Log Configuration...your CPU does not support the related functions. 4.4 Advanced menu The Advanced menu items allow you to malfunction. Advanced BIOS SETUP UTILITY Configure advanced CPU settings Module Version:01.04 Manufacturer:Intel Brand String:Intel(R) Xeon(R) CPU Frequency :2.53GHz BCLK Speed ...

User Manual
Page 69
...[Enabled] Adjacent Cache Line Prefetch [Enabled] Allows you to virtually function as several systems. Configuration options: [Disabled] [Enabled] ASUS P7F-M WS 4-17 Use the and keys to enable or disable the Adjacent Cache Line Prefetch function. Note:If an invalid ratio ...CPUID Value Limit [Disabled] Setting this item to [Enabled] allows legacy operating systems to boot even without support for more items. Advanced BIOS SETUP UTILITY CPU TM Function [Enabled] Execute-Disable Bit Capability [Enabled] Intel(R) HT Technology [Enabled] Active Processor Cores [All] A20M [Disabled...
...[Enabled] Adjacent Cache Line Prefetch [Enabled] Allows you to virtually function as several systems. Configuration options: [Disabled] [Enabled] ASUS P7F-M WS 4-17 Use the and keys to enable or disable the Adjacent Cache Line Prefetch function. Note:If an invalid ratio ...CPUID Value Limit [Disabled] Setting this item to [Enabled] allows legacy operating systems to boot even without support for more items. Advanced BIOS SETUP UTILITY CPU TM Function [Enabled] Execute-Disable Bit Capability [Enabled] Intel(R) HT Technology [Enabled] Active Processor Cores [All] A20M [Disabled...

User Manual
Page 72
...[1066 MHz] [1333 MHz] Refer to display the sub-menu. Configure CPU Bridge features. Uncore Configuration Advanced BIOS SETUP UTILITY CUPnUcoBrreidCgoenfiCghuirpasteitonConfiguration CIPMUC R:EVCIlSaIrOkNs Field :B0 Current CSI Frequency :6.400GT CMuermroernytRMeemmaopryFeFarteuqruee ncy :10[6E6naMbhlzed] PCI MMIO Allocation: 4GB... at www.asus.com. 4-20 Chapter 4: BIOS setup DISABLE: Do not allow the system to detect DDR3 memory frequency via SPD or designate a specific frequency. Advanced Advanced Chipset Settings BIOS SETUP UTILITY WARNING: Setting wrong values...
...[1066 MHz] [1333 MHz] Refer to display the sub-menu. Configure CPU Bridge features. Uncore Configuration Advanced BIOS SETUP UTILITY CUPnUcoBrreidCgoenfiCghuirpasteitonConfiguration CIPMUC R:EVCIlSaIrOkNs Field :B0 Current CSI Frequency :6.400GT CMuermroernytRMeemmaopryFeFarteuqruee ncy :10[6E6naMbhlzed] PCI MMIO Allocation: 4GB... at www.asus.com. 4-20 Chapter 4: BIOS setup DISABLE: Do not allow the system to detect DDR3 memory frequency via SPD or designate a specific frequency. Advanced Advanced Chipset Settings BIOS SETUP UTILITY WARNING: Setting wrong values...

User Manual
Page 74
... Change Option F1 General Help F10 Save and Exit ESC Exit v02.61 (C)Copyright 1985-2009, American Megatrends, Inc. Advanced BIOS SETUP UTILITY Onboard Devices Configuration HDA Controller OnBoard LAN1 Boot ROM OnBoard LAN2 Boot ROM Serial Port1 Address Interrupt 19 Capture [Enabled] [PXE] [PXE] [3F8/IRQ4] [Enabled] ...
... Change Option F1 General Help F10 Save and Exit ESC Exit v02.61 (C)Copyright 1985-2009, American Megatrends, Inc. Advanced BIOS SETUP UTILITY Onboard Devices Configuration HDA Controller OnBoard LAN1 Boot ROM OnBoard LAN2 Boot ROM Serial Port1 Address Interrupt 19 Capture [Enabled] [PXE] [PXE] [3F8/IRQ4] [Enabled] ...

User Manual
Page 75
...the USB controller legacy mode is disabled. Configuration options: [Disabled] [Enabled] [Auto] BIOS EHCI Hand-Off [Enabled] Enables or disables the BIOS EHCI hand-off [Enabled] Options Disabled Enabled +F1 F10 ESC Select Screen Select Item Change...: [Disabled] [Enabled] 4.4.4 USB Configuration Advanced BIOS SETUP UTILITY USB Configuration Module Version - 2.24.5-13.4 USB Devices Enabled: 2 Hubs USB Functions [Enabled] Legacy USB Support [Auto] BIOS EHCI Hand-off support. Configuration options: [Disabled] [Enabled] ASUS P7F-M WS 4-23 Setting to [Auto] allows the...
...the USB controller legacy mode is disabled. Configuration options: [Disabled] [Enabled] [Auto] BIOS EHCI Hand-Off [Enabled] Enables or disables the BIOS EHCI hand-off [Enabled] Options Disabled Enabled +F1 F10 ESC Select Screen Select Item Change...: [Disabled] [Enabled] 4.4.4 USB Configuration Advanced BIOS SETUP UTILITY USB Configuration Module Version - 2.24.5-13.4 USB Devices Enabled: 2 Hubs USB Functions [Enabled] Legacy USB Support [Auto] BIOS EHCI Hand-off support. Configuration options: [Disabled] [Enabled] ASUS P7F-M WS 4-23 Setting to [Auto] allows the...


