Owners Manual
Page 7
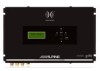
...and Fader positions must also be centered. Autorange Setup This track is used by the input to the maximum undistorted level. The accuracy of these adjustments are directly affected by the installer to make coarse adjustments to the PXE-H660 is very important that the output from the factory... radio be set for better noise immunity and signal processing. The input to amplifier levels. 7 Back the volume down to the processor. SETUP CD - AntEQ™ Calibration This track ...
...and Fader positions must also be centered. Autorange Setup This track is used by the input to the maximum undistorted level. The accuracy of these adjustments are directly affected by the installer to make coarse adjustments to the PXE-H660 is very important that the output from the factory... radio be set for better noise immunity and signal processing. The input to amplifier levels. 7 Back the volume down to the processor. SETUP CD - AntEQ™ Calibration This track ...
Owners Manual
Page 9
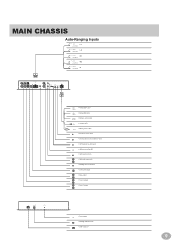
... • AFT head unit on AUX input • AUX trim level clip LED • AUX input level trim • AUX audio input jacks • MultEQ setup microphone • Subwoofer output • Rear output • Front 2 output • Front 1 output U SB M U LTEQ LED RESET • Reset button • MultEQ calibration LED •...
... • AFT head unit on AUX input • AUX trim level clip LED • AUX input level trim • AUX audio input jacks • MultEQ setup microphone • Subwoofer output • Rear output • Front 2 output • Front 1 output U SB M U LTEQ LED RESET • Reset button • MultEQ calibration LED •...
Owners Manual
Page 10
... Full Range Output Subwoofer For Factory Subwoofer Output Note: OUTPUT: For full-range only, use this trimmer control to a good chassis ground on the PXE-H660. Use this switch ON, if a factory radio source is not turning on . • Remote ON (BLU/WHT) If the OEM head unit.... • Remote OUT (BLU/WHT) This output can turn on included Imprint Setup CD) 2 MULTEQ LED - The signal supplies 12 volts PXE-H660 is on the EQ using the AUX INPUT. 8 CLIP - EQ Status indicator during setup 3 RESET - It will accept speaker or line level outputs. It draws minimal ...
... Full Range Output Subwoofer For Factory Subwoofer Output Note: OUTPUT: For full-range only, use this trimmer control to a good chassis ground on the PXE-H660. Use this switch ON, if a factory radio source is not turning on . • Remote ON (BLU/WHT) If the OEM head unit.... • Remote OUT (BLU/WHT) This output can turn on included Imprint Setup CD) 2 MULTEQ LED - The signal supplies 12 volts PXE-H660 is on the EQ using the AUX INPUT. 8 CLIP - EQ Status indicator during setup 3 RESET - It will accept speaker or line level outputs. It draws minimal ...
Owners Manual
Page 11
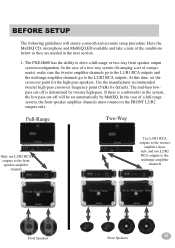
... At this time, set of the conditions below as they are needed in the system, the low pass cut -off will ensure a smooth and accurate setup procedure. In the case of a two-way system (bi-amping a set the crossover point for the high-pass speakers. Full-Range Two-Way Only use... front speaker amplifier channels must connect to the midrange amplifier channels Front Speaker Amp Tweeter Amp Front Midrange Amp Front Speakers Front Speakers 11 The PXE-H660 has the ability to the L2/R2 RCA outputs. BEFORE SETUP The following guidelines will be set automatically by MultEQ.
... At this time, set of the conditions below as they are needed in the system, the low pass cut -off will ensure a smooth and accurate setup procedure. In the case of a two-way system (bi-amping a set the crossover point for the high-pass speakers. Full-Range Two-Way Only use... front speaker amplifier channels must connect to the midrange amplifier channels Front Speaker Amp Tweeter Amp Front Midrange Amp Front Speakers Front Speakers 11 The PXE-H660 has the ability to the L2/R2 RCA outputs. BEFORE SETUP The following guidelines will be set automatically by MultEQ.

Owners Manual
Page 12
...a rear seat it 's the first time the PXE-H660 is performed. If the unit displays "ALPINE PXE-H660" on the display after the reset procedure is being used to the passenger's normal head position as possible. BEFORE SETUP 2. The PXE-H660's included microphone must be taken at least 6 seconds... to reset the PXE-H660 to its factory settings (refer...
...a rear seat it 's the first time the PXE-H660 is performed. If the unit displays "ALPINE PXE-H660" on the display after the reset procedure is being used to the passenger's normal head position as possible. BEFORE SETUP 2. The PXE-H660's included microphone must be taken at least 6 seconds... to reset the PXE-H660 to its factory settings (refer...
Owners Manual
Page 13
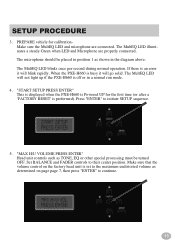
.... 5. The MultEQ LED illuminates a steady Green when LED and Microphone are connected. The microphone should be turned OFF. SETUP PROCEDURE 3. "START SETUP PRESS ENTER" This is displayed when the PXE-H660 is performed). If there is busy it will go solid. PREPARE vehicle for the first time (or after a 'FACTORY RESET' is Powered UP...
.... 5. The MultEQ LED illuminates a steady Green when LED and Microphone are connected. The microphone should be turned OFF. SETUP PROCEDURE 3. "START SETUP PRESS ENTER" This is displayed when the PXE-H660 is performed). If there is busy it will go solid. PREPARE vehicle for the first time (or after a 'FACTORY RESET' is Powered UP...
Owners Manual
Page 14
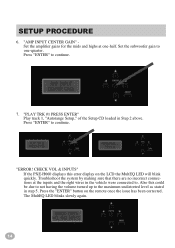
...making sure that there are no incorrect connections at one -quarter. The MultEQ LED blinks slowly again. 14 CHECK VOL & INPUTS" If the PXE-H660 displays this could be due to not having the volume turned up to continue. Press the "ENTER" button on the LCD the MultEQ LED ... has been corrected. Press "ENTER" to the maximum undistorted level as stated in step 5. SETUP PROCEDURE 6. "ERROR! Set the subwoofer gain to one -half. "PLAY TRK #1 PRESS ENTER" Play track 1, "Autorange Setup," of the Setup CD loaded in the vehicle were connected to continue. 7. "AMP INPUT CENTER GAIN" Set ...
...making sure that there are no incorrect connections at one -quarter. The MultEQ LED blinks slowly again. 14 CHECK VOL & INPUTS" If the PXE-H660 displays this could be due to not having the volume turned up to continue. Press the "ENTER" button on the LCD the MultEQ LED ... has been corrected. Press "ENTER" to the maximum undistorted level as stated in step 5. SETUP PROCEDURE 6. "ERROR! Set the subwoofer gain to one -half. "PLAY TRK #1 PRESS ENTER" Play track 1, "Autorange Setup," of the Setup CD loaded in the vehicle were connected to continue. 7. "AMP INPUT CENTER GAIN" Set ...
Owners Manual
Page 15
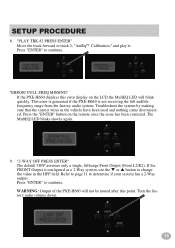
... Output (Front L2/R2). If the FRONT Output is not receiving the full audible frequency range from the factory audio system. WARNING: Output of the PXE-H660 will blink quickly. The MultEQ LED blinks slowly again. 9. Turn the factory radio volume down. 15 Troubleshoot the system by making sure that the correct... "ENTER" button on the LCD the MultEQ LED will not be muted after this error display on the remote once the issue has been corrected. SETUP PROCEDURE 8. "PLAY TRK #2 PRESS ENTER" Move the track forward to continue. Press "ENTER" to continue.
... Output (Front L2/R2). If the FRONT Output is not receiving the full audible frequency range from the factory audio system. WARNING: Output of the PXE-H660 will blink quickly. The MultEQ LED blinks slowly again. 9. Turn the factory radio volume down. 15 Troubleshoot the system by making sure that the correct... "ENTER" button on the LCD the MultEQ LED will not be muted after this error display on the remote once the issue has been corrected. SETUP PROCEDURE 8. "PLAY TRK #2 PRESS ENTER" Move the track forward to continue. Press "ENTER" to continue.
Owners Manual
Page 16
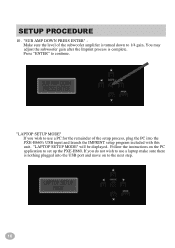
... may adjust the subwoofer gain after the Imprint process is nothing plugged into the PXE-H660's USB input and launch the IMPRINT setup program included with this unit. If you wish to use a laptop make sure there is complete. "LAPTOP SETUP MODE" If you do not wish to use a PC for the remainder of... the subwoofer amplifier is turned down to the next step. 16 "LAPTOP SETUP MODE" will be displayed. "SUB AMP DOWN PRESS ENTER" Make sure the level of the setup process, plug the PC into the USB port and move on the PC application to continue...
... may adjust the subwoofer gain after the Imprint process is nothing plugged into the PXE-H660's USB input and launch the IMPRINT setup program included with this unit. If you wish to use a laptop make sure there is complete. "LAPTOP SETUP MODE" If you do not wish to use a PC for the remainder of... the subwoofer amplifier is turned down to the next step. 16 "LAPTOP SETUP MODE" will be displayed. "SUB AMP DOWN PRESS ENTER" Make sure the level of the setup process, plug the PC into the USB port and move on the PC application to continue...
Owners Manual
Page 17
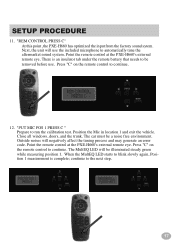
..., Position 1 measurement is an insulator tab under the remote battery that needs to automatically tune the aftermarket sound system. Point the remote control at the PXE-H660's external remote eye. "PUT MIC POS 1 PRESS C " Prepare to continue. 12. Next, the unit will use . Press "C" on the remote .... The MultEQ LED will negatively affect the tuning process and may generate an error code. Point the remote control at the PXE-H660's external remote eye. Outside noises will be illuminated steady green while measuring position 1. "REM CONTROL PRESS C" At this point, the...
..., Position 1 measurement is an insulator tab under the remote battery that needs to automatically tune the aftermarket sound system. Point the remote control at the PXE-H660's external remote eye. "PUT MIC POS 1 PRESS C " Prepare to continue. 12. Next, the unit will use . Press "C" on the remote .... The MultEQ LED will negatively affect the tuning process and may generate an error code. Point the remote control at the PXE-H660's external remote eye. Outside noises will be illuminated steady green while measuring position 1. "REM CONTROL PRESS C" At this point, the...
Owners Manual
Page 18
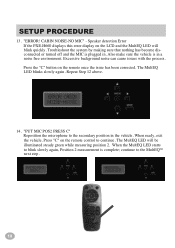
Speaker detection Error If the PXE-H660 displays this error display on the remote control to the secondary position in a noise free environment. Repeat Step 12 above. 14. "PUT MIC POS2 PRESS C" ... position 2. The MultEQ LED will blink quickly. Press the "C" button on the remote once the issue has been corrected. The MultEQ LED blinks slowly again. SETUP PROCEDURE 13. Troubleshoot the system by making sure that nothing has become disconnected or turned off and the MIC is complete; Excessive background noise can...
Speaker detection Error If the PXE-H660 displays this error display on the remote control to the secondary position in a noise free environment. Repeat Step 12 above. 14. "PUT MIC POS2 PRESS C" ... position 2. The MultEQ LED will blink quickly. Press the "C" button on the remote once the issue has been corrected. The MultEQ LED blinks slowly again. SETUP PROCEDURE 13. Troubleshoot the system by making sure that nothing has become disconnected or turned off and the MIC is complete; Excessive background noise can...
Owners Manual
Page 19
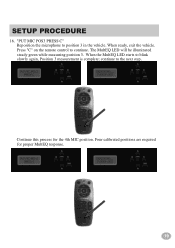
The MultEQ LED will be illuminated steady green while measuring position 3. Continue this process for proper MultEQ response. 19 continue to position 3 in the vehicle. "PUT MIC POS3 PRESS C" Reposition the microphone to the next step. Four calibrated positions are required for the 4th MIC position. SETUP PROCEDURE 16. Press "C" on the remote control to blink slowly again, Position 3 measurement is complete; When the MultEQ LED starts to continue. When ready, exit the vehicle.
The MultEQ LED will be illuminated steady green while measuring position 3. Continue this process for proper MultEQ response. 19 continue to position 3 in the vehicle. "PUT MIC POS3 PRESS C" Reposition the microphone to the next step. Four calibrated positions are required for the 4th MIC position. SETUP PROCEDURE 16. Press "C" on the remote control to blink slowly again, Position 3 measurement is complete; When the MultEQ LED starts to continue. When ready, exit the vehicle.

Owners Manual
Page 20
..."ENTER" to continue. This resets MultEQ settings (calibration of MultEQ must be redone after reset). 20 Done After completing the 4 MIC positions, MultEQ setup will be redone after reset). 2) Press and hold RESET button for at least 3 seconds but less than 6 seconds. Press "ENTER" to continue.... 18. This resets all the measurements have been taken. NOTE: To repeat setup process follow these steps: 1) Press and hold the RESET button for at least 6 seconds or more. SETUP PROCEDURE 17. "SUB AMP UP PRESS ENTER" This is recommended to listen to the system...
..."ENTER" to continue. This resets MultEQ settings (calibration of MultEQ must be redone after reset). 20 Done After completing the 4 MIC positions, MultEQ setup will be redone after reset). 2) Press and hold RESET button for at least 3 seconds but less than 6 seconds. Press "ENTER" to continue.... 18. This resets all the measurements have been taken. NOTE: To repeat setup process follow these steps: 1) Press and hold the RESET button for at least 6 seconds or more. SETUP PROCEDURE 17. "SUB AMP UP PRESS ENTER" This is recommended to listen to the system...
Owners Manual
Page 21
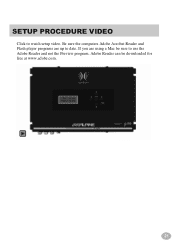
Adobe Reader can be sure to use the Adobe Reader and not the Preview program. If you are up to watch setup video. SETUP PROCEDURE VIDEO Click to date. Be sure the computers Adobe Acrobat Reader and Flash player programs are using a Mac be downloaded for free at www.adobe.com. 21
Adobe Reader can be sure to use the Adobe Reader and not the Preview program. If you are up to watch setup video. SETUP PROCEDURE VIDEO Click to date. Be sure the computers Adobe Acrobat Reader and Flash player programs are using a Mac be downloaded for free at www.adobe.com. 21
Owners Manual
Page 23
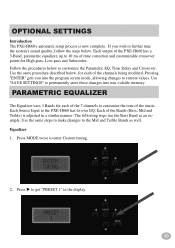
OPTIONAL SETTINGS Introduction The PXE-H660's automatic setup process is adjusted in the display. 23 Each of the ...Low-pass and Subwoofer. Equalizer 1. Each Source Input to enter Custom tuning. 2. Press MODE twice to the PXE-H660 has its own EQ. Use the same procedure described below, for each of time correction and customizable crossover points ...for each of the 7 channels to the Mid and Treble Bands as an example. Each output of the PXE-H660 has a 3-Band, parametric equalizer, up to customize the Parametric EQ, Time Delay and Crossover. Press u to current...
OPTIONAL SETTINGS Introduction The PXE-H660's automatic setup process is adjusted in the display. 23 Each of the ...Low-pass and Subwoofer. Equalizer 1. Each Source Input to enter Custom tuning. 2. Press MODE twice to the PXE-H660 has its own EQ. Use the same procedure described below, for each of time correction and customizable crossover points ...for each of the 7 channels to the Mid and Treble Bands as an example. Each output of the PXE-H660 has a 3-Band, parametric equalizer, up to customize the Parametric EQ, Time Delay and Crossover. Press u to current...

Owners Manual
Page 28
If you are up to watch setup video. Parametric equAlizer VIDEO Click to date. Adobe Reader can be sure to use the Adobe Reader and not the Preview program. Be sure the computers Adobe Acrobat Reader and Flash player programs are using a Mac be downloaded for free at www.adobe.com. 28
If you are up to watch setup video. Parametric equAlizer VIDEO Click to date. Adobe Reader can be sure to use the Adobe Reader and not the Preview program. Be sure the computers Adobe Acrobat Reader and Flash player programs are using a Mac be downloaded for free at www.adobe.com. 28
Owners Manual
Page 29
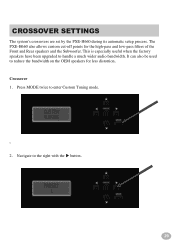
This is especially useful when the factory speakers have been upgraded to the right with the u button. 29 Navigate to handle a much wider audio bandwidth. It can also be used to enter Custom Tuning mode. \\ 2. Press MODE twice to reduce the bandwidth on the OEM speakers for the high-pass and low-pass filters of the Front and Rear speakers and the Subwoofer. Crossover settings The system's crossovers are set by the PXE-H660 during its automatic setup process. Crossover 1. The PXE-H660 also allows custom cut-off points for less distortion.
This is especially useful when the factory speakers have been upgraded to the right with the u button. 29 Navigate to handle a much wider audio bandwidth. It can also be used to enter Custom Tuning mode. \\ 2. Press MODE twice to reduce the bandwidth on the OEM speakers for the high-pass and low-pass filters of the Front and Rear speakers and the Subwoofer. Crossover settings The system's crossovers are set by the PXE-H660 during its automatic setup process. Crossover 1. The PXE-H660 also allows custom cut-off points for less distortion.

Owners Manual
Page 34
If you are up to date. Crossover settings VIDEO Click to use the Adobe Reader and not the Preview program. Be sure the computers Adobe Acrobat Reader and Flash player programs are using a Mac be downloaded for free at www.adobe.com. 34 Adobe Reader can be sure to watch setup video.
If you are up to date. Crossover settings VIDEO Click to use the Adobe Reader and not the Preview program. Be sure the computers Adobe Acrobat Reader and Flash player programs are using a Mac be downloaded for free at www.adobe.com. 34 Adobe Reader can be sure to watch setup video.

Owners Manual
Page 35
Be advised, any changes made causes deviation from 0 to 10ms in the display. 35 Press u to its ideal sound stage. Press MODE twice to be tweaked or temporarily modified. However, there may be times when the delay needs to enter Custom Tuning mode. 2. Time Delay 1. Time Correction MultEQ determines the default delay during initial Setup. All channels have delays adjustable from the MultEQ default specs and no longer conforms to get "PRESET 1" in 0.1ms steps.
Be advised, any changes made causes deviation from 0 to 10ms in the display. 35 Press u to its ideal sound stage. Press MODE twice to be tweaked or temporarily modified. However, there may be times when the delay needs to enter Custom Tuning mode. 2. Time Delay 1. Time Correction MultEQ determines the default delay during initial Setup. All channels have delays adjustable from the MultEQ default specs and no longer conforms to get "PRESET 1" in 0.1ms steps.

Owners Manual
Page 40
Adobe Reader can be sure to use the Adobe Reader and not the Preview program. Time Correction VIDEO Click to date. Be sure the computers Adobe Acrobat Reader and Flash player programs are using a Mac be downloaded for free at www.adobe.com. 40 If you are up to watch setup video.
Adobe Reader can be sure to use the Adobe Reader and not the Preview program. Time Correction VIDEO Click to date. Be sure the computers Adobe Acrobat Reader and Flash player programs are using a Mac be downloaded for free at www.adobe.com. 40 If you are up to watch setup video.


