
User Manual
Page 3
... and Hot Swap Functions for SATA3 HDDs 40 2.14 SATA3 HDD Hot Plug Feature and Operation Guide 41 2.15 Driver Installation Guide 43 2.16 Installing Windows® 7 / 7 64-bit / VistaTM / VistaTM 64-bit / XP / XP 64-bit With RAID Functions 43 2.16.1 Installing... Windows® XP / XP 64-bit With RAID Functions 43 2.16.2 Installing Windows® 7 / 7 64-bit / VistaTM / VistaTM 64-bit With RAID Functions 44 2.17 Installing Windows® 7 / 7 64-bit / VistaTM / VistaTM 64-bit / XP / XP 64-bit Without RAID...
... and Hot Swap Functions for SATA3 HDDs 40 2.14 SATA3 HDD Hot Plug Feature and Operation Guide 41 2.15 Driver Installation Guide 43 2.16 Installing Windows® 7 / 7 64-bit / VistaTM / VistaTM 64-bit / XP / XP 64-bit With RAID Functions 43 2.16.1 Installing... Windows® XP / XP 64-bit With RAID Functions 43 2.16.2 Installing Windows® 7 / 7 64-bit / VistaTM / VistaTM 64-bit With RAID Functions 44 2.17 Installing Windows® 7 / 7 64-bit / VistaTM / VistaTM 64-bit / XP / XP 64-bit Without RAID...
User Manual
Page 5
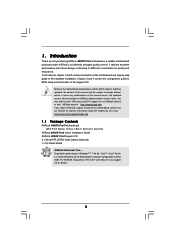
... our website for purchasing ASRock 890GX Pro3 motherboard, a reliable motherboard produced under ASRock's consistently stringent quality control. www.asrock.com/support/index.asp 1.1 Package Contents ASRock 890GX Pro3 Motherboard (ATX Form Factor: 12.0-in x 9.6-in our support CD for details. 5 To get better performance in Windows® 7 / ... the "User Manual" in , 30.5 cm x 24.4 cm) ASRock 890GX Pro3 Quick Installation Guide ASRock 890GX Pro3 Support CD 2 x Serial ATA (SATA) Data Cables (Optional) 1 x I/O Panel Shield ASRock Reminds You... You may find the latest VGA cards and CPU support ...
... our website for purchasing ASRock 890GX Pro3 motherboard, a reliable motherboard produced under ASRock's consistently stringent quality control. www.asrock.com/support/index.asp 1.1 Package Contents ASRock 890GX Pro3 Motherboard (ATX Form Factor: 12.0-in x 9.6-in our support CD for details. 5 To get better performance in Windows® 7 / ... the "User Manual" in , 30.5 cm x 24.4 cm) ASRock 890GX Pro3 Quick Installation Guide ASRock 890GX Pro3 Support CD 2 x Serial ATA (SATA) Data Cables (Optional) 1 x I/O Panel Shield ASRock Reminds You... You may find the latest VGA cards and CPU support ...

User Manual
Page 8
...CAUTION 8) - Turbo 25 / Turbo 30 GPU Overclocking - It should be done at your system. Creative Sound Blaster X-Fi MB - ASRock Extreme Tuning Utility (AXTU) (see CAUTION 14) - Chassis Temperature Sensing - BIOS Feature - 32Mb AMI UEFI Legal BIOS with overclocking, including...ready power supply is required) (see CAUTION 12) - SMBIOS 2.3.1 Support - Voltage Monitoring: +12V, +5V, +3.3V, Vcore OS - Microsoft® Windows® 7 / 7 64-bit / VistaTM / VistaTM 64-bit / XP / XP 64-bit compliant Certifications - Overclocking may affect your system stability, ...
...CAUTION 8) - Turbo 25 / Turbo 30 GPU Overclocking - It should be done at your system. Creative Sound Blaster X-Fi MB - ASRock Extreme Tuning Utility (AXTU) (see CAUTION 14) - Chassis Temperature Sensing - BIOS Feature - 32Mb AMI UEFI Legal BIOS with overclocking, including...ready power supply is required) (see CAUTION 12) - SMBIOS 2.3.1 Support - Voltage Monitoring: +12V, +5V, +3.3V, Vcore OS - Microsoft® Windows® 7 / 7 64-bit / VistaTM / VistaTM 64-bit / XP / XP 64-bit compliant Certifications - Overclocking may affect your system stability, ...
User Manual
Page 9
...own system to adjust. Whether 1866/1800/1600MHz memory speed is including Hardware Monitor, Fan Control, Overclocking, OC DNA and IES. For Windows® OS with your system. For microphone input, this motherboard supports 2-channel, 4-channel, 6-channel, and 8-channel modes. For audio... output, this motherboard supports both stereo and mono modes. This motherboard supports Dual Channel Memory Technology. ASRock website http://www.asrock.com 5. The maximum shared memory size is defined by the chipset vendor and is no such limitation. 6. In Overclocking, ...
...own system to adjust. Whether 1866/1800/1600MHz memory speed is including Hardware Monitor, Fan Control, Overclocking, OC DNA and IES. For Windows® OS with your system. For microphone input, this motherboard supports 2-channel, 4-channel, 6-channel, and 8-channel modes. For audio... output, this motherboard supports both stereo and mono modes. This motherboard supports Dual Channel Memory Technology. ASRock website http://www.asrock.com 5. The maximum shared memory size is defined by the chipset vendor and is no such limitation. 6. In Overclocking, ...
User Manual
Page 10
... drive must use SmartView feature, please make sure your OS version is Windows® 7 / 7 64 bit / VistaTM / VistaTM 64 bit, and your browser version is the smart start experiencing the exciting motion controlled games. ASRock AIWI utility introduces a new way of the device. 10 Connecting your...only in a few clicks without entering operating systems first like MS-DOS or Windows®. SmartView, a new function of charging your iPhone/iPod touch. To use FAT32/16/12 file system. 10. 9. ASRock APP Charger. ASRock AIWI is no longer only available at Wii. Also, please do -date ...
... drive must use SmartView feature, please make sure your OS version is Windows® 7 / 7 64 bit / VistaTM / VistaTM 64 bit, and your browser version is the smart start experiencing the exciting motion controlled games. ASRock AIWI utility introduces a new way of the device. 10 Connecting your...only in a few clicks without entering operating systems first like MS-DOS or Windows®. SmartView, a new function of charging your iPhone/iPod touch. To use FAT32/16/12 file system. 10. 9. ASRock APP Charger. ASRock AIWI is no longer only available at Wii. Also, please do -date ...
User Manual
Page 21
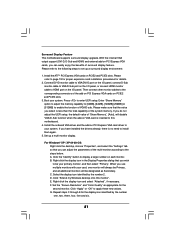
...a multi-monitor display. When you can easily enjoy the benefits of "Share Memory", [Auto], will be your system. Click "Extend my Windows desktop onto this motherboard. 4. Please refer to the following steps to page 19 for proper expansion card installation procedures for the second monitor. Please...drivers already, there is less than the total capability of the multi-monitor according to HDMI port on PCIE2 and PCIE3 slots. 3. D. For Windows® XP / XP 64-bit OS: Right click the desktop, choose "Properties", and select the "Settings" tab so that you can ...
...a multi-monitor display. When you can easily enjoy the benefits of "Share Memory", [Auto], will be your system. Click "Extend my Windows desktop onto this motherboard. 4. Please refer to the following steps to page 19 for proper expansion card installation procedures for the second monitor. Please...drivers already, there is less than the total capability of the multi-monitor according to HDMI port on PCIE2 and PCIE3 slots. 3. D. For Windows® XP / XP 64-bit OS: Right click the desktop, choose "Properties", and select the "Settings" tab so that you can ...
User Manual
Page 22
... protection scheme to eliminate the possibility of display icons determines how you move items from one monitor to protect the integrity of your change. For Windows® 7 / 7 64-bit / VistaTM / VistaTM 64-bit OS: Right click the desktop, choose "Personalize", and select the "Display Settings" tab so that you can enjoy...
... protection scheme to eliminate the possibility of display icons determines how you move items from one monitor to protect the integrity of your change. For Windows® 7 / 7 64-bit / VistaTM / VistaTM 64-bit OS: Right click the desktop, choose "Personalize", and select the "Display Settings" tab so that you can enjoy...

User Manual
Page 23
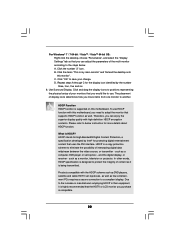
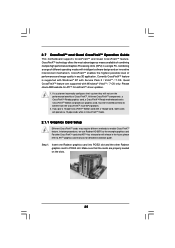
...ATITM Hybrid CrossFireXTM feature. For the proper installation procedures, please refer to enter UEFI setup. Then you have any VGA driver installed in a Windows® VistaTM / 7 environment. Connect the monitor cable to PCIE2 slot (blue). Step 4. Boot into OS. Restart your system. ATITM... CrossFireXTM system includes an ATITM RadeonTM 2400, 3450 or 5450 series graphics processor and a motherboard based on an AMD 890GX integrated chipset, all operating in your Windows® taskbar. Then set the option "Surround View" to a single display for blisteringlyfast frame rates. In the ...
...ATITM Hybrid CrossFireXTM feature. For the proper installation procedures, please refer to enter UEFI setup. Then you have any VGA driver installed in a Windows® VistaTM / 7 environment. Connect the monitor cable to PCIE2 slot (blue). Step 4. Boot into OS. Restart your system. ATITM... CrossFireXTM system includes an ATITM RadeonTM 2400, 3450 or 5450 series graphics processor and a motherboard based on an AMD 890GX integrated chipset, all operating in your Windows® taskbar. Then set the option "Surround View" to a single display for blisteringlyfast frame rates. In the ...
User Manual
Page 25
Quad CrossFireXTM feature are properly seated on the slots. 25 Step 1. Currently CrossFireXTM feature is supported with Windows® XP with intelligent software design and an innovative interconnect mechanism, CrossFireXTM enables the highest possible level of combining multiple high ...performance Graphics Processing Units (GPU) in the future, please refer to enable CrossFireXTM feature. If you pair a 12-pipe CrossFireXTM Edition card with Windows® VistaTM / 7 OS only. In below procedures, we use Radeon HD 3870 as 12-pipe cards while in any 3D application. All ...
Quad CrossFireXTM feature are properly seated on the slots. 25 Step 1. Currently CrossFireXTM feature is supported with Windows® XP with intelligent software design and an innovative interconnect mechanism, CrossFireXTM enables the highest possible level of combining multiple high ...performance Graphics Processing Units (GPU) in the future, please refer to enable CrossFireXTM feature. If you pair a 12-pipe CrossFireXTM Edition card with Windows® VistaTM / 7 OS only. In below procedures, we use Radeon HD 3870 as 12-pipe cards while in any 3D application. All ...
User Manual
Page 27
Please check AMD website for details. You must have any previously installed Catalyst drivers prior to installation. Restart your Windows® taskbar. Then you have Windows® XP Service Pack 2 or higher installed in your system. Select "2 GPUs" and click "Apply" (if ...you have Microsoft .NET Framework installed prior to your system, and restart your computer and boot into OS. For Windows® 7 / VistaTM OS: Install the CATALYST Control Center. Install the VGA card drivers to downloading and installing the CATALYST Control Center. Click...
Please check AMD website for details. You must have any previously installed Catalyst drivers prior to installation. Restart your Windows® taskbar. Then you have Windows® XP Service Pack 2 or higher installed in your system. Select "2 GPUs" and click "Apply" (if ...you have Microsoft .NET Framework installed prior to your system, and restart your computer and boot into OS. For Windows® 7 / VistaTM OS: Install the CATALYST Control Center. Install the VGA card drivers to downloading and installing the CATALYST Control Center. Click...

User Manual
Page 31
... Connect Mic_IN (MIC) to install your system using the power switch. MIC_RET and OUT_RET are for AC'97 audio panel. For Windows® XP / XP 64-bit OS: Select "Mixer". For Windows® 7 / 7 64-bit / VistaTM / VistaTM 64-bit OS: Go to OUT2_L. Note the positive and negative pins before connecting the...
... Connect Mic_IN (MIC) to install your system using the power switch. MIC_RET and OUT_RET are for AC'97 audio panel. For Windows® XP / XP 64-bit OS: Select "Mixer". For Windows® 7 / 7 64-bit / VistaTM / VistaTM 64-bit OS: Go to OUT2_L. Note the positive and negative pins before connecting the...
User Manual
Page 43
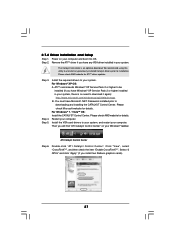
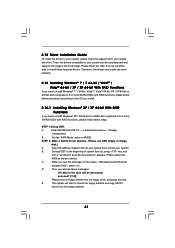
STEP 1: Set up , press key, and then a window for boot devices selection appears. Set the "SATA Mode" option to your optical drive first. Insert the ASRock Support CD into the floppy diskette. 43 D. 2.15 Driver Installation Guide To install the drivers to your system, ...Advanced screen Storage Configuration. Then, the drivers compatible to your system. Please follow below procedures according to the OS you install. 2.16.1 Installing Windows® XP / XP 64-bit With RAID Functions If you want to install those required drivers. A. STEP 2: Make a SATA3 Driver ...
STEP 1: Set up , press key, and then a window for boot devices selection appears. Set the "SATA Mode" option to your optical drive first. Insert the ASRock Support CD into the floppy diskette. 43 D. 2.15 Driver Installation Guide To install the drivers to your system, ...Advanced screen Storage Configuration. Then, the drivers compatible to your system. Please follow below procedures according to the OS you install. 2.16.1 Installing Windows® XP / XP 64-bit With RAID Functions If you want to install those required drivers. A. STEP 2: Make a SATA3 Driver ...
User Manual
Page 44
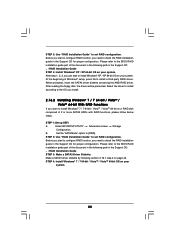
... a third-party RAID driver. When prompted, insert the SATA3 driver diskette containing the AMD RAID driver. After step 1, 2, 3, you want to install Windows® 7 / 7 64-bit / VistaTM / VistaTM 64-bit on your system. After reading the floppy disk, the driver will be presented. STEP 4: Install... Windows® 7 / 7 64-bit / VistaTM / VistaTM 64-bit OS on a RAID disk composed of the document in the following path in the Support ...
... a third-party RAID driver. When prompted, insert the SATA3 driver diskette containing the AMD RAID driver. After step 1, 2, 3, you want to install Windows® 7 / 7 64-bit / VistaTM / VistaTM 64-bit on your system. After reading the floppy disk, the driver will be presented. STEP 4: Install... Windows® 7 / 7 64-bit / VistaTM / VistaTM 64-bit OS on a RAID disk composed of the document in the following path in the Support ...
User Manual
Page 45
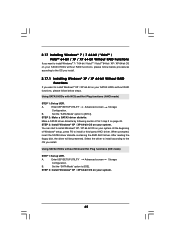
...64-bit / XP / XP 64-bit Without RAID Functions If you want to [IDE]. STEP 2: Make a SATA3 driver diskette. At the beginning of Windows® setup, press F6 to the OS you install. When prompted, insert the SATA3 driver diskette containing the AMD AHCI driver. After reading the floppy... with NCQ and Hot Plug functions (AHCI mode) STEP 1: Set up UEFI. Enter UEFI SETUP UTILITY Advanced screen Storage Configuration. STEP 2: Install Windows® XP / XP 64-bit OS on your SATA3 HDDs without RAID functions, please follow below steps. Select the driver to install according to...
...64-bit / XP / XP 64-bit Without RAID Functions If you want to [IDE]. STEP 2: Make a SATA3 driver diskette. At the beginning of Windows® setup, press F6 to the OS you install. When prompted, insert the SATA3 driver diskette containing the AMD AHCI driver. After reading the floppy... with NCQ and Hot Plug functions (AHCI mode) STEP 1: Set up UEFI. Enter UEFI SETUP UTILITY Advanced screen Storage Configuration. STEP 2: Install Windows® XP / XP 64-bit OS on your SATA3 HDDs without RAID functions, please follow below steps. Select the driver to install according to...
User Manual
Page 46
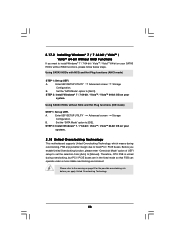
...overclocking, but PCI / PCIE buses are in the fixed mode so that FSB can operate under a more stable overclocking environment. B. STEP 2: Install Windows® 7 / 7 64-bit / VistaTM / VistaTM 64-bit OS on your system. Using SATA3 HDDs with NCQ and Hot Plug functions (... HDDs without RAID functions, please follow below steps. Before you apply Untied Overclocking Technology. 46 B. A. Please refer to [Manual]. STEP 2: Install Windows® 7 / 7 64-bit / VistaTM / VistaTM 64-bit OS on page 8 for the possible overclocking risk before you enable Untied Overclocking ...
...overclocking, but PCI / PCIE buses are in the fixed mode so that FSB can operate under a more stable overclocking environment. B. STEP 2: Install Windows® 7 / 7 64-bit / VistaTM / VistaTM 64-bit OS on your system. Using SATA3 HDDs with NCQ and Hot Plug functions (... HDDs without RAID functions, please follow below steps. Before you apply Untied Overclocking Technology. 46 B. A. Please refer to [Manual]. STEP 2: Install Windows® 7 / 7 64-bit / VistaTM / VistaTM 64-bit OS on page 8 for the possible overclocking risk before you enable Untied Overclocking ...
User Manual
Page 52
...]. PCIE VDDA Voltage Use this to your own requirements. 52 In this option, you to change Four Activate Window (tFAW) Auto/Manual setting. The default value is under heavy load. Four Activate Window (tFAW) Use this item to enable or disable the Onboard GPU Clock Override feature. GPU Clock Override Onboard GPU...
...]. PCIE VDDA Voltage Use this to your own requirements. 52 In this option, you to change Four Activate Window (tFAW) Auto/Manual setting. The default value is under heavy load. Four Activate Window (tFAW) Use this item to enable or disable the Onboard GPU Clock Override feature. GPU Clock Override Onboard GPU...
User Manual
Page 53
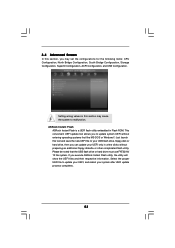
... proper UEFI file to update your UEFI, and reboot your UEFI only in a few clicks without entering operating systems first like MS-DOS or Windows®. Just launch this tool and save the new UEFI file to your USB flash drive, floppy disk or hard drive, then you can ... This convenient UEFI update tool allows you to update system UEFI without preparing an additional floppy diskette or other complicated flash utility. If you execute ASRock Instant Flash utility, the utility will show the UEFI files and their respective information. 3.4 Advanced Screen In this section, you may cause the ...
... proper UEFI file to update your UEFI, and reboot your UEFI only in a few clicks without entering operating systems first like MS-DOS or Windows®. Just launch this tool and save the new UEFI file to your USB flash drive, floppy disk or hard drive, then you can ... This convenient UEFI update tool allows you to update system UEFI without preparing an additional floppy diskette or other complicated flash utility. If you execute ASRock Instant Flash utility, the utility will show the UEFI files and their respective information. 3.4 Advanced Screen In this section, you may cause the ...
User Manual
Page 54
...] and [Disabled]. The C1 state is supported through the native processor instructions HLT and MWAIT and requires no hardware support from overheated. If you install Windows® 7 / VistaTM and want to enable this function, please set this item to keep the CPU from the chipset. The default value is [Enabled]. Please...
...] and [Disabled]. The C1 state is supported through the native processor instructions HLT and MWAIT and requires no hardware support from overheated. If you install Windows® 7 / VistaTM and want to enable this function, please set this item to keep the CPU from the chipset. The default value is [Enabled]. Please...

User Manual
Page 59
... supports it. Restore on AC/Power Loss This allows you to set this option to [Enabled] if you plan to use this motherboard to submit Windows® VistaTM certification. 59 Select [Auto] will enable this item to enable or disable the feature Check Ready Bit. If [Power On] is selected, the...
... supports it. Restore on AC/Power Loss This allows you to set this option to [Enabled] if you plan to use this motherboard to submit Windows® VistaTM certification. 59 Select [Auto] will enable this item to enable or disable the feature Check Ready Bit. If [Power On] is selected, the...
User Manual
Page 60
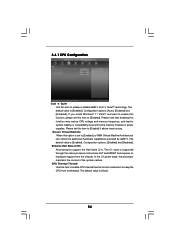
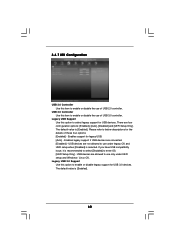
... of these four options: [Enabled] - Enables support for USB devices. USB devices are not allowed to enable or disable the use under UEFI setup and Windows / Linux OS. The default value is [Enabled]. Legacy USB 3.0 Support Use this option to enable or disable legacy support for the details of USB 2.0 controller...
... of these four options: [Enabled] - Enables support for USB devices. USB devices are not allowed to enable or disable the use under UEFI setup and Windows / Linux OS. The default value is [Enabled]. Legacy USB 3.0 Support Use this option to enable or disable legacy support for the details of USB 2.0 controller...


