Get support for Ryobi RB101

Ryobi RB101 Support Question

Ryobi RB101 Support Question

Find answers below for this question about Ryobi RB101.
Need a Ryobi RB101 manual? We have 3 online manuals for this item!
Question posted by robertk49610 on April 7th, 2024

How Do I Replace The Pad Assembly?

The person who posted this question about this Ryobi product did not include a detailed explanation. Please use the "Request More Information" button to the right if more details would help you to answer this question.

Current Answers

Answer #1: Posted by hzplj9 on April 8th, 2024 12:57 PM
This answer was accepted by the poster of the original question.
hzplj9

Member since:
June 25th, 2012

Points: 4,873,510
1,100
points
I have been unable to locate a teardown manual. However you can obtain a user guide here.

https://www.manualowl.com/p/Ryobi/RB101/Manual/111252

There are often simple ways to repair equipment and by looking for fixing screws around the lower part under the foam pad may give you a clue. You may need a Torx screwdriver to undo any screws rather than a cross head.

Hope that solves your problem. Please mark as helpful if it leads you to a satisfactory solution.Thank you.


Answer #2: Posted by SonuKumar on April 9th, 2024 9:10 AM
SonuKumar

Member since:
May 9th, 2021

Points: 16,609,800
100
points
Here's a breakdown of how to replace the pad assembly on a Ryobi RB101 sander/polisher, along with some resources to help:

Instructions:

Safety First: Unplug the sander for complete safety.

Remove the Old Pad: The pad is typically held in place by small tabs or by a hook-and-loop (Velcro-like) system. Look at how the old pad is attached and gently remove it.

Inspect the Area: Clean any debris or buildup where the pad mounts.

Install the New Pad:

Tabs: Align the tabs of the new pad with the grooves on the sander base.

Hook-and-Loop: Press the new pad firmly against the sander base.

Check Securely: Ensure the pad is seated correctly and won't slip during operation.

Things to Note:

Specific Model: Slight variations may exist for different model numbers. Your owner's manual, if available, would have the most accurate instructions.

Ordering the Pad: Make sure you get the exact replacement pad for your sander model. They are usually available online or at stores carrying Ryobi tools.

Helpful Resources

YouTube Video: Search for "Ryobi RB101 pad replacement" on YouTube. Many handy tutorials exist. Here's one example: https://www.youtube.com/watch?v=inuSHV7KTyk

Manufacturer Website: Visit Ryobi's website and search for your specific model. They may have instructions or diagrams available.

Replacement Parts Websites: Stores specializing in tool replacement parts often carry detailed diagrams and descriptions for the pad assembly.

Let me know if you can't find your specific model, and I'll help search for the right resources!


Please respond to my effort to provide you with the best possible solution by using the "Acceptable Solution" and/or the "Helpful" buttons when the answer has proven to be helpful.

Regards,
Sonu
Your search handyman for all e-support needs!!

Related Ryobi RB101 Manual Pages

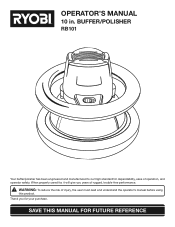
English Manual - Page 1

... MANUAL FOR FUTURE REFERENCE Thank you for , it will give you years of rugged, trouble-free performance. When properly cared for your purchase. BUFFER/POLISHER RB101 Your buffer/polisher has been engineered and manufactured to our high standard for dependability, ease of injury, the user must read and understand the operator...
English Manual - Page 2

...� Assembly ...9 � Operation...9-11 � Maintenance ...12  Troubleshooting ...13 � Parts Ordering / Service ...14 INTRODUCTION This tool has many features... One World Technologies, Inc. WARRANTY RYOBI® POWER TOOL - ryobitools.com. The replacement power tool will complete the work properly due to defective workmanship or ...
English Manual - Page 3

..., contact a qualified electrician to follow all instructions listed below, may ignite the dust or fumes.  Keep bystanders, children, and visitors away while operating a power tool. Replace damaged cords immediately. Properly maintained tools with care. If damaged, have the switch on invites accidents.  Remove adjusting keys or wrenches before turning the...
English Manual - Page 4

... injury.  Always wear safety glasses. A wire gauge size (A.W.G.) of at your lungs. If in length. If you loan someone this tool. GENERAL SAFETY RULES SERVICE  Tool service must be replaced only by the manufacturer or by an authorized service center to avoid risk.  Save these instructions also. 4 SPECIFIC SAFETY RULES...
English Manual - Page 5

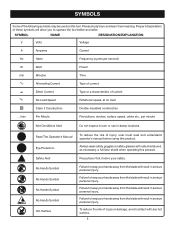
...Hot Surface To reduce the risk of the following symbols may be used on this tool. Precautions that involve your hands away from the blade will result in serious personal injury...hands away from the blade will allow you to keep your safety. Failure to operate the tool better and safer. Please study them and learn their meaning. Proper interpretation of current Rotational ...
English Manual - Page 6

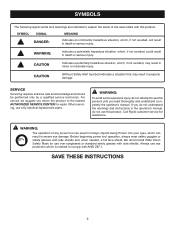
... customer service for repair. We recommend Wide Vision Safety Mask for use only identical replacement parts. SAVE THESE INSTRUCTIONS 6 SYMBOL SIGNAL MEANING DANGER: Indicates an imminently hazardous situation...understand the warnings and instructions in death or serious injury. Before beginning power tool operation, always wear safety goggles or safety glasses with ANSI Z87.1. CAUTION ...
English Manual - Page 7

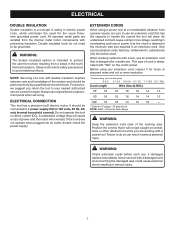
...power and the motor will cause a drop in line voltage, resulting in the tool's internal insulation. If the tool does not operate when plugged into an outlet, double-check the power supply. ... and should be performed only by Underwriter's Laboratories (UL) should be grounded. If damaged replace immediately. ELECTRICAL DOUBLE INSULATION Double insulation is 120 volts, 60 Hz, AC only (normal ...
English Manual - Page 8

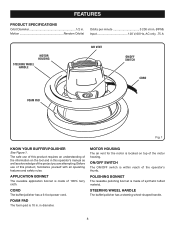
...tool and in . FEATURES PRODUCT SPECIFICATIONS Orbit Diameter 1/2 in diameter. Motion Random Orbital Orbits per minute 3 200 r/min. (RPM) Input 120 V, 60 Hz, AC only, .75 A STEERING WHEEL HANDLE MOTOR HOUSING AIR VENT ON/OFF SWITCH CORD FOAM PAD... yourself with all operating features and safety rules. FOAM PAD The foam pad is made of the project you are attempting. POLISHING ...
English Manual - Page 9

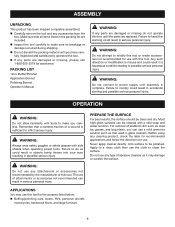
... product has been shipped completely assembled.  Carefully remove the tool and any cleaning product, check the label for recommended applications and follow the directions for use. Make sure that all items listed in . Buffer/Polisher Application Bonnet Polishing Bonnet Operator's Manual WARNING: If any parts are replaced. WARNING: Do not connect to...
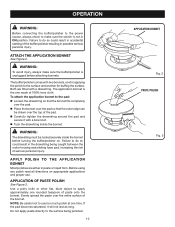
English Manual - Page 10

... edge can be tucked securely inside the bonnet. Do not apply paste directly to the surface being caught between the motor housing and orbiting foam pad, increasing the risk of the buffer/polisher resulting in paste or liquid form. Use a putty knife or other flat, blunt object to apply approximately one...
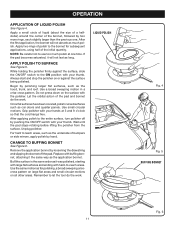
English Manual - Page 11

...the application bonnet. Remember to let the tool do the work . NOTE: Be careful not to the ON position with the polisher. Replace with your thumb. While holding the polisher ... halfdollar) around the center of polish to the entire surface, turn polisher off the pad. If the pad becomes saturated, it was polished, starting with large flat surfaces and ending with your...
English Manual - Page 12

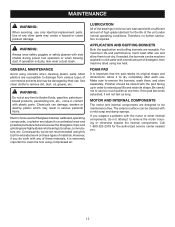
... plastics are susceptible to bearings, brushes, commutators, etc. FOAM PAD It is extremely important to clean the tool using this tool are highly abrasive to damage from various types of any time let... after use only identical replacement parts. If operation is required. Allow it will not last as long. WARNING: Do not at one time. Electric tools used on these materials,...
English Manual - Page 13

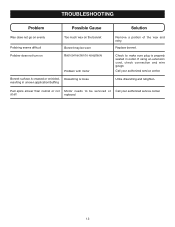
... be serviced or Call your authorized service center. Call your authorized service center. Pad spins slower than normal or not Motor needs to be worn Bad connection to make sure plug is loose resulting in outlet. Replace bonnet. at all replaced 13 If using an extension cord, check connection and wire gauge. Check...
English Manual - Page 14

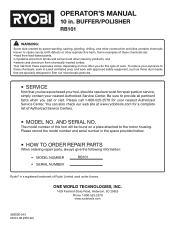
...• MODEL NO. OPERATOR'S MANUAL 10 in a well ventilated area, and work . BUFFER/POLISHER RB101 WARNING: Some dust created by power sanding, sawing, grinding, drilling, and other reproductive harm. The model...reduce your exposure to these exposures varies, depending on how often you have purchased your tool, should a need ever exist for a complete list of Ryobi Limited used under license....

Similar Questions

Not Enough Penetration.
How to replace drive assembly? Drive plate wornout
(Posted by 4jannburgs 9 years ago)
Hpl Replacement Battery
I need a replacement battery for my Ryobi model HP41L. Can you provode or direct men to where to pur...
(Posted by jpiraino1 11 years ago)
Replacement Of Pad.on A Ryobi Rst #10 Table Saw.
The pad is located behind the knob that locks the blade swivel.
(Posted by tabucher 11 years ago)
Why Won't The Polish/buffer Covers Will Not Stay On?
The covers that are included with the RB101 should be tied on once they are properly installed on th...
(Posted by bbrusenbach 12 years ago)
Ask a New Question
Use the box below to post a new question about this Ryobi product .
Points & Prizes
  • You can earn points for nearly everything you do on HelpOwl.com
  • You can trade in those points for gift cards at leading retailers such as Amazon.com and Walmart
  • It's that simple!
See How it Works
Create a Free Account

Ryobi Manuals

Find free Ryobi RB101 manuals and user guides available at ManualOwl.com. Try out our unique manual viewer allowing you to interact with manuals from directly within your browser!

Ryobi Reviews

View thousands of Ryobi user reviews and customer ratings available at ReviewOwl.com.

Contact Information

Complete Ryobi customer service contact information including steps to reach representatives, hours of operation, customer support links and more from ContactHelp.com.

Scoreboard Ratings

See detailed Ryobi customer service rankings, employee comments and much more from our sister site.

Ryobi Recalls

Find comprehensive Ryobi recall information updated hourly on RecallOwl.com.