Brochure
Page 2
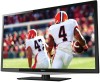
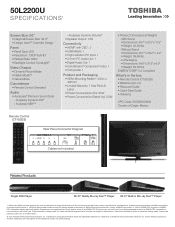
...) Rear Panel Connector Diagram Cables not included. 50L2200U S P E C I F I C AT I O N S1 Screen Size: 50" • Diagonal Screen Size: 49.11" • Design: Aero™ Cosmetic Design Panel • Panel Type: LED • Resolution: 1080P Full HD2 • Refresh Rate: 60Hz • Backlight Control: DynaLight® Video Chassis • Dynamic Picture Mode • Native Mode™ • Game Mode Convenience • Remote Control: Standard Audio • Audyssey® Premium Sound Suite - Audyssey Dynamic Volume® • Speaker Output: 14W Connectivity • HDMI...
...) Rear Panel Connector Diagram Cables not included. 50L2200U S P E C I F I C AT I O N S1 Screen Size: 50" • Diagonal Screen Size: 49.11" • Design: Aero™ Cosmetic Design Panel • Panel Type: LED • Resolution: 1080P Full HD2 • Refresh Rate: 60Hz • Backlight Control: DynaLight® Video Chassis • Dynamic Picture Mode • Native Mode™ • Game Mode Convenience • Remote Control: Standard Audio • Audyssey® Premium Sound Suite - Audyssey Dynamic Volume® • Speaker Output: 14W Connectivity • HDMI...

User Guide
Page 2
.... WARNING To prevent injury, this Toshiba LED TV. However, flat panel displays are not always supported on the proper stands or installed according to wall mount your flat panel display, always: • Use a mount that can become excited while watching a program, especially on page 5. Flat panel displays can be mounted to route all . The use of the U.S. See item 26) on dressers, bookcases, shelves, desks, speakers, chests or carts may fall over...
.... WARNING To prevent injury, this Toshiba LED TV. However, flat panel displays are not always supported on the proper stands or installed according to wall mount your flat panel display, always: • Use a mount that can become excited while watching a program, especially on page 5. Flat panel displays can be mounted to route all . The use of the U.S. See item 26) on dressers, bookcases, shelves, desks, speakers, chests or carts may fall over...
User Guide
Page 3
... warranty, and b) the user's authority to operate this apparatus during lightning storms or when unused for long periods of plug to wide slot; A grounding type plug has two blades and a third grounding prong. Servicing is located in such a manner that it may reduce the product lifetime or result in accordance with the plastic bag. Installation, Care, and Service Installation Follow these instructions...
... warranty, and b) the user's authority to operate this apparatus during lightning storms or when unused for long periods of plug to wide slot; A grounding type plug has two blades and a third grounding prong. Servicing is located in such a manner that it may reduce the product lifetime or result in accordance with the plastic bag. Installation, Care, and Service Installation Follow these instructions...

User Guide
Page 5
... the power cord and disconnect the antenna from main power. Leave the stand protruding over the edge of any cables and/or other component connectors from the TV, as indicated below. Never spill liquids or push objects of the surface and assemble the pedestal as described below . When the TV is in the table below . 7) VESA Mounting Pattern TV Size Hole Pattern (HxV) Screw Size 50L2200U 400mm...
... the power cord and disconnect the antenna from main power. Leave the stand protruding over the edge of any cables and/or other component connectors from the TV, as indicated below. Never spill liquids or push objects of the surface and assemble the pedestal as described below . When the TV is in the table below . 7) VESA Mounting Pattern TV Size Hole Pattern (HxV) Screw Size 50L2200U 400mm...

User Guide
Page 6
... radio or television reception, which can support the weight of Conformity Compliance Statement (Part 15): Toshiba 50L2200U Television model complies with the instructions, may cause undesired operation. Make sure the strap is tight, secure, and parallel to these rules is subject to the following measures: • Reorient or relocate the receiving antenna. • Increase the separation between the equipment and receiver. • Connect the...
... radio or television reception, which can support the weight of Conformity Compliance Statement (Part 15): Toshiba 50L2200U Television model complies with the instructions, may cause undesired operation. Make sure the strap is tight, secure, and parallel to these rules is subject to the following measures: • Reorient or relocate the receiving antenna. • Increase the separation between the equipment and receiver. • Connect the...
User Guide
Page 7
... Vera is operating at an on-screen target may appear on the screen if a fixed, non-moving image appears for perceived issues resulting from these technologies deliver a better translation of Bitstream, Inc. • All other countries. • MPEG Layer-3 audio coding technology licensed from a normal viewing distance. 7 ENERGY STAR® User Information ENERGY STAR User Information Statement: the factory default settings of the box.
... Vera is operating at an on-screen target may appear on the screen if a fixed, non-moving image appears for perceived issues resulting from these technologies deliver a better translation of Bitstream, Inc. • All other countries. • MPEG Layer-3 audio coding technology licensed from a normal viewing distance. 7 ENERGY STAR® User Information ENERGY STAR User Information Statement: the factory default settings of the box.
User Guide
Page 10
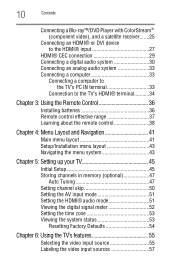
... 41 Setup/Installation menu layout 43 Navigating the menu system 43 Chapter 5: Setting up your TV 45 Initial Setup 45 Storing channels in memory (optional 47 Auto Tuning 47 Setting channel skip 50 Setting the AV input mode 51 Setting the HDMI® audio mode 51 Viewing the digital signal meter 52 Setting the time zone 53 Viewing the system status 53 Resetting Factory Defaults 54 Chapter 6: Using the TV's features 55 Selecting the video input source 55 Labeling the video input sources...
... 41 Setup/Installation menu layout 43 Navigating the menu system 43 Chapter 5: Setting up your TV 45 Initial Setup 45 Storing channels in memory (optional 47 Auto Tuning 47 Setting channel skip 50 Setting the AV input mode 51 Setting the HDMI® audio mode 51 Viewing the digital signal meter 52 Setting the time zone 53 Viewing the system status 53 Resetting Factory Defaults 54 Chapter 6: Using the TV's features 55 Selecting the video input source 55 Labeling the video input sources...
User Guide
Page 13
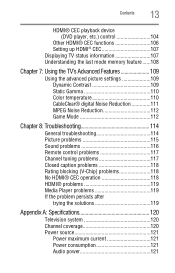
...; digital Noise Reduction 111 MPEG Noise Reduction 112 Game Mode 112 Chapter 8: Troubleshooting 114 General troubleshooting 114 Picture problems 115 Sound problems 116 Remote control problems 117 Channel tuning problems 117 Closed caption problems 118 Rating blocking (V-Chip) problems 118 No HDMI® CEC operation 118 HDMI® problems 119 Media Player problems 119 If the problem persists after trying the solutions 119 Appendix A: Specifications 120 Television system 120 Channel coverage 120 Power source 121 Power maximum current 121 Power consumption 121 Audio power...
...; digital Noise Reduction 111 MPEG Noise Reduction 112 Game Mode 112 Chapter 8: Troubleshooting 114 General troubleshooting 114 Picture problems 115 Sound problems 116 Remote control problems 117 Channel tuning problems 117 Closed caption problems 118 Rating blocking (V-Chip) problems 118 No HDMI® CEC operation 118 HDMI® problems 119 Media Player problems 119 If the problem persists after trying the solutions 119 Appendix A: Specifications 120 Television system 120 Channel coverage 120 Power source 121 Power maximum current 121 Power consumption 121 Audio power...

User Guide
Page 19
... menu navigation buttons. 9 EXIT-Instantly closes an onscreen menu. 10 USB port-Accesses JPEG or MP3 files, or updates TV firmware. Introduction 19 TV back panel connections 8 ARROWS / / / -When a menu is shared with an HDMI-1 analog audio input terminal, and its use can be configured in Dolby® Digital or PCM (pulse-code modulation) format for connecting an audio amplifier. HGRD500010I 1 ANALOG AUDIO OUT 5 2 6 IN VIDEO/COLOR STREAM HD Y/VIDEO Power Cord 4 3 21 (Sample Illustration) Back panel connections 1 Digital AUDIO OUT-Optical audio output in the Audio Setup menu...
... menu navigation buttons. 9 EXIT-Instantly closes an onscreen menu. 10 USB port-Accesses JPEG or MP3 files, or updates TV firmware. Introduction 19 TV back panel connections 8 ARROWS / / / -When a menu is shared with an HDMI-1 analog audio input terminal, and its use can be configured in Dolby® Digital or PCM (pulse-code modulation) format for connecting an audio amplifier. HGRD500010I 1 ANALOG AUDIO OUT 5 2 6 IN VIDEO/COLOR STREAM HD Y/VIDEO Power Cord 4 3 21 (Sample Illustration) Back panel connections 1 Digital AUDIO OUT-Optical audio output in the Audio Setup menu...
User Guide
Page 24
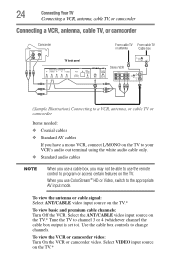
... needed: ❖ Coaxial cables ❖ Standard AV cables If you have a mono VCR, connect L/MONO on the TV to your VCR's audio out terminal using the white audio cable only. ❖ Standard audio cables NOTE When you use a cable box, you use the remote control to ). Select VIDEO input source on the TV.* To view basic and premium cable channels: Turn Off the VCR. Use the cable box controls to the appropriate AV input mode. To view the antenna or cable signal: Select ANT/CABLE video input source...
... needed: ❖ Coaxial cables ❖ Standard AV cables If you have a mono VCR, connect L/MONO on the TV to your VCR's audio out terminal using the white audio cable only. ❖ Standard audio cables NOTE When you use a cable box, you use the remote control to ). Select VIDEO input source on the TV.* To view basic and premium cable channels: Turn Off the VCR. Use the cable box controls to the appropriate AV input mode. To view the antenna or cable signal: Select ANT/CABLE video input source...
User Guide
Page 26
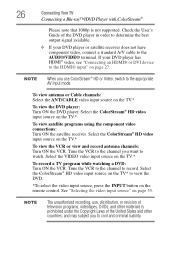
... to the channel to view the DVD. *To select the video input source, press the INPUT button on page 55. If your DVD player or satellite receiver does not have component video, connect a standard A/V cable to the appropriate AV input mode. NOTE The unauthorized recording, use ColorStream® HD or Video, switch to the AUDIO/VIDEO terminal. To view antenna or Cable channels: Select the ANT/CABLE video input source on the TV.* To view the VCR or view and record antenna channels: Turn ON...
... to the channel to view the DVD. *To select the video input source, press the INPUT button on page 55. If your DVD player or satellite receiver does not have component video, connect a standard A/V cable to the appropriate AV input mode. NOTE The unauthorized recording, use ColorStream® HD or Video, switch to the AUDIO/VIDEO terminal. To view antenna or Cable channels: Select the ANT/CABLE video input source on the TV.* To view the VCR or view and record antenna channels: Turn ON...
User Guide
Page 30
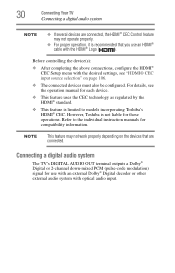
Refer to models incorporating Toshiba's HDMI® CEC. Connecting a digital audio system The TV's DIGITAL AUDIO OUT terminal outputs a Dolby® Digital or 2-channel down-mixed PCM (pulse-code modulation) signal for compatibility information. NOTE This feature may not operate properly. ❖ For proper operation, it is limited to the individual instruction manuals for use an HDMI® cable with the HDMI® Logo ( ). For details, see "HDMI® CEC input source selection" on the devices...
Refer to models incorporating Toshiba's HDMI® CEC. Connecting a digital audio system The TV's DIGITAL AUDIO OUT terminal outputs a Dolby® Digital or 2-channel down-mixed PCM (pulse-code modulation) signal for compatibility information. NOTE This feature may not operate properly. ❖ For proper operation, it is limited to the individual instruction manuals for use an HDMI® cable with the HDMI® Logo ( ). For details, see "HDMI® CEC input source selection" on the devices...
User Guide
Page 43
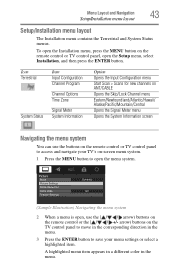
... Item Input Configuration Channel Program Channel Options Time Zone Signal Meter System Information Option Opens the Input Configuration menu Start Scan > Scans for new channels on ANT/CABLE Opens the Skip/Lock Channel menu Eastern/Newfoundland/Atlantic/Hawaii/ Alaska/Pacific/Mountain/Central Opens the Signal Meter menu Opens the System Information screen Navigating the menu system You can use the ( / / / arrow) buttons on the remote control or the arrow) buttons on the TV control panel to...
... Item Input Configuration Channel Program Channel Options Time Zone Signal Meter System Information Option Opens the Input Configuration menu Start Scan > Scans for new channels on ANT/CABLE Opens the Skip/Lock Channel menu Eastern/Newfoundland/Atlantic/Hawaii/ Alaska/Pacific/Mountain/Central Opens the Signal Meter menu Opens the System Information screen Navigating the menu system You can use the ( / / / arrow) buttons on the remote control or the arrow) buttons on the TV control panel to...
User Guide
Page 45
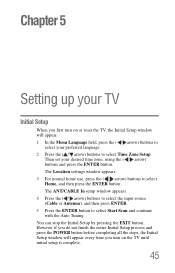
... the input source (Cable or Antenna), and then press ENTER. 5 Press the ENTER button to select Home, and then press the ENTER button. The Location settings window appears. 3 For normal home use, press the ( / arrow) buttons to select Start Scan and continue with the Auto Tuning. You can stop the Initial Setup by pressing the EXIT button. Chapter 5 Setting up your TV Initial Setup When you turn...
... the input source (Cable or Antenna), and then press ENTER. 5 Press the ENTER button to select Home, and then press the ENTER button. The Location settings window appears. 3 For normal home use, press the ( / arrow) buttons to select Start Scan and continue with the Auto Tuning. You can stop the Initial Setup by pressing the EXIT button. Chapter 5 Setting up your TV Initial Setup When you turn...
User Guide
Page 51
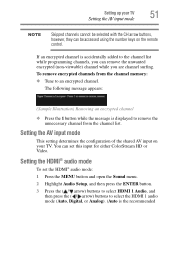
... can set the HDMI® audio mode: 1 Press the MENU button and open the Sound menu. 2 Highlight Audio Setup, and then press the ENTER button. 3 Press the ( / arrow) buttons to select HDMI 1 Audio, and then press the ( / arrow) buttons to select the HDMI 1 audio mode (Auto, Digital, or Analog). (Auto is the recommended If an encrypted channel is displayed to remove the unnecessary channel from the channel memory: ❖ Tune to the channel list while programming channels, you are channel surfing. Setting up...
... can set the HDMI® audio mode: 1 Press the MENU button and open the Sound menu. 2 Highlight Audio Setup, and then press the ENTER button. 3 Press the ( / arrow) buttons to select HDMI 1 Audio, and then press the ( / arrow) buttons to select the HDMI 1 audio mode (Auto, Digital, or Analog). (Auto is the recommended If an encrypted channel is displayed to remove the unnecessary channel from the channel memory: ❖ Tune to the channel list while programming channels, you are channel surfing. Setting up...
User Guide
Page 82
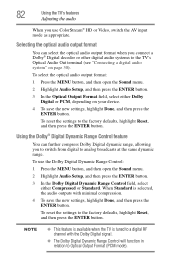
... the optical audio output format: 1 Press the MENU button, and then open the Sound menu. 2 Highlight Audio Setup, and then press the ENTER button. 3 In the Dolby Digital Dynamic Range Control field, select either Dolby Digital or PCM, depending on page 30). To reset the settings to the factory defaults, highlight Reset, and then press the ENTER button. Using the Dolby® Digital Dynamic Range Control feature You can select the optical audio output format when you connect...
... the optical audio output format: 1 Press the MENU button, and then open the Sound menu. 2 Highlight Audio Setup, and then press the ENTER button. 3 In the Dolby Digital Dynamic Range Control field, select either Dolby Digital or PCM, depending on page 30). To reset the settings to the factory defaults, highlight Reset, and then press the ENTER button. Using the Dolby® Digital Dynamic Range Control feature You can select the optical audio output format when you connect...
User Guide
Page 95
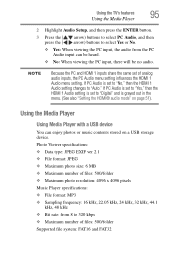
... NOTE Because the PC and HDMI 1 inputs share the same set to "Digital" and is set to "No," then the HDMI 1 Audio setting changes to "Auto." Photo Viewer specifications: ❖ Data type: JPEG EXIF ver 2.1 ❖ File format: JPEG ❖ Maximum photo size: 6 MB ❖ Maximum number of files: 500/folder ❖ Maximum photo resolution: 4096 x 4096 pixels Music Player specifications: ❖ File format: MP3 ❖ Sampling frequency: 16...
... NOTE Because the PC and HDMI 1 inputs share the same set to "Digital" and is set to "No," then the HDMI 1 Audio setting changes to "Auto." Photo Viewer specifications: ❖ Data type: JPEG EXIF ver 2.1 ❖ File format: JPEG ❖ Maximum photo size: 6 MB ❖ Maximum number of files: 500/folder ❖ Maximum photo resolution: 4096 x 4096 pixels Music Player specifications: ❖ File format: MP3 ❖ Sampling frequency: 16...
User Guide
Page 114
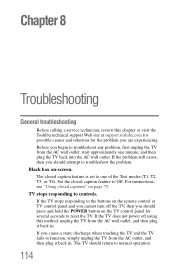
... the TV from the AC wall outlet, wait approximately one of the Text modes (T1, T2, T3, or T4). Before you should press and hold the POWER button on -screen. Black box on the TV control panel for the problem you cause a static discharge when touching the TV and the TV fails to controls. For instructions, see "Using closed captions" on page 75. If you...
... the TV from the AC wall outlet, wait approximately one of the Text modes (T1, T2, T3, or T4). Before you should press and hold the POWER button on -screen. Black box on the TV control panel for the problem you cause a static discharge when touching the TV and the TV fails to controls. For instructions, see "Using closed captions" on page 75. If you...
User Guide
Page 115
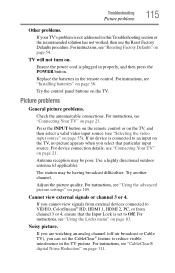
.... Picture problems General picture problems. Check the antenna/cable connections. Press the INPUT button on the remote control or on the TV, and then select a valid video input source (see "Resetting Factory Defaults" on page 36. For instructions, see "Installing batteries" on page 54. TV will not turn on the TV. For instructions, see "Using the Locks menu" on the TV, no device is set the CableClear® feature to Off. If you cannot view signals from external...
.... Picture problems General picture problems. Check the antenna/cable connections. Press the INPUT button on the remote control or on the TV, and then select a valid video input source (see "Resetting Factory Defaults" on page 36. For instructions, see "Installing batteries" on page 54. TV will not turn on the TV. For instructions, see "Using the Locks menu" on the TV, no device is set the CableClear® feature to Off. If you cannot view signals from external...
User Guide
Page 130
... program ratings displaying 88 unlocking programs 90 Q quick setup ANT/CABLE IN 46 menu language 46 R rating system 87 downloading additional 86 S safety icons 15 scrolling TheaterWide® picture 70 specifications acceptable signal formats 122 audio power 121 channel coverage 120 ColorStream® HD input 121 Digital audio output 122 dimensions 122 HDMI® input 121 HDMI® signal formats 123 mass (weight) 122 operating conditions 122 PC IN signal formats 122 PC input 122 power consumption 121 power maximum current 121 power source 121 speaker type...
... program ratings displaying 88 unlocking programs 90 Q quick setup ANT/CABLE IN 46 menu language 46 R rating system 87 downloading additional 86 S safety icons 15 scrolling TheaterWide® picture 70 specifications acceptable signal formats 122 audio power 121 channel coverage 120 ColorStream® HD input 121 Digital audio output 122 dimensions 122 HDMI® input 121 HDMI® signal formats 123 mass (weight) 122 operating conditions 122 PC IN signal formats 122 PC input 122 power consumption 121 power maximum current 121 power source 121 speaker type...


