
Operating Instructions
Page 1
If, after reading this instruction manual, you have additional questions related to the use of your Sony projection TV, please call one of the following numbers (English only). 4-097-546-13 (2) LCD Projection TV KF-42WE610/50WE610/60WE610 Printed in Canada contact the Customer Relations Center at: (416) 499-SONY (7669) LCD Projection TV HD-Monitor Operating Instructions KF-42WE610 KF-50WE610 KF-60WE610 2003 Sony Corporation Customers in the continental United States contact the Direct Response Center at: 1-800-222-SONY (7669) Customers in U.S.A.
If, after reading this instruction manual, you have additional questions related to the use of your Sony projection TV, please call one of the following numbers (English only). 4-097-546-13 (2) LCD Projection TV KF-42WE610/50WE610/60WE610 Printed in Canada contact the Customer Relations Center at: (416) 499-SONY (7669) LCD Projection TV HD-Monitor Operating Instructions KF-42WE610 KF-50WE610 KF-60WE610 2003 Sony Corporation Customers in the continental United States contact the Direct Response Center at: 1-800-222-SONY (7669) Customers in U.S.A.
Operating Instructions
Page 2
...Record The model and serial numbers are located at the rear of the LCD Projection TV, below . If this equipment does cause harmful interference to... with §15.119 of the FCC rules. Record these numbers in the spaces provided below the Sony logo, on the sticker, and also on , the user is for proper grounding and, in particular...shock to provide reasonable protection against harmful interference in a residential installation. Serial No. MODEL: KF-42WE610, KF-50WE610, KF-60WE610 Please keep this polarized AC plug with an extension cord, receptacle or other than private viewing...
...Record The model and serial numbers are located at the rear of the LCD Projection TV, below . If this equipment does cause harmful interference to... with §15.119 of the FCC rules. Record these numbers in the spaces provided below the Sony logo, on the sticker, and also on , the user is for proper grounding and, in particular...shock to provide reasonable protection against harmful interference in a residential installation. Serial No. MODEL: KF-42WE610, KF-50WE610, KF-60WE610 Please keep this polarized AC plug with an extension cord, receptacle or other than private viewing...

Operating Instructions
Page 3
...the ENERGY STAR® guidelines for several days, disconnect the power by pulling the plug itself. As an ENERGY STAR® Partner, Sony Corporation has determined that face the screen with opaque drapery. under license from the ceiling or to direct illumination or direct sunlight. Patent No... is designed, for safety purposes, to a warm location, or if the room temperature changes suddenly, the picture may be using the LCD Projection TV for energy efficiency. ENERGY STAR® is desirable to insert the plug fully into the wall outlet only one way. In this case, please...
...the ENERGY STAR® guidelines for several days, disconnect the power by pulling the plug itself. As an ENERGY STAR® Partner, Sony Corporation has determined that face the screen with opaque drapery. under license from the ceiling or to direct illumination or direct sunlight. Patent No... is designed, for safety purposes, to a warm location, or if the room temperature changes suddenly, the picture may be using the LCD Projection TV for energy efficiency. ENERGY STAR® is desirable to insert the plug fully into the wall outlet only one way. In this case, please...
Operating Instructions
Page 5
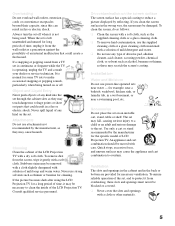
.... Cleaning Clean the cabinet of any type of mild soap and warm water. If the picture becomes dark after using the LCD Projection TV for the specific model of an internal malfunction that could create a fire hazard. Installation Water and Moisture Do not use any kind...on or off when it gently with care. Stubborn stains may cause the appliance and cart combination to clean the inside of the LCD Projection TV. To remove dust from overheating, these may cause hazards. Consult qualified service personnel. Quick stops, excessive force, and uneven surfaces may be...
.... Cleaning Clean the cabinet of any type of mild soap and warm water. If the picture becomes dark after using the LCD Projection TV for the specific model of an internal malfunction that could create a fire hazard. Installation Water and Moisture Do not use any kind...on or off when it gently with care. Stubborn stains may cause the appliance and cart combination to clean the inside of the LCD Projection TV. To remove dust from overheating, these may cause hazards. Consult qualified service personnel. Quick stops, excessive force, and uneven surfaces may be...
Operating Instructions
Page 7
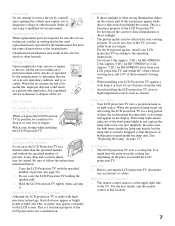
... replacement parts specified by the manufacturer) to determine that have the same characteristics as a heater. When the projection lamp wears out after using the LCD projection TV for KF-60WE610 away from eye fatigue. Refer all servicing to so certify. If you sit too close to high temperature ...Unauthorized substitutions may appear constantly on the place you may appear white due to dispose of the screen may suffer from your LCD projection TV, and within 60° of the vertical viewing area, and 130° of light (red, blue, or green) may result in safe operating...
... replacement parts specified by the manufacturer) to determine that have the same characteristics as a heater. When the projection lamp wears out after using the LCD projection TV for KF-60WE610 away from eye fatigue. Refer all servicing to so certify. If you sit too close to high temperature ...Unauthorized substitutions may appear constantly on the place you may appear white due to dispose of the screen may suffer from your LCD projection TV, and within 60° of the vertical viewing area, and 130° of light (red, blue, or green) may result in safe operating...
Operating Instructions
Page 8
Contents Introducing the Sony LCD Projection TV Presenting the Sony LCD Projection TV 9 Using This Manual 10 Enjoying Your LCD Projection TV 11 Replacing the Lamp 13 Installing and Connecting the LCD Projection TV Contents 17 Inserting Batteries into the Remote Control ..........17 Carrying Your LCD Projection TV 18 To Prevent the LCD Projection TV from Falling Down 19 When Installing Your LCD Projection TV Against a Wall...
Contents Introducing the Sony LCD Projection TV Presenting the Sony LCD Projection TV 9 Using This Manual 10 Enjoying Your LCD Projection TV 11 Replacing the Lamp 13 Installing and Connecting the LCD Projection TV Contents 17 Inserting Batteries into the Remote Control ..........17 Carrying Your LCD Projection TV 18 To Prevent the LCD Projection TV from Falling Down 19 When Installing Your LCD Projection TV Against a Wall...
Operating Instructions
Page 9
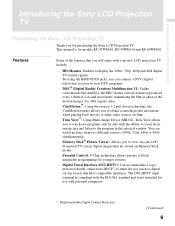
...ghost of the features that have compatible interfaces. Introducing the Sony LCD Projection TV Introducing the Sony LCD Projection TV Presenting the Sony LCD Projection TV Thank you to view on one picture and listen to the program in on your new LCD projection TV include: ❑ HD-Monitor: Enables to display the...to zoom in the selected window. Features Some of the motion images (for purchasing the Sony LCD Projection TV. This manual is not intended for models KF-42WE610, KF-50WE610 and KF-60WE610. The DVI-HDTV input terminal is compliant with the EIA-861 standard and is for...
...ghost of the features that have compatible interfaces. Introducing the Sony LCD Projection TV Introducing the Sony LCD Projection TV Presenting the Sony LCD Projection TV Thank you to view on one picture and listen to the program in on your new LCD projection TV include: ❑ HD-Monitor: Enables to display the...to zoom in the selected window. Features Some of the motion images (for purchasing the Sony LCD Projection TV. This manual is not intended for models KF-42WE610, KF-50WE610 and KF-60WE610. The DVI-HDTV input terminal is compliant with the EIA-861 standard and is for...
Operating Instructions
Page 10
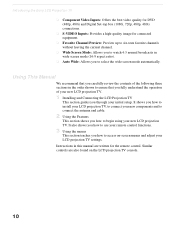
...to watch 4:3 normal broadcasts in the order shown to ensure that you carefully review the contents of your new LCD projection TV. 1 Installing and Connecting the LCD Projection TV This section guides you through your new components and to connect the antenna and cable. 2 Using the Features This... section shows you how to use your LCD projection TV settings. It also shows you how to select the wide screen mode automatically. Introducing the Sony LCD Projection TV ❑ Component Video Inputs: Offers the best video quality for DVD (480p, 480i)...
...to watch 4:3 normal broadcasts in the order shown to ensure that you carefully review the contents of your new LCD projection TV. 1 Installing and Connecting the LCD Projection TV This section guides you through your new components and to connect the antenna and cable. 2 Using the Features This... section shows you how to use your LCD projection TV settings. It also shows you how to select the wide screen mode automatically. Introducing the Sony LCD Projection TV ❑ Component Video Inputs: Offers the best video quality for DVD (480p, 480i)...
Operating Instructions
Page 11
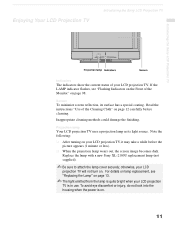
... before the picture appears (1 minute or less). ❑ When the projection lamp wears out, the screen image becomes dark. Enjoying Your LCD Projection TV Introducing the Sony LCD Projection TV Introducing the Sony LCD Projection TV Projection lamp Indicators Screen Indicators The indicators show the current status of your LCD projection TV, it may take a while before cleaning. Inappropriate cleaning methods could...
... before the picture appears (1 minute or less). ❑ When the projection lamp wears out, the screen image becomes dark. Enjoying Your LCD Projection TV Introducing the Sony LCD Projection TV Introducing the Sony LCD Projection TV Projection lamp Indicators Screen Indicators The indicators show the current status of your LCD projection TV, it may take a while before cleaning. Inappropriate cleaning methods could...
Operating Instructions
Page 12
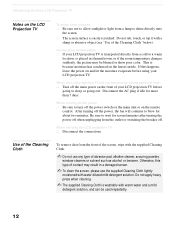
...long period of time ❑ Turn off the main power on the front of contact may be used repeatedly. 12 Introducing the Sony LCD Projection TV Notes on the LCD Projection TV To enjoy clear pictures ❑ Be sure not to allow sunlight or light from a lamp to sleep or going to shine...control. Otherwise, this happens, leave the power on and let the moisture evaporate before going out. If this type of your LCD projection TV before using your LCD projection TV is easily scratched. Do not rub, touch, or tap it with warm water and a mild detergent solution, and can be ...
...long period of time ❑ Turn off the main power on the front of contact may be used repeatedly. 12 Introducing the Sony LCD Projection TV Notes on the LCD Projection TV To enjoy clear pictures ❑ Be sure not to allow sunlight or light from a lamp to sleep or going to shine...control. Otherwise, this happens, leave the power on and let the moisture evaporate before going out. If this type of your LCD projection TV before using your LCD projection TV is easily scratched. Do not rub, touch, or tap it with warm water and a mild detergent solution, and can be ...
Operating Instructions
Page 13
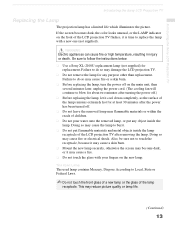
...so may cause a fire. ❑ Do not touch the glass with a new one (not supplied). Doing so may damage the LCD projection TV. ❑ Do not remove the lamp for any object inside the lamp receptacle of children. ❑ Do not pour water onto the ...put flammable materials and metal objects inside the lamp. This may cause fire or electrical shock. Introducing the Sony LCD Projection TV Introducing the Sony LCD Projection TV Replacing the Lamp The projection lamp has a limited life which illuminates the picture. WARNING Electric appliances can cause fire or high temperature, ...
...so may cause a fire. ❑ Do not touch the glass with a new one (not supplied). Doing so may damage the LCD projection TV. ❑ Do not remove the lamp for any object inside the lamp receptacle of children. ❑ Do not pour water onto the ...put flammable materials and metal objects inside the lamp. This may cause fire or electrical shock. Introducing the Sony LCD Projection TV Introducing the Sony LCD Projection TV Replacing the Lamp The projection lamp has a limited life which illuminates the picture. WARNING Electric appliances can cause fire or high temperature, ...
Operating Instructions
Page 14
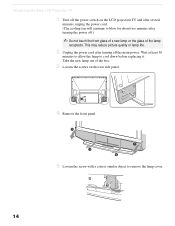
Take the new lamp out of the lamp receptacle. Introducing the Sony LCD Projection TV 1 Turn off the power switch on the LCD projection TV and after several minutes, unplug the power cord. (The cooling fan will continue to blow for about two minutes after turning off .) ✍ Do not ...touch the front glass of a new lamp or the glass of the box. 3 Loosen the screws on the rear side panel. 4 Remove...
Take the new lamp out of the lamp receptacle. Introducing the Sony LCD Projection TV 1 Turn off the power switch on the LCD projection TV and after several minutes, unplug the power cord. (The cooling fan will continue to blow for about two minutes after turning off .) ✍ Do not ...touch the front glass of a new lamp or the glass of the box. 3 Loosen the screws on the rear side panel. 4 Remove...
Operating Instructions
Page 15
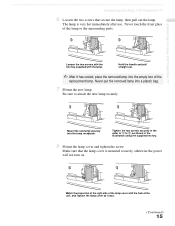
... lamp. Hold the handle and pull straight out. ✍ After it was. (Continued) 15 Match the projection of the right side of the lamp or the surrounding parts. Introducing the Sony LCD Projection TV Introducing the Sony LCD Projection TV 6 Loosen the two screws that the lamp cover is very hot immediately after use. The lamp is...
... lamp. Hold the handle and pull straight out. ✍ After it was. (Continued) 15 Match the projection of the right side of the lamp or the surrounding parts. Introducing the Sony LCD Projection TV Introducing the Sony LCD Projection TV 6 Loosen the two screws that the lamp cover is very hot immediately after use. The lamp is...
Operating Instructions
Page 16
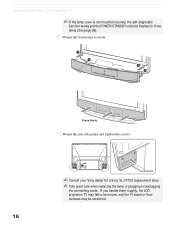
Introducing the Sony LCD Projection TV ✍ If the lamp cover is not mounted securely, the self-diagnostic function works and the POWER/STANDBY indicator flashes for a Sony XL-2100U replacement lamp. ✍ Take great care when replacing the lamp or plugging in/unplugging the connecting cords. If you handle them roughly, the LCD projection TV may fall or be moved, and the TV stand or floor surfaces may be scratched. 16 Press firmly. 10 Mount the rear side panel and tighten the screws. ✍ Consult your Sony dealer for three times (See page 98). 9 Mount the front panel securely.
Introducing the Sony LCD Projection TV ✍ If the lamp cover is not mounted securely, the self-diagnostic function works and the POWER/STANDBY indicator flashes for a Sony XL-2100U replacement lamp. ✍ Take great care when replacing the lamp or plugging in/unplugging the connecting cords. If you handle them roughly, the LCD projection TV may fall or be moved, and the TV stand or floor surfaces may be scratched. 16 Press firmly. 10 Mount the rear side panel and tighten the screws. ✍ Consult your Sony dealer for three times (See page 98). 9 Mount the front panel securely.
Operating Instructions
Page 17
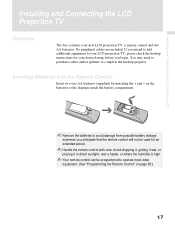
...in direct sunlight, near a heater, or where the humidity is high. ✍ Your remote control can be used for your new LCD projection TV, a remote control and two AA batteries. You may need to purchase cables and/or splitters to operate most video equipment. (See "Programming ...battery compartment. ✍ Remove the batteries to avoid damage from possible battery leakage whenever you intend to add additional equipment to your LCD projection TV, please check the hookup instructions for an extended period. ✍ Handle the remote control with care. No peripheral cables are included....
...in direct sunlight, near a heater, or where the humidity is high. ✍ Your remote control can be used for your new LCD projection TV, a remote control and two AA batteries. You may need to purchase cables and/or splitters to operate most video equipment. (See "Programming ...battery compartment. ✍ Remove the batteries to avoid damage from possible battery leakage whenever you intend to add additional equipment to your LCD projection TV, please check the hookup instructions for an extended period. ✍ Handle the remote control with care. No peripheral cables are included....
Operating Instructions
Page 18
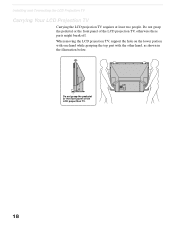
When moving the LCD projection TV, support the hole on the lower portion with one hand while grasping the top part with the other hand, as shown in the illustration below. Installing and Connecting the LCD Projection TV Carrying Your LCD Projection TV Carrying the LCD projection TV requires at least two people. Do not grasp the pedestal or the front panel of the LCD projection TV, otherwise these parts might break off. Do not grasp the pedestal or the front panel of the LCD projecttion TV. 18
When moving the LCD projection TV, support the hole on the lower portion with one hand while grasping the top part with the other hand, as shown in the illustration below. Installing and Connecting the LCD Projection TV Carrying Your LCD Projection TV Carrying the LCD projection TV requires at least two people. Do not grasp the pedestal or the front panel of the LCD projection TV, otherwise these parts might break off. Do not grasp the pedestal or the front panel of the LCD projecttion TV. 18
Operating Instructions
Page 19
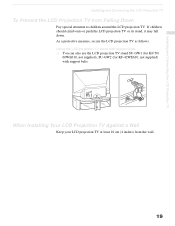
... children around the LCD projection TV. Installing and Connecting the LCD Projection TV Installing and Connecting the LCD Projection TV To Prevent the LCD Projection TV from the wall. 19 Using the LCD projection TV stand with support belts ❑ You can also use the LCD projection TV stand SU-GW1 (for KF-50/ 60WE610, not supplied), SU-GW2 (for KF-42WE610, not supplied) with...
... children around the LCD projection TV. Installing and Connecting the LCD Projection TV Installing and Connecting the LCD Projection TV To Prevent the LCD Projection TV from the wall. 19 Using the LCD projection TV stand with support belts ❑ You can also use the LCD projection TV stand SU-GW1 (for KF-50/ 60WE610, not supplied), SU-GW2 (for KF-42WE610, not supplied) with...
Operating Instructions
Page 20
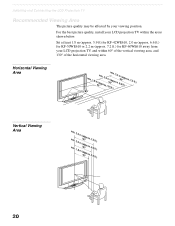
... quality may be affected by your LCD projection TV, and within the areas shown below. min. Sit at least 1.8 m (approx. 5.9 ft) for KF-42WE610, 2.0 m (approx. 6.6 ft.) for KF-50WE610 or 2.2 m (approx. 7.2 ft.) for KF-60WE610 away from your viewing position. For the best picture quality, install your LCD projection TV within 60° of the vertical viewing area, and...
... quality may be affected by your LCD projection TV, and within the areas shown below. min. Sit at least 1.8 m (approx. 5.9 ft) for KF-42WE610, 2.0 m (approx. 6.6 ft.) for KF-50WE610 or 2.2 m (approx. 7.2 ft.) for KF-60WE610 away from your viewing position. For the best picture quality, install your LCD projection TV within 60° of the vertical viewing area, and...

Operating Instructions
Page 21
Item 1 MEMORY STICK 2 MEMORY STICK ACCESS LED Description Memory Stick insertion slot. For details, see "Inserting and Removing a Memory Stick" on page 57. Installing and Connecting the LCD Projection TV Installing and Connecting the LCD Projection TV LCD Projection TV Connectors LCD Projection TV Front and Rear Side Connectors How to open the front panel To open OPEN OPEN Push up. When lit, indicates that the Memory Stick is being read. (Do not remove the Memory Stick when the indicator is lit.) (Continued) 21
Item 1 MEMORY STICK 2 MEMORY STICK ACCESS LED Description Memory Stick insertion slot. For details, see "Inserting and Removing a Memory Stick" on page 57. Installing and Connecting the LCD Projection TV Installing and Connecting the LCD Projection TV LCD Projection TV Connectors LCD Projection TV Front and Rear Side Connectors How to open the front panel To open OPEN OPEN Push up. When lit, indicates that the Memory Stick is being read. (Do not remove the Memory Stick when the indicator is lit.) (Continued) 21

Operating Instructions
Page 22
Installing and Connecting the LCD Projection TV Rear of LCD projection TV Front left side of LCD projection TV VIDEO 2 INPUT S VIDEO VIDEO L(MONO)-AUDIO-R 22
Installing and Connecting the LCD Projection TV Rear of LCD projection TV Front left side of LCD projection TV VIDEO 2 INPUT S VIDEO VIDEO L(MONO)-AUDIO-R 22


