
Operating Guide
Page 9
... pack NP-FH40 (1) (p.11) (DCR-SR42/SR62/ SR82) NP-FH60 (1) (p.11) (DCR-SR200/SR300) Handycam Station (1) (p.11) A/V connecting cable (1) (p.25) USB cable (1) (p.27) CD-ROM "Handycam Application Software" (1) (p.26) - Getting Started Step 1: Checking supplied items Make sure that item supplied. The number in the parentheses indicates the number of that you have the following items supplied with your camcorder.
... pack NP-FH40 (1) (p.11) (DCR-SR42/SR62/ SR82) NP-FH60 (1) (p.11) (DCR-SR200/SR300) Handycam Station (1) (p.11) A/V connecting cable (1) (p.25) USB cable (1) (p.27) CD-ROM "Handycam Application Software" (1) (p.26) - Getting Started Step 1: Checking supplied items Make sure that item supplied. The number in the parentheses indicates the number of that you have the following items supplied with your camcorder.
Operating Guide
Page 21
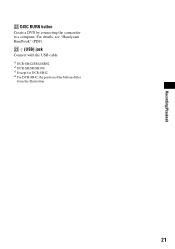
Recording/Playback ws DISC BURN button Create a DVD by connecting the camcorder to a computer. wd (USB) jack Connect with the USB cable. *1 DCR-SR42/SR62/SR82 *2 DCR-SR200/SR300 *3 Except for DCR-SR42 *4 For DCR-SR42, the position of the buttons differ from the illustration. 21 For details, see "Handycam Handbook" (PDF).
Recording/Playback ws DISC BURN button Create a DVD by connecting the camcorder to a computer. wd (USB) jack Connect with the USB cable. *1 DCR-SR42/SR62/SR82 *2 DCR-SR200/SR300 *3 Except for DCR-SR42 *4 For DCR-SR42, the position of the buttons differ from the illustration. 21 For details, see "Handycam Handbook" (PDF).

Operating Guide
Page 27
... appears, you use a Notebook computer, connect it at this must be provided as the power source. Provide the camcorder and the Handycam Station, and a USB cable beforehand. However, imported images and images on computers fulfilling the above system requirements. • Picture Motion Browser does not...6 Check your area and country/region, then click [Next]. • The software is set up for your computer using the supplied USB cable, then click [Next] on the connection confirmation screen. The installation is reproduced in the disc drive of the computer. Even if a ...
... appears, you use a Notebook computer, connect it at this must be provided as the power source. Provide the camcorder and the Handycam Station, and a USB cable beforehand. However, imported images and images on computers fulfilling the above system requirements. • Picture Motion Browser does not...6 Check your area and country/region, then click [Next]. • The software is set up for your computer using the supplied USB cable, then click [Next] on the connection confirmation screen. The installation is reproduced in the disc drive of the computer. Even if a ...

Operating Guide
Page 28
...Picture Motion Browser), appear on -screen instructions to install the software. http://www.sony.net/registration/di/ • For the information about Picture Motion Browser, visit the following URL: http://www.sony.net/support-disoft/ Performing various functions - Follow the on the desktop. Windows ... the installation. For details, see "Handycam Handbook" (PDF). 1 Turn on your camcorder, then press (HOME) A (or B). 2 Touch the desired setup item. 3 Follow the guide on the screen for your computer. • For disconnecting the USB cable, see the explanation of the function ...
...Picture Motion Browser), appear on -screen instructions to install the software. http://www.sony.net/registration/di/ • For the information about Picture Motion Browser, visit the following URL: http://www.sony.net/support-disoft/ Performing various functions - Follow the on the desktop. Windows ... the installation. For details, see "Handycam Handbook" (PDF). 1 Turn on your camcorder, then press (HOME) A (or B). 2 Touch the desired setup item. 3 Follow the guide on the screen for your computer. • For disconnecting the USB cable, see the explanation of the function ...


