Operating Guide
Page 49
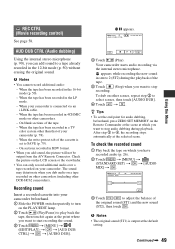
...on the Remote Commander at the scene at the point where you can only record additional audio over a tape recorded on other DCR-HC62 camcorders). When the tape has been recorded in the 16-bit mode (p. 50). - When the tape has been recorded in HDV ... playback. AUD DUB CTRL (Audio dubbing) Using the internal stereo microphone (p. 90), you want to select scenes, then touch [AUDIO DUB]. 6 Touch t . b Notes • The original sound (ST1) is connected via the internal stereo microphone. When your camcorder. b Notes • You cannot record additional audio: -
...on the Remote Commander at the scene at the point where you can only record additional audio over a tape recorded on other DCR-HC62 camcorders). When the tape has been recorded in the 16-bit mode (p. 50). - When the tape has been recorded in HDV ... playback. AUD DUB CTRL (Audio dubbing) Using the internal stereo microphone (p. 90), you want to select scenes, then touch [AUDIO DUB]. 6 Touch t . b Notes • The original sound (ST1) is connected via the internal stereo microphone. When your camcorder. b Notes • You cannot record additional audio: -
Operating Guide
Page 73
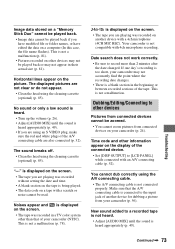
... edited the data on a computer (In this case, the file name flashes). This is not compatible with a 4ch microphone (4CH MIC REC). Noises appear and on the picture. Your camcorder is not a malfunction (p. 78). If one day's recording is being played. • The data code on the ...display of another device with 4ch microphone recording. This is not a malfunction (p. 81). • Pictures recorded on other devices ...
... edited the data on a computer (In this case, the file name flashes). This is not compatible with a 4ch microphone (4CH MIC REC). Noises appear and on the picture. Your camcorder is not a malfunction (p. 78). If one day's recording is being played. • The data code on the ...display of another device with 4ch microphone recording. This is not a malfunction (p. 81). • Pictures recorded on other devices ...
Operating Guide
Page 90
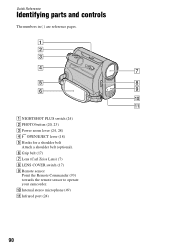
F Grip belt (17) G Lens (Carl Zeiss Lens) (7) H LENS COVER switch (17) I Remote sensor Point the Remote Commander (93) towards the remote sensor to operate your camcorder. J Internal stereo microphone (49) K Infrared port (24) 90 A NIGHTSHOT PLUS switch (24) B PHOTO button (20, 23) C Power zoom lever (24, 28) D OPEN/EJECT lever (18) E Hooks for a shoulder belt Attach a shoulder belt (optional). Quick Reference Identifying parts and controls The numbers in ( ) are reference pages.
F Grip belt (17) G Lens (Carl Zeiss Lens) (7) H LENS COVER switch (17) I Remote sensor Point the Remote Commander (93) towards the remote sensor to operate your camcorder. J Internal stereo microphone (49) K Infrared port (24) 90 A NIGHTSHOT PLUS switch (24) B PHOTO button (20, 23) C Power zoom lever (24, 28) D OPEN/EJECT lever (18) E Hooks for a shoulder belt Attach a shoulder belt (optional). Quick Reference Identifying parts and controls The numbers in ( ) are reference pages.


