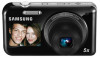
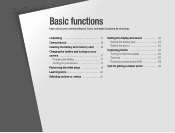
PL120 Won't Turn On - Samsung
PL120 Won't Turn On
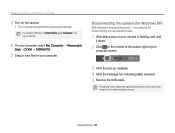
Related Manual Pages


Similar Questions

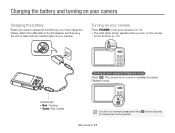
My Camera Won't Turn On
my battery is fully charged and the camera won't turn on. The Lens is also sticking out as if it's j...
my battery is fully charged and the camera won't turn on. The Lens is also sticking out as if it's j...
(Posted by dazzaboy8 4 years ago)


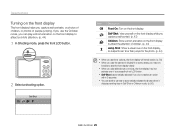
My Camera Isnt Turning On Anymore
It all statrted by the battery being low, like i would charge it over night and the baterey would be...
It all statrted by the battery being low, like i would charge it over night and the baterey would be...
(Posted by Yaseminwhite 11 years ago)

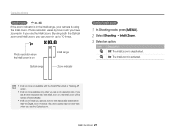
Unable To Turn The Camera On.
Unable to turn the camera on. Green lite will light up after POWER button is pressed and goes off a...
Unable to turn the camera on. Green lite will light up after POWER button is pressed and goes off a...
(Posted by reza14 12 years ago)
Related Terms
The following terms were also used when searching for PL120 Won't Turn On - Samsung:- at pl120 manual
- at pl120 review
- pl120 14mp
- pl120 14mp digital camera
- pl120 accessories
- pl120 battery
- pl120 battery charger
- pl120 best buy
- pl120 black
- pl120 blurry picture
- pl120 cable
- pl120 camera
- pl120 camera accessories
- pl120 camera battery
- pl120 camera charger
- pl120 camera driver
- pl120 camera manual
- pl120 camera price
- pl120 camera problems
- pl120 camera reviews
- pl120 camera troubleshooting
- pl120 charger
- pl120 charger amazon
- pl120 charger best buy
- pl120 charger cable
- pl120 charger cord
- pl120 charging cable
- pl120 cord
- pl120 digital camera
- pl120 digital camera charger
- pl120 digital camera manual
- pl120 digital camera reviews
- pl120 downloads
- pl120 driver
- pl120 dual view
- pl120 dual view camera
- pl120 dualview
- pl120 elf name error
- pl120 instruction manual
- pl120 instructions
- pl120 manual
- pl120 manual pdf
- pl120 memory
- pl120 memory card
- pl120 memory card size
- pl120 owner's manual
- pl120 parts
- pl120 pink
- pl120 pl121
- pl120 power cord
- pl120 price
- pl120 prices
- pl120 purple
- pl120 repair
- pl120 review
- pl120 reviews
- pl120 samsung
- pl120 samsung camera
- pl120 samsung camera charger
- pl120 samsung camera manual
- pl120 samsung camera review
- pl120 samsung camera reviews
- pl120 samsung charger
- pl120 samsung digital camera
- pl120 samsung manual
- pl120 samsung memory card
- pl120 samsung price
- pl120 samsung review
- pl120 screen replacement
- pl120 sd card
- pl120 software
- pl120 software download
- pl120 spec
- pl120 specs
- pl120 usb cable
- pl120 user guide
- pl120 user manual
- pl120 video
- pl120 won't turn on
- pl120 wont turn on
- pl120/pl121
- samsung pl 120
- samsung pl120
- samsung pl120 14mp
- samsung pl120 accessories
- samsung pl120 battery
- samsung pl120 battery charger
- samsung pl120 best buy
- samsung pl120 black
- samsung pl120 blurry picture
- samsung pl120 cable
- samsung pl120 camera
- samsung pl120 camera accessories
- samsung pl120 camera battery
- samsung pl120 camera charger
- samsung pl120 camera manual
- samsung pl120 camera price
- samsung pl120 camera problems
- samsung pl120 camera reviews
- samsung pl120 camera troubleshooting
- samsung pl120 charger
- samsung pl120 charger amazon
- samsung pl120 charger best buy
- samsung pl120 charger cable
- samsung pl120 charger cord
- samsung pl120 charging cable
- samsung pl120 digital camera
- samsung pl120 digital camera charger
- samsung pl120 digital camera manual
- samsung pl120 digital camera reviews
- samsung pl120 downloads
- samsung pl120 driver
- samsung pl120 dual view
- samsung pl120 dual view camera
- samsung pl120 dualview
- samsung pl120 instruction manual
- samsung pl120 instructions
- samsung pl120 manual
- samsung pl120 manual pdf
- samsung pl120 memory
- samsung pl120 memory card
- samsung pl120 memory card size
- samsung pl120 owner's manual
- samsung pl120 parts
- samsung pl120 pink
- samsung pl120 pl121
- samsung pl120 power cord
- samsung pl120 price
- samsung pl120 prices
- samsung pl120 purple
- samsung pl120 repair
- samsung pl120 review
- samsung pl120 reviews
- samsung pl120 screen replacement
- samsung pl120 sd card
- samsung pl120 software
- samsung pl120 software download
- samsung pl120 specs
- samsung pl120 usb cable
- samsung pl120 user guide
- samsung pl120 user manual
- samsung pl120 video
- samsung pl120 won't turn on
- samsung pl120 wont turn on
- samsung pl120/pl121