PL120 Camera Battery - Samsung
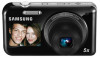
PL120 Camera Battery
Related Manual Pages


Similar Questions

Camera Batteries
what batteries should I use with this camera?
what batteries should I use with this camera?
(Posted by cheyennedouglas2018 1 year ago)


My Camera Isnt Turning On Anymore
It all statrted by the battery being low, like i would charge it over night and the baterey would be...
It all statrted by the battery being low, like i would charge it over night and the baterey would be...
(Posted by Yaseminwhite 11 years ago)
Where To Get Pl210 Camera Battery Charger At Discount In Canada
(Posted by jvenkatarangam 11 years ago)

My Camera Zoom Is Not Working The Model Is Samsung Pl120?
i purchased this digicam last feb 14, 2012. while im using.. it's ok..the zoom is working well..then...
i purchased this digicam last feb 14, 2012. while im using.. it's ok..the zoom is working well..then...
(Posted by romalyn1020 12 years ago)