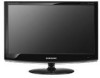
Samsung 2333HD Windows 10 - SyncMaster 23 LCD Monitor
Samsung 2333HD Windows 10
Related Manual Pages


Similar Questions

Driver For Windows 10
Is there a driver out there for windows 10 for the samsung syncmaster 172v?Thank you!
Is there a driver out there for windows 10 for the samsung syncmaster 172v?Thank you!
(Posted by Anonymous-171043 1 year ago)
Screen Out Of Focus.?is Samsung T260 Compatible With Windows 10?
Is Samsung T260 compatible with Windows 10?
Is Samsung T260 compatible with Windows 10?
(Posted by jimhuang68 7 years ago)

Driver For Mac Osx 10.6.8?
do you have a driver for the mac? monitor's been acting weird lately and i think that it may have to...
do you have a driver for the mac? monitor's been acting weird lately and i think that it may have to...
(Posted by cowboy69 12 years ago)
Related Terms
The following terms were also used when searching for Samsung 2333HD Windows 10 - SyncMaster 23 LCD Monitor:- samsung 2333hd
- syncmaster 2333hd
- samsung 2333hd lcd
- 2333hd samsung
- samsung 2333hd 23
- sync master 2333hd
- 2333hd lcd
- 2333hd hdtv
- samsung 2333hd tv
- samsung 2333hd price
- 2333hd price
- samsung 2333hd monitor
- samsung 2333hd hdtv
- samsung 2333hd review
- 2333hd review
- samsung 2333hd lcd tv
- 2333hd remote
- 2333hd driver
- 2333hd lcd tv
- 2333hd firmware
- 2333hd monitor
- 2333hd hdtv widescreen lcd
- samsung 2333hd driver
- 2333hd manual
- samsung 2333hd firmware
- samsung 2333hd manual
- syncmaster 2333hd review
- 2333hd firmware update
- 2333hd specs
- samsung 2333hd tv review
- 2333hd 23 hd widescreen lcd monitor
- ls23cfekf en
- 2333hd black friday
- 2333hd pip
- 2333hd software update
- samsung 2333hd 23 hd widescreen lcd monitor
- samsung 2333hd firmware update
- 2333hd samsung review
- samsung 2333hd specs
- 2333hd
- 2333hd 1080p
- 2333hd 23 1080p hd lcd
- 2333hd 23 hd/tv
- 2333hd 23 widescreen
- 2333hd 23-inch
- 2333hd 64-bit driver
- 2333hd amazon
- 2333hd base
- 2333hd base removal
- 2333hd driver windows 10
- 2333hd driver windows 7
- 2333hd driver windows 8
- 2333hd drivers
- 2333hd drivers download
- 2333hd factory reset
- 2333hd firmware update usb
- 2333hd firmware upgrade
- 2333hd for windows 7
- 2333hd hdmi problem
- 2333hd hdmi problems
- 2333hd input lag
- 2333hd is black and white
- 2333hd lcd monitor
- 2333hd manual download
- 2333hd manual pdf
- 2333hd mount
- 2333hd no sound
- 2333hd parts
- 2333hd power cord
- 2333hd price india
- 2333hd problems
- 2333hd ps3 settings
- 2333hd red line
- 2333hd refresh rate
- 2333hd remote code
- 2333hd remote control
- 2333hd remote not working
- 2333hd remove base
- 2333hd remove stand
- 2333hd replacement screen
- 2333hd resolution
- 2333hd review cnet
- 2333hd reviews
- 2333hd samsung driver
- 2333hd samsung manual
- 2333hd samsung price
- 2333hd samsung review cnet
- 2333hd samsung specs
- 2333hd samsung tv
- 2333hd samsung youtub
- 2333hd screen replacement
- 2333hd service manual
- 2333hd service manual free
- 2333hd service menu
- 2333hd software upgrade
- 2333hd specifications
- 2333hd stand
- 2333hd stand removal
- 2333hd syncmaster
- 2333hd tips
- 2333hd tv
- 2333hd tv monitor
- 2333hd update
- 2333hd user manual
- 2333hd users manual
- 2333hd vesa
- 2333hd wall mount
- 2333hd watts
- 2333hd where to buy one
- 2333hd windows 10
- 2333hd won't turn on
- 2333hd-1 23 lcd tv
- 2333hd-1 driver download
- 2333hd-1 review
- ls23cfekf en samsung
- ls23cfekf english
- ls23cfekf entertainment
- ls23cfekf review
- ls23cfekf uk
- ls23cfekf za
- ls23cfekf/en
- model 2333hd
- samsung 2333hd 23 1080p hd lcd
- samsung 2333hd 23 hd/tv
- samsung 2333hd 23 widescreen
- samsung 2333hd 23-inch
- samsung 2333hd amazon
- samsung 2333hd base removal
- samsung 2333hd driver windows 10
- samsung 2333hd driver windows 7
- samsung 2333hd driver windows 8
- samsung 2333hd drivers
- samsung 2333hd drivers download
- samsung 2333hd factory reset
- samsung 2333hd firmware update usb
- samsung 2333hd firmware upgrade
- samsung 2333hd for windows 7
- samsung 2333hd hdmi problem
- samsung 2333hd lcd monitor
- samsung 2333hd manual download
- samsung 2333hd manual pdf
- samsung 2333hd mount
- samsung 2333hd no sound
- samsung 2333hd parts
- samsung 2333hd pip
- samsung 2333hd power cord
- samsung 2333hd problems
- samsung 2333hd ps3 settings
- samsung 2333hd red line
- samsung 2333hd refresh rate
- samsung 2333hd remote
- samsung 2333hd remote code
- samsung 2333hd remote control
- samsung 2333hd remote not working
- samsung 2333hd remove base
- samsung 2333hd remove stand
- samsung 2333hd replacement screen
- samsung 2333hd resolution
- samsung 2333hd review cnet
- samsung 2333hd reviews
- samsung 2333hd service manual
- samsung 2333hd service manual free
- samsung 2333hd service menu
- samsung 2333hd software update
- samsung 2333hd software upgrade
- samsung 2333hd stand
- samsung 2333hd stand removal
- samsung 2333hd tv monitor
- samsung 2333hd update
- samsung 2333hd user manual
- samsung 2333hd wall mount
- samsung 2333hd watts
- samsung 2333hd where to buy one
- samsung 2333hd windows 10
- samsung 2333hd won't turn on
- samsung 2333hd-1 23 lcd tv
- samsung 2333hd-1 review
- samsung ls23cfekf en
- samsung ls23cfekf/en
- samsung syncmaster 2333hd
- syncmaster 2333hd driver
- syncmaster 2333hd manual