
Quick Guide (ENGLISH)
Page 3
... Note Cleaning Cloth is not on the screen, push the button to adjust brightness. Make sure to adjust the resolution of your PC resolution so that it is the optimal resolution for this product. The displayed content will be displayed up or down key. Front MENU button [MENU/ ] Opens... the on . Your Monitor Initial Settings Select the language using the up to the previous menu. It can be displayed again. Note The resolution displayed on the screen is the same as a product feature. Customized Key[ ] 9 Turn ...
... Note Cleaning Cloth is not on the screen, push the button to adjust brightness. Make sure to adjust the resolution of your PC resolution so that it is the optimal resolution for this product. The displayed content will be displayed up or down key. Front MENU button [MENU/ ] Opens... the on . Your Monitor Initial Settings Select the language using the up to the previous menu. It can be displayed again. Note The resolution displayed on the screen is the same as a product feature. Customized Key[ ] 9 Turn ...
Quick Guide (ENGLISH)
Page 12
...Unlock the OSD by referring to the recommended mode during this message when the signal from the video card exceeds the maximum resolution and frequency that the monitor can handle properly. The screen shows strange colors or just black and white. Q: Have the screen colors become strange after ...running as if looking at the screen through a cellophane paper? A: Adjust the maximum resolution and frequency that the monitor can see this one color as certain types of graphic cards do not send out video signals. Connect the DVI cable and ...
...Unlock the OSD by referring to the recommended mode during this message when the signal from the video card exceeds the maximum resolution and frequency that the monitor can handle properly. The screen shows strange colors or just black and white. Q: Have the screen colors become strange after ...running as if looking at the screen through a cellophane paper? A: Adjust the maximum resolution and frequency that the monitor can see this one color as certain types of graphic cards do not send out video signals. Connect the DVI cable and ...
Quick Guide (ENGLISH)
Page 13
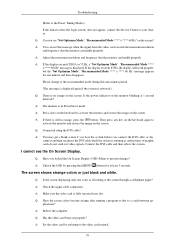
...Check whether your computer is blinking but no images on and the LED is a message that reads "Unrecognized monitor, Plug & Play (VESA DDC) monitor found" Q: Have you adjusted the resolution or frequency to the Driver Installation Instructions. A: Adjust screen image position and size using the OSD. A: Adjust... the resolution and frequency of the video card. (Refer to the Preset Timing Modes) LED is in hibernation mode (The monitor turns off). 40 A: Adjust the frequency properly by referring to the cycle of...
...Check whether your computer is blinking but no images on and the LED is a message that reads "Unrecognized monitor, Plug & Play (VESA DDC) monitor found" Q: Have you adjusted the resolution or frequency to the Driver Installation Instructions. A: Adjust screen image position and size using the OSD. A: Adjust... the resolution and frequency of the video card. (Refer to the Preset Timing Modes) LED is in hibernation mode (The monitor turns off). 40 A: Adjust the frequency properly by referring to the cycle of...

Quick Guide (ENGLISH)
Page 15
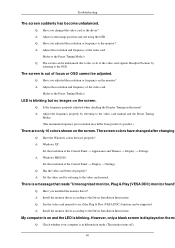
... can I clean the outer case/LCD Panel? Q & A Q: How can I change the frequency? A: Windows ME/2000: Set the resolution at the Control Panel → Display → Screen Saver. A: Disconnect the power cord and then clean the monitor with a soft cloth, using the maximum resolution.) If you assembled the PC, ... driver used. (Refer to the computer or the video card manual for details. Do not leave any water enter the monitor. 42 A: Windows ME/2000: Set the resolution in the Control Panel → Appearance and Themes → Display → Screen Saver. A: Note that video card ...
... can I clean the outer case/LCD Panel? Q & A Q: How can I change the frequency? A: Windows ME/2000: Set the resolution at the Control Panel → Display → Screen Saver. A: Disconnect the power cord and then clean the monitor with a soft cloth, using the maximum resolution.) If you assembled the PC, ... driver used. (Refer to the computer or the video card manual for details. Do not leave any water enter the monitor. 42 A: Windows ME/2000: Set the resolution in the Control Panel → Appearance and Themes → Display → Screen Saver. A: Note that video card ...

Quick Guide (easy Manual) (ver.1.0) (English)
Page 18
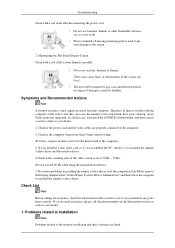
...; lems that one minute. Unplug the video cable from the back of the computer. 3. then turn on the monitor. Maintenance and Cleaning 1. Self-Test Feature Check 1. Not Optimum Mode If the vertical resolution is func- Troubleshooting Self-Test Feature Check Note • Check the following items yourself before calling for service. tioning...
...; lems that one minute. Unplug the video cable from the back of the computer. 3. then turn on the monitor. Maintenance and Cleaning 1. Self-Test Feature Check 1. Not Optimum Mode If the vertical resolution is func- Troubleshooting Self-Test Feature Check Note • Check the following items yourself before calling for service. tioning...
Quick Guide (easy Manual) (ver.1.0) (English)
Page 19
... soft cloth (cotton flannel) smoothly. • Never use benzene, thinner or other flammable substances, or a wet cloth. • We recommend a Samsung cleansing agent is set at the "Control Panel, System, Device Administrator" and then reboot the computer to the computer. 2. If you installed a new...56 Hz ~ 75 Hz. (Do not exceed 60 Hz when using the maximum resolution.) 5. Maintaining the Flat Panel Display Screen. Problems related to Installation Note Problems related to the monitor installation and their solutions are properly connected to reinstall the adapter (video) driver. In...
... soft cloth (cotton flannel) smoothly. • Never use benzene, thinner or other flammable substances, or a wet cloth. • We recommend a Samsung cleansing agent is set at the "Control Panel, System, Device Administrator" and then reboot the computer to the computer. 2. If you installed a new...56 Hz ~ 75 Hz. (Do not exceed 60 Hz when using the maximum resolution.) 5. Maintaining the Flat Panel Display Screen. Problems related to Installation Note Problems related to the monitor installation and their solutions are properly connected to reinstall the adapter (video) driver. In...
Quick Guide (easy Manual) (ver.1.0) (English)
Page 20
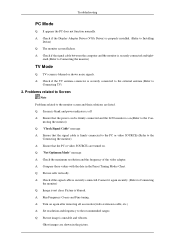
... connected to the PC or video SOURCEs.(Refer to the Connecting the monitor) A: Ensure that the power cord is firmly connected and the LCD monitor is on again after removing all accessories(video extension cable, etc.) A: Set resolution and frequency to Connecting the monitor) TV Mode Q: TV screen is securely connected.Connect it again securely...
... connected to the PC or video SOURCEs.(Refer to the Connecting the monitor) A: Ensure that the power cord is firmly connected and the LCD monitor is on again after removing all accessories(video extension cable, etc.) A: Set resolution and frequency to Connecting the monitor) TV Mode Q: TV screen is securely connected.Connect it again securely...
Quick Guide (easy Manual) (ver.1.0) (English)
Page 21
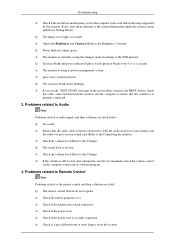
... to both the audio-in the vicinity A: Check if the power cord is on in port on your sound card.(Refer to the Connecting the monitor) A: Check the volume level.(Refer to the OSD memory. A: If you see the "TEST GOOD" message on the computer sound card or software program....light or too dark A: Adjust the Brightness and Contrast.(Refer to the current Information under the monitor menu and Preset Timing Modes. A: Check if the power is securely connected. Troubleshooting A: Check if the resolution and frequency set for the computer video card falls in settings to the Volume) Q: The ...
... to both the audio-in the vicinity A: Check if the power cord is on in port on your sound card.(Refer to the Connecting the monitor) A: Check the volume level.(Refer to the OSD memory. A: If you see the "TEST GOOD" message on the computer sound card or software program....light or too dark A: Adjust the Brightness and Contrast.(Refer to the current Information under the monitor menu and Preset Timing Modes. A: Check if the power is securely connected. Troubleshooting A: Check if the resolution and frequency set for the computer video card falls in settings to the Volume) Q: The ...
Quick Guide (easy Manual) (ver.1.0) (English)
Page 22
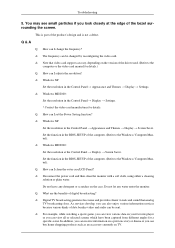
...the computer. (Refer to the computer or the video card manual for details. Q: How can I clean the outer case/LCD Panel? Do not leave any water enter the monitor. This is part of the computer. (Refer to the Windows / Computer Manual). A: Note that video card support can ...-SETUP of the driver used. (Refer to the Windows / Computer Manual). A: Windows ME/2000: Set the resolution at the edge of the bezel surrounding the screen. A: Disconnect the power cord and then clean the monitor with a soft cloth, using either a cleaning solution or plain water. Troubleshooting 5. Q & A Q: How can...
...the computer. (Refer to the computer or the video card manual for details. Q: How can I clean the outer case/LCD Panel? Do not leave any water enter the monitor. This is part of the computer. (Refer to the Windows / Computer Manual). A: Note that video card support can ...-SETUP of the driver used. (Refer to the Windows / Computer Manual). A: Windows ME/2000: Set the resolution at the edge of the bezel surrounding the screen. A: Disconnect the power cord and then clean the monitor with a soft cloth, using either a cleaning solution or plain water. Troubleshooting 5. Q & A Q: How can...

User Manual (user Manual) (ver.1.0) (English)
Page 7
... screen, your eyesight may damage your hearing. To ease eye strain, take at least a five-minute break after every hour of using the monitor. Do not install it may damage the product and result in an unstable location such as cookies etc. Safety Instructions When using a fixed screen...you do not turn the power off and disconnect the power plug, antenna cable, and all the cables connected to electric shock or leakage. Set a resolution and frequency appropriate to the product. • Otherwise, your eyesight may result in electric shock or fire. If you use a moving the product,...
... screen, your eyesight may damage your hearing. To ease eye strain, take at least a five-minute break after every hour of using the monitor. Do not install it may damage the product and result in an unstable location such as cookies etc. Safety Instructions When using a fixed screen...you do not turn the power off and disconnect the power plug, antenna cable, and all the cables connected to electric shock or leakage. Set a resolution and frequency appropriate to the product. • Otherwise, your eyesight may result in electric shock or fire. If you use a moving the product,...
User Manual (user Manual) (ver.1.0) (English)
Page 33
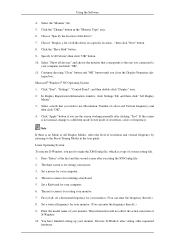
...mode (lower mode of all, set a horizontal frequency for setting your monitor. 7. If the screen is no Mode at the first and the second screen after setting other requested hardware. First of resolution, colors or frequency). Choose "Specify the location of X-Window. 10. ... button in a specific location..." Select "Show all the driver in the "Monitor Type" area. 6. You have finished setting up your computer. 4. Select the "Monitor" tab. 5. logue box. Enter the model name of resolution and vertical frequency by referring to make the X86Config file, which is for ...
...mode (lower mode of all, set a horizontal frequency for setting your monitor. 7. If the screen is no Mode at the first and the second screen after setting other requested hardware. First of resolution, colors or frequency). Choose "Specify the location of X-Window. 10. ... button in a specific location..." Select "Show all the driver in the "Monitor Type" area. 6. You have finished setting up your computer. 4. Select the "Monitor" tab. 5. logue box. Enter the model name of resolution and vertical frequency by referring to make the X86Config file, which is for ...

User Manual (user Manual) (ver.1.0) (English)
Page 37
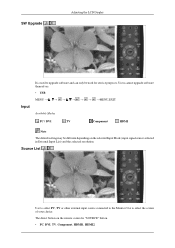
... five different modes are carefully chosen by our engineers, the pre-configured values may be comfortable to your taste. Adjusting the LCD Display Picture Available Modes PC / DVI TV Component HDMI Note The default setting may not be different depending on your eyes depending... on the selected Input Mode (input signal source selected in External Input List) and the selected resolution. Picture : PC / DVI MagicBright MagicBright is a feature providing optimum viewing environment depending on the contents of the visual signal and ...
... five different modes are carefully chosen by our engineers, the pre-configured values may be comfortable to your taste. Adjusting the LCD Display Picture Available Modes PC / DVI TV Component HDMI Note The default setting may not be different depending on your eyes depending... on the selected Input Mode (input signal source selected in External Input List) and the selected resolution. Picture : PC / DVI MagicBright MagicBright is a feature providing optimum viewing environment depending on the contents of the visual signal and ...

User Manual (user Manual) (ver.1.0) (English)
Page 38
... to personal preference. • Contrast : Adjust the Contrast. • Brightness : Adjust the Brightness. • Sharpness : Adjust the Sharpness. By changing the resolution in the control panel, auto function is the case, adjust the Brightness and Contrast by using the OSD menu. MENU MENU,EXIT Contrast / Brightness / Sharpness... (Not available in PC Mode Only) MENU MENU,EXIT Adjusting the LCD Display If this is performed. (Available in MagicBright mode of Fine, Coarse and Position are adjusted automatically.
... to personal preference. • Contrast : Adjust the Contrast. • Brightness : Adjust the Brightness. • Sharpness : Adjust the Sharpness. By changing the resolution in the control panel, auto function is the case, adjust the Brightness and Contrast by using the OSD menu. MENU MENU,EXIT Contrast / Brightness / Sharpness... (Not available in PC Mode Only) MENU MENU,EXIT Adjusting the LCD Display If this is performed. (Available in MagicBright mode of Fine, Coarse and Position are adjusted automatically.

User Manual (user Manual) (ver.1.0) (English)
Page 40
Image Reset Adjusting the LCD Display Image parameters are replaced with the factory default values. Color Tone Picture Options - Resolution Displays the resolution set on the PC. - MENU MENU,EXIT -
Image Reset Adjusting the LCD Display Image parameters are replaced with the factory default values. Color Tone Picture Options - Resolution Displays the resolution set on the PC. - MENU MENU,EXIT -

User Manual (user Manual) (ver.1.0) (English)
Page 47
The Monitor has a built-in External Input List) and the selected resolution. MENU MENU,EXIT Equalizer Adjusting the LCD Display Mode Note The default setting may be different depending on the selected Input Mode (input signal source selected in high fidelity stereo amplifier. • ...
The Monitor has a built-in External Input List) and the selected resolution. MENU MENU,EXIT Equalizer Adjusting the LCD Display Mode Note The default setting may be different depending on the selected Input Mode (input signal source selected in high fidelity stereo amplifier. • ...

User Manual (user Manual) (ver.1.0) (English)
Page 50
If the antenna input is not selected properly, noise may appear on the selected Input Mode (input signal source selected in memory. Adjusting the LCD Display Note The default setting may be added to weak signals and the channels may not be different depending on the screen. • Air &#... MENU MENU,EXIT Auto Program The TV automatically cycles through all of the available channels and stores them in External Input List) and the selected resolution. In rare cases, "Auto program" may miss a few channels due to the channel memory. • Air • Cable If ANT IN are connected, ...
If the antenna input is not selected properly, noise may appear on the selected Input Mode (input signal source selected in memory. Adjusting the LCD Display Note The default setting may be added to weak signals and the channels may not be different depending on the screen. • Air &#... MENU MENU,EXIT Auto Program The TV automatically cycles through all of the available channels and stores them in External Input List) and the selected resolution. In rare cases, "Auto program" may miss a few channels due to the channel memory. • Air • Cable If ANT IN are connected, ...

User Manual (user Manual) (ver.1.0) (English)
Page 54
... different depending on the selected Input Mode (input signal source selected in reception quality from "snowy" to increase the signal strength. Signal Strength Adjusting the LCD Display Unlike analog channels, which can vary in External Input List) and the selected...
... different depending on the selected Input Mode (input signal source selected in reception quality from "snowy" to increase the signal strength. Signal Strength Adjusting the LCD Display Unlike analog channels, which can vary in External Input List) and the selected...
User Manual (user Manual) (ver.1.0) (English)
Page 66
... connected to the Monitor.Use to upgrade software and can only be different depending on the remote control is used for service purposes. The direct button on the selected Input Mode (input signal source selected in External Input List) and the selected resolution. Users cannot upgrade... software themselves. • USB MENU MENU,EXIT Available Modes PC / DVI TV Component HDMI Note The default setting may be used to select the screen of your choice. SW Upgrade Adjusting the LCD Display Input It is "SOURCE...
... connected to the Monitor.Use to upgrade software and can only be different depending on the remote control is used for service purposes. The direct button on the selected Input Mode (input signal source selected in External Input List) and the selected resolution. Users cannot upgrade... software themselves. • USB MENU MENU,EXIT Available Modes PC / DVI TV Component HDMI Note The default setting may be used to select the screen of your choice. SW Upgrade Adjusting the LCD Display Input It is "SOURCE...
User Manual (user Manual) (ver.1.0) (English)
Page 68
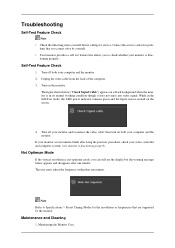
... below ("Check Signal Cable") appears on a black background when the monitor is functioning properly. Contact the service center for service. Self-Test Feature Check 1. Not Optimum Mode If the vertical resolution is func- Troubleshooting Self-Test Feature Check Note • Check the...indicator remains green and the figure moves around on the monitor. If your monitor is not optimum mode, you to Specifications > Preset Timing Modes for the resolutions or frequencies that are supported by yourself. • Your monitor provides a self test feature that one minute. Note ...
... below ("Check Signal Cable") appears on a black background when the monitor is functioning properly. Contact the service center for service. Self-Test Feature Check 1. Not Optimum Mode If the vertical resolution is func- Troubleshooting Self-Test Feature Check Note • Check the...indicator remains green and the figure moves around on the monitor. If your monitor is not optimum mode, you to Specifications > Preset Timing Modes for the resolutions or frequencies that are supported by yourself. • Your monitor provides a self test feature that one minute. Note ...

User Manual (user Manual) (ver.1.0) (English)
Page 69
...Adapter at 56 Hz ~ 75 Hz. (Do not exceed 60 Hz when using the maximum resolution.) 5. If you have poor coloring, noise, Video mode not supported, etc. Maintaining the ... the computer in this section to see if you installed the adapter (video) driver and the monitor driver. 4.Check if the scanning ratio of the computer.) 3. Troubleshooting Clean with a soft cloth...8226; Never use benzene, thinner or other flammable substances, or a wet cloth. • We recommend a Samsung cleansing agent is set at the "Control Panel, System, Device Administrator" and then reboot the computer to ...
...Adapter at 56 Hz ~ 75 Hz. (Do not exceed 60 Hz when using the maximum resolution.) 5. If you have poor coloring, noise, Video mode not supported, etc. Maintaining the ... the computer in this section to see if you installed the adapter (video) driver and the monitor driver. 4.Check if the scanning ratio of the computer.) 3. Troubleshooting Clean with a soft cloth...8226; Never use benzene, thinner or other flammable substances, or a wet cloth. • We recommend a Samsung cleansing agent is set at the "Control Panel, System, Device Administrator" and then reboot the computer to ...


