
User Guide
Page 5
...-Reviewing the Redial Numbers 29 -Installing the handset battery 11 -Storing a Redial Record in Directory 29 -Base Station 12-14 -Transferring a call to another extension 30 Programming the Phone -Standby Screen -Programming Functions -Phone Setting -Date/Time -Auto Answer -Auto Answer Intercom -Dial Mode -Area Code 15 15 15 15 16 -Receiving a transferred call from another extension -Ringer on/off and ringer volume -Speakerphone, handset and headset volume -Hold -Conference calls 30 30 30 31 31 16 Intercom Calls 32 16 -One-touch /memory log 32 17 -Answering an intercom call...
...-Reviewing the Redial Numbers 29 -Installing the handset battery 11 -Storing a Redial Record in Directory 29 -Base Station 12-14 -Transferring a call to another extension 30 Programming the Phone -Standby Screen -Programming Functions -Phone Setting -Date/Time -Auto Answer -Auto Answer Intercom -Dial Mode -Area Code 15 15 15 15 16 -Receiving a transferred call from another extension -Ringer on/off and ringer volume -Speakerphone, handset and headset volume -Hold -Conference calls 30 30 30 31 31 16 Intercom Calls 32 16 -One-touch /memory log 32 17 -Answering an intercom call...
User Guide
Page 6
Answering System Operation -Answering system on/off -Recording incoming messages -Monitoring incoming calls -Memo record -Memo recording -Message/memo playback -Erasing messages -Remote access from remote party -Memory full Changing the Battery Battery Safety Precautions Display Messages Handset Sound Signals -Backup battery operation Troubleshooting Guide -Telephone solutions -Caller ID solutions -Battery General Product Care Causes of Contents Cont. Table of Poor Reception Warranty Assistance Limited Warranty Accessory Information 40 40 40 40 41 41 41 42 42 43 43 43 44 45 45...
Answering System Operation -Answering system on/off -Recording incoming messages -Monitoring incoming calls -Memo record -Memo recording -Message/memo playback -Erasing messages -Remote access from remote party -Memory full Changing the Battery Battery Safety Precautions Display Messages Handset Sound Signals -Backup battery operation Troubleshooting Guide -Telephone solutions -Caller ID solutions -Battery General Product Care Causes of Contents Cont. Table of Poor Reception Warranty Assistance Limited Warranty Accessory Information 40 40 40 40 41 41 41 42 42 43 43 43 44 45 45...
User Guide
Page 7
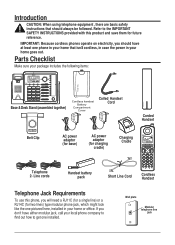
... (assembled together) Coiled Handset Cord Corded Handset Belt Clip AC power adaptor (for base) AC power adaptor (for charging cradle) Charging Cradle Telephone 2- Line cords Handset battery pack Short Line Cord Cordless Handset Telephone Jack Requirements To use this product and save them for two lines) type modular phone jack, which might look like the one installed. If you will need a RJ11C (for a single line) or a RJ14C (for future reference. Parts Checklist Make sure your home goes out.
... (assembled together) Coiled Handset Cord Corded Handset Belt Clip AC power adaptor (for base) AC power adaptor (for charging cradle) Charging Cradle Telephone 2- Line cords Handset battery pack Short Line Cord Cordless Handset Telephone Jack Requirements To use this product and save them for two lines) type modular phone jack, which might look like the one installed. If you will need a RJ11C (for a single line) or a RJ14C (for future reference. Parts Checklist Make sure your home goes out.
User Guide
Page 8
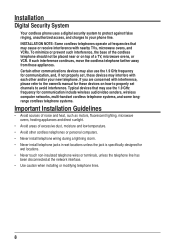
.... Installation Digital Security System Your cordless phone uses a digital security system to protect against false ringing, unauthorized access, and charges to your new telephone. To minimize or prevent such interference, the base of the cordless telephone should not be placed near or on how to properly set , these appliances. Typical devices that may use the 1.9 GHz frequency for wet locations. • Never touch non-insulated telephone wires or terminals, unless the telephone line...
.... Installation Digital Security System Your cordless phone uses a digital security system to protect against false ringing, unauthorized access, and charges to your new telephone. To minimize or prevent such interference, the base of the cordless telephone should not be placed near or on how to properly set , these appliances. Typical devices that may use the 1.9 GHz frequency for wet locations. • Never touch non-insulated telephone wires or terminals, unless the telephone line...
User Guide
Page 15
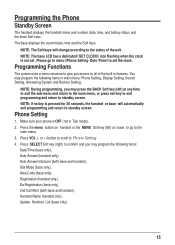
...), Dial Mode (base only), Area Code (base only), Registration (handset only), De-Registration (base only), 2nd Call Alert (both base and handset), Handset Name (handset only), Update Handset List (base only). 15 NOTE: The Soft keys will automatically exit programming and return to Phone Setting. 4. or +) button to scroll to standby screen. You may program the following items in main menu: Phone Setting, Display Setting, Sound Setting, Answering System and Restore Setting. Programming the Phone Standby Screen The handset displays the handset name and number, date, time, and battery...
...), Dial Mode (base only), Area Code (base only), Registration (handset only), De-Registration (base only), 2nd Call Alert (both base and handset), Handset Name (handset only), Update Handset List (base only). 15 NOTE: The Soft keys will automatically exit programming and return to Phone Setting. 4. or +) button to scroll to standby screen. You may program the following items in main menu: Phone Setting, Display Setting, Sound Setting, Answering System and Restore Setting. Programming the Phone Standby Screen The handset displays the handset name and number, date, time, and battery...
User Guide
Page 16
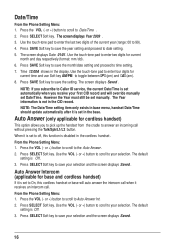
... set to Auto Answer Int. 2. The screen displays Saved . Use the touch-tone pad to enter the last two digits of the current year (range: 00 to toggle between "P" (pm) and "A" (am). 8. The screen displays Date 01/01. When it is disabled in the base. Time 12:00A shows in base menu, handset Date/Time should update automatically after it receives an intercom call when it is Off. 3. Press SAVE Soft key...
... set to Auto Answer Int. 2. The screen displays Saved . Use the touch-tone pad to enter the last two digits of the current year (range: 00 to toggle between "P" (pm) and "A" (am). 8. The screen displays Date 01/01. When it is disabled in the base. Time 12:00A shows in base menu, handset Date/Time should update automatically after it receives an intercom call when it is Off. 3. Press SAVE Soft key...
User Guide
Page 17
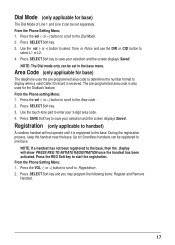
.... Area Code (only applicable for base) The telephone uses the pre-programmed area code to determine the number format to save your 3-digit area code. 4. From the Phone Setting Menu: 1. Dial Mode (only applicable for base) The Dial Mode of Line 1 and Line 2 can be set in the base menu. From the Phone Setting Menu: 1. Press the vol (- Registration (only applicable to the Dial Mode. 2. Press SELECT Soft key and you may program the following items: Register and Remove Handset...
.... Area Code (only applicable for base) The telephone uses the pre-programmed area code to determine the number format to save your 3-digit area code. 4. From the Phone Setting Menu: 1. Dial Mode (only applicable for base) The Dial Mode of Line 1 and Line 2 can be set in the base menu. From the Phone Setting Menu: 1. Press the vol (- Registration (only applicable to the Dial Mode. 2. Press SELECT Soft key and you may program the following items: Register and Remove Handset...
User Guide
Page 19
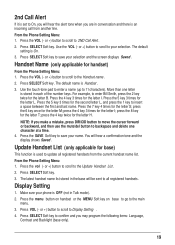
... H. Make sure your selection. 2nd Call Alert If it is set to On, you will hear the alert tone when you are in conversation and there is an incoming call from the current handset name list. Press the 4 key 3 times for base) This function is used to all registered handsets from another line. press the 4 key twice for the letter T; You will be sent to update all registered handsets. Press...
... H. Make sure your selection. 2nd Call Alert If it is set to On, you will hear the alert tone when you are in conversation and there is an incoming call from the current handset name list. Press the 4 key 3 times for base) This function is used to all registered handsets from another line. press the 4 key twice for the letter T; You will be sent to update all registered handsets. Press...
User Guide
Page 20
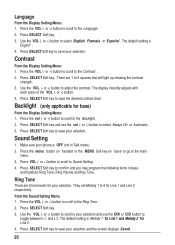
... the VOL (- Language From the Display Setting Menu: 1. or +) button to save your phone is English . 4. The default setting is OFF (not in base and handset: Ring Tone, Ring Volume and Key Tone. There are Melody 1 to confirm and you may program the following items in Talk mode). 2. Press SELECT Soft key to select English , Francais or Español . Backlight (only applicable for Line 2. 4. Press VOL...
... the VOL (- Language From the Display Setting Menu: 1. or +) button to save your phone is English . 4. The default setting is OFF (not in base and handset: Ring Tone, Ring Volume and Key Tone. There are Melody 1 to confirm and you may program the following items in Talk mode). 2. Press SELECT Soft key to select English , Francais or Español . Backlight (only applicable for Line 2. 4. Press VOL...
User Guide
Page 23
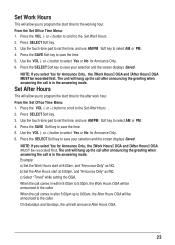
... to save the time. 5. Use the VOL (- Press the VOL (- Use the VOL (- When the call comes in after announcing the greeting when answering the call is in the answering mode. Press SELECT Soft key. 3. Set After Hours This will allow you to program the start time for Announce Only, the "Work Hours" OGA and "After Hours" OGA MUST be recorded first. The unit will hang...
... to save the time. 5. Use the VOL (- Press the VOL (- Use the VOL (- When the call comes in after announcing the greeting when answering the call is in the answering mode. Press SELECT Soft key. 3. Set After Hours This will allow you to program the start time for Announce Only, the "Work Hours" OGA and "After Hours" OGA MUST be recorded first. The unit will hang...
User Guide
Page 25
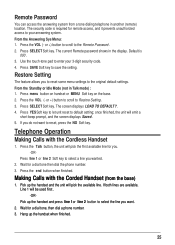
... default setting; Press menu button on handset or MENU Soft key on the base. 2. Press YES Soft key to let unit reset to save the setting. once finished, the unit will pick the first available line for remote access, and it prevents unauthorized access to enter your answering system. Telephone Operation Making Calls with the Corded Handset (from a tone dialing telephone in Talk mode) : 1. Press line 1 or line 2 Soft key to select the line you wanted. 2. Wait for a dial tone, then dial a phone number. 3. Making Calls...
... default setting; Press menu button on handset or MENU Soft key on the base. 2. Press YES Soft key to let unit reset to save the setting. once finished, the unit will pick the first available line for remote access, and it prevents unauthorized access to enter your answering system. Telephone Operation Making Calls with the Corded Handset (from a tone dialing telephone in Talk mode) : 1. Press line 1 or line 2 Soft key to select the line you wanted. 2. Wait for a dial tone, then dial a phone number. 3. Making Calls...
User Guide
Page 26
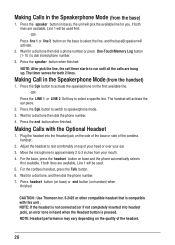
.... 4. The handset will pick the available line for a dial tone then dial a phone number or press One-Touch/Memory Log button (1- 10 ) to select a specific line. Wait for a dial tone, and then dial the phone number. 7. Making Calls with this unit . . Adjust the headset to activate the speakerphone on the side of the base or side of the headset. 26 For the cordless handset, press the Talk button. 6. NOTE: If the headset is not connected (or if...
.... 4. The handset will pick the available line for a dial tone then dial a phone number or press One-Touch/Memory Log button (1- 10 ) to select a specific line. Wait for a dial tone, and then dial the phone number. 7. Making Calls with this unit . . Adjust the headset to activate the speakerphone on the side of the base or side of the headset. 26 For the cordless handset, press the Talk button. 6. NOTE: If the headset is not connected (or if...
User Guide
Page 27
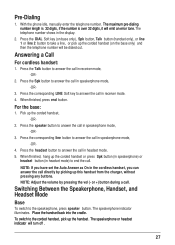
... cordless handset: 1. Press the Spk button to end the call in speakerphone mode, -OR- 4. Pick up this handset from the charger, without pressing any buttons. Switching Between the Speakerphone, Handset, and Headset Mode Base To switch to answer the call . The telephone number shows in speakerphone mode, -OR- 3. When finished, press end button. or +) button during a call in receiver mode. 4. The speakerphone or headset indicator will emit an error tone. Press the corresponding LINE Soft key to the speakerphone, press speaker button. Pre-Dialing...
... cordless handset: 1. Press the Spk button to end the call in speakerphone mode, -OR- 4. Pick up this handset from the charger, without pressing any buttons. Switching Between the Speakerphone, Handset, and Headset Mode Base To switch to answer the call . The telephone number shows in speakerphone mode, -OR- 3. When finished, press end button. or +) button during a call in receiver mode. 4. The speakerphone or headset indicator will emit an error tone. Press the corresponding LINE Soft key to the speakerphone, press speaker button. Pre-Dialing...
User Guide
Page 28
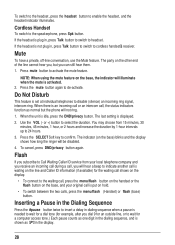
... the display. 28 Cordless Handset To switch to disable (silence) an incoming ring signal, intercom ring. or +) button to headset. Mute To have a private, off-line conversation, use the Mute feature. NOTE: When using the mute feature on the base, the indicator will illuminate when the mute is an incoming call or an intercom call, the status indicators function as "P" in dialing sequence when a pause is needed to wait for a dial tone (for example, after you will hear a beep...
... the display. 28 Cordless Handset To switch to disable (silence) an incoming ring signal, intercom ring. or +) button to headset. Mute To have a private, off-line conversation, use the Mute feature. NOTE: When using the mute feature on the base, the indicator will illuminate when the mute is an incoming call or an intercom call, the status indicators function as "P" in dialing sequence when a pause is needed to wait for a dial tone (for example, after you will hear a beep...
User Guide
Page 29
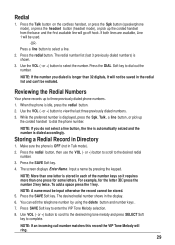
... incoming call number matches this record the VIP Tone Melody will go off hook. or +) button to select a line. 2. Make sure the phone is idle, press the redial button. 2. Redial 1. Press the Talk button on the cordless handset, or press the Spk button (speakerphone mode), or press the headset button (headset mode), or pick up the corded handset to dial out the number. If both lines are available, Line 1 will not be used. -ORPress a line button to select the number...
... incoming call number matches this record the VIP Tone Melody will go off hook. or +) button to select a line. 2. Make sure the phone is idle, press the redial button. 2. Redial 1. Press the Talk button on the cordless handset, or press the Spk button (speakerphone mode), or press the headset button (headset mode), or pick up the corded handset to dial out the number. If both lines are available, Line 1 will not be used. -ORPress a line button to select the number...
User Guide
Page 32
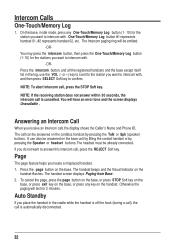
Intercom Calls One-Touch/Memory Log 1. The handset screen displays Paging from Base . 2. One-Touch/Memory Log button #1 represents handset 01, #2 represents handset 02, etc. The Intercom paging ring will be emitted. -ORYou may press the intercom button, then press the One-Touch/Memory Log button (1-10) for 2 minutes. NOTE: If the receiving station does not answer within 30 seconds, the intercom call , press the STOP Soft key. Page The page feature helps you do...
Intercom Calls One-Touch/Memory Log 1. The handset screen displays Paging from Base . 2. One-Touch/Memory Log button #1 represents handset 01, #2 represents handset 02, etc. The Intercom paging ring will be emitted. -ORYou may press the intercom button, then press the One-Touch/Memory Log button (1-10) for 2 minutes. NOTE: If the receiving station does not answer within 30 seconds, the intercom call , press the STOP Soft key. Page The page feature helps you do...
User Guide
Page 33
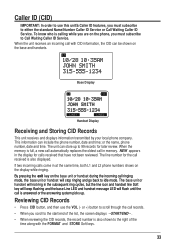
... CID button, and then use this unit's Caller ID features, you must subscribe to either the standard Name/Number Caller ID Service or Call Waiting Caller ID Service. When the unit receives an incoming call ringing mode, the base unit or handset will not ring in the display for later review. When the memory is answered or the answering system picks up to 99 records for calls received that have not been reviewed. The unit can include the phone number, date and time...
... CID button, and then use this unit's Caller ID features, you must subscribe to either the standard Name/Number Caller ID Service or Call Waiting Caller ID Service. When the unit receives an incoming call ringing mode, the base unit or handset will not ring in the display for later review. When the memory is answered or the answering system picks up to 99 records for calls received that have not been reviewed. The unit can include the phone number, date and time...
User Guide
Page 34
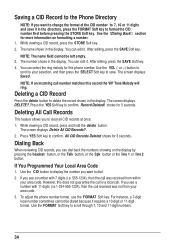
...;rm. Dialing Back When reviewing CID records, you can select the ring melody for more information on the display by pressing the headset button, or the Talk button, or the Spk button or the line 1 or line 2 button. If You Programmed Your Local Area Code 1. While viewing a CID record, press the STORE Soft key. 2. While viewing a CID record, press and hold the delete button. The screen displays Delete All CID Records?. 2. The number shows...
...;rm. Dialing Back When reviewing CID records, you can select the ring melody for more information on the display by pressing the headset button, or the Talk button, or the Spk button or the line 1 or line 2 button. If You Programmed Your Local Area Code 1. While viewing a CID record, press the STORE Soft key. 2. While viewing a CID record, press and hold the delete button. The screen displays Delete All CID Records?. 2. The number shows...
User Guide
Page 43
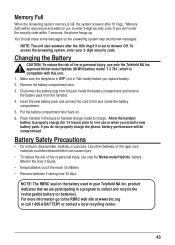
... this unit. 1. Make sure the telephone is set to the jack inside the battery compartment and remove the battery pack from the handset. 4. NO TE: The RBRC seal on . 6. For more information go to charge. To access the answering system, enter your Telefield NA Inc. Memory Full full" You should erase some messages so the answering system may record new messages. NOTE: The unit also answers after the 10th ring if...
... this unit. 1. Make sure the telephone is set to the jack inside the battery compartment and remove the battery pack from the handset. 4. NO TE: The RBRC seal on . 6. For more information go to charge. To access the answering system, enter your Telefield NA Inc. Memory Full full" You should erase some messages so the answering system may record new messages. NOTE: The unit also answers after the 10th ring if...
User Guide
Page 46
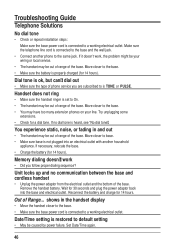
... of range of Range... Remove the handset battery. Make sure the telephone line cord is properly charged (for 14 hours. Unit locks up and no dial tone is set to a working electrical outlet. Out of the base. Handset does not ring • Make sure the handset ringer is heard, see "No dial tone". If no communication between the base and cordless handset • Unplug the power adaptor from the electrical outlet and the bottom of the base. Memory dialing doesn't work , the problem might...
... of range of Range... Remove the handset battery. Make sure the telephone line cord is properly charged (for 14 hours. Unit locks up and no dial tone is set to a working electrical outlet. Out of the base. Handset does not ring • Make sure the handset ringer is heard, see "No dial tone". If no communication between the base and cordless handset • Unplug the power adaptor from the electrical outlet and the bottom of the base. Memory dialing doesn't work , the problem might...


