Owner's Manual
Page 2
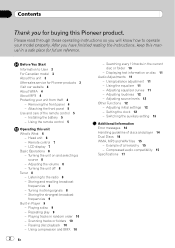
... Displaying text information on and selecting a source 8 - Contents Thank you have finished reading the instructions, keep this manual in a safe place for future reference. Removing the front panel 4 - LCD display 7 Basic Operations 8 - ...folders 10 - Using balance adjustment 11 - Adjusting equalizer curves 11 - Setting the clock 12 - After you for Pioneer products 3 Visit our website 4 About WMA 4 About MP3 4 Protecting your model properly. Listening to operate your unit... how to the radio 8 - Using the remote control 5 Operating this unit 3 After-sales service for ...
... Displaying text information on and selecting a source 8 - Contents Thank you have finished reading the instructions, keep this manual in a safe place for future reference. Removing the front panel 4 - LCD display 7 Basic Operations 8 - ...folders 10 - Using balance adjustment 11 - Adjusting equalizer curves 11 - Setting the clock 12 - After you for Pioneer products 3 Visit our website 4 About WMA 4 About MP3 4 Protecting your model properly. Listening to operate your unit... how to the radio 8 - Using the remote control 5 Operating this unit 3 After-sales service for ...
Owner's Manual
Page 3
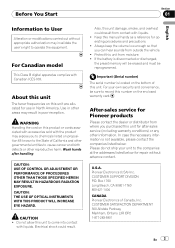
...SUPPORT DIVISION P.O. After-sales service for use in poor reception. Box 1760 Long Beach, CA 90801-1760 800-421-1404 CANADA Pioneer Electronics of this unit to come into contact with Canadian ICES-003. Before You Start Section 01 English Information to User Alteration ...to the companies at the addresses listed below for operating procedures and precautions. ! Electrical shock could result from where you purchased this manual handy as a reference for repair without appropriate authorization may result in North America. U.S.A. For your unit to cause cancer and ...
...SUPPORT DIVISION P.O. After-sales service for use in poor reception. Box 1760 Long Beach, CA 90801-1760 800-421-1404 CANADA Pioneer Electronics of this unit to come into contact with Canadian ICES-003. Before You Start Section 01 English Information to User Alteration ...to the companies at the addresses listed below for operating procedures and precautions. ! Electrical shock could result from where you purchased this manual handy as a reference for repair without appropriate authorization may result in North America. U.S.A. For your unit to cause cancer and ...
Owner's Manual
Page 4
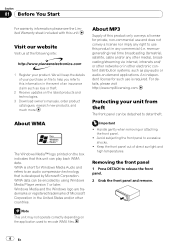
... For details, please visit http://www.mp3licensing.com. Important ! Note This unit may not operate correctly depending on the latest products and technologies. 3 Download owner's manuals, order product catalogues, research new products, and much more. WMA data can be encoded by Microsoft Corporation. Avoid subjecting the front panel to release the...
... For details, please visit http://www.mp3licensing.com. Important ! Note This unit may not operate correctly depending on the latest products and technologies. 3 Download owner's manuals, order product catalogues, research new products, and much more. WMA data can be encoded by Microsoft Corporation. Avoid subjecting the front panel to release the...
Owner's Manual
Page 6
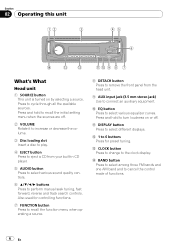
...menu when operating a source. 8 DETACH button Press to remove the front panel from your built-in CD player. 5 AUDIO button Press to select various sound quality controls. 6 a/b/c/d buttons Press to perform manual seek tuning, fast forward, reverse and track search controls. Also used for preset tuning. Press and...off . 2 VOLUME Rotate it to increase or decrease the volume. 3 Disc loading slot Insert a disc to play. 4 EJECT button Press to eject a CD from the head unit. 9 AUX input jack (3.5 mm stereo jack) Use to cancel the control mode of functions. 6 En d CLOCK button Press to ...
...menu when operating a source. 8 DETACH button Press to remove the front panel from your built-in CD player. 5 AUDIO button Press to select various sound quality controls. 6 a/b/c/d buttons Press to perform manual seek tuning, fast forward, reverse and track search controls. Also used for preset tuning. Press and...off . 2 VOLUME Rotate it to increase or decrease the volume. 3 Disc loading slot Insert a disc to play. 4 EJECT button Press to eject a CD from the head unit. 9 AUX input jack (3.5 mm stereo jack) Use to cancel the control mode of functions. 6 En d CLOCK button Press to ...
Owner's Manual
Page 8
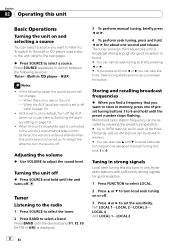
... to the vehicle's auto-antenna relay control terminal, the vehicle's antenna extends when this unit's source is connected to the built-in CD player, load a disc in CD player-AUX Notes ! When the AUX (auxiliary input) is set to 6. AUX is set to on and selecting a source You... tuner will not change: - Turn off . When there is displayed. 3 To perform manual tuning, briefly press c or d. 4 To perform seek tuning, press and hold until the preset number stops flashing. Tuner Listening to the radio 1 Press SOURCE to select the tuner. 2 Press BAND to adjust the sound level. Memorized...
... to the vehicle's auto-antenna relay control terminal, the vehicle's antenna extends when this unit's source is connected to the built-in CD player, load a disc in CD player-AUX Notes ! When the AUX (auxiliary input) is set to 6. AUX is set to on and selecting a source You... tuner will not change: - Turn off . When there is displayed. 3 To perform manual tuning, briefly press c or d. 4 To perform seek tuning, press and hold until the preset number stops flashing. Tuner Listening to the radio 1 Press SOURCE to select the tuner. 2 Press BAND to adjust the sound level. Memorized...


