Leaflet
Page 2
...38173 UPC: 6 09585 14497 2 © 2009 Koninklijke Philips Electronics N.V. Cordless phone answer machine Specifications Picture/Display • Backlight • Backlight color: Blue • Display colors: Black & White • Lines of text: 2 • Main Display Technology: STN • Main Display Type: Dot-Matrix Sound • Handset ringers: Polyphonic • Volume Control: Volume Control up/down Convenience • Alarms: Alarm Clock • Base Station keys: Answering machine keys, Paging key • Battery charging indication • Call Management: Call Waiting, Caller ID...
...38173 UPC: 6 09585 14497 2 © 2009 Koninklijke Philips Electronics N.V. Cordless phone answer machine Specifications Picture/Display • Backlight • Backlight color: Blue • Display colors: Black & White • Lines of text: 2 • Main Display Technology: STN • Main Display Type: Dot-Matrix Sound • Handset ringers: Polyphonic • Volume Control: Volume Control up/down Convenience • Alarms: Alarm Clock • Base Station keys: Answering machine keys, Paging key • Battery charging indication • Call Management: Call Waiting, Caller ID...
User manual
Page 5
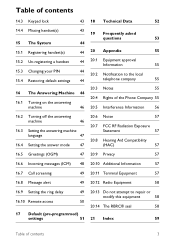
....3 Setting the answering machine Statement 57 language 47 20.8 Hearing Aid Compatibility 16.4 Setting the answer mode 47 (HAC) 57 16.5 Greetings (OGM) 47 20.9 Privacy 57 16.6 Incoming messages (ICM) 48 20.10 Additional Information 57 16.7 Call screening 49 20.11 Terminal Equipment 57 16.8 Message alert 49 20.12 Radio Equipment 58 16.9 Setting the ring delay 49 16.10 Remote access 50 17 Default (pre-programmed) settings 51...
....3 Setting the answering machine Statement 57 language 47 20.8 Hearing Aid Compatibility 16.4 Setting the answer mode 47 (HAC) 57 16.5 Greetings (OGM) 47 20.9 Privacy 57 16.6 Incoming messages (ICM) 48 20.10 Additional Information 57 16.7 Call screening 49 20.11 Terminal Equipment 57 16.8 Message alert 49 20.12 Radio Equipment 58 16.9 Setting the ring delay 49 16.10 Remote access 50 17 Default (pre-programmed) settings 51...
User manual
Page 7
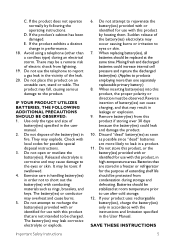
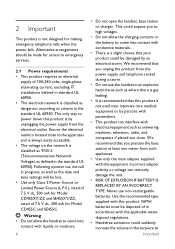
... soon as rings, bracelets, and keys. If your product uses rechargeable battery(ies), charge the battery(ies) only in the vicinity of battery(ies) can cause charging, and that are more than a cordless type) during storage and defrosting. IF YOUR PRODUCT UTILIZES BATTERIES, THE FOLLOWING ADDITIONAL PRECAUTIONS SHOULD BE OBSERVED: 1. It may be replaced at room temperature prior to use the telephone to...
... soon as rings, bracelets, and keys. If your product uses rechargeable battery(ies), charge the battery(ies) only in the vicinity of battery(ies) can cause charging, and that are more than a cordless type) during storage and defrosting. IF YOUR PRODUCT UTILIZES BATTERIES, THE FOLLOWING ADDITIONAL PRECAUTIONS SHOULD BE OBSERVED: 1. It may be replaced at room temperature prior to use the telephone to...
User manual
Page 8
... SE455C. ! This could be made for making emergency telephone calls when the power fails. Use the recommended type supplied with this equipment. rated of 7.5 V dc, 200 mA for Model CD455XY/ZZ and SE455XY/ZZ; Warning • Do not allow the charging contacts or the battery to Important We recommend that you position the base station at least one meter from such...
... SE455C. ! This could be made for making emergency telephone calls when the power fails. Use the recommended type supplied with this equipment. rated of 7.5 V dc, 200 mA for Model CD455XY/ZZ and SE455XY/ZZ; Warning • Do not allow the charging contacts or the battery to Important We recommend that you position the base station at least one meter from such...
User manual
Page 12
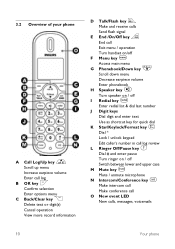
... record information r D Talk/Flash key Make and receive calls e Send flash signal E End /On/Off key End call Exit menu / operation m Turn handset on/off F Menu key d Access main menu G Phonebook/Down key Scroll down menu Decrease earpiece volume v Enter phonebook H Speaker key l Turn speaker on / off I Redial key Enter redial list & dial last number J Digit keys Dial digit and enter text * Use as shortcut key for quick dial K Star/Keylock/Format key Dial * Lock / unlock keypad # Edit caller's number in call log review L Ringer Off/Pause key Dial...
... record information r D Talk/Flash key Make and receive calls e Send flash signal E End /On/Off key End call Exit menu / operation m Turn handset on/off F Menu key d Access main menu G Phonebook/Down key Scroll down menu Decrease earpiece volume v Enter phonebook H Speaker key l Turn speaker on / off I Redial key Enter redial list & dial last number J Digit keys Dial digit and enter text * Use as shortcut key for quick dial K Star/Keylock/Format key Dial * Lock / unlock keypad # Edit caller's number in call log review L Ringer Off/Pause key Dial...

User manual
Page 13
Turn the answering machine on/off B Volume down f Decrease speaker volume C Delete key + Delete messages D Volume up R Increase speaker volume E Previous key p Skip backward during playback F Play/Stop key Play messages s Stop message playback G Next key V Skip forward during playback H Handset locator key Locate handset(s) Enter registration mode I Message counter Display message number Display answering machine operation Your phone 11 3.3 Overview of the base station P Loudspeaker Q Battery door R Headset jack A On/Off key o -
Turn the answering machine on/off B Volume down f Decrease speaker volume C Delete key + Delete messages D Volume up R Increase speaker volume E Previous key p Skip backward during playback F Play/Stop key Play messages s Stop message playback G Next key V Skip forward during playback H Handset locator key Locate handset(s) Enter registration mode I Message counter Display message number Display answering machine operation Your phone 11 3.3 Overview of the base station P Loudspeaker Q Battery door R Headset jack A On/Off key o -

User manual
Page 24
... warning tones if your handset is dialed out. The number is dialed out. 5.1.4 Calling from the phonebook For details on the phonebook, see "Checking the battery level" on page 28. 1 Press to access the phonebook. 2 Select the phonebook record you want to erase a digit. Check the signal strength before making emergency telephone calls when the power fails. The call timer displays the talk time of battery. Press and hold to dial out the call. 5.1.5 Calling...
... warning tones if your handset is dialed out. The number is dialed out. 5.1.4 Calling from the phonebook For details on the phonebook, see "Checking the battery level" on page 28. 1 Press to access the phonebook. 2 Select the phonebook record you want to erase a digit. Check the signal strength before making emergency telephone calls when the power fails. The call timer displays the talk time of battery. Press and hold to dial out the call. 5.1.5 Calling...
User manual
Page 25
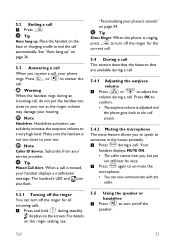
.... Warning When the handset rings during a call. 5.4.1 Adjusting the earpiece u d volume 1 Press or to turn off the speaker. Handsfree activation can turn on the ringer setting, see 5.5 Using the speaker or v handsfree 1 Press to a very high level. displays on page 36. 5.3 Answering a call r v When you receive a call 1 Press . Tip e Silent Ringer. "Personalizing your ear. Make sure the handset is adjusted and the phone goes back to the call screen. 5.4.2 Muting the microphone The...
.... Warning When the handset rings during a call. 5.4.1 Adjusting the earpiece u d volume 1 Press or to turn off the speaker. Handsfree activation can turn on the ringer setting, see 5.5 Using the speaker or v handsfree 1 Press to a very high level. displays on page 36. 5.3 Answering a call r v When you receive a call 1 Press . Tip e Silent Ringer. "Personalizing your ear. Make sure the handset is adjusted and the phone goes back to the call screen. 5.4.2 Muting the microphone The...

User manual
Page 27
... caller(s). 6.1 Calling another handset Note If the base station only has 2 handsets i (yours and another handset) registered to it, you , outside caller(s), and another handset user in your call. • The outside call and the intercom call. The handset(s) available for the called handset answers your house. e • The intercom is established. 4 Press to the other i handset instantly. 1 Press . Press OK. 3 Press after the called handset to initiate an internal call. The handset(s) available for intercom is displayed...
... caller(s). 6.1 Calling another handset Note If the base station only has 2 handsets i (yours and another handset) registered to it, you , outside caller(s), and another handset user in your call. • The outside call and the intercom call. The handset(s) available for the called handset answers your house. e • The intercom is established. 4 Press to the other i handset instantly. 1 Press . Press OK. 3 Press after the called handset to initiate an internal call. The handset(s) available for intercom is displayed...
User manual
Page 31
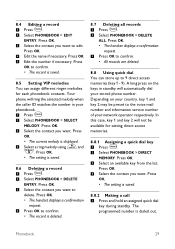
... handset displays a confirmation request. 3 Press OK to confirm. • All records are deleted. 8.8 Using quick dial You can assign different ringer melodies for setting direct access memories. Press OK. 3 Select the contact you want to confirm. • The record is deleted. The programmed number is saved. Press OK. 3 Select the contact you want . Press OK. • The current melody is saved. 8.8.2 Making a call 1 Press and hold an assigned quick dial key...
... handset displays a confirmation request. 3 Press OK to confirm. • All records are deleted. 8.8 Using quick dial You can assign different ringer melodies for setting direct access memories. Press OK. 3 Select the contact you want to confirm. • The record is deleted. The programmed number is saved. Press OK. 3 Select the contact you want . Press OK. • The current melody is saved. 8.8.2 Making a call 1 Press and hold an assigned quick dial key...
User manual
Page 39
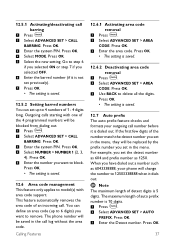
... an incoming call m barring 1 Press . 2 Select ADVANCED SET > CALL BARRING. Outgoing calls starting with area code support. You can set the detect number as 604 and prefix number as 6043338888, your outgoing call log without the area code. Press OK. 3 Enter the system PIN. The maximum length of the 4 programmed numbers will be m blocked from dialing out. 1 Press . 2 Select ADVANCED SET > CALL BARRING. 12.5.1 Activating/deactivating call . Press OK. 4 Select MODE...
... an incoming call m barring 1 Press . 2 Select ADVANCED SET > CALL BARRING. Outgoing calls starting with area code support. You can set the detect number as 604 and prefix number as 6043338888, your outgoing call log without the area code. Press OK. 3 Enter the system PIN. The maximum length of the 4 programmed numbers will be m blocked from dialing out. 1 Press . 2 Select ADVANCED SET > CALL BARRING. 12.5.1 Activating/deactivating call . Press OK. 4 Select MODE...
User manual
Page 42
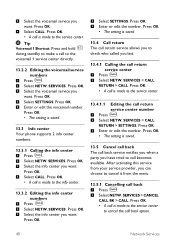
... to make a call back 1 Press . 2 Select NETW. Press OK. 4 Select SETTINGS. m 13.5.1 Cancelling call to the info center. 13.3.2 Editing the info center m numbers 1 Press . 2 Select NETW. SERVICES. Press OK. 4 Select CALL. Press OK. • A call is made to the service center. 13.4.1.1 Editing the call is made to the voicemail 1 service center directly. 13.2.2 Editing the voicemail service m numbers 1 Press . 2 Select NETW. SERVICES > CALL RETURN > CALL. SERVICES > CALL RETURN > SETTINGS. Press...
... to make a call back 1 Press . 2 Select NETW. Press OK. 4 Select SETTINGS. m 13.5.1 Cancelling call to the info center. 13.3.2 Editing the info center m numbers 1 Press . 2 Select NETW. SERVICES. Press OK. 4 Select CALL. Press OK. • A call is made to the service center. 13.4.1.1 Editing the call is made to the voicemail 1 service center directly. 13.2.2 Editing the voicemail service m numbers 1 Press . 2 Select NETW. SERVICES > CALL RETURN > CALL. SERVICES > CALL RETURN > SETTINGS. Press...

User manual
Page 43
... number caller ID. SERVICES > CANCEL CALL BK > SETTINGS. Network Services 41 Press OK. 3 Enter or edit the number. SERVICES > WITHHOLD ID > ACTIVATE. SERVICES > WITHHOLD ID > SETTINGS. Press OK. • The withhold ID code is saved. 13.6 Withholding ID This feature enables you to prevent the person you want to call back m service number 1 Press . 2 Select NETW. Press OK. • The setting is dialed out. 3 Enter the number...
... number caller ID. SERVICES > CANCEL CALL BK > SETTINGS. Network Services 41 Press OK. 3 Enter or edit the number. SERVICES > WITHHOLD ID > ACTIVATE. SERVICES > WITHHOLD ID > SETTINGS. Press OK. • The withhold ID code is saved. 13.6 Withholding ID This feature enables you to prevent the person you want to call back m service number 1 Press . 2 Select NETW. Press OK. • The setting is dialed out. 3 Enter the number...
User manual
Page 44
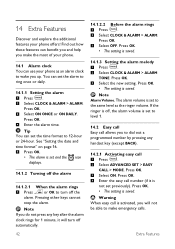
... dial out a programmed number by pressing any key after the alarm clock rings for 1 minute, it is set and the icon displays. 14.1.2 Turning off the alarm. Note Alarm Volume. Press OK. 4 Enter the easy call 1 Press . 2 Select ADVANCED SET > EASY CALL > MODE. 14 Extra Features Discover and explore the additional features your phone. 14.1 Alarm clock You can benefit you and help you make emergency calls. 42 Extra...
... dial out a programmed number by pressing any key after the alarm clock rings for 1 minute, it is set and the icon displays. 14.1.2 Turning off the alarm. Note Alarm Volume. Press OK. 4 Enter the easy call 1 Press . 2 Select ADVANCED SET > EASY CALL > MODE. 14 Extra Features Discover and explore the additional features your phone. 14.1 Alarm clock You can benefit you and help you make emergency calls. 42 Extra...

User manual
Page 46
... the new system PIN again for protecting access rights to un-register. Additional handsets must be registered to the base station before you can reset your phone settings to the factory pre-set PIN is found within a certain period, your PIN for future use them. Press OK. 3 Follow the handset's screen instruction. • Registration shall be restored to the m original factory settings. 1 Press . 2 Select ADVANCED SET > RESET. The base automatically assigns a handset number to unregister another m handset that shares...
... the new system PIN again for protecting access rights to un-register. Additional handsets must be registered to the base station before you can reset your phone settings to the factory pre-set PIN is found within a certain period, your PIN for future use them. Press OK. 3 Follow the handset's screen instruction. • Registration shall be restored to the m original factory settings. 1 Press . 2 Select ADVANCED SET > RESET. The base automatically assigns a handset number to unregister another m handset that shares...
User manual
Page 48
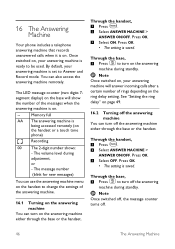
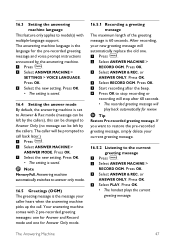
... accessed remotely (on the answering machine You can also access the answering machine remotely. o Through the base, 1 Press to turn off . 46 The Answering Machine The LED message counter (two digits 7segment display) on the base will answer incoming calls after a certain number of the messages when the answering machine is on the answering machine during standby. The message number (blink for new messages) You can use the answering machine menu on the handset to change the settings of the answering machine. 16.1 Turning on the handset or a touch tone phone) Recording...
... accessed remotely (on the answering machine You can also access the answering machine remotely. o Through the base, 1 Press to turn off . 46 The Answering Machine The LED message counter (two digits 7segment display) on the base will answer incoming calls after a certain number of the messages when the answering machine is on the answering machine during standby. The message number (blink for new messages) You can use the answering machine menu on the handset to change the settings of the answering machine. 16.1 Turning on the handset or a touch tone phone) Recording...
User manual
Page 49
...-recorded greeting message. Press OK. • The handset plays the current greeting message. The caller will play back automatically for the pre-recorded greeting message and voice prompt instructions m announced by the callers. Press OK. • The setting is the language for review. Press OK. • The setting is saved. 16.4 Setting the answer mode By default, the answering machine is the message your caller hears when the answering machine picks up the call back later.) 1 Press . 2 Select ANSWER MACHINE > ANSWER MODE...
...-recorded greeting message. Press OK. • The handset plays the current greeting message. The caller will play back automatically for the pre-recorded greeting message and voice prompt instructions m announced by the callers. Press OK. • The setting is the language for review. Press OK. • The setting is saved. 16.4 Setting the answer mode By default, the answering machine is the message your caller hears when the answering machine picks up the call back later.) 1 Press . 2 Select ANSWER MACHINE > ANSWER MODE...
User manual
Page 53
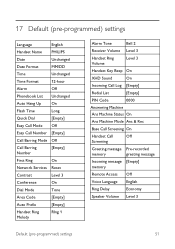
...Dial Mode Tone Area Code [Empty] Auto Prefix [Empty] Handset Ring Melody RIng 1 Alarm Tone Bell 2 Receiver Volume Level 3 Handset Ring Volume Level 3 Handset Key Beep On XHD Sound On Incoming Call Log [Empty] Redial List [Empty] PIN Code 0000 Answering Machine Ans Machine Status On Ans Machine Mode Ans & Rec Base Call Screening On Handset Call Off Screening Greeting message Pre-recorded memory greeting message Incoming message [Empty] memory Remote Access Off Voice Language English Ring Delay Economy Speaker Volume Level 3 Default (pre-programmed) settings...
...Dial Mode Tone Area Code [Empty] Auto Prefix [Empty] Handset Ring Melody RIng 1 Alarm Tone Bell 2 Receiver Volume Level 3 Handset Ring Volume Level 3 Handset Key Beep On XHD Sound On Incoming Call Log [Empty] Redial List [Empty] PIN Code 0000 Answering Machine Ans Machine Status On Ans Machine Mode Ans & Rec Base Call Screening On Handset Call Off Screening Greeting message Pre-recorded memory greeting message Incoming message [Empty] memory Remote Access Off Voice Language English Ring Delay Economy Speaker Volume Level 3 Default (pre-programmed) settings...
User manual
Page 55
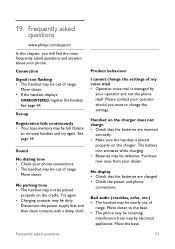
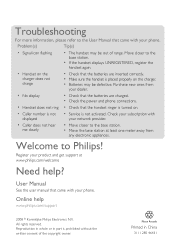
... display • Check that the batteries are charged. • Check the power and phone connections. See page 44. Handset on the charger does not charge • Check that the batteries are inserted correctly. • Make sure the handset is managed by your operator and not the phone itself. Purchase new ones from nearby electrical appliances. I cannot change the settings. Move closer to change the settings of range. 19 Frequently asked questions www.philips.com/support In...
... display • Check that the batteries are charged. • Check the power and phone connections. See page 44. Handset on the charger does not charge • Check that the batteries are inserted correctly. • Make sure the handset is managed by your operator and not the phone itself. Purchase new ones from nearby electrical appliances. I cannot change the settings. Move closer to change the settings of range. 19 Frequently asked questions www.philips.com/support In...
Quick start guide
Page 6
... of the copyright owner. Move closer to the base station. • If the handset displays UNREGISTERED, register the handset again. • Handset on the charger does not charge • Check that the batteries are charged. • Check the power and phone connections. • Handset does not ring • Check that the handset ringer is turned on the charger. • Batteries may be defective. Printed in part is placed properly on . • Caller number is not displayed • Service is not activated...
... of the copyright owner. Move closer to the base station. • If the handset displays UNREGISTERED, register the handset again. • Handset on the charger does not charge • Check that the batteries are charged. • Check the power and phone connections. • Handset does not ring • Check that the handset ringer is turned on the charger. • Batteries may be defective. Printed in part is placed properly on . • Caller number is not displayed • Service is not activated...


